|
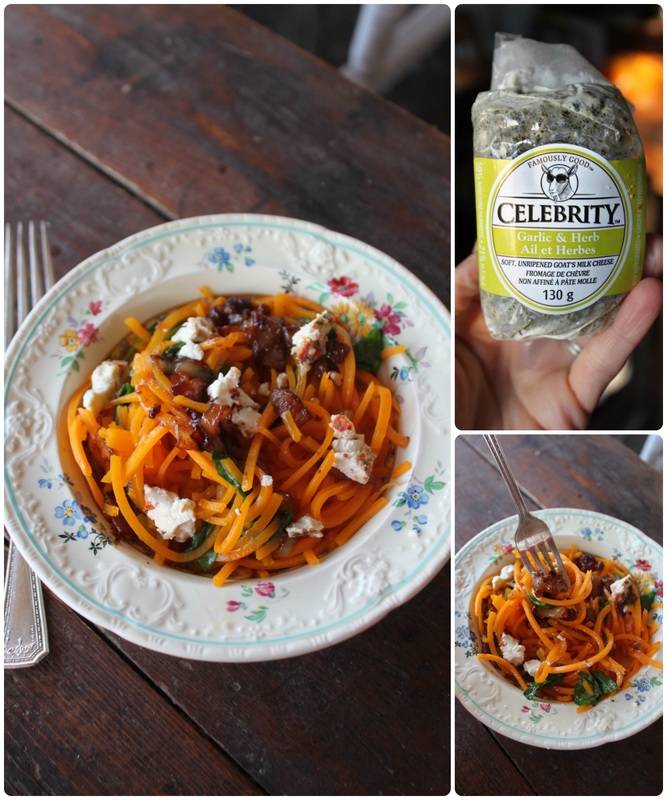
April Fool's Day! Planning any good pranks? The origins of April Fool's Day are murky, but it seems as thought every country recognizes it, and takes part in some way or another. My kids love Sponge Bob Square Pants....ok, I kind of love the show too, but there's an April Fool's Day episode where Sponge Bob plays pranks, and the level of his pranking is pretty close to my level.....  Needless to say I shan't be pulling any pranks today because I'm pretty crappy at thinking up any! So, let's move onto food! I found a recipe for spaghetti squash with bacon, spinach and goat cheese from BuzzFeed Life and it looked like a super yummy and simple recipe, but I was feeling pretty sick of spaghetti squash. I've really been enjoying noodles made from sweet potato though, and thought the recipe would still be good if I swapped out one veggie noodle for another. And it was indeed! This dish comes together really quite quickly, but has so many wonderful flavours that you'd think it required more skill or effort. Ooh!! Is that an April Fool's prank?!? I make a meal that seems really difficult to make, and when my husband and kids are all, "oh, what a delicious dinner! You are so skilled, this must have taken some time and effort!", and I let them go on for a bit, and then I spring a "April Fool's! This meal was hilariously easy to make!!!" Haha, some days my geek is all out there for the world to see, isn't it? Whomp whomp. My husband and kids don't talk to me like that at dinner anyway....they always say if they think something is yummy, and they say thanks for dinner, but that weird 1950's dialogue I had going up there was cra-cra! I think I should just move on now. 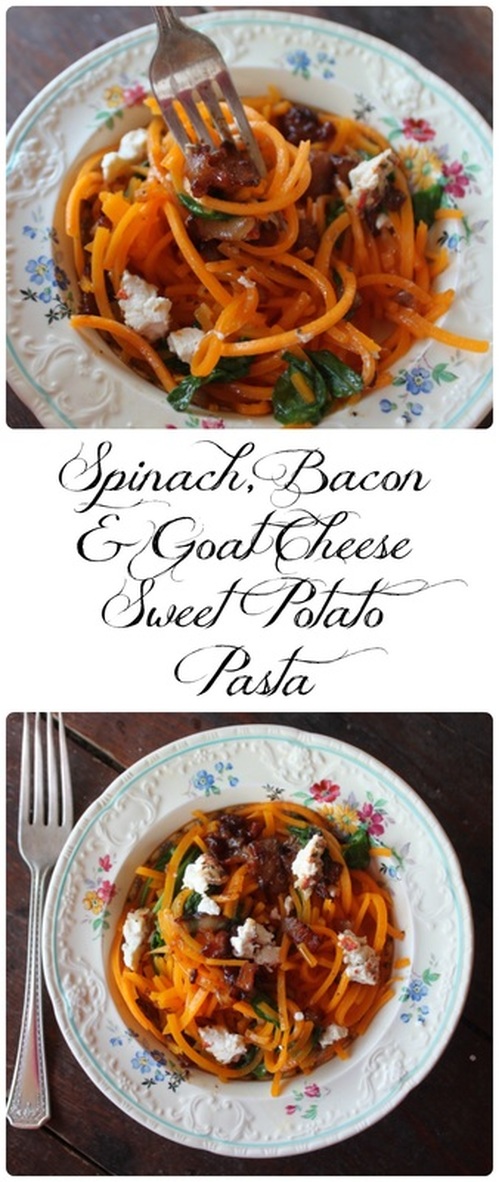 Spinach, Bacon & Goat Cheese Sweet Potato Pasta Makes 2 nice, big servings, or 3-4 smaller "lunch size" servings Ingredients:
Method:
 Alright, well, have a good day! Watch out for those trying to play tricks on you! Don't forget that today marks the beginning of Autism Awareness Month, and that tomorrow is World Autism Awareness Day. My son's wonderful resource teacher sent me the link to this article about how awareness is important, but acceptance is vital. The author of the article puts it this way, "Why acceptance? Because autistic people deserve the love and respect that come with acceptance, not merely acknowledgment that autism exists. Awareness is passive. Acceptance is a choice". That is so well said. I talked about a few ways people can promote autism awareness in a post a few years ago "World Autism Awareness Day" if you wanna take a look there for a few practical ideas. Until next week, adiós, adieu, arrivederci, ciao, auf Wiedersehen, au revoir, sayonara, and goodbye! : )
1 Comment
I feel like I've been doing a lot of recipe round-ups lately?! No matter, I like doing round-ups! There are so many amazing bloggers, recipe developers and photographers out in the World Wide Web, and I want to share their work with you! Today I have a delicious collection of Easter treats, all are no-bake, and most can be, or are already, gluten-free--which can be so helpful now-a-days with so many people trying avoid gluten! These treats are also beautiful, and super spring-y.....which is nice....especially since it's still snowing here today!!! It was sunny and warm last weekend, and then from that point until this point we've had a snow storm, freezing rain, yesterday the buses were cancelled due to "inclement weather"....happy spring!!! : ( Thumbs down. So, I mean, making a delightful treat like any of the ones below should make at least your kitchen and tummy feel like spring is here! I whipped up a double batch of the Layered Peeps Crispy Pops last night (and my husband tried a Peep for the first time!), so Spring may not have been outside, but it was inside! Enjoy!!! Erin at Suburban Simplicity created this beautiful Bunny Chow. This is a quick and simple recipe that is a serious crowd pleaser!  A few years ago I posted these Easter treats: Rice Krispie Mini Egg Squares and Mini Egg Macaroon Nests. Simple, yummy. The end! 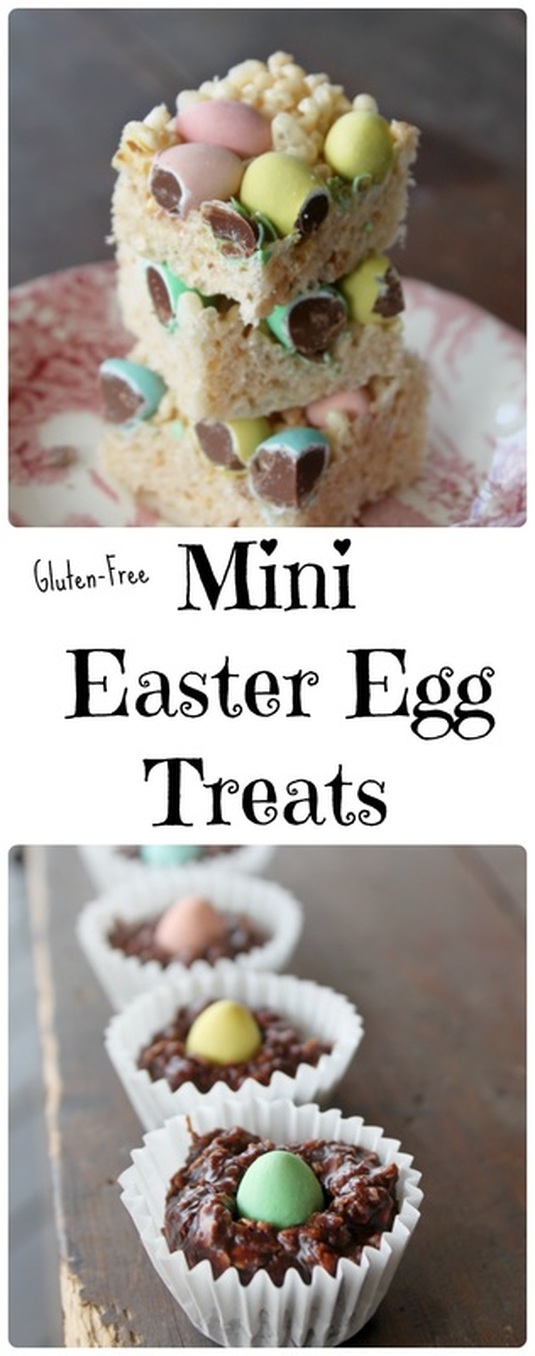 Rice Krispie squares made from Peeps marshmallows? Genius!!! Kristin at Yellow Bliss Road created these Layered Peeps Crispy Pops by swapping out the usual marshmallows and using Peeps instead! 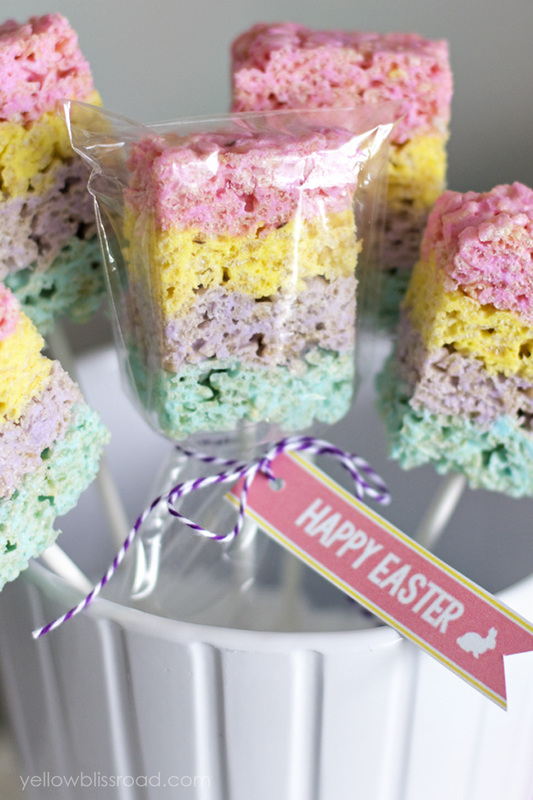 Just look at that Creme Egg Rocky Road Bark from Sarah at Taming Twins!!! What the heck, right?!? Get in my belly! : )  Jen at Cincy Shopper made these really cute, and oh-so-simple Krispie Treat Easter Carrots. She uses store bought Rice Krispie Treats, but making these yourself would be a-okay too! 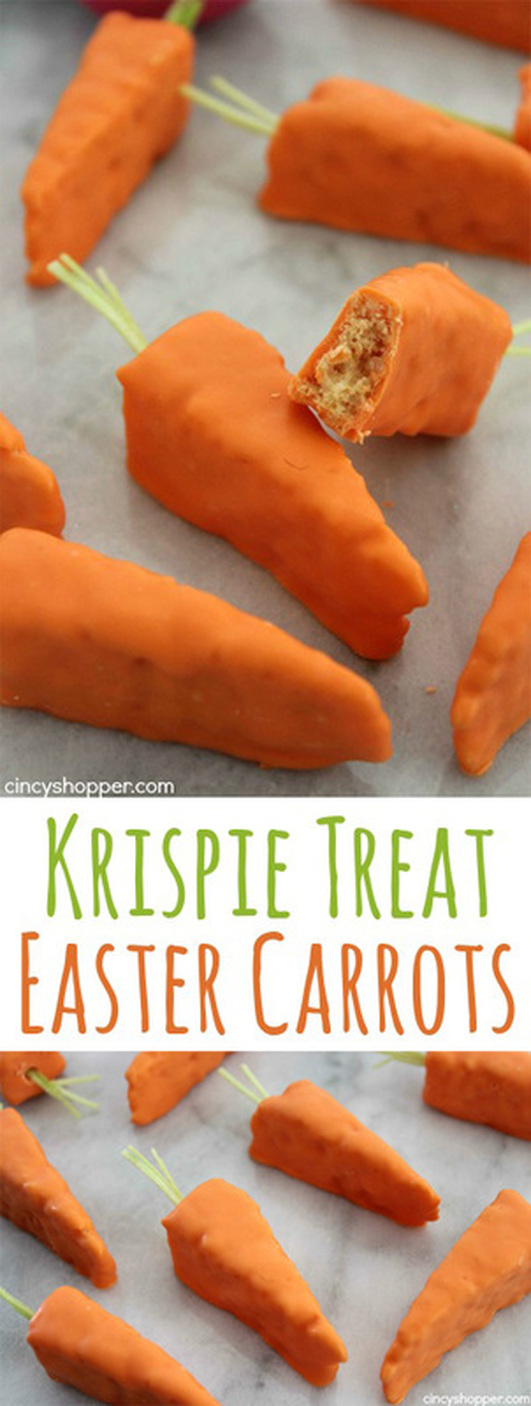 Easter Egg Pretzel Chocolate Swirl Bark is a crazy long name for a really easy to make treat from Samantha at Five Heart Home!  We'll be heading down to Brantford and area to visit family for the Easter weekend. My Mom and Dad are away on a trip to Ireland though, so it'll be a very different kind of visit! They've left their house for us to still stay in (as it's usually our "home base" when we're in the area visiting family), but it'll be strange to not have them there! It'll also be potentially challenging to have Easter egg hunts in the snow! Ok, well, it is a few hours south, so maybe the weather is nice there? I should check. I loved Easter when I was a kid. My sisters and I (well, us younger girls) would get the cutest (well, cute for the '80's and early '90's!) dresses, often a cute hat to match to wear to church for Easter Sunday. On Easter Sunday morning our Mom would have at our place at the breakfast table new socks and underwear, bubbles, a jump rope, and a chocolate bunny. Sometimes other things too, but I remember those as a sure thing on Easter morning. We would always seem to have a lot of people over, and it was always a lot of fun. One year I vividly recall a basket full (FULL!!!) of solid chocolate bunnies, I remember small, medium and large ones, and I also remember eating my weight in these chocolate bunnies! The basket was right out in the open in the kitchen, and I don't remember anyone saying "please don't eat chocolate all day!"...so then I ate chocolate all day. Eek. My chocolate addiction goes way back...... Anyway, I hope everyone has a safe and wonderful weekend, whatever you're doing! xo Well, I hate to gripe about the weather....again....but it started snowing again last night! It's official! Spring is NOT coming to Ontario this year! Sorry! With some luck we'll hopefully get summer, but I'm not holding out hope at this point! While doing the barn chores this morning, and getting the hay out for the horses from our last bale I thought, "well, crap! I guess I'm going to need to get more hay?!?!" With the nice weather we had a few weeks ago I really thought we'd make it with the hay we had....but then the winter was like, "Psych! I'm cooooooming baaaaaack!". (insert weeping from this gal). Don't get me wrong, I like winter. But it's officially been spring now for 2 weeks, tomorrow is April, in 2 weeks it's Easter - so I want spring!!! I am saying that like a 3 year old having a temper tantrum! Alright....move on Amy-Lyn....no amount of whining will change the weather..... Here at the Van Londersele house we like pizza. We like store bought, homemade, take-out (well, we rarely order take-out, but sometimes people come to visit for dinner, and they stop in town and grab a pizza or two). We'll eat sauce, cheese and pepperoni on baked potatoes, zucchini, and stuffed into chicken breasts. Because, let's be honest, tomato sauce, cheese and pepperoni together are soooo yummy, it hardly matters what they're hanging out with, it's ends up being delicious! I recently have been trying to get my kids (aka-trick my kids) into eating more veggies. They are actually all pretty good about eating the veggies they like, which isn't a bad variety of veggies, but I want to be able to make less and less variations of dinner to suit us all. I'm not a make-8-different-kinds-of-dinner-to-suit-everyone kind of Mom by any means, but I do tend to make the family something to eat (it's always gluten-free), but because I eat mostly paleo, I'm the one with the adjusted meal. Yes, I am the picky child in our family scenario. Ok, I'm not picky at all, just specific. So, for instance, if we're having a pasta night, the kids will have gluten free pasta, and Adam and I will have spaghetti squash noodles, or some other veggie noodle (because I own a Inspiralizer and can make noodles out of anything!). Caleb, my eldest child who has autism is getting really, really good at trying new foods, but there are still a few he is very wary about. Spaghetti squash is one of those foods. But recently I'd made a casserole using spaghetti squash, and he ate it (he picked the broccoli out though). The casserole had a "cheese sauce", bacon and chicken though, so it was easy to get him to eat it. I'm not sure he even noticed it was spaghetti squash with how much he enjoyed the meats and "cheese". So, taking advantage of his enormous pre-teen appetite, and his love of meat and cheese, and the fact that he'd successfully eaten spaghetti squash without gagging, I thought this could be a good time to try something new and delicious. Pizza stuffed spaghetti squash! Yes indeed! I will openly admit that he was reeeeeeealy skeptical, and wasn't into eating his "pizza" out of the squash shell (or the "squashes stinky coat" as he called it!), so I dumped it into a bowl, added another generous pinch of mozzarella, and a sprinkle of parmesan....and he ate it! I may have also bribed him with a treat if he finished it. I mean, sometimes, no amount of meat, cheese, or treat bribery will work to convince him to eat something new, so the fact that it did speaks to the tasty value of these pizzas! He did say when he was done, "Caleb will not like spaghetti squash" (it sounds like a question, but he was making a statement), and I said, "but you ate it all?", and he said nothing. In my Mom brain though I heard him say "drat". : ) So, I'm not going to say "everyone will love this recipe!", but if your family already likes spaghetti squash then it's a no-brainer that you'll want to try this, but if your kids are on the fence, this may be the ticket to getting them on the spaghetti squash train! 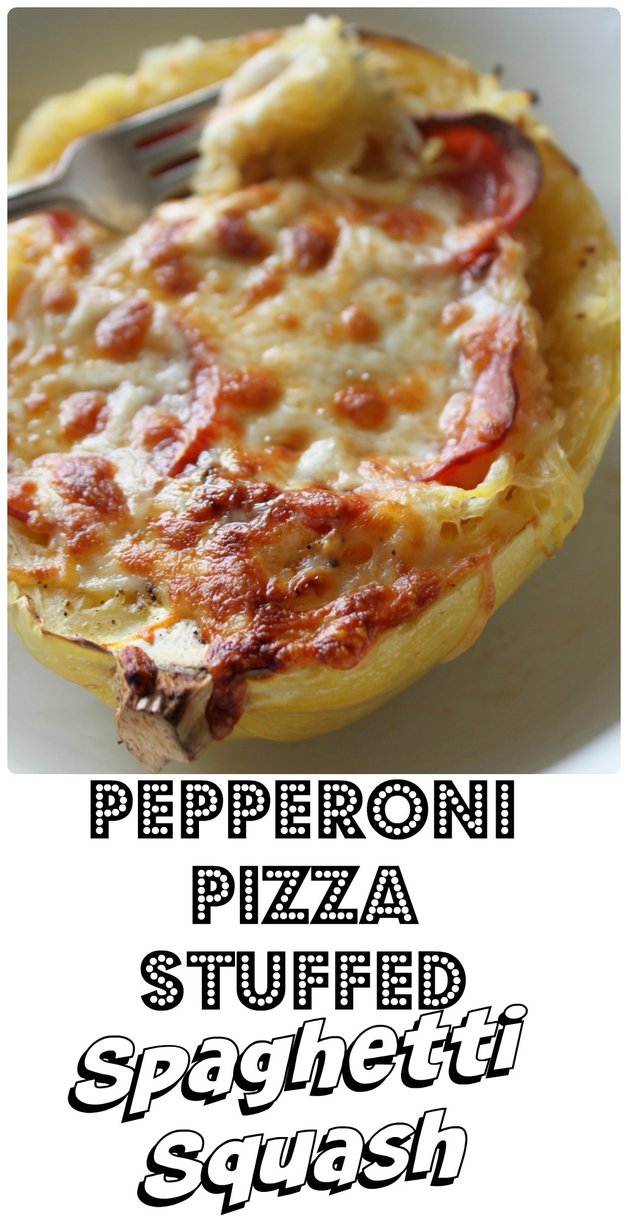 Pizza Stuffed Spaghetti Squash Ingredients:
Method:
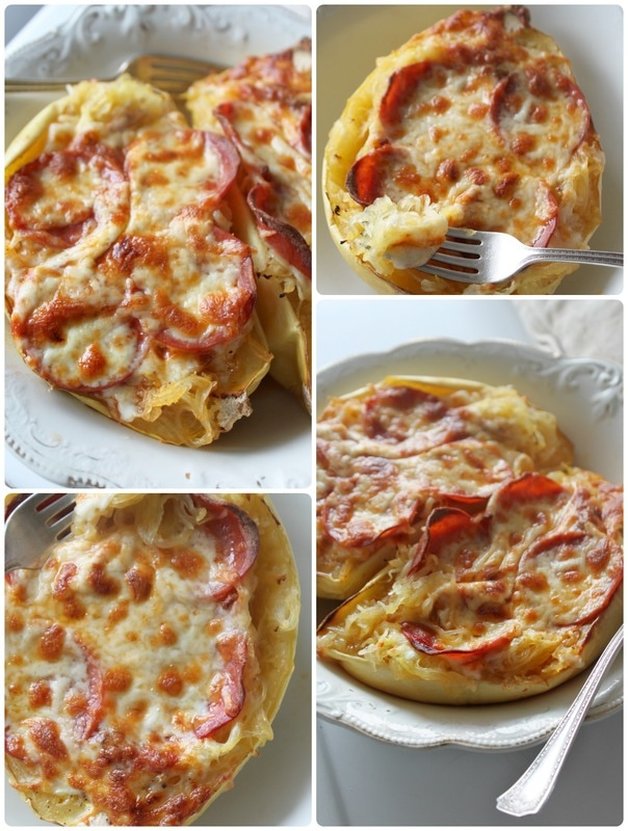 For a bunch more spaghetti squash ideas, check out this post from Buzzfeed!
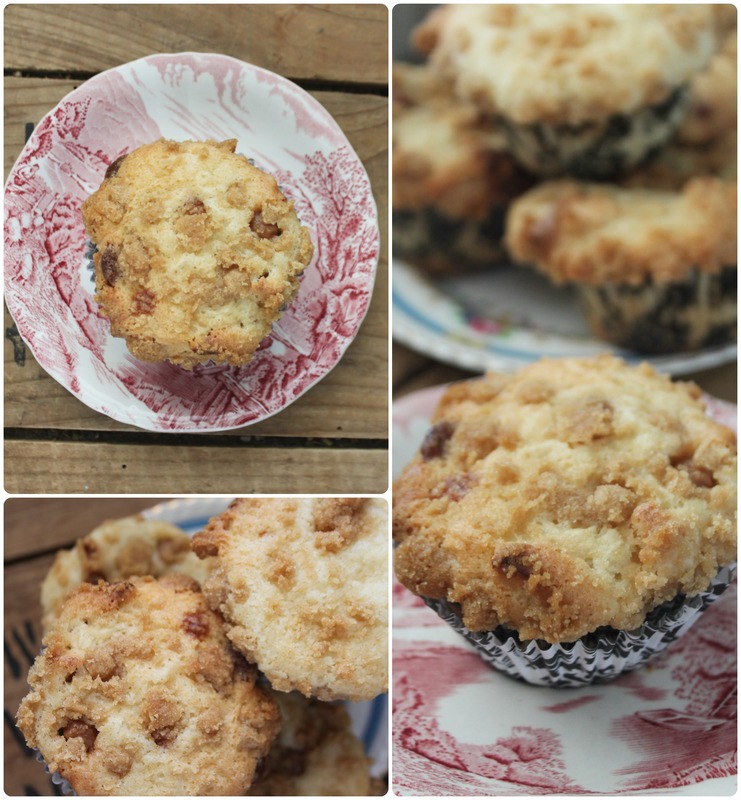
I blabbed too much at the beginning of this post, so all I will say now is have a great weekend! Bye! Hello! Happy first day of autumn! :) Truthfully, it's not been terribly "autumn-y' around here! We've had hotter days than we had all summer, and we've had them more continuously than we had all summer! But, the earth temperature aside, our apple and pear trees are still making fruit (although not as happily as usual), and making muffins from some of that fruit needed to happen! I saw this recipe for Caramel-Apple Streusel Muffins from Tracey's Culinary Adventures! They looked so good, and I had apples to spare, so I gave them a shot! Of course, because I had a ton of apples, I made this recipe x 3 and stored most of them away in the freezer to use in school lunches, breakfasts, or after school snacks. They are delicious & full of fall flavour! Enjoy!!! 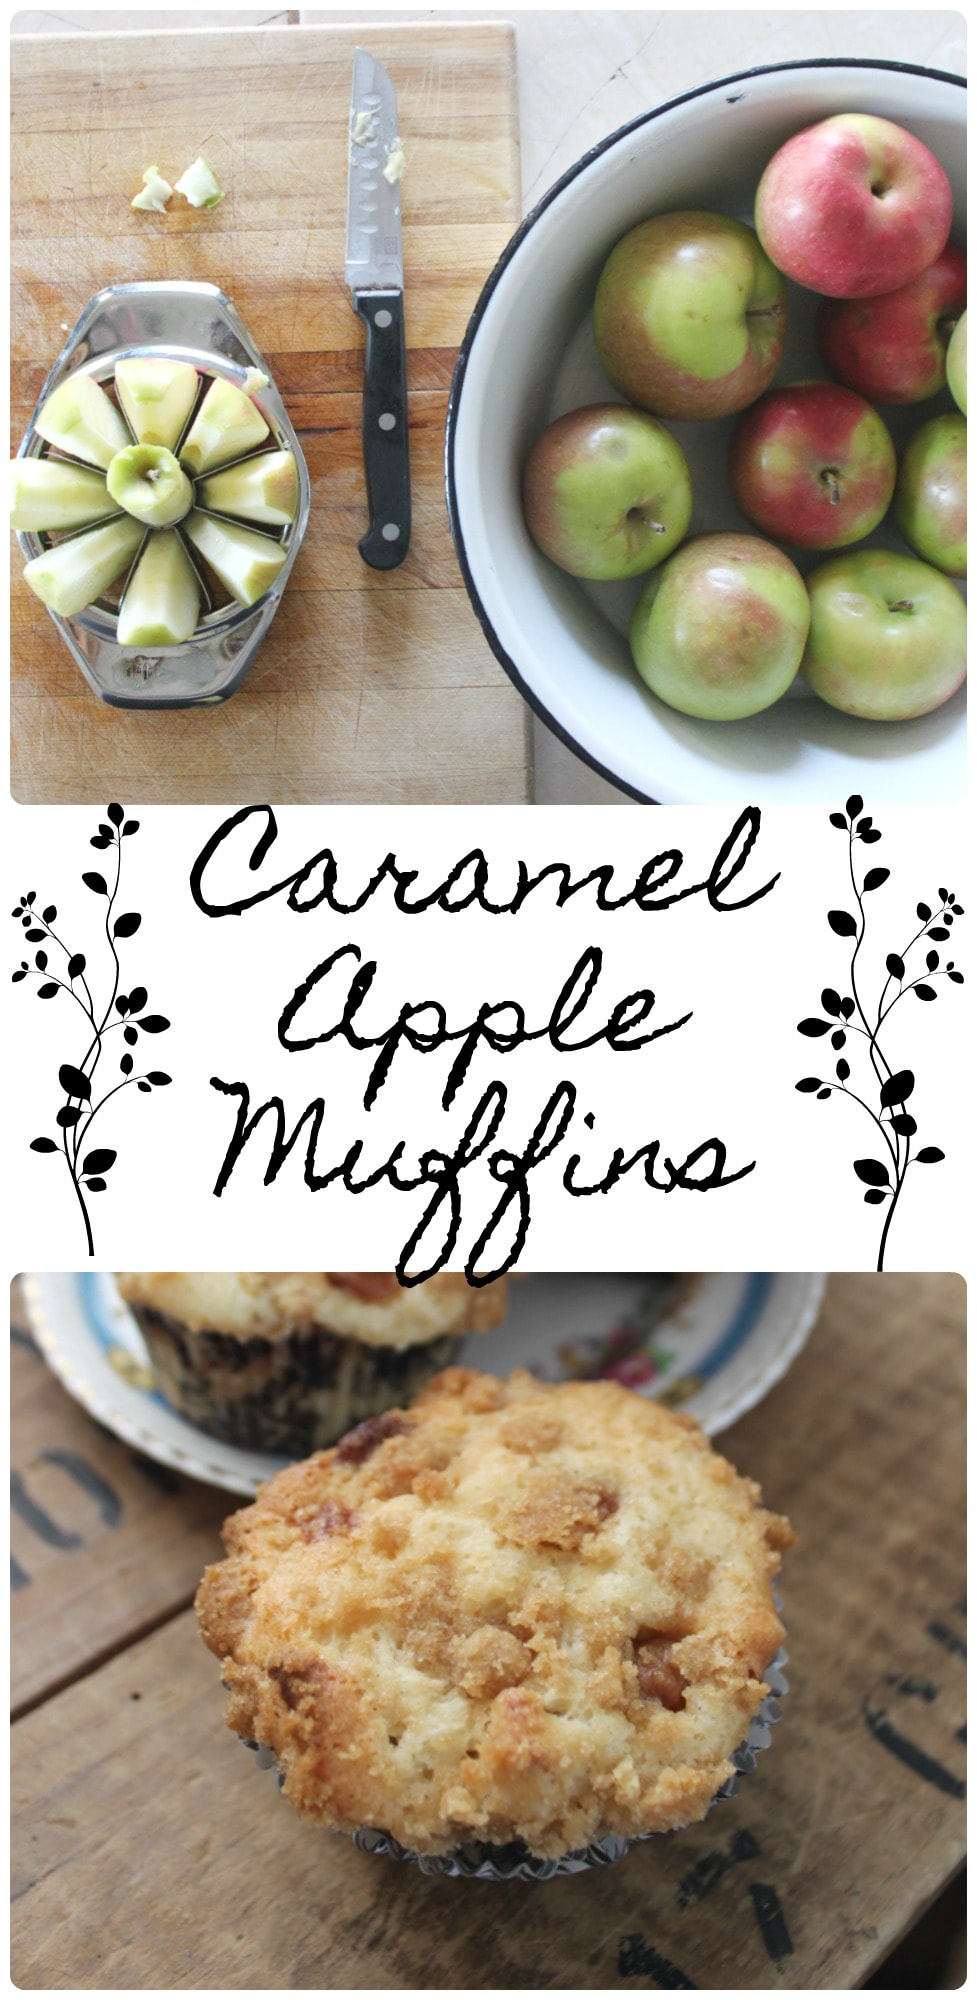 Caramel Apple Muffins Ingredients: Muffins
Streusel Topping
Method:
 Let's shift gears a little here....and look at my kids from the last 4 years of the first day of school! I mean, they go from babies to beautiful, grown-up kids! *tear*  Let's shift gears again....to a little company that is starting up that I'd love to briefly share about! It's called Little Red Canoe Book Co., and they are a Canadian book subscription business! I was asked to review a book box with Abby and Keziah, but that only involved getting the boxes, and doing an online survey for the woman who got in touch with me from the company - me talking about it here is all me!!! The girls (and I) loved the boxes! They were beautiful, filled with wonderful things, awesome books, and so much fun (which then makes reading even more fun!). So, check them out! 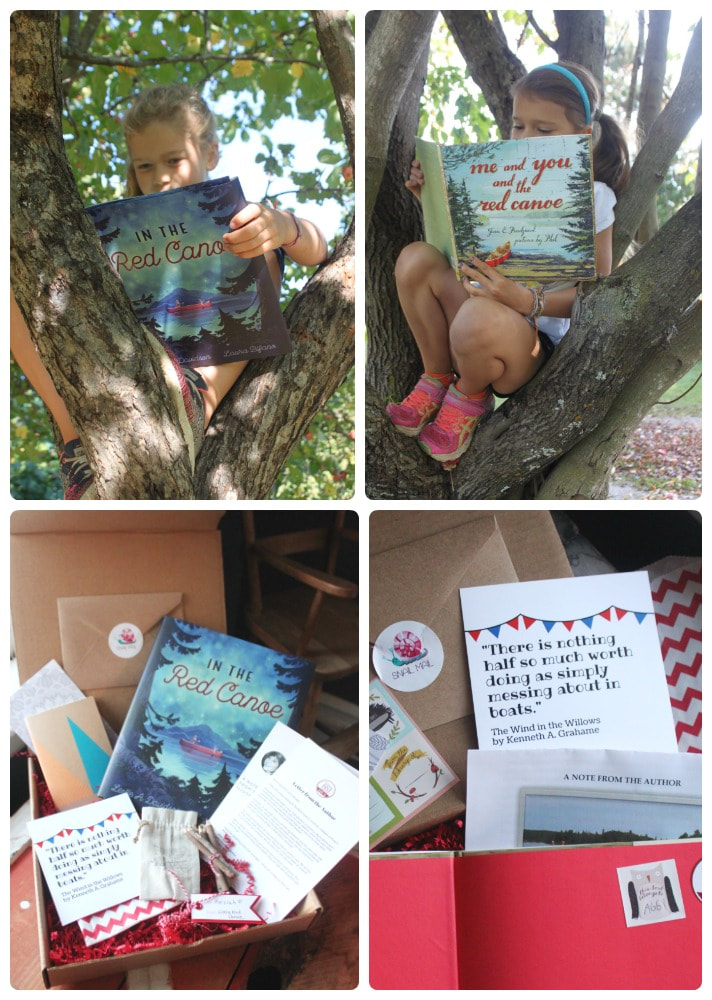 That's all for now!
Sorry I've been so absent! I've been super duper busy!!! xoxoxox Happy Thanksgiving American friends! It is not Thanksgiving here in Canada, we celebrate back in October! Anywhooo, I hope wherever you are reading this, and whenever it is, that you can stop and find something to be thankful for! So, I have a few recipes I've been fussing with, and I still love creating my own recipes, but the truth is, I'm often just surfing the web, looking for recipes that'll suit something I have in my mind, but spare me the grief of trial and error! This is one of those recipes! I had nice, fresh blueberries in the summer, and wanted a simple and strait forward recipe that yielded deee-licious muffins! I also wanted a streusel top because I find that muffins that are just so crazy-delicious moist tend to get sticky on top. It's better than them getting dry on top, but still, I don't like sticky top muffins! And because I'm the kind of person who likes to freeze baked goods for later, if the tops are too moist, they get all icicle-y. Ya know? Well, anyway, when these came out the first time looking like a million bucks, and then having all the teen staff at the summer camp I was cooking at DEVOUR them, I figured they were a good recipe! And the batches I made at home that friends and neighbours gobbled up confirmed that this recipe was a good one. So, here it is, adapted oh so slightly from Chef Savvy and her Blueberry Streusel Muffin recipe! The muffins in my photos are (stupidly) shy on streusel! I made a double batch of the muffins when I was going to take the pictures, and didn't make enough topping, but when I realized it, I had already packed ingredients up, and done dishes, and I'm a little anal about cleaning and tidying as I go which can backfire in situations like these! Phew, what a run-on sentence!!! Also, the muffins I made at camp were a lot of "bakery style" with the domed top because the oven there isn't a weeny like my oven at home..... (sigh...) Anyway, with a lot or a little toping, with the tops perfectly domed or not, these muffins are so good. For realz. 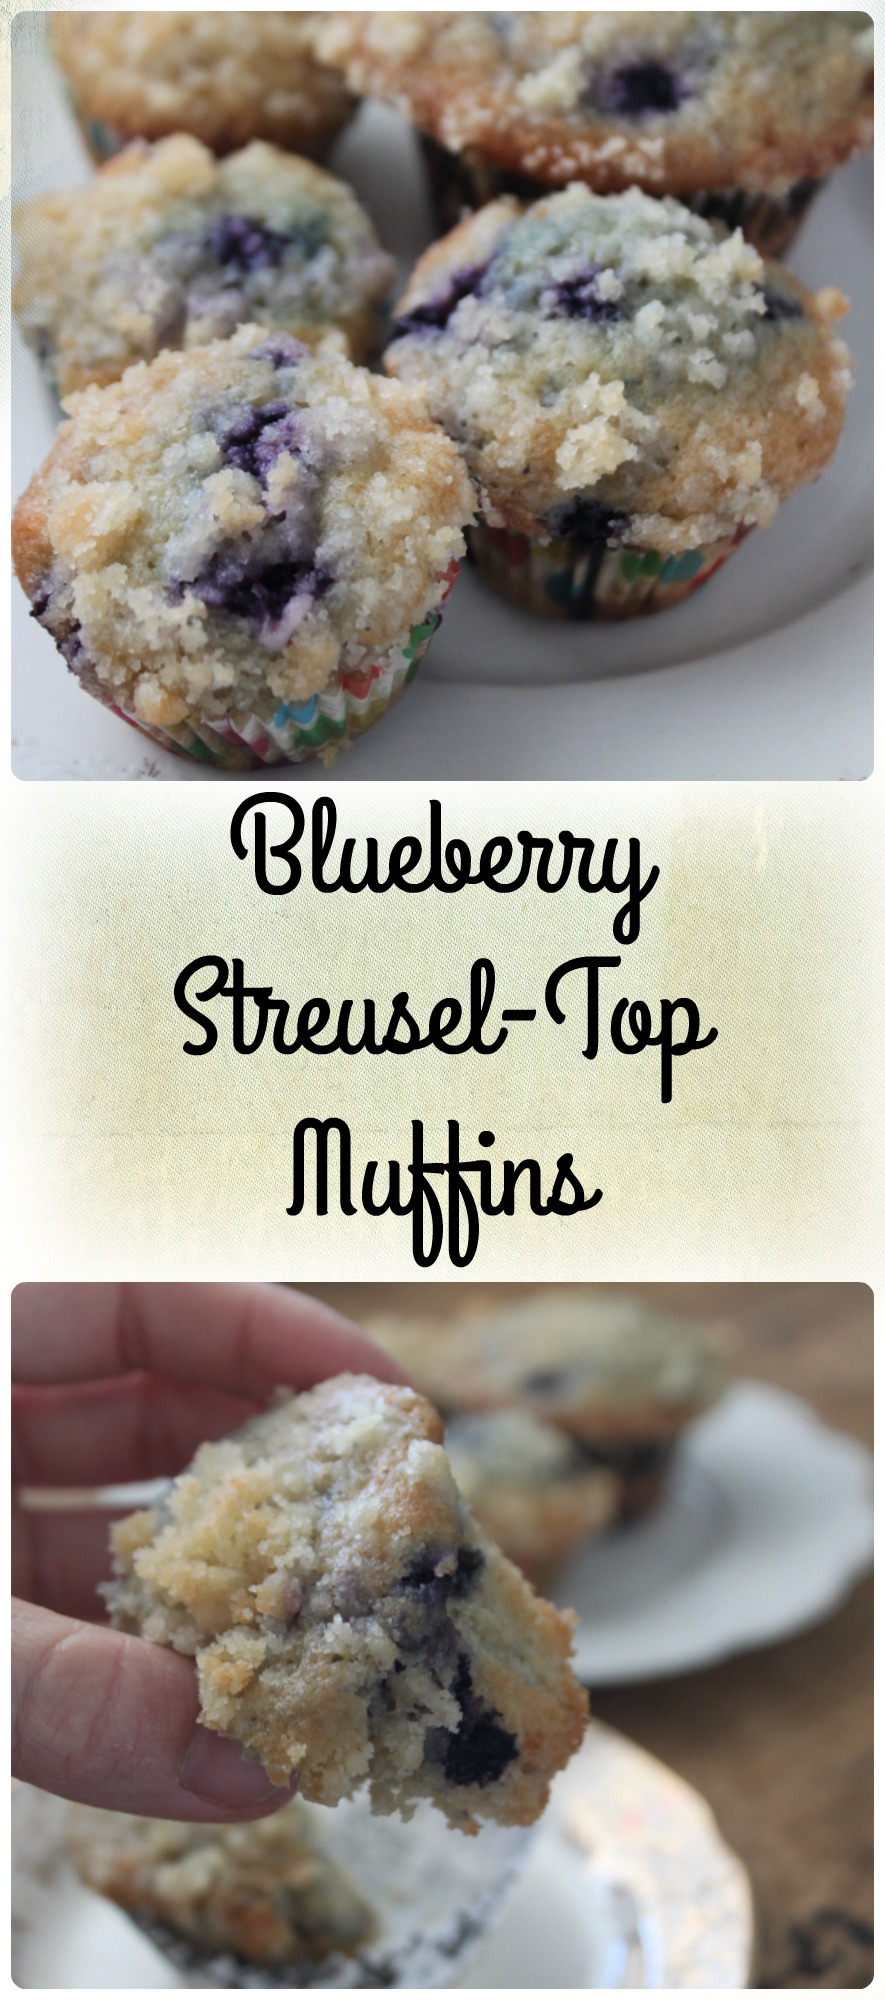 Blueberry Streusel Top Muffins From "Blueberry Streusel Muffins" from Chef Savvy Ingredients: For the streusel Topping:
For the Muffins
Method: Streusel Topping:
For the Muffins:
The best way to eat these? Still warm, with some butter and honey. Yum!!! 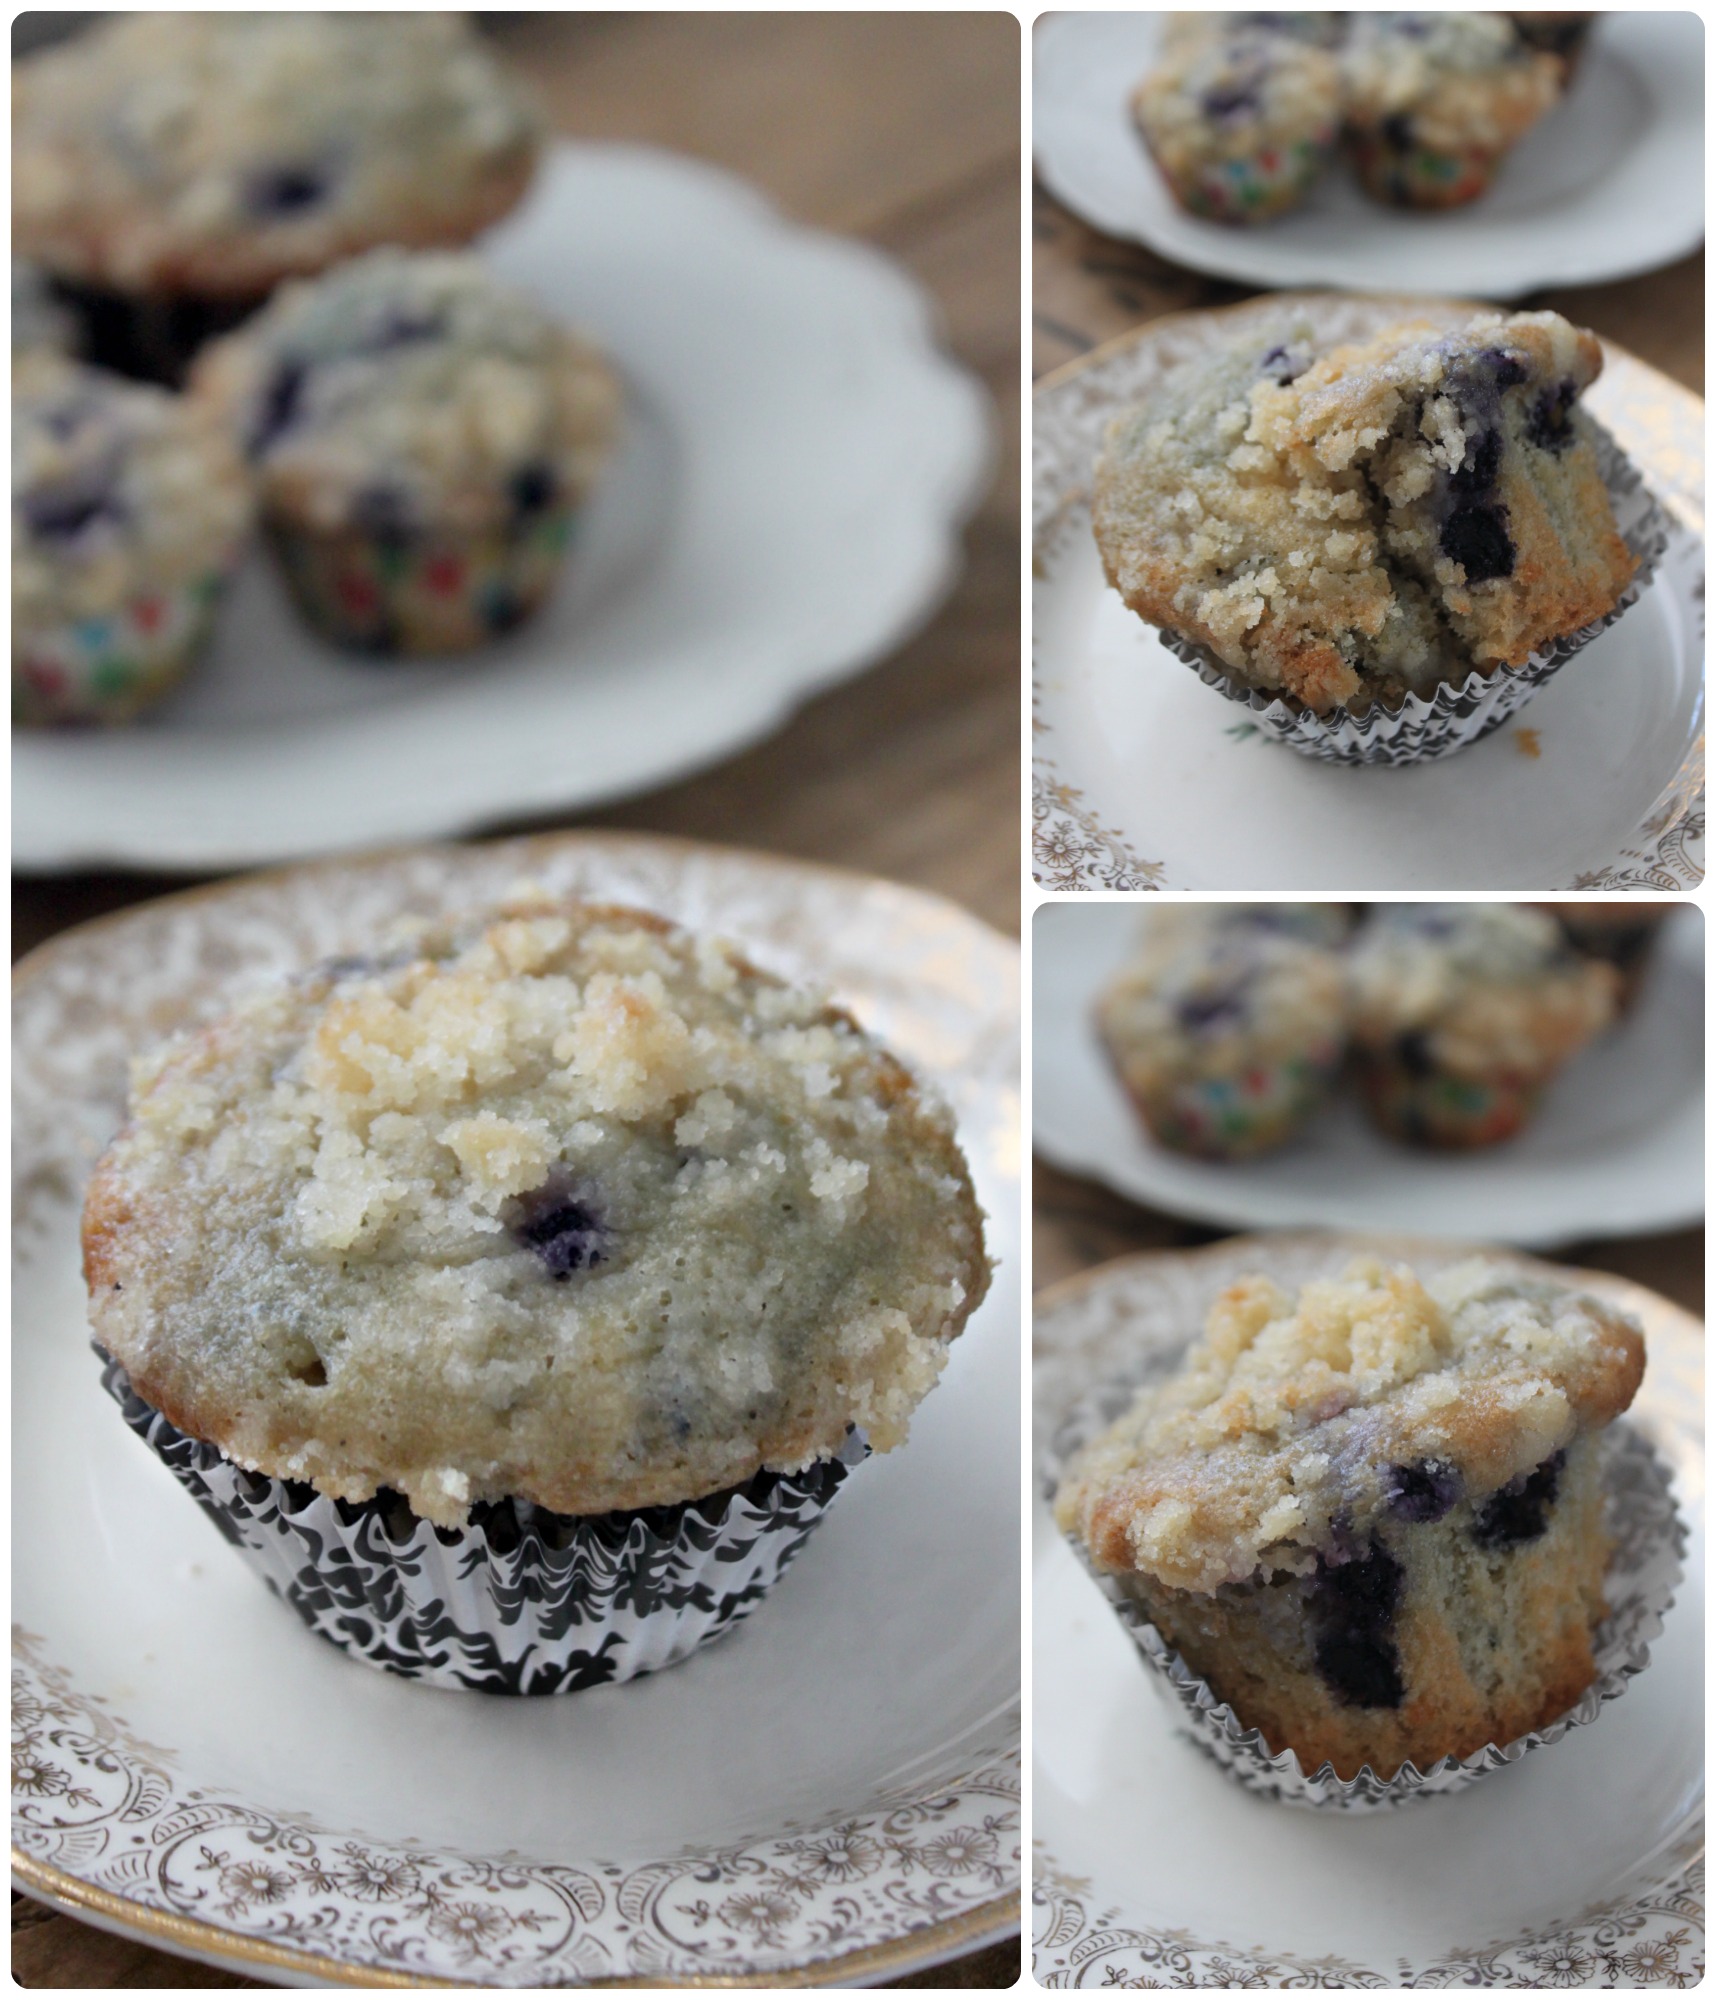 Well, I wanted to have this posted earlier today. I also had a post ready for yesterday that I never got to actually finish and post. Last week the kids missed school on Friday because we drove to Toronto to see Matilda The Musical (which we had so much fun seeing!), then this week Monday was a snow-day, and Thursday was too - but we drove the kids to school (because we're mean) and because we had a meeting to be at, and also because we wanted to go into the school to be involved in the training for Caleb's new iPad. Again, with the run-on sentences! Then today was a P.A. day!!! So, I mean, this week was all wonky, and I didn't really get all the things done that I wanted to, but, oh well! I'm trying this new thing where I don't beat myself up about every failure, whether real or perceived. It's a hard task, but I think it's important to not be my #1 critic 24/7!!!
I will share next Thursday about my Caleb, my amazing Caleb and something that happened this past week that left me weeping like a sappy, happy Mother numerous times! For now, just have a wonderful weekend, and I'll see ya next week! xoxo Hey there! I know I used to post a motivational Monday and Health & Fitness post on Monday's, but I'm breaking the rules! I just want to share some recipes I have, and that's all there is to it! This recipe is so simple, it's basically oatmeal chocolate chips cookies, minus all the scooping it takes to make cookies! :) And, this makes a great dessert to throw together when guests are coming over last-minute. It's got some pretty simple ingredients (ingredients most people have on hand), and comes together quickly! The hardest part is letting them cool before cutting them into squares. These little gems are also a nice treat to add to kids lunches, fyi. They freeze well, so, cut them into squares, put them into an airtight container, stick 'em in the freezer, and pull them out to add to lunches as needed! This recipe is from Jamie Cooks it Up. She has photos of the process, so hop on over there to see them if you want to! 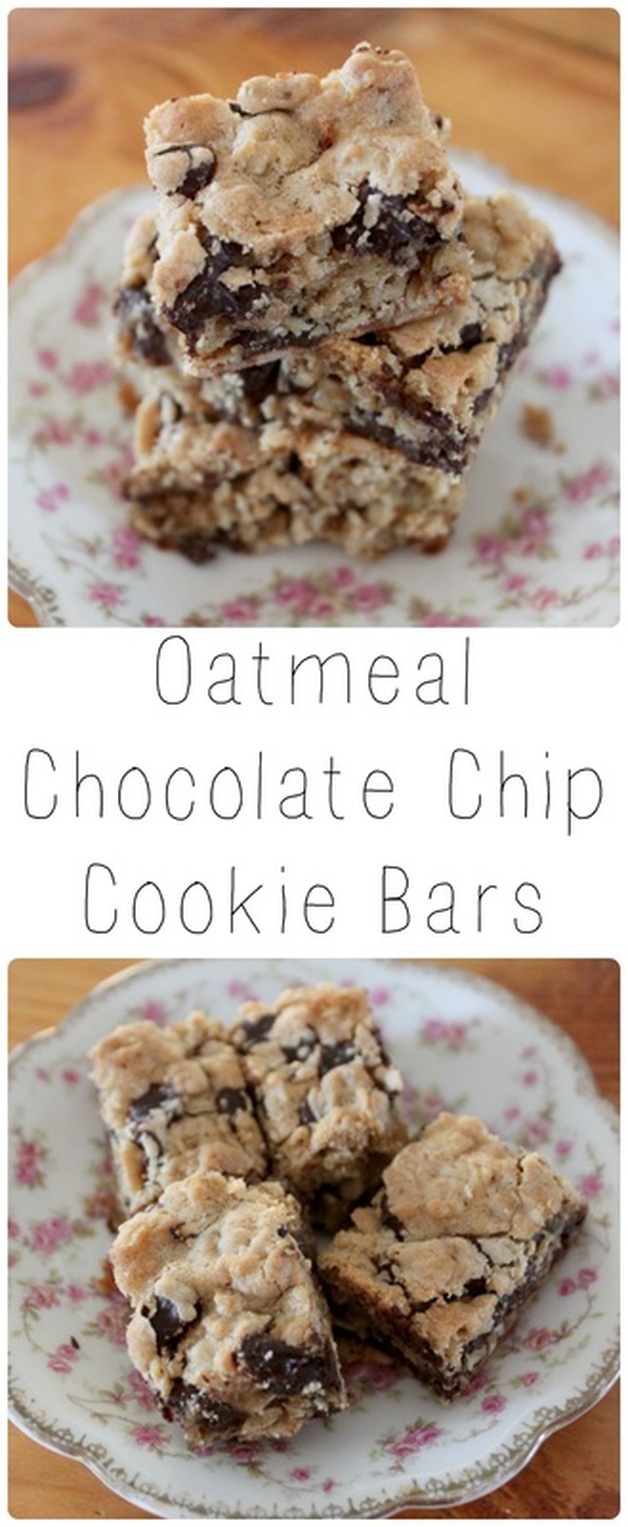 Chocolate Chip Cookie Bars Ingredients:
Method: 1. Preheat your oven to 350 degrees and prepare a 9x13 pan with parchment paper, and a bit of cooking spray or butter where the parchment isn't covering. Leave a bit of overhang with the parchment to use as "handles" later 2. To a large bowl, place all the dry ingredients, and whisk to combine 5. Pour the melted butter into the dry mixture, and stir well until every is coated 6. Add the eggs and vanilla 7. Mix until the dough is thoroughly combined 8. Add the chocolate chips, and stir to combine 9. Now press your dough into the prepared pan 10. Bake for about 20 minutes. My oven is being a little fussy lately, so anywhere from 15-25 minutes may be the ticket for perfect, moist bars. At 15 minutes, use a toothpick or butter knife to check for doneness by sticking it right into the middle of the bars. If the top is golden, and all you have is melted chocolate (and no wet dough) on your toothpick or knife, then they're done! 11. Allow them to cool completely, and then lift the bars out of the pan using the parchment "handles". Place onto a cutting board, and divide into bars/squares! 12. Then eat them, obviously :) 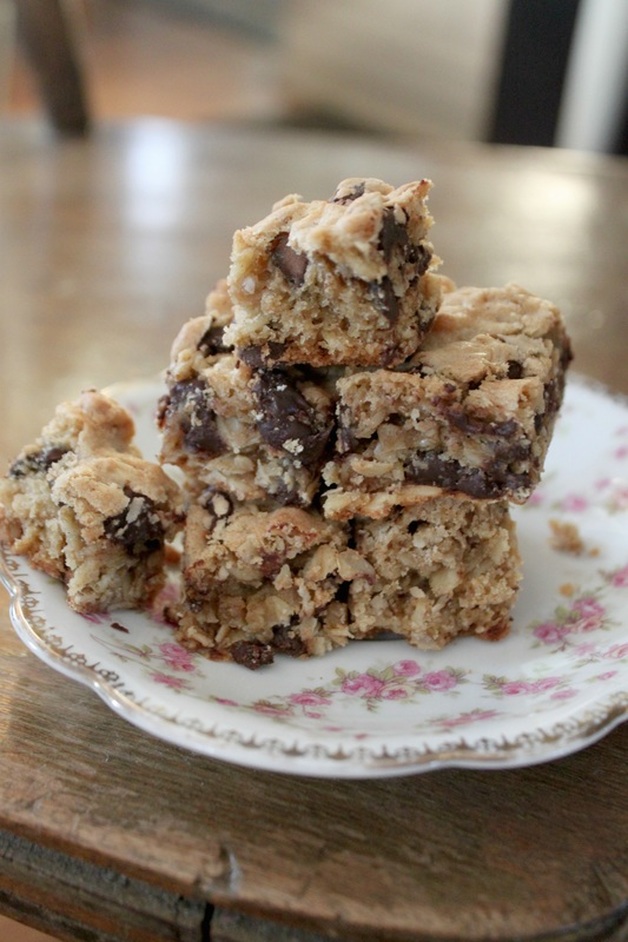 So, today was a snow day! Busses cancelled! Snow everywhere! It's suddenly winter! And I do mean suddenly! On Friday I was working out in the yard wearing only joggy bottoms and a t-shirt. Today? Winter boots, warm coat, scarf, mittens and hat.
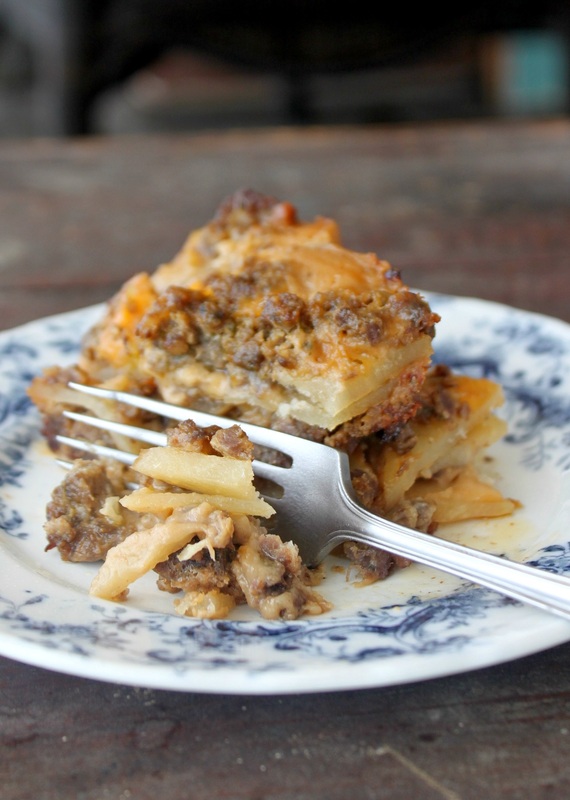
Oh Canada.... :) I hope you get a chance to make these bars sometime soon! Let me know if you do, alrighty? xoxo I'm still here, fear not! I missed the boat on Motivational Monday and my Health & Fitness post....but, it is what it is! I'm moving on! The dish I'm sharing today is one I often make because it's so simple, and everyone in my house loves it! And any random kids that may be over also seem to like it! Seriously, on 3 different occasions, 3 different girls (6 & 7 year olds) have been over when I've served this for dinner, and each one looked at it like, "eewwwwww".....and then I said, "it's just potatoes, chicken, bacon and cheese", and they were like, "....oh...?" and proceeded to eat everything I gave them. Usually with added ketchup (bleh)-but to each his own! The recipe can be easily doubled and made in a larger pan (accommodating extra mouths to feed), and makes great leftovers eaten cold, strait-up reheated, or re-fried in a pan to serve with eggs, or or or, tossed into a few cups of broth/stock and made into soup! 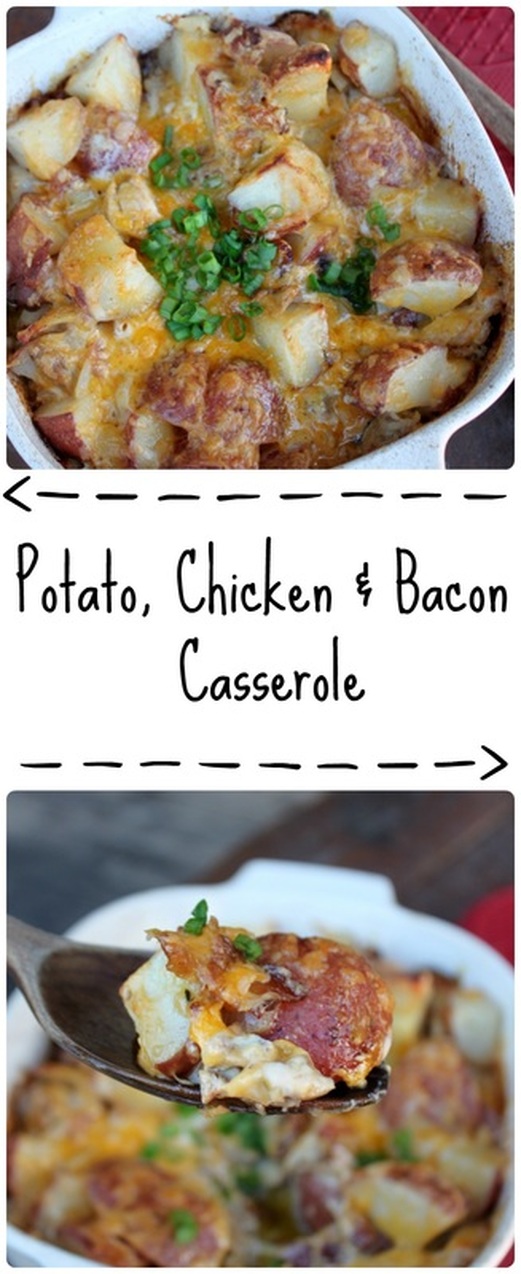 Potato, Chicken & Bacon Casserole Ingredients:
Method:
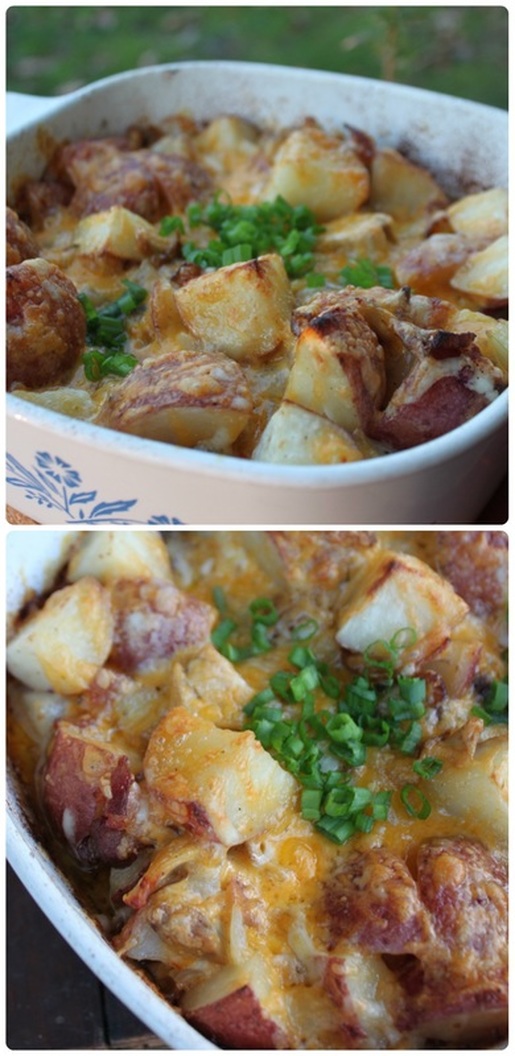 And there you have it! Simple, tasty, served with a side salad or even just raw, cut up veggies, and you've got a great meal! So......how was March Break? We did well over here; kept busy, had friends over to play and visit, did some crafts, made a lot of cookies and treats, slept in, stayed up late--it's been pretty good! The weather was mostly rainy (thumbs down), but kids quite like mud and puddles, so when it would stop raining they would make the most of the squishy yard and huge puddles! My girls have been turning our chicken coop (which has been vacant all winter) into a "clubhouse", which they would play in even while it was raining too, so that was great! Well, ok. I guess I'm done talking for now! I hope everyone had a great week, a good St. Patrick's Day yesterday, and that you have a good weekend while perhaps going to some St. Patty's Day parties? So, up until a few years ago I wouldn't have considered butternut squash to be something I would choose to eat on purpose. I would eat it at Thanksgiving, Christmas, and Easter family meals when it would be a side dish, but that was about it for me. Back in the fall of 2014 I decided to make a roasted butternut squash soup because our neighbour had given me some squash from his garden. I roasted the ingredients, squashed them with a potato masher, and added it all to a chicken broth. It was a good soup, even my husband (a true squash hater!) liked it. But it still wasn't a regular dish around our place. Then, just a few months ago, I bought a veggie spiralizer (the Inspiralizer, to be exact) and suddenly I wanted to turn every vegetable I possibly could into noodles!!! I decided to try making noodles out of butternut squash (just the strait "neck" part of it), and they were just about the yummiest noodles I had ever had! But the only problem was it left me with the bulbous bottoms with nothing to do! I would usually cut the bottom open, scrape out the seeds to roast for snacking, and roast the squash. Then when it was cooked, I would scrape the nice cooked squash out into a Ziploc bag and throw it into the fridge for some other use later. But one day, after scraping out the seeds for roasting, I ran out of time, and just tossed the uncooked seeds into a container, and the uncooked bulbous bottom of the squash into a bag, and put it all in the fridge. Well, fast-forward a few days, and I still had the squash in my fridge, and I was making chicken and veggie stock in my slow cooker. After I had finished making the stock and pouring it out of the slow cooker to cool, I wondered about making a squash soup in the slow cooker. With a quick Google search I found Pillsbury had a recipe that looked super-duper delish, and could be made by just putting everything into the crock-pot and letting it do it's thing! Well, this soup was so good, so very, very good! And, it freezes really well, making it a great soup for my husband to take to work! The Pillsbury recipe has you blending the soup in a blender or food processor, but I simply used my immersion (hand) blender (that I purchased for $4 from a local second hand store!) and that made the job super easy. Another option (though I haven't tried it with this soup), would be to let it cook sufficiently, and then just mash it up a bit in the crock-pot with a potato masher and not use a blender of any sort. In fact (as you can see) I like my soup a little lumpier, so if you're a fan of lumpy soup you can happily use a potato masher to blend this up! Anywho, this warm, fill-up-your-tummy soup is fantastic, & full of flavour. It may seem a little un-seasonal now, but I think it'll be a perfect soup to help warm ya up on a drizzly spring day! 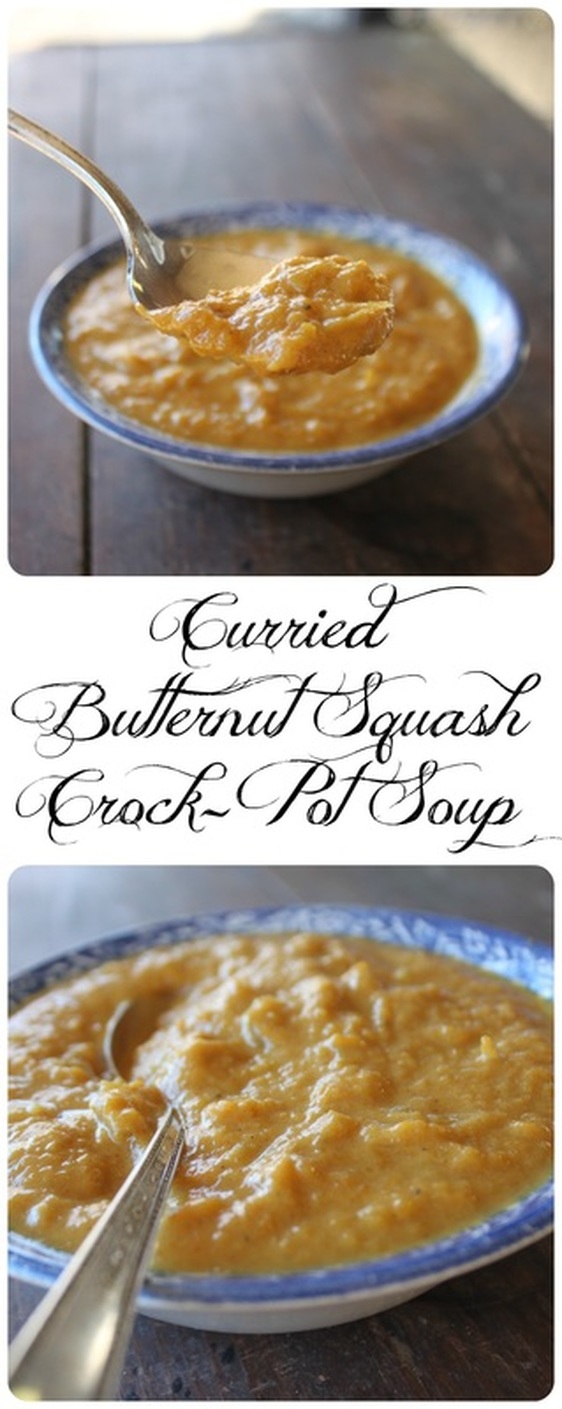 Curried Butternut Squash Crock-Pot Soup Adapted From Pillsbury Ingredients
Method:
***Serve topped with diced apple, green onion, or roasted squash seeds!*** 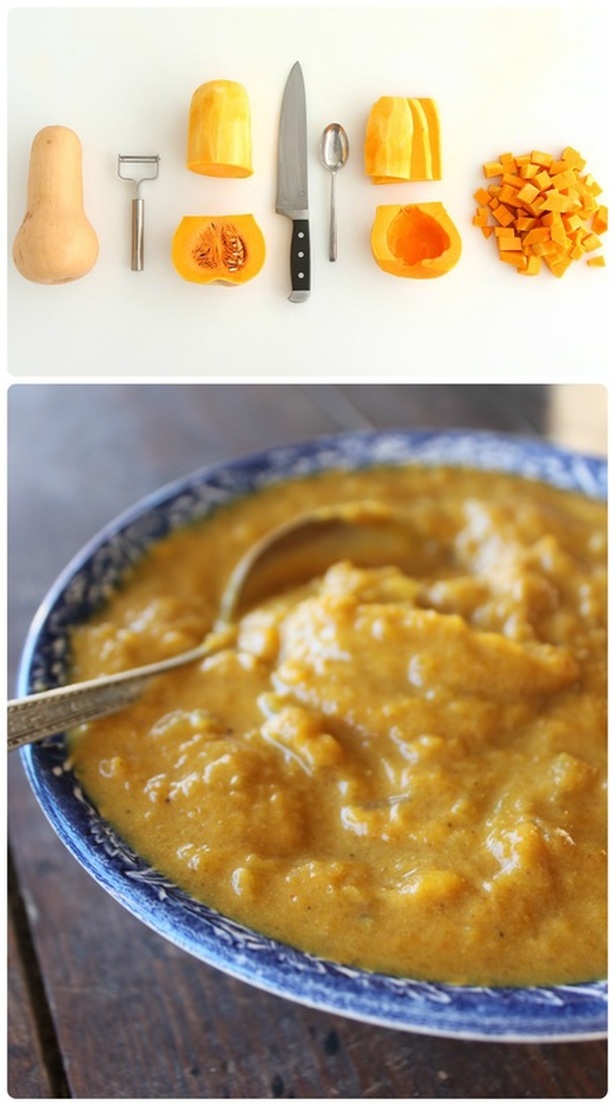 Here's a video link to Martha Stewart for a how-to on butternut squash cutting (it's also where I got that image of the squash prep)! Well, my husband just texted me to remind me that this weekend the clocks "spring forward" an hour for Daylight Savings for some of Canada (for a complete and home-schoolery list of Daylight Savings all over the world, click here!) : ) Alright, well....I can't think of anything else to tell you! Have a good weekend, make some soup, put some of it the freezer, ya know. xo My sister and brother in-law reintroduced me to the fry supreme a while ago (I think I'd only had the "real one" once or twice) when they came to visit and they suggested we make it for dinner one night. So, we cooked up a huge batch of fries, and went fry supreme nuts! If you're asking yourself, "what is a fry supreme?", fear not, I'll fill you in! Basically, a fry supreme is potato fries piled high with what you would normally find on nachos. The "real' fry supreme (in Canada, it's from Taco Bell) is simply seasoned meat, cheese sauce, green onion, tomato & sour cream, so if you're a purest, you can stick with those items! I, however, love adding seasoned meat, shredded cheese, cheese sauce, salsa (sometimes con queso-which is a cheese sauce and salsa mix), finely chopped lettuce, diced pepper, green onions, tomato, sour cream, and guacamole. I like to also add a drizzle of spicy bbq sauce, and a drizzle of ranch dressing. I mean, if I'm going for it, I'm really going to go for it! : ) Basically, anything you love on nachos also tastes amazing on french fries....but seriously, no, seriously.....it tastes 100000x better on "Tasti Taters" as they are called in Canada. "Tater Tots" is the name of these lovelies in the U.S. (and made by Ore-Ida). According to the (all knowing) Wikipedia, names from other countries include: "potato gems", "potato royals" or "potato pom-poms".in Australia and New Zealand. In the United Kingdom there was once a similar product called "oven crunchies" which are no longer available, but are still produced and sold under the name "potato crunchies". Canada also has an organic version from Cascadian Farm called "Spud Puppies". As for the 'recipe" today, it's less of a recipe and more an idea, a few tips, and a lot of drooling while dreaming up what you would add to your "Tot-Chos" Supreme (Ya get it right? Tater-Tots, nachos, Supreme-d?) Yes! : ) I'm sure I didn't have to spell that out for you, but I did anyway! 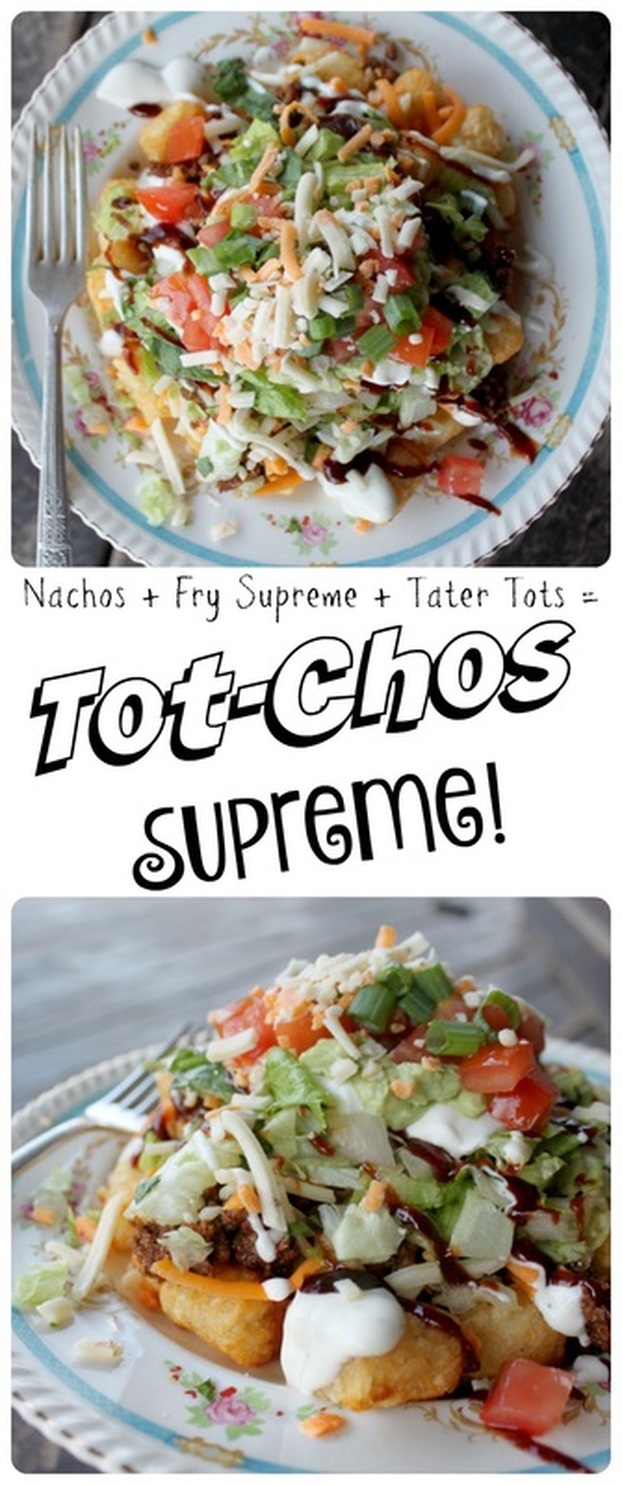 Tot-Chos Supreme Ingredients:
Possible Toppings:
Method:
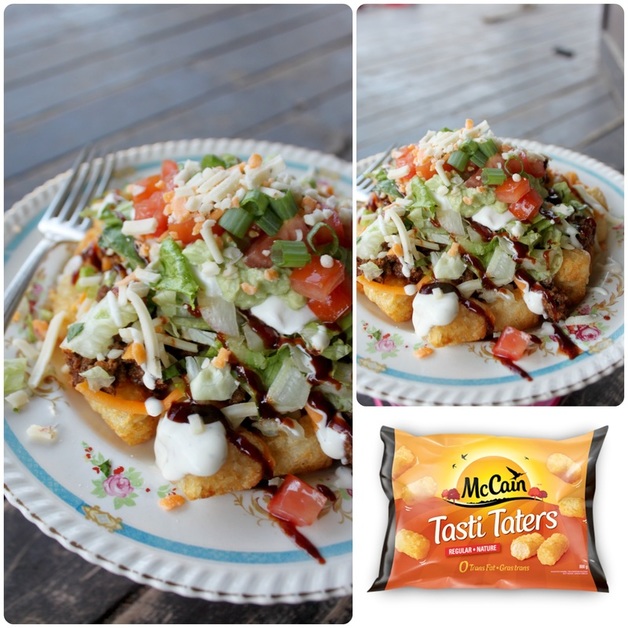 This meal is actually a great one to throw together for company (uh...not fancy company, obviously!) : ) Really though, if you set up all the toppings like a bar/buffet, then when the tots come out of the oven everyone can pile up their taters with toppings as they so desire. Sometimes, per gram, the price of Tasti Taters is cheaper than corn chips too, so, bonus! Welllz, my parents are coming up to visit this weekend, which we're pretty excited about! And, it's my hubby's birthday today, so we're going out for dinner tonight, which we're also very excited about! We usually go to a fancy-schmancy, locally owned restaurant in Belleville where we can get amazing steak, so, yuuummmmm........ This week has been an odd one 'round here.....Monday and Tuesday seemed like long and stressful days, the kids had Wednesday and Thursday at home because of snow days (so they seemed like long days too)......but now it feels like Friday is suddenly here! How confusing is that?!? Anywho....it looks like the kids finally get to go back to school today, and I'll just be busy baking a cake for Adam, making cookies for Sunday's "The Music man" rehearsal, and cleaning the guest room and house for my parents arrival! I hope you have a great weekend, whether working, staying home, visiting people, etc., etc., etc.! Just enjoy whatever you're doing! Don't waste time being grumpy or unhappy! Ok? Ok. : ) Mmmmm, I want to eat this again right now! But, it's pre-sunrise and "whipping up a batch" of sesame chicken seems like a little too much....? Yes? No? Anyway, when I made this for the first time, my husband said he would gladly eat it every week. That's saying a lot for him because he quite dislikes eating the same thing week after week. That's legit. Who wants to be bored with dinner? What a waste of a meal if you're bored with it!?! I love to love my meals! I love to enjoy my meals! And this dish is one I really love to enjoy! It is really simple to pull together, and tastes so great. I can't say "it's better than take-out" because, truthfully.....I don't think I've ever had take-out sesame chicken....? But I can say it has such fantastic flavour; it's sticky, sweet, garlicky & gingery! Wonderful, wonderful! 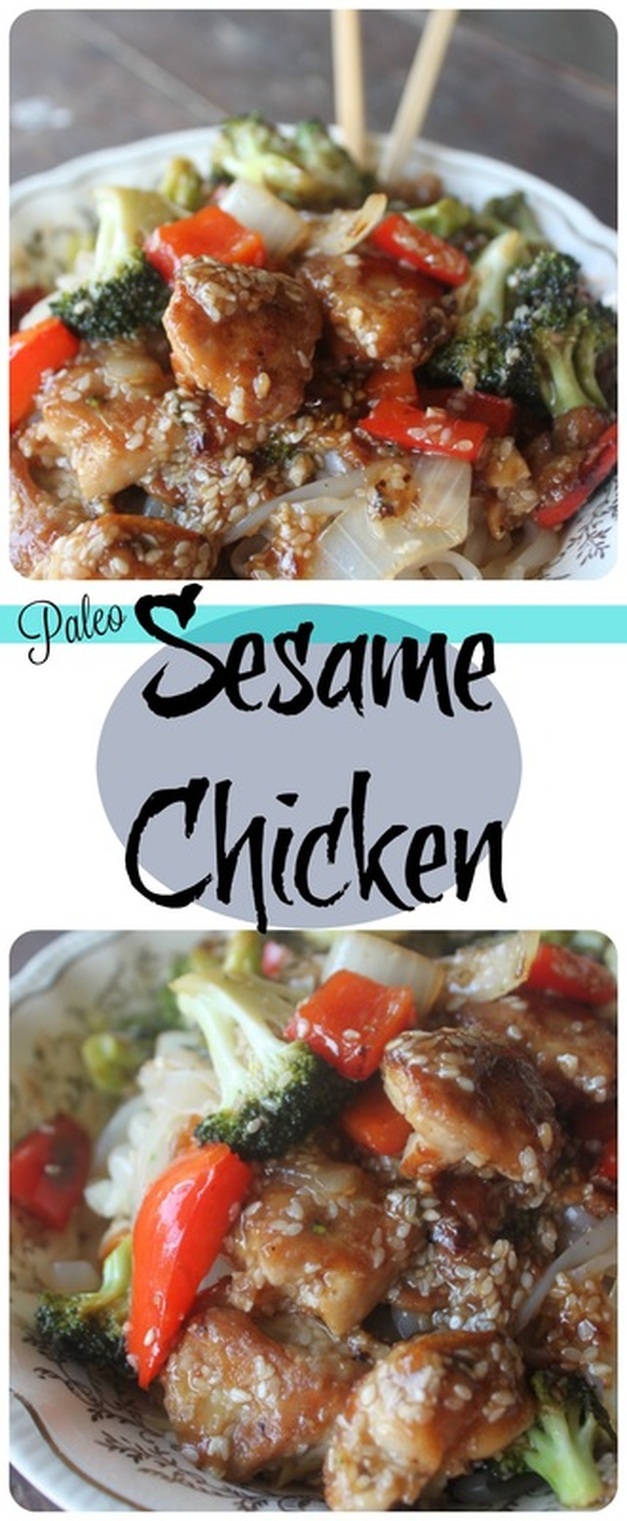 Paleo Sesame Chicken From Wicked Spatula Ingredients
***If you use frozen veggies, run them under some warm water to thaw out slightly*** For the Sauce
Method:
I like to serve Chinese dishes with stir fried cabbage (I just dump the pre-cut coleslaw mix into a pan with some oil, salt & pepper and fry it quickly). I also love using "miracle noodles" (I buy mine from Vitacost) 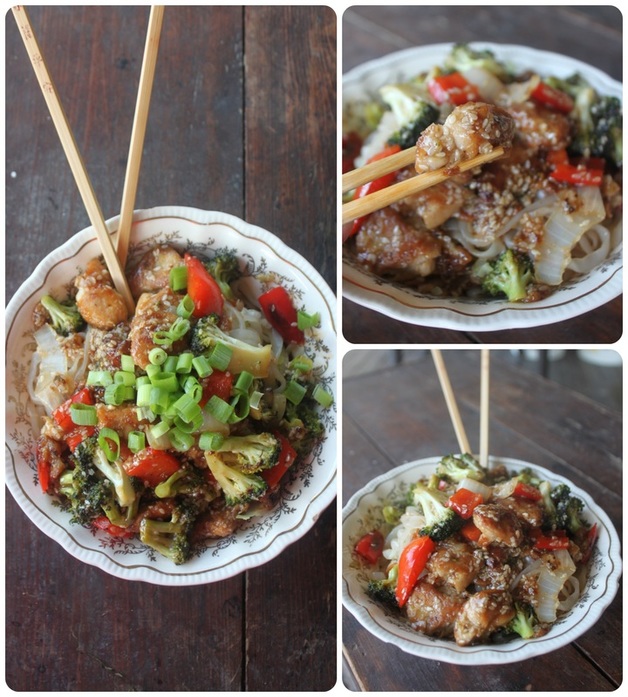 This week was like, "whaaaaaa?" for me.
Family Day was on Monday, so it was a holiday. Then Tuesday the buses were cancelled because of the wintery weather. Wednesday my kids school was closed due to burst water pipes. The kids finally went back to school on Thursday, but, I mean, that's confusing! My eldest child (who has autism) couldn't figure out what his day would look like ("free time for french?", "popcorn day?") because he was so thrown on what day of the week it was, and my youngest came out of her room and asked if we were going to church thinking that maybe it was Sunday! I felt the same! Wednesday I had a dance rehearsal for The Music Man and I got home late, so that was exhausting. Then last night my husband and I were at week 7 of a 10 week course we're taking, and we get home late from that, so I was even more exhausted! I want my coffee to be administered intravenously this morning....... When I finally sat my sorry self up in bed this morning, I mumbled to my husband, "guess what we're doing first thing tomorrow?", and he answered, "not getting up early?". He guessed right!!! Ok, whining over! : ) Have a great weekend! |
Hi, I'm Amy-Lyn! 
I am the lady behind this here blog! I live in the sticks with my animals, my super handsome husband, and my
3 amazing kids! Here you'll find things from recipes (gluten-free, paleo, and strait up junk food!), DIY ideas, thoughts on raising a son with autism, and whatever else pops into my brain! : ) Read more about me by clicking here! Want to Stay Connected?
Find What
|
 RSS Feed