|
A while back I posted a chocolate mug cake that needed to be microwaved. Two things happened though: One, people e-mailed to ask what they can do if they didn't have a micro-wave, and two: I personally found that I often couldn't actually eat the whole mug cake. Because I didn't want to waste, and I also didn't want to leave some random, useless amount of mug cake in the fridge, I would end up eating it all and feeling a smidge too full. So, to answer both problems, here are mini muffins (so you could eat as much or little as you want), made in the oven! 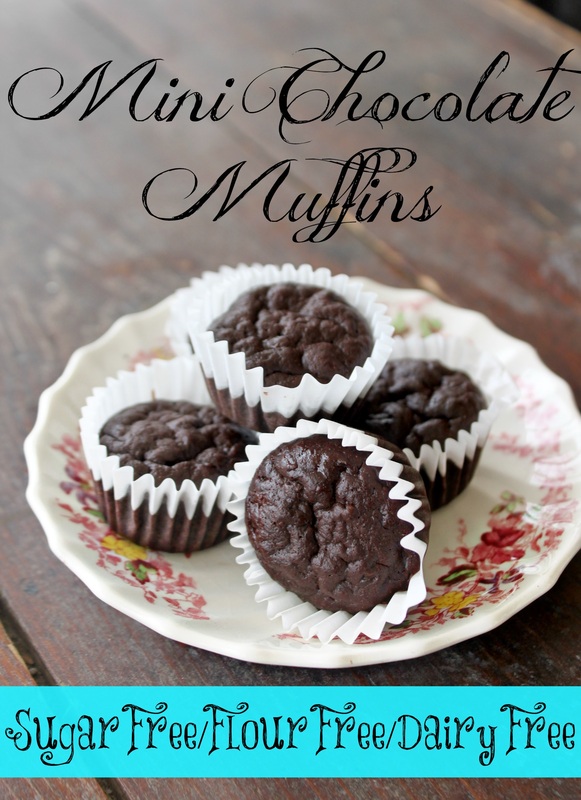 Mini Chocolate Muffins Ingredients:
Method:
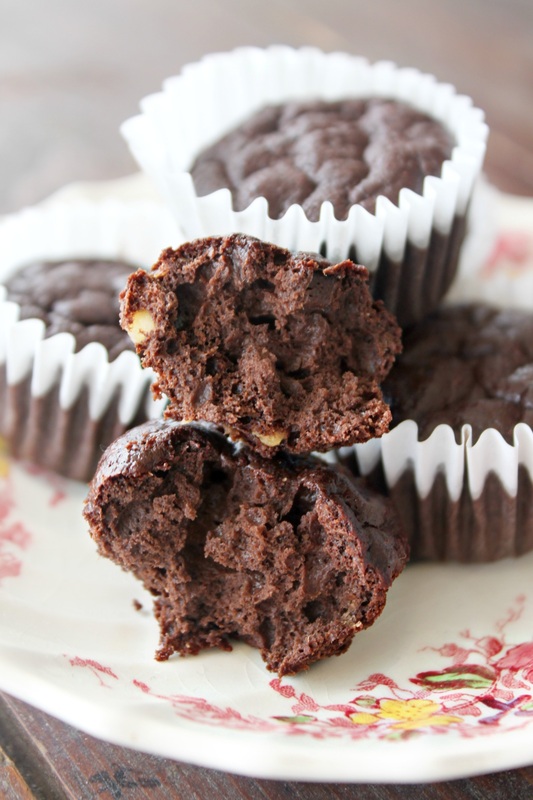 These little gems have a moist, fluffy texture, and I'm sure you'll love 'em!
3 Comments
Today's life hack makes me so happy! My kids (like all kids) love blowing bubbles, but as the adult, I am generally holding onto the bubbles so that they don't spill (so the kids don't cry!). I don't really mind holding the bubbles, but my hands do get pretty sloppy with all the soapy drippings. Option B is that the kids hold their own bubbles, and have soap dripping down their arms, or they set them down somewhere, and inevitably spill them. Then the crying starts.  But this....oh this glorious idea...I saw it on Pinterest, and my life changed forever! :) It's pretty self-explanatory, and (as you can see) doesn't need hard-core tape to hold it up. All I had was painters tape for some reason. Anywho, it worked great, the kids had a blast (well, the youngest missed out because she was in bed having a hard time waking up from her nap), there was no soapy mess, and no crying! The best life hack ever. The End. 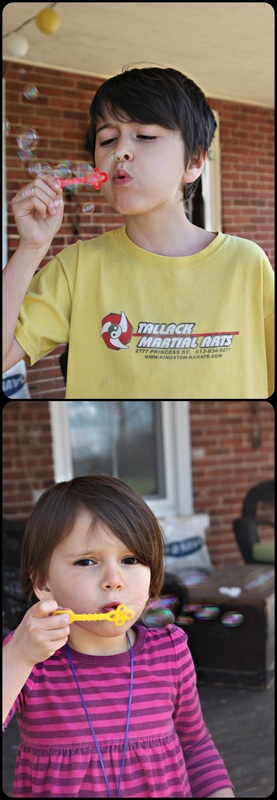 Oh, wait, one last thing. Open the bottle(s), take off the seal under the lid, then put the lids back on before attempting to tape it up. Maybe I'm stating the obvious, but I don't want anyone saying I never told them, and they have a bubble soap disaster!
Oh, wait, one more last thing. I don't mind kids getting messy, they are kids after all! But if there is an option that avoids it, I would be a bonkers parent not to at least try it! If I had never seen this idea, my kids would still be blowing bubbles, getting super messy, and crying over spilled soap. Blowing bubbles would not be eliminated from our lives because it was messy. I just needed to say that. The End (for real). Our good friends moved recently, and gave us their laying hens. Well, they didn't lay a single egg for 2 weeks (because it was still so very cold), and then-wham! They were laying a million eggs every day!!! O.k, a million is an egg-xaggeration (see what I did there?), but we suddenly had more eggs than we could possibly eat. So, as the old saying goes, if you have too many eggs, make a quiche. That is 100% not a real saying, but it could be. Because we are largely gluten-free at our house, a "regular" crust was out, but I wasn't in the mood for a crustless quiche....with some inspiration from a favourite blog of mine, PaleOMG, a meat crust seemed genius, and I went for it! 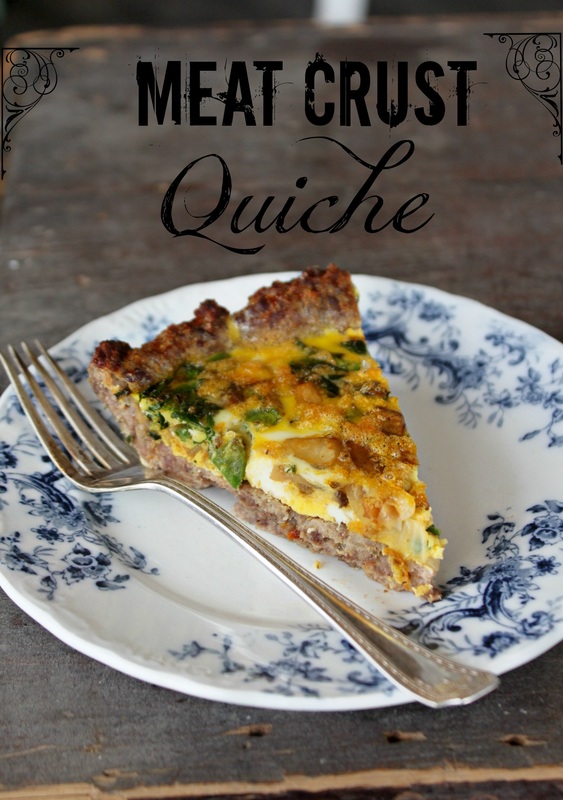 Meat Crust Quiche Ingredients
Method:
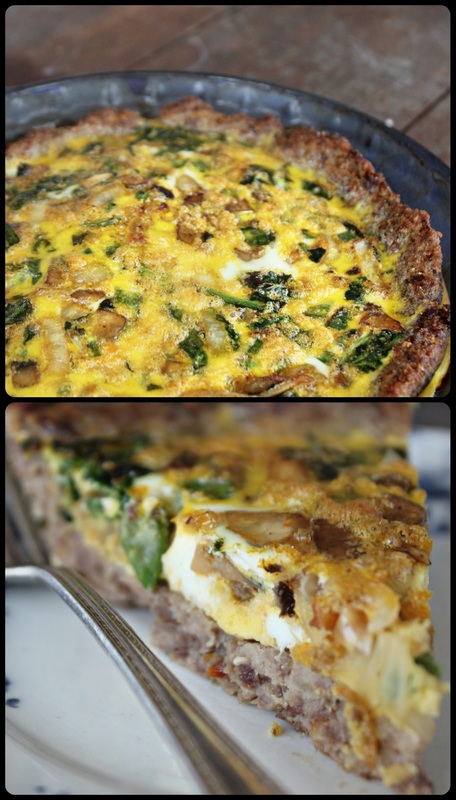 This quiche is hearty (obviously!), and it makes some of the best leftovers ever.
Well, alrighty. Gosh, I'm pooped. It's a super terrific, sun-shiny day though (SpongeBob said it first, not me), so I'm hoping a nice walk with my youngest after the olders get on the bus will wake me up....fingers crossed! Happy Monday! I have been seeing these "cake mix cookies" all over Pinterest, and it seemed backwards to me. I thought you would use a cake mix, then just change what you added so that it was more cookie-ish or something, and I always thought, "um, why not just buy a cookie mix?". But, because I like to experiment, I thought I would try them! I found a recipe I liked from Sally's Baking Addiction (though I did add cornstarch, and omit the sprinkles, I just don't get using sprinkles? Maybe it's because I'm old and crotchety?) Even as I was putting them into the oven, I was feeling doubtful. Why cake mix? But then I could smell them baking, and it was this glorious cross between cake and cookie smell. Drool....Then, when I pulled them out of the oven...they had this fantastic looking top, and I knew they were different than a regular chocolate chip cookie and would be yummy! 
Cake Mix Chocolate Chip Cookies Ingredients:
Method:
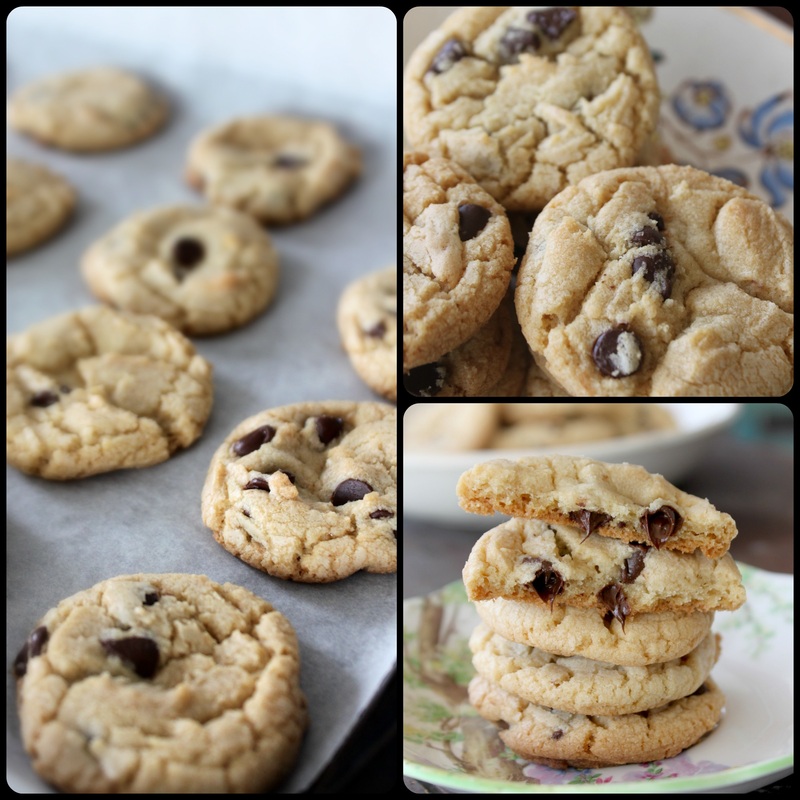
You can see that they are a pinch thin, and they were a little crunchy. Generally I like nice, poofy, softy-soft cookies, but these were perfect as is. They were great to snack on, and because they were a little smaller, and were perfect for dipping into tea.
So, final verdict is that these cookies were worth trying out. I love my regular chocolate chip cookies, but these were a delight in their own way. Well everyone-have a great weekend! For this final Thursday in Autism Awareness Month, I wanted to honour Caleb.  We have had many hard years with him, but the truth is that he is the most genuine person you will ever meet, and has the most contagious laugh and beautiful smile. The song playing with the video is called "Meant to Be" and is from the Veggie Tales movie "It's a Meaningful Life". It is written and sung by Steven Curtis Chapman. This song has been "our song" for Caleb since we first heard it on the movie (mentioned above), as we feel it sums up not only how we feel about Caleb, but more importantly, how God feels about Caleb. Chorus You were meant to be touching The lives that you touch And meant to be here Making this world so much more Than it would be without you in it You were meant to be bringing The gifts that you bring And singing the songs You've been given to sing You are perfectly, wonderfully, Beautifully meant to be You were meant to be xoxo Love you Caleb
My mind is so blank right now....I can't seem to think of how to start this post. I can hear my daughters voices in my head though when they make me sit down to watch one of their "shows", so, I'm gonna go with their opening speech formula: ladies and gentlemen, boys and girls, welcome to the apple & bacon roast chicken show! Seriously, it's all I've got right now. Please be gracious. :) 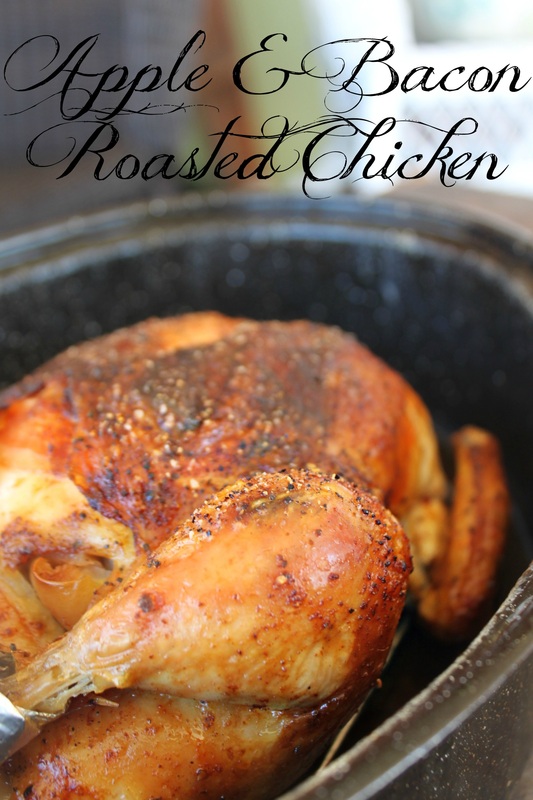 Apple & Bacon Roast Chicken Ingredients:
Method:
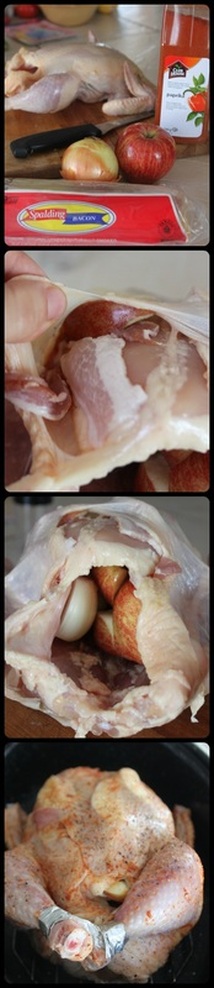 You can see here I put the apples under the skin. It was still tasty, but I preferred when I made it with all the apple in the cavity, and only bacon under the skin. This really is a simple roast chicken to put together, and it comes out so tasty and juicy. 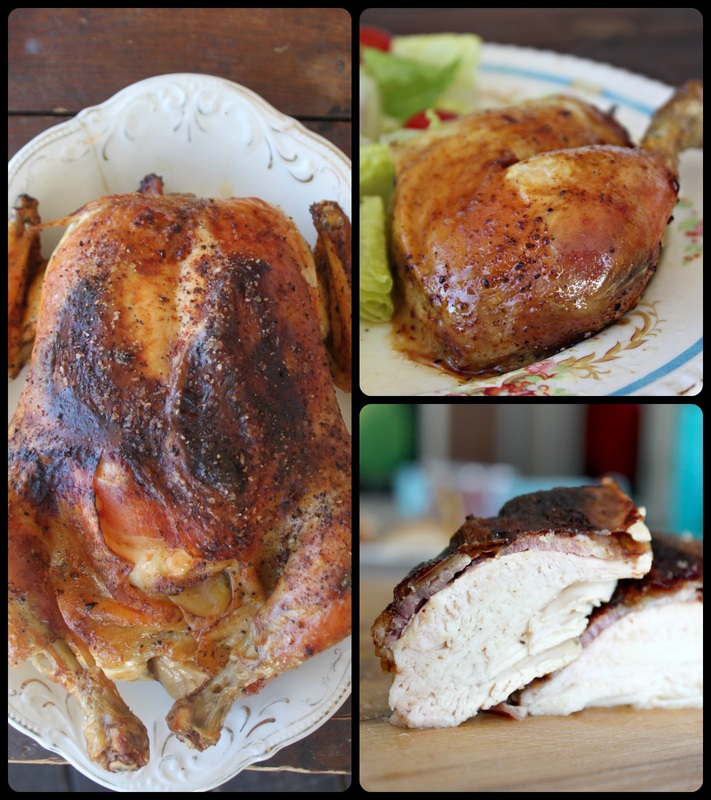 Back when I posted my lemon & rosemary roast chicken, I meant to ask what kind of roast chicken anyone in the great big www liked? Share your ideas if you have any!
Just a quick post today about re-using old things as new! One of my favourite things! These pillow cases are old sacks that I've purchased at antique and flea markets and washed (and washed again), and simply slid another pillow into. 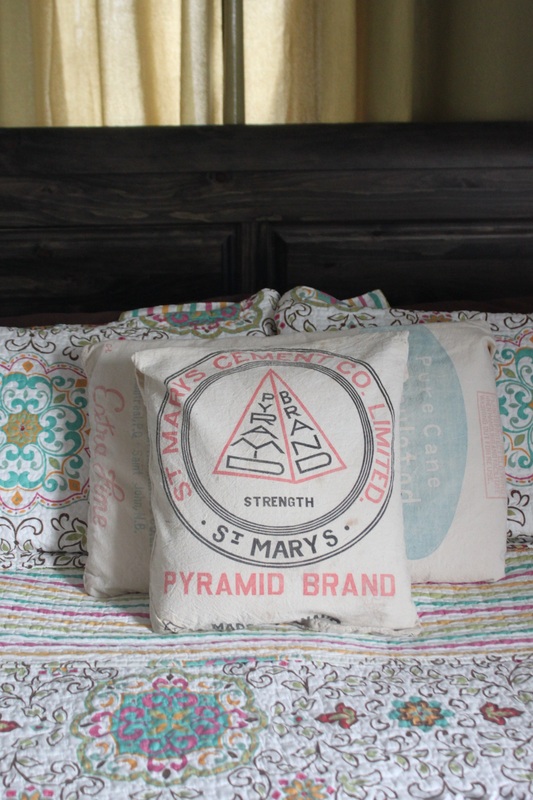 I bought this particular pillow case because years ago my husband worked for an industrial vacuuming company, and they would do regular jobs vacuuming the huge tubes and tunnels at the cement plant in St. Mary's. In my living room I also had 6 other old sacks as pillows, but instead of putting a different pillow into it, I bought them stuffed with "pillow fluff" (stuffing), and sewn shut. They are a little more tricky to wash though....so, I would personally recommend just slipping a different pillow into the sack, and if you want it to close, just sew a zipper, or some cute buttons. 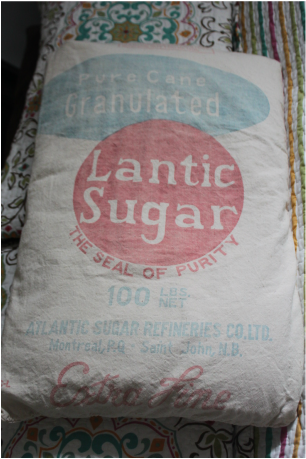 Well, we're heading home today, and I will be able to rest my head on my lovely pillows again! :)
So, I'm still away visiting family, and I didn't even remember that today was Monday! I'm sitting here chatting with my Mom, and I had to ask her what day it was! We were visiting other family 40 minutes away from our "visiting home base" of my Mom & Dad's, and we only rolled in around 3am....so, yikes, I'm a little pooped! Anyway, I wrote this draft about a week ago, but was busy making (and posting) Easter treats and didn't post this! So, lets take a step back from all that sugar from last week, and make a healthy-ish casserole. I know "casserole season" is coming to an end, but I eat spaghetti squash a lot, and was getting a little tired of it in a bowl with sauce and needed something different, gosh darn it! 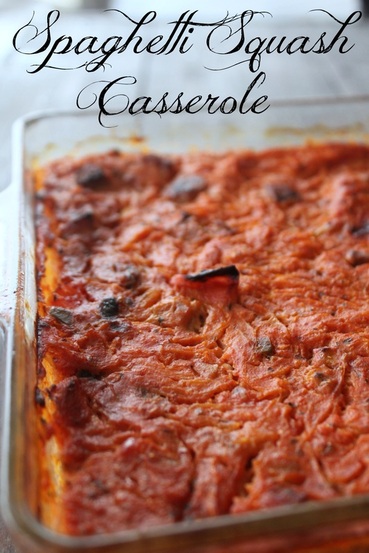 Spaghetti Squash Casserole Ingredients
Instructions
 So, I had planned on making this, but forgot and used my sausages a night or two before. I had other ground meat options, but because I had made more sausages than we needed, I decided I would just cut up the cooked sausages and use them. So, fyi, that's an option. I just added them to the pan with the onion like I would have the raw meat, and continued on.
Anywho, this was tasty, makes great leftovers, and was a nice change from the usual. I hope everyone had a good weekend (or maybe still having a good 'weekend' like me?). Whatever your plans, whether you have today off or not, have a great day! So one last Easter treat! These are yummy, yumm-yum! 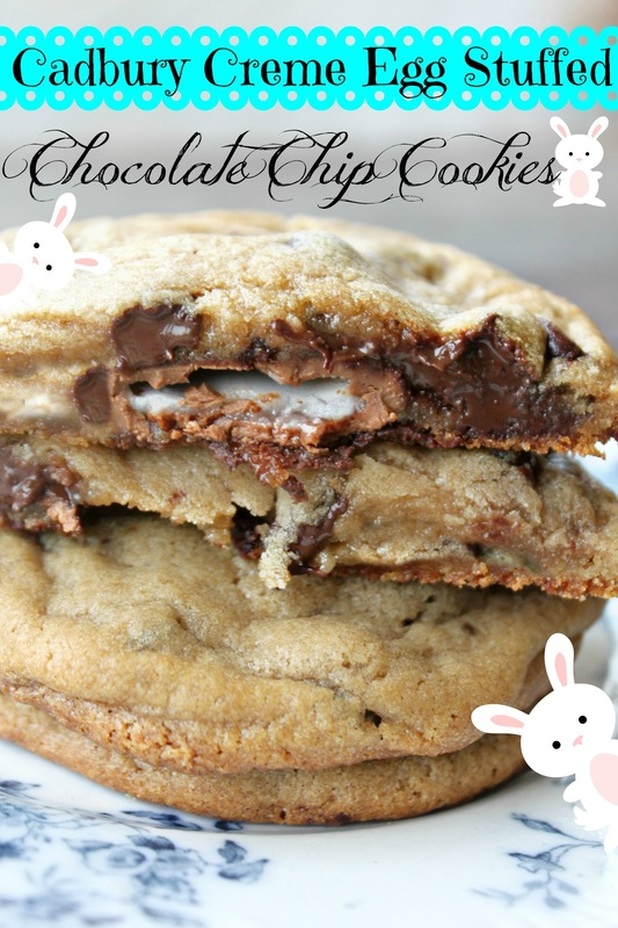 Cadbury Creme Egg Stuffed Chocolate Chip Cookie Ingredients:
Method:
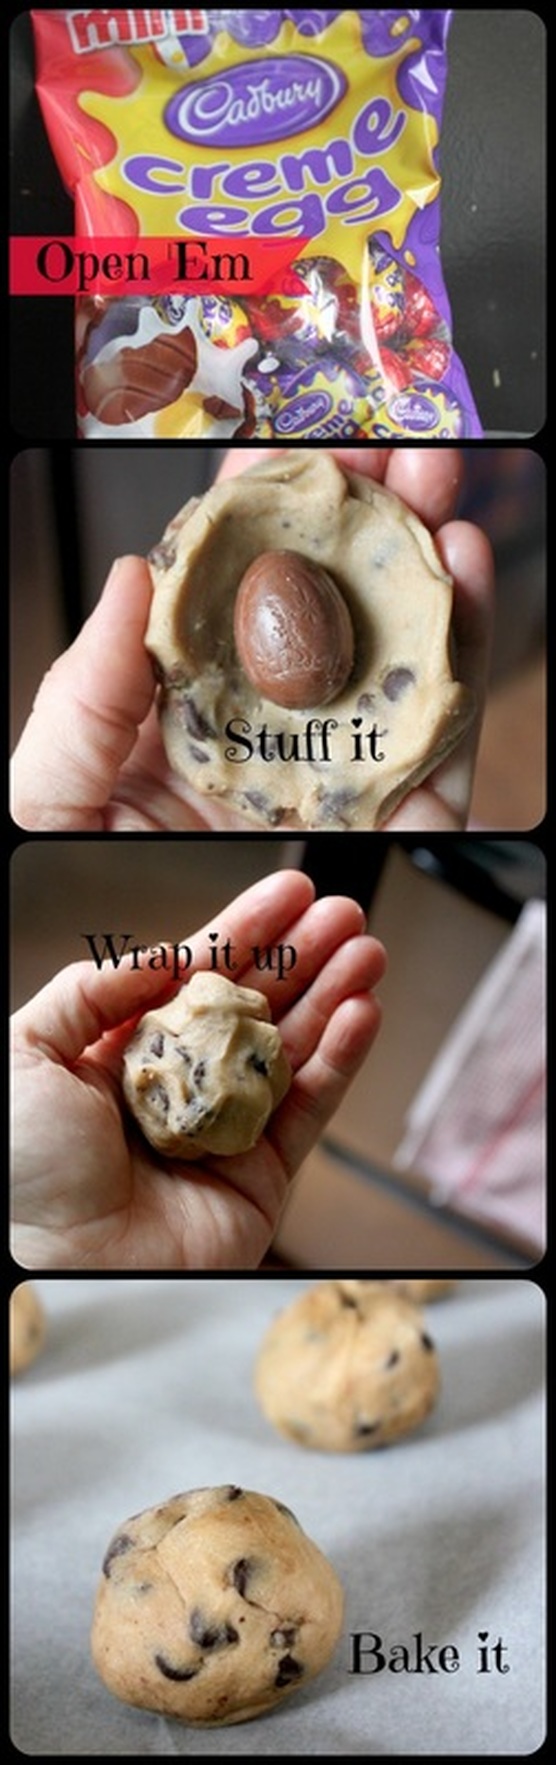 Pretty darn (or "derned", as my sister would say) simple. And man, these are sooooo yummy! Seriously, so yummy! 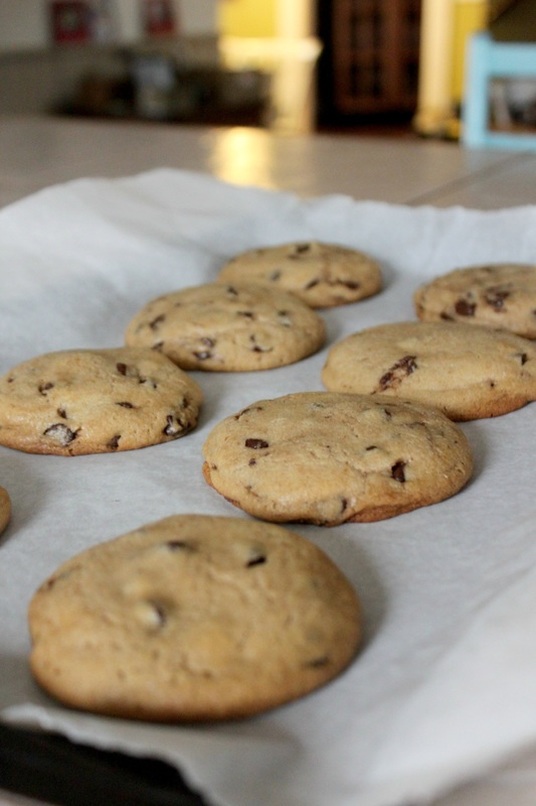 Hot out of the oven with a wee surprise inside. Why did I say that like a Leprechaun? I dunno. Well now, I hope everyone has a great Easter weekend, whatever your plans! We're heading out to see the fam for the weekend, and I'm quite looking forward to it!
I struggled with this post because I felt like it was a cop-out somehow, but I've reconciled myself to it, and am sure that a big part of people becoming familiar with autism is by watching it. They say knowledge is power, and I really believe power from this knowledge will change the way people see autism. Today I have a few video trailers from films that really touched me, taught me, and challenged me and how I saw autism in my son, and in others. I hope you take the time to watch the trailers, but more than that, I hope you write yourself a little note to remember to actually watch these in full. Autism: The Musical This HBO documentary "Autism: The Musical", and documents children with different levels of autism coming together to celebrate their differences, and their unique talents. Temple Grandin Another HBO film titled "Temple Grandin" (based on the book "Thinking in Pictures: My Life With Autism" by Temple Grandin) is such a wonderful movie. Claire Danes, who plays Temple, did so much research into how Temple talked, her mannerisms, and what made her who she was. A wonderful film that you will want to watch, and tell other to watch too! The book is also amazing, and worth reading. The Horse Boy This last film, a documentary called "The Horse Boy", may seem strange. This family travels across the world to visit Shaman (a Shaman is a person thought to have access to, and influence in the world of the supernatural) in an attempt to help their autistic son. What I love about this is watching a family come together, working together, learning from each other, and coming out better for it. This movie also touches me because I see in their son a lot of what my Caleb used to be like a few years ago; they share a lot of the same problems and mannerisms, and it breaks my heart to see their son struggle. The book "The Horse Boy: A Father's Quest to Heal his Son" by Rubert Isaacson is a great read, and gives a lot more details than the documentary. The truth about me watching movies and documentaries (and reading books) about autism is that I need a reminder, I need empathy, I need to see autism in more ways, but I especially need to see it from my sons eyes.
It can be easy for me to get into "the groove" of dealing with Caleb, and I forget to stop and see how beautiful he is, how amazing he is, how far he's come. I get frustrated with his limitations, and see what he does wrong through the lens of my "normal" brain, not his autistic brain. Caleb struggles, but he also fights everyday to overcome the things that could (should) hold him down. I don't give him the credit he deserves for what he has to do every day to function and survive. Watching others (especially kids) with autism gives me a new, outside-looking-in view of Caleb, and my life with him. I watch a movie or documentary, or read a book, and see Caleb in it. It reminds me to be patient, to show grace, to love the things that make him who he is, and see how strong he is. When I see autism that way, it inspires me to be better for Caleb, the way Caleb works everyday to be better for me. |
Hi, I'm Amy-Lyn! 
I am the lady behind this here blog! I live in the sticks with my animals, my super handsome husband, and my
3 amazing kids! Here you'll find things from recipes (gluten-free, paleo, and strait up junk food!), DIY ideas, thoughts on raising a son with autism, and whatever else pops into my brain! : ) Read more about me by clicking here! Want to Stay Connected?
Find What
|
 RSS Feed


