|
Ok, well, the title warned you! You now enter this post at your own risk! : ) My husband's Belgian family celebrates and mourns with ham buns. A wedding, baby shower, anniversary, birthday, funeral - all involve "ham buns". This food item is EXACTLY what is sounds like. A bun. With ham. The bun is simply buttered, filled with a piece of ham, and that's it! It seems basic, but somehow it tastes like a dream! I dunno. Last year, my husband's Uncle passed away, and at the funeral luncheon we had, of course, ham buns. Adam's uncle specifically requested double ham on his ham buns though (extra delicious!), and my girls really enjoyed them. I was surprised by this because my girls have not eaten a sandwich in at least 5 years! I think the fact that the options were were limited, they gave the buns a try. Well, after the luncheon there were leftovers, and the wonderful women running the meal packed up lots of food for us to take home. We had at least 2 dozen ham buns that Adam took to work and the girls took to school over the next week! When they ran out, the girls asked if I could make them the buns. We are mostly a gluten-free family because I eat mainly paleo, and Caleb is fully gluten-free, so it’s easier for us all to eat similar. Plus, I told the girls, making the delicious buns that the ham was nestled in takes too much time to make. So, that was that. Well then, didn’t a neighbour come over one day not too long after with some rolls she'd made with her aunt that day. They were so good......so, so, so good! Belgian funeral good. I commented on how I don't usually make bread or buns because I hate waiting for it to rise. Yes, I'm occasionally impatient! Anywho, she told me that these particular rolls only took about an hour to make, and I thought - what? For Real? I thought she was pulling my leg, and was trying to make them sound easier than they were. Well, the next day she came over with the recipe for me to see, and promised that they only took an hour. So, I said, “well, let’s make them right now!”. And we did. And it was scary easy, and scary fast how we produced big, soft and fluffy rolls in an hour. If you’re not organized (or your kitchen isn’t), I could see this taking an hour and 15 minutes. Or if you got distracted while making these, perhaps it would take an hour and 30 minutes. But getting distracted while making these will be impossible because you’ll be so focused on the warm, delicious goodness you’ll have in an hour, you’ll just hone in and get ‘er done! So, here it is! My neighbours' aunt's recipe for "bread buns" as she called them, or "dangerously quick and simple buns" as I call them! 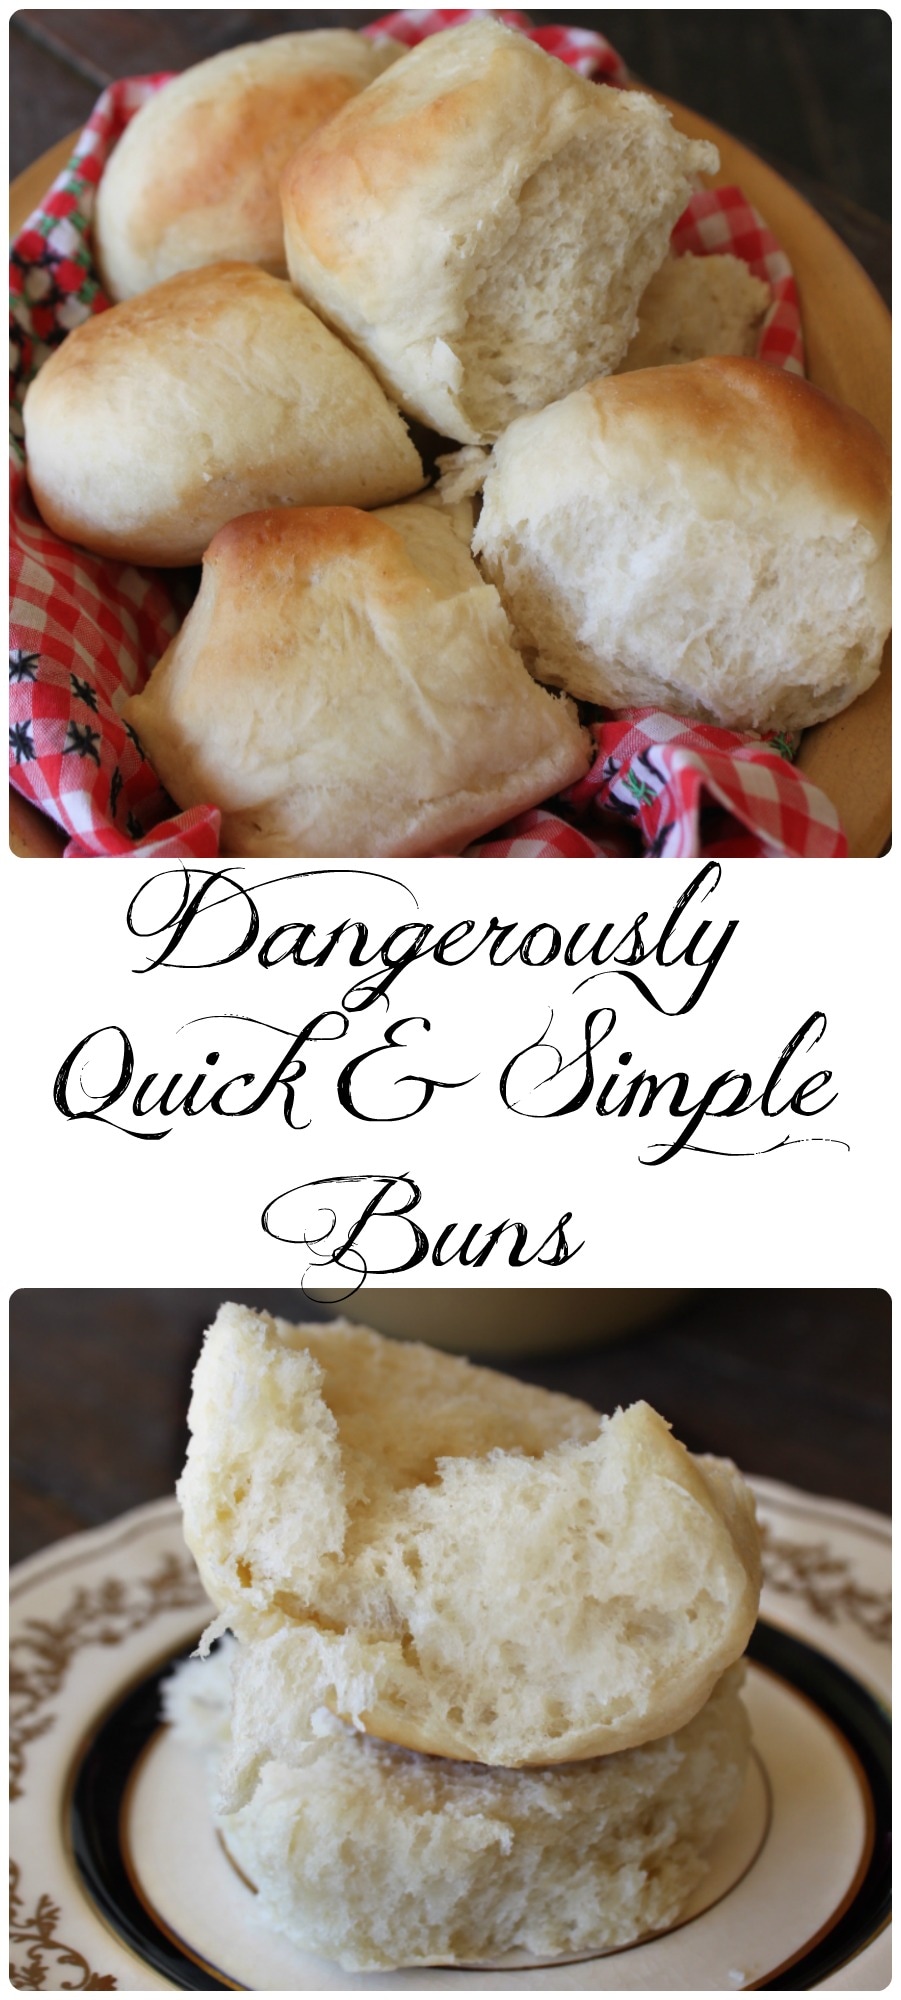 Dangerously Quick & Simple Buns (or dump pan buns!) Ingredients
Method:
It's honestly a really simple process to go from some humble ingredients to amazing, fluffy buns! 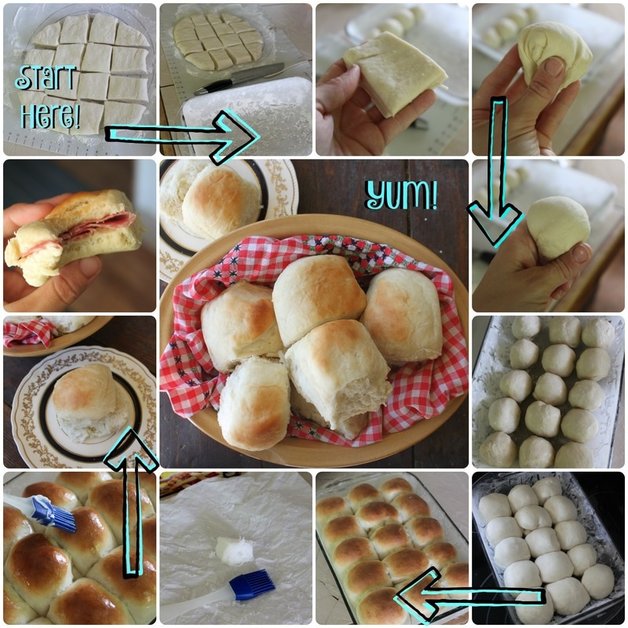 This is my Keziah who especially loves these delicious buns! She can hardly wait for them to cool a bit so she can devour one! 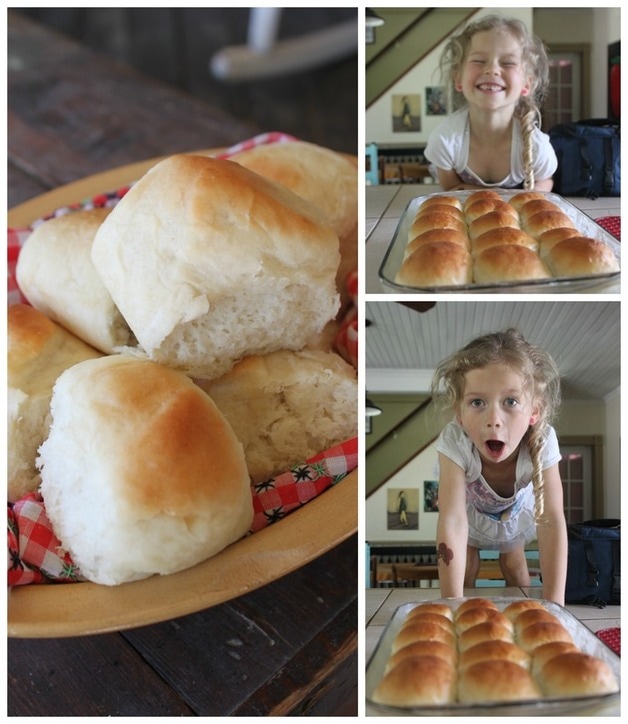 Can I just highlight some recipes for buns from the past.....specifically, from my book by Dr. Chase from 1884? I love looking through this old book when I'm thinking up a recipe because why re-invent the wheel, right? Well, sometimes the wheel needs some rounding out! This recipe below for "Buns, Better Than bakers" is a multi-day event! You'd start the water, sugar and yeast the night before you planned to make these rolls ("hooray for rapid rise yeast" shouts all the modern women!) : ) Anyway, it's a gem of a recipe, anyway!  Ok, I had to share one more recipe from Dr. Chase's book because......yuk. I mean, I might still try making it because it sounds so strange, but, yuk! It's called "Pork Cake", so, I think we can just right away agree (based on the name) that this is a recipe that maybe won't suit many peoples tastes...? I think it could be a breakfast style cake? Read the whole recipe, especially the last part about what you use to check for doneness. It's brilly-bobs (as my sister would say. Translation: brilliant) 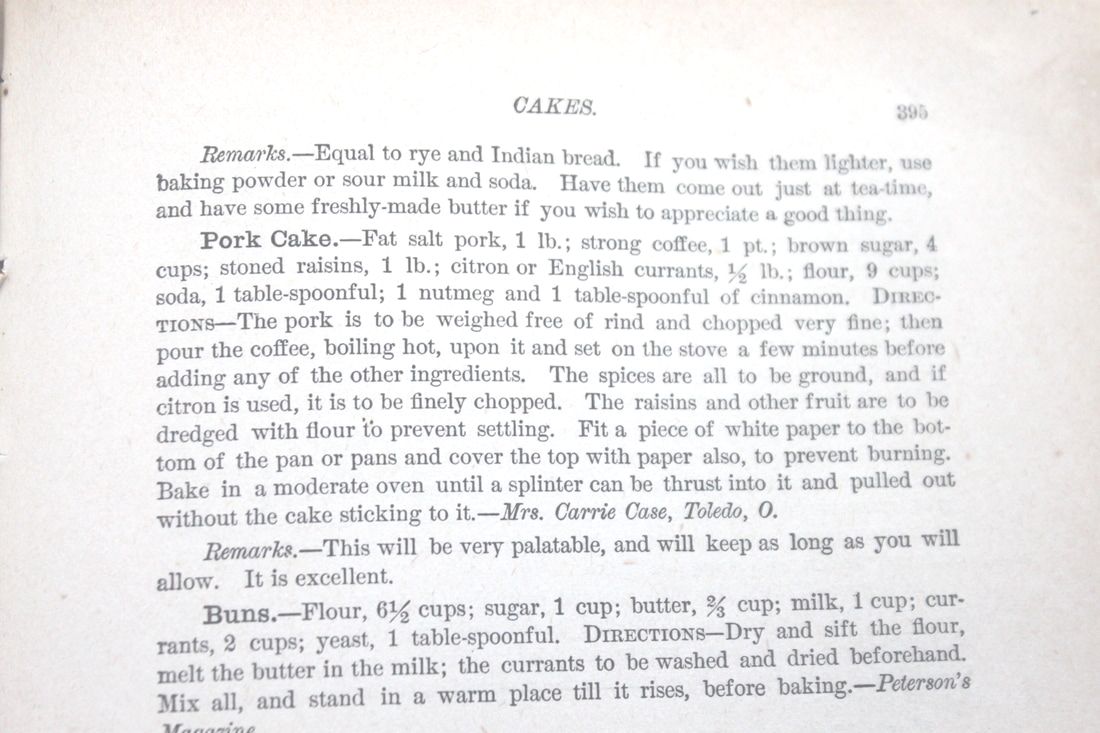 It is amazing, isn't it?! Anyway, this post seems too long? Sorry about that. I'll just get outta here then! Have a great weekend! It's a long weekend here in Ontario because Family Day is on Monday (also in Alberta and Saskatchewan!), and we have family visiting (how fitting!), and I'm excited! xoxo
0 Comments
Hello! Ever seen the baked ham & cheese sandwiches before? I have been seeing them on the world-wide-web for a long, long time, but just never got around to making them! Well, now I've gone and made them, and there's no going back! So, hey, if you're going to a potluck and know the hosts, and know that you could use their oven once at the event....these make the best bring to a potluck food! All the recipes I found called for Worcestershire sauce, which I've never owned and wasn't about to purchase, as well as poppy seeds. I suppose I could have gotten those, but it didn't seem essential. Oh, and you're supposed to use "King's Hawaiian Rolls", which if you live outside of Canada, you should apparently be able to find. Here in Canada? No such thing as this King and his rolls from Hawaii! : ) Let's be real though, this crazy delicious hot baked sandwich recipe isn't exactly rocket science, and there is lots of leeway! For instance, you can use whatever thin sliced meat you'd like & whatever kind of cheese, though a strong, sharp, or spicy cheese is the best (in my opinion)! 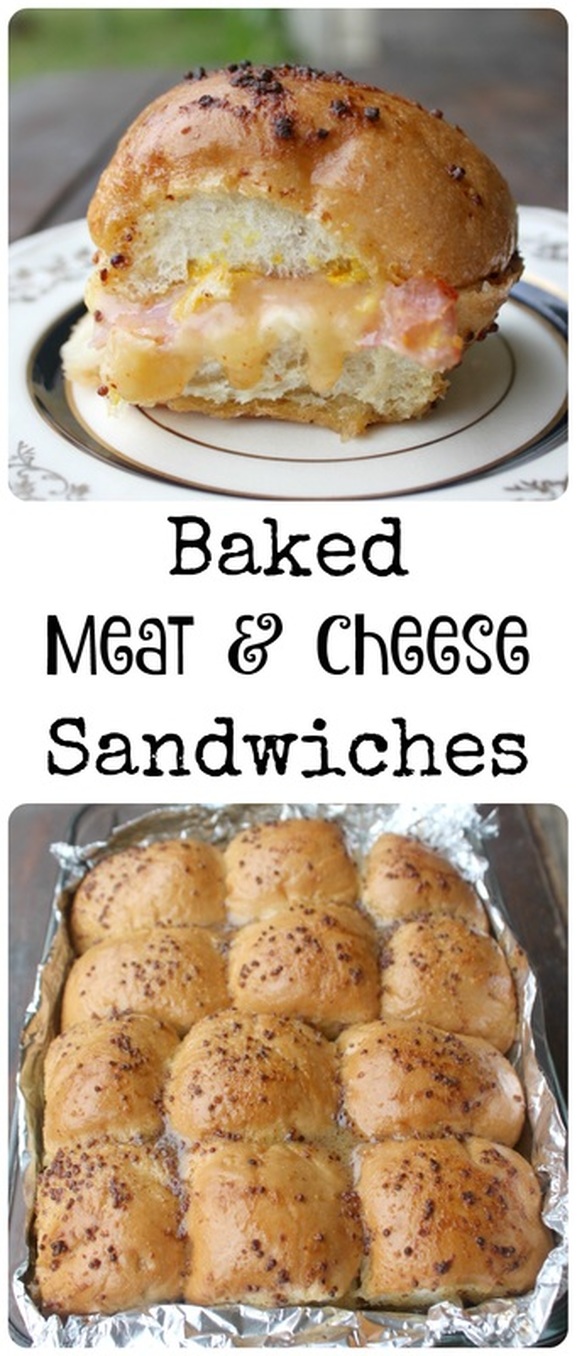 Baked Meat & Cheese Sandwiches Ingredients:
Method:
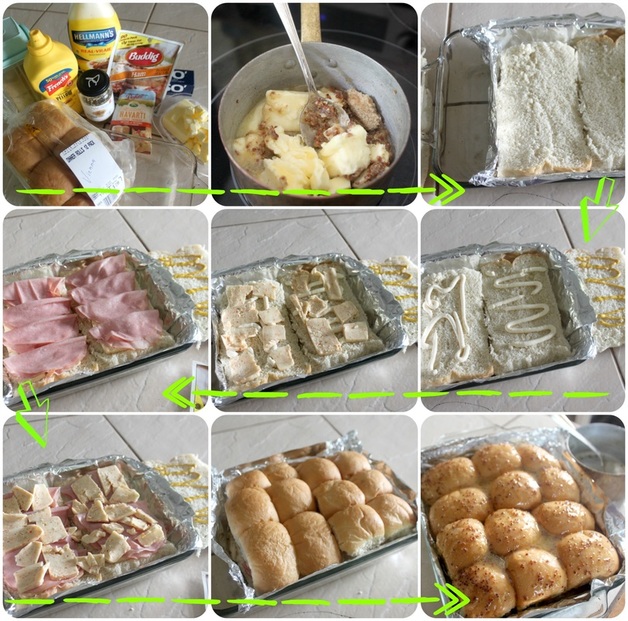 These sandwiches are really simple to put together, but the results are faaab-u-lous! Seriously, you end up with a warm & soft sandwich, but with perfect crunchy tops and edges, as well as the crazy delicious taste from the butter/mustard/sugar mixture......mmmmmmmm...... 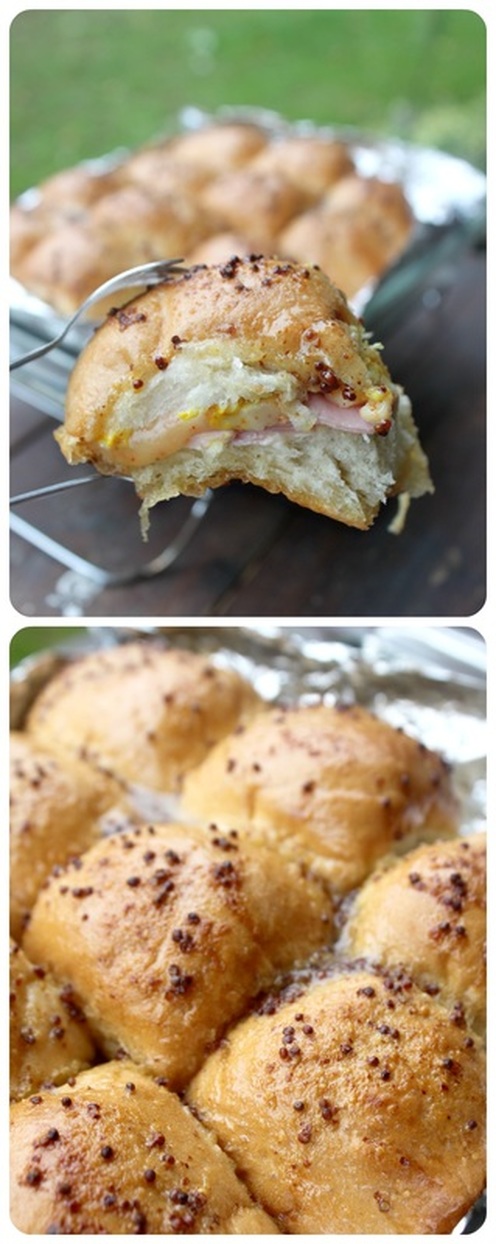 These fantastic sandwiches with a nice soup would be a perfectly delightful lunch with guests! Wouldn't you want to be invited to someones house with these?!? So, send this recipe to someone, and then super casual invite yourself over for a meal, then randomly mention how you soooo enjoy warm, baked sandwiches....and offer to bring the soup yourself : ) I'm signing off now, it's family movie night and we're watching the 1930's production of "Peter Pan" and putting a dent into the Halloween candy we got last weekend! Hazaa! Have a great weekend! xo Ya know what makes a great party? No, it's not the friends, or the conversation. It's the dip. Ok, I am kidding, but for realz, a great dip makes an awesome party awesomer! : ) Awesomer may not be a real word, but it is in my house with a 5 & 6 year old, and it describes this dip! First up....I took crappy photos of said dip. Thumbs down. I was (happily) busy getting ready for my birthday party, and only stopped briefly to take a few pictures. The starting point for this recipe can be found here, at mom4real and her photo of the dip gives it a little more justice. "Buffalo Chicken" refers to hot wings, btw. When I was young, I really and truly believed that these "buffalo wings" that I heard grown-ups talking about were some sort of genetic mutation specialty food....buffalo with wings? Yikes! Well, let me put your mind at rest, according to the internet (where all pieces of information are true-haha), Buffalo wings got their name from their originated location, Buffalo, New York. I read this enlightening piece of information here, on todayifoundout.com. I know I went, "ohhhh, Buffalo, New York!" when I found out. I knew as an adult the wings weren't part of a buffalo, but my brain blanked beyond that and never thought of the New York city! Duh. Typically, Buffalo wings are served with blue cheese dressing, and other Buffalo chicken dip recipes use blue cheese, but I can't. I loooves me some cheese, but blue cheese? Nope. Can't do it. Anyway, ranch is equally as popular now for chicken wing eaters, and well, there's no rules when it comes to wing eating or dip making! Anywho, the real surprise twist here is what we did with the leftovers....oh good golly, it was gooooooood. But first, the dip! 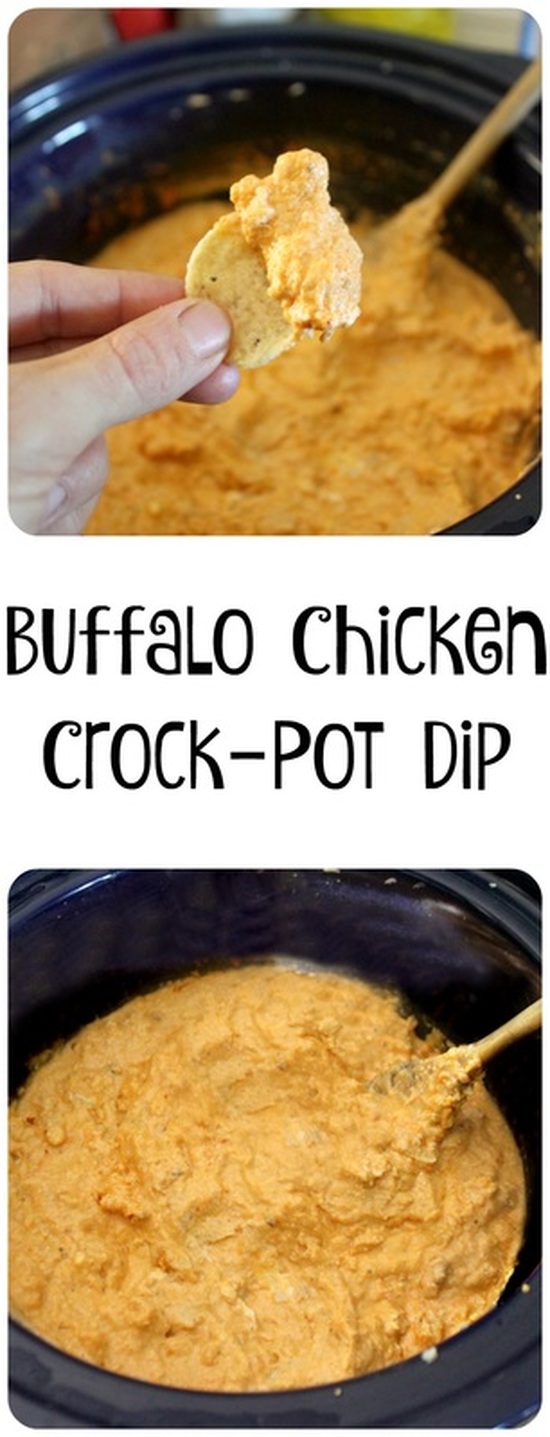 Buffalo Chicken Crock Pot Dip Adapted from mom4real Ingredients:
Method:
Well now, you can see the pic below ruining the surprise of what we did with the leftovers! We made it into the most fantastic grilled cheese sandwich ever!!! I guess if you're not a grilled cheese lover this won't be that appealing to you, but let me tell you, this treat day dinner was right up my alley! We buttered some fresh bread, then prepared the sandwich by loading it with leftover dip, an extra splash of Frank's Hot Sauce, a drizzle of ranch dressing, and a little extra grated cheese. This sandwich could be replicated without making the dip too. Simple empty the contents of a can of chunk chicken into a bowl. Mix in some Frank's, ranch dressing, and a little cream cheese (if you have any). Mix up well! Then, butter 2 pieces of bread and put some shredded cheese on the non-buttered side of one piece, top with some of the filling, add a little more cheese, then finish with the second piece of bread (butter side up. Then grill to melty perfection! 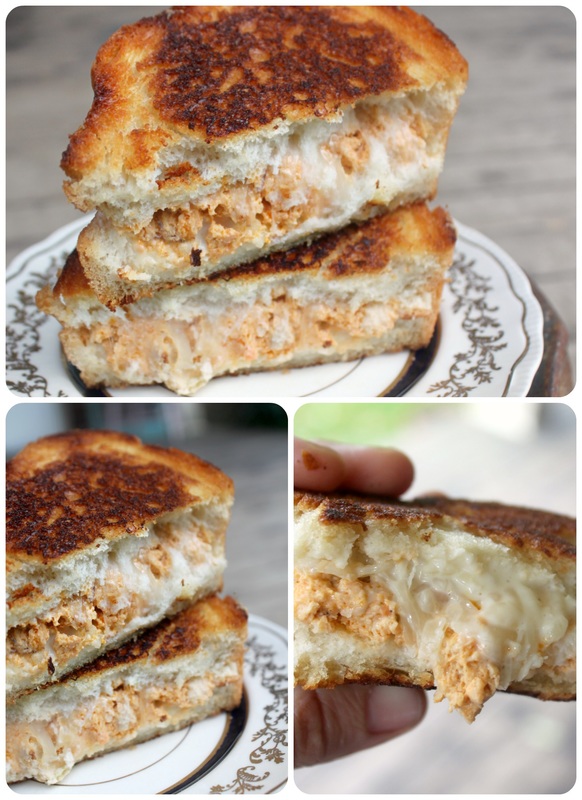 Let's talk about my Jekyll & Hyde thing I've got going here, shall we? On Monday I started my new Health & Fitness page. So....where does cheese laden dip and buttered smothered grilled cheese fit into this? I eat Paleo....80%-90% of the time. Paleo is a whole foods lifestyle with lots of fresh veggies and fruits, meat, nuts and seeds, and avoiding things like grains, (refined) sugar, and dairy. But I am (at heart) a food lover. A lover of ALL food! So, 5-6 days a week I eat strictly Paleo, but the 1-2 days a week I don't eat Paleo, my "treat day(s)", I don't worry about what I eat! Sounds crazy? Maybe. But it works for me, it keeps me on track, really. If I looked into the endless future, knowing I would never again enjoy a grilled cheese, a or a bowlful of Maynard's gummy candies.....I would be so sad. So very, very sad. I love healthy food, and I love how I feel when I create something delicious with it, and how I feel knowing my body is being well fuelled. But, taking a break mentally from good eating re-charges me to keep eating healthy! So, to ya'll going, "whaaaaat?" to the seemingly random recipes I post, this is the "why" to your "what". : ) Happy Friday everyone! Please leave a comment if you stop by here, or share this recipe with someone you know would love it, or make it for your next party so that you'll be the most awesome person ever! Awesomer. xoxo 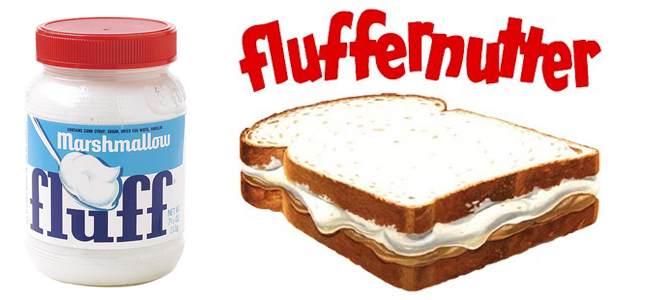 Let me start by saying that I in no way shape or form invented the "fluffernutter". It's a recipe on the back on the Marshmallow Fluff jar. Do me a favour and watch this fantastic commercial for the sandwich from waaay back. Anywhooo, a regular fluffernutter sandwich is fantastic, but I decided one day to spread some butter on the outside of it and fry 'er up (grilled cheese style).....oohhhhh man! Yum-o! 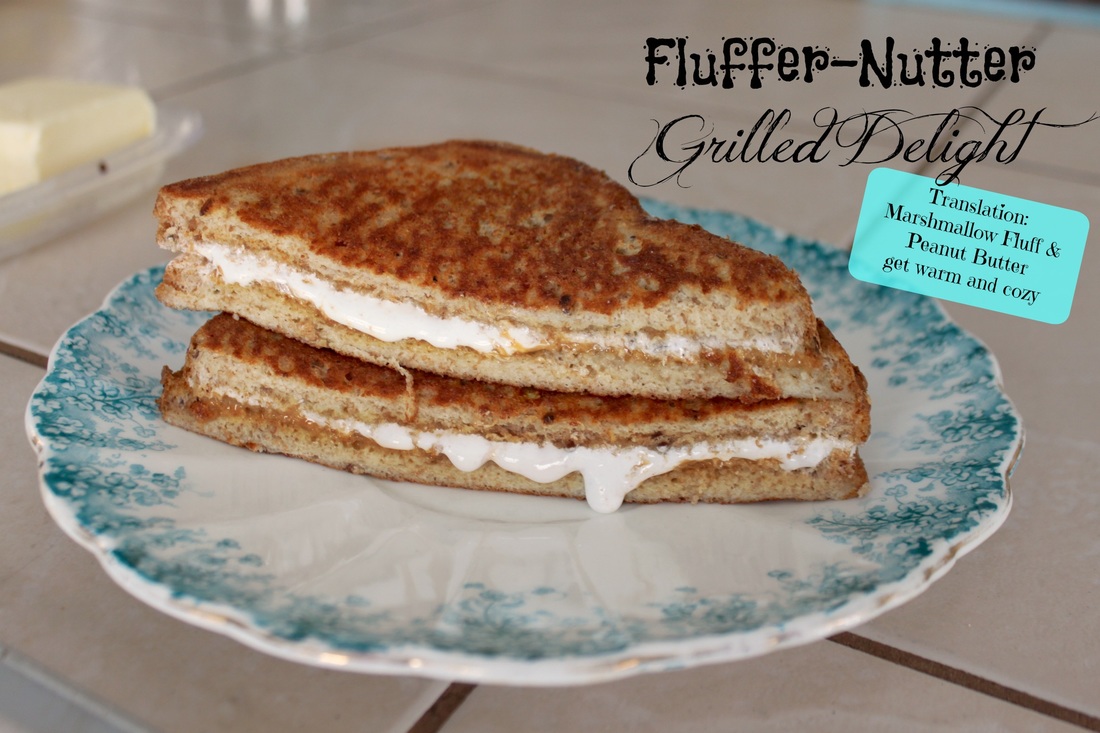 Fluffer Nutter Grilled Delight Ingredients:
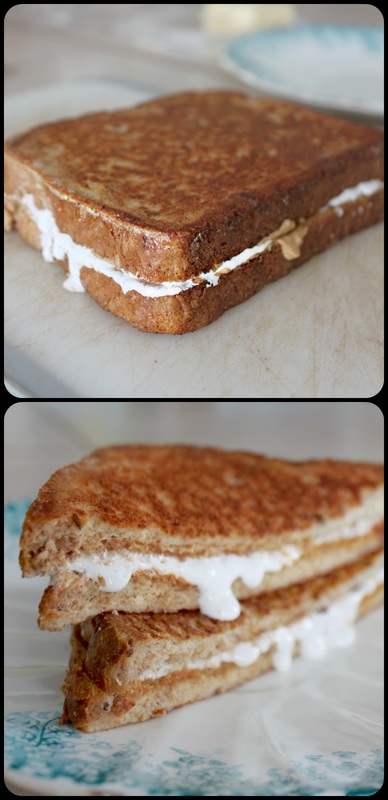
I obviously can't list exact amounts of the ingredients because it's a bit preference based! I also feel like you would be shocked and horrified at the amount of p.b, fluff, and butter I use.....whomp whomp :) Method:
 So, in case you needed another crazy-delishous, totally bad for you, definitely not anything but a dessert sandwich, check out this one (pictured below). What the-? Am I right? That bad boy is peanut butter, Nutella, and marshmallows turned into a sandwich, buttered and fried, then dusted with icing sugar. Mmmm, I haven't had this one in a while. I think I'll whip one up on my next treat day! 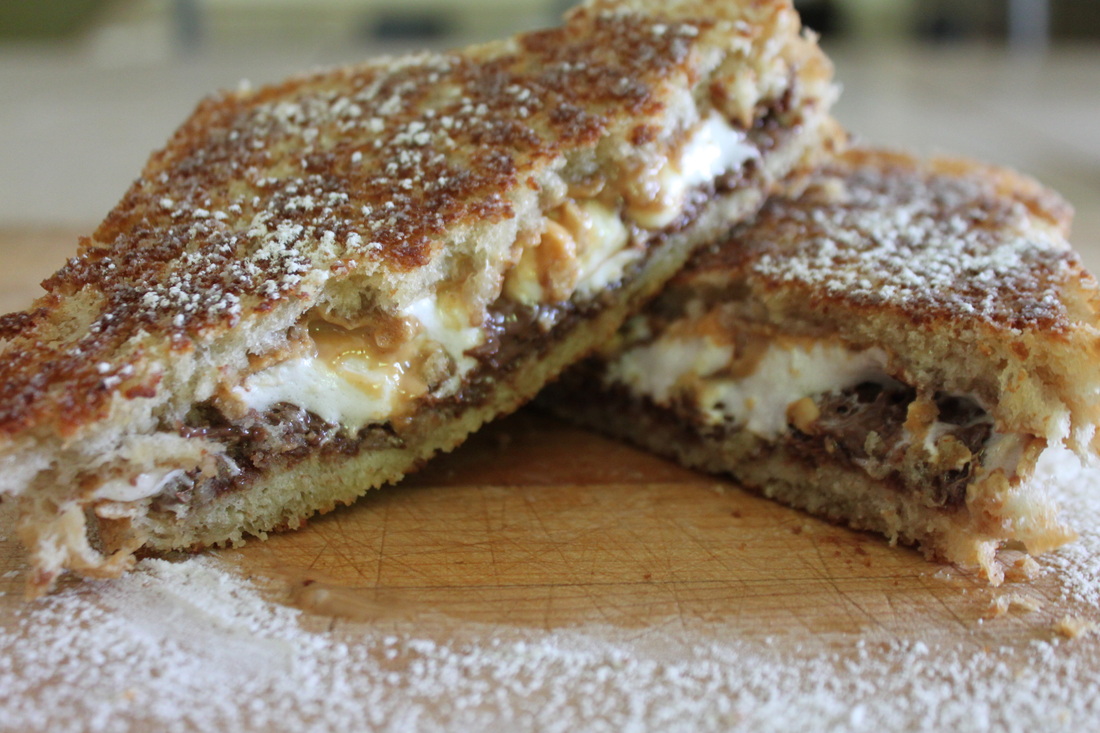 Alright, well, that about sums 'er up.
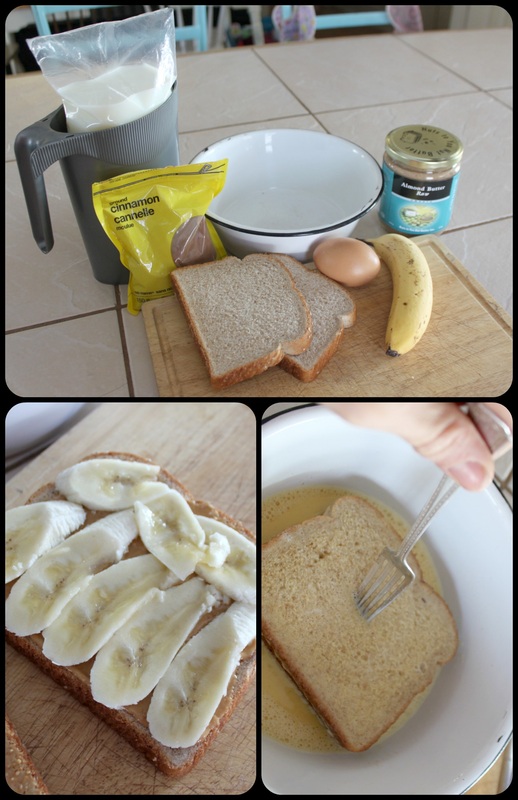
How's the spring going for everyone? Our gardens are coming up happy, although some bossy tiger lilies have taken over a portion of one of my gardens. And that's after they were completely trampled and squashed last year by our chickens who found those plants particularly comfortable and would get cozy and barge right into them, scratch at them, push them down, and turn them into a lovely sitting spot. Perhaps this is the tiger lilies revenge? They may be like the flowers in Alice's Adventures in Wonderland; you know, talking and being sassy and what-not? We just saw a local High-School's production of the show this past weekend, so I was thinking of my lilies while I watched that scene! Anyway, after last week of wearing tank tops and having back-sweat while driving, we go to today where the kids asked to wear hats, mitts, and scarves to school because it's so cold! Oh, Canada...so tricky. Well, I should be off, many a task to complete today, and only so many hours to complete them in! April 1st!!! Today is April Fool's Day, but today also marks the beginning of Autism Awareness Month! I have been woefully negligent of my blog lately....my life is suddenly very busy! I always like to keep busy, and that often included working away at the blog, but lately I've been for realz busy, and haven't had any time to sit and blog! Thumbs down emoji. Anyway, I really, really, really plan/hope to at least get some autism posts up every Thursday of this month (Thursdays are/were my usual day to chat and share about raising a boy with autism), because I want to keep making more and more people aware of autism and what it is, what it looks like & how to 'handle' it. Anyway, I'm way off base from french toast right now! French toast! A delicious meal idea made better by turning it into a "monte carlo" type french toast. A monte carlo is when you make a meat and cheese sandwich (with mayo and mustard), then dip it into an egg and milk mixture, and fry it until it's golden and delightful. This breakfast version has nut butter and banana made into a sandwich, dipped in an egg and milk mixture, then fried with a sprinkle of cinnamon, then you eat it with syrup, as you would any french toast! 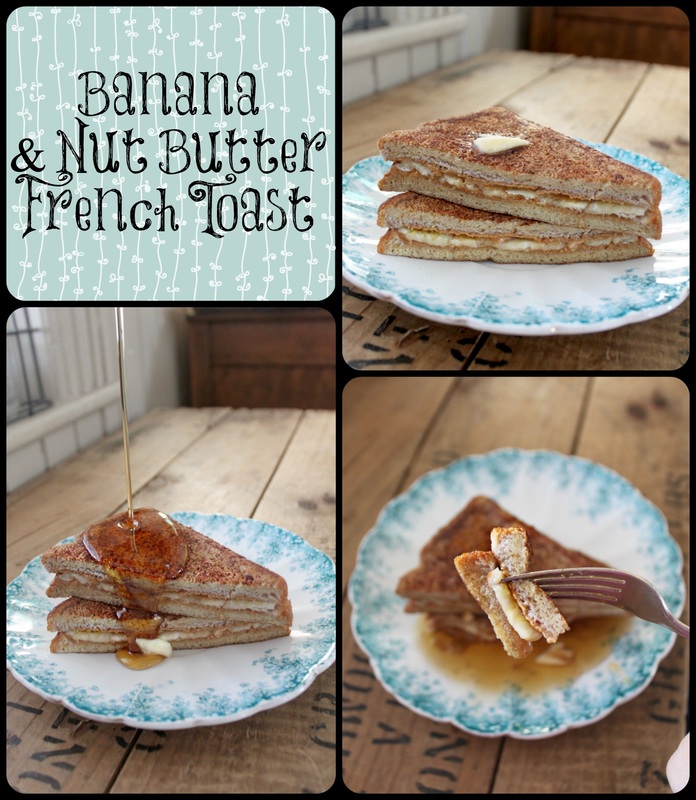 Banana & Nut Butter French Toast Ingredients:
Method:
 So, as I mentioned in the ingredients list, this super-filling monte carlo style french toast can be adapted a few ways. We've used peanut butter, cashew butter, & almond butter. We've also used sprouted grain bread, 'regular' bread, and gluten free bread. And one of my favourite variations is to use thinly sliced apples in place of the banana. So good.
I have, incidentally, never made an actual monte carlo sandwich, but perhaps I will some time. It seems like it would be very yummy! Alright, well, that's it! I literally cannot believe that I have been writing this blog for a whole year (technically a whole year tomorrow the 18th, but geez)! This year has been an up and down one, and parts of it have been chronicled here! On the first day I decided to start the blog I put up 6 posts! Haha, I remember my sister saying something about being a little ambitious, and I just thought, "I dunno! I just had a bunch of things I wanted to post! I used up an entire weeks worth of ideas in one day! Fail. :) Anyway, I wanted to take today to highlight some of my favourite recipes, DIY and life hack ideas, and some of my posts about autism. I hope you take the time to click through and enjoy bits and pieces of what I enjoy! ...But first, I want to give you a little history here on a bushel & a peck! Not history about me, but the term itself! Because I know you were dying to know! ;) Well, a real bushel & a peck are dry measurements in agriculture. There's a pint, quart, gallon, peck, and a bushel. But the real reason people know the phrase, "I love you, a bushel & a peck" is from a song written for the musical "Guys & Dolls". Back in 1950 the song was recorded by many artists, and the song was already so well known before the musical even opened that they moved the number from the second act to the first. In the context of the show, "A Bushel and a Peck" is the intro to the Hot Box, a night club in which the headliner is Miss Adelaide. Doris Day (among many others) recorded a version of this song, but she changed the lyrics a bit to remove some of the more direct references from the show and to clean it up for 1950's radio. And there you have it! If you've never seen Guys & Dolls, you should, it's a good show! Now, onto my favourite and most popular posts (p.s., just click on the green titles to go to that recipe!)! Bad-For-You Favourites! 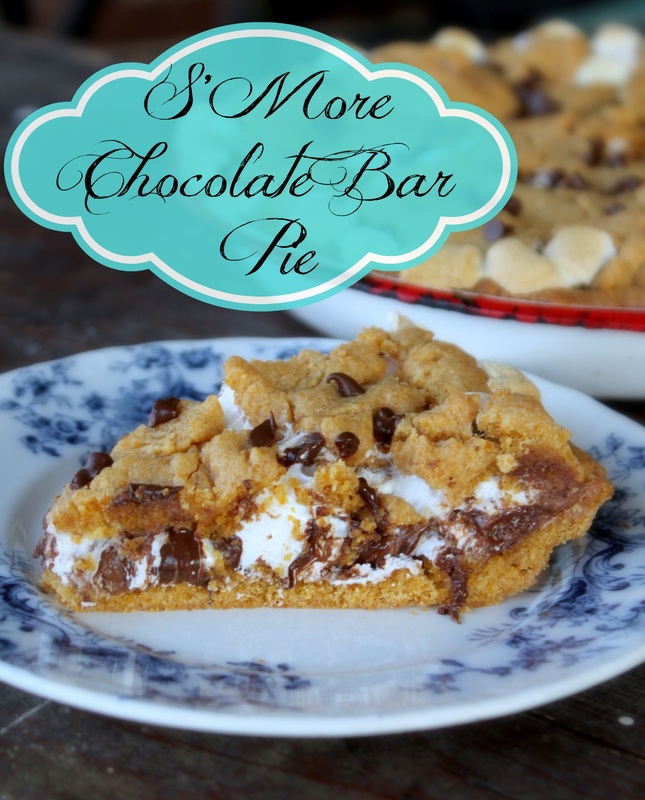 This pie....oh this pie!!! It is honestly just the tastiest thing you'll ever eat! The homemade graham crust, the chocolate in the form of semi-sweet chips and chocolate bars of your choice, and gooey mallows....drool....  When my sister invented this evil little sandwich I loved her so much! :) Inside of that lovely, grilled and icing sugar dusted bread is peanut butter, Nutella, and marshmallows. Oh my goodness gracious, it is too good to be true. D.I.Y. & Life Hack Favourites 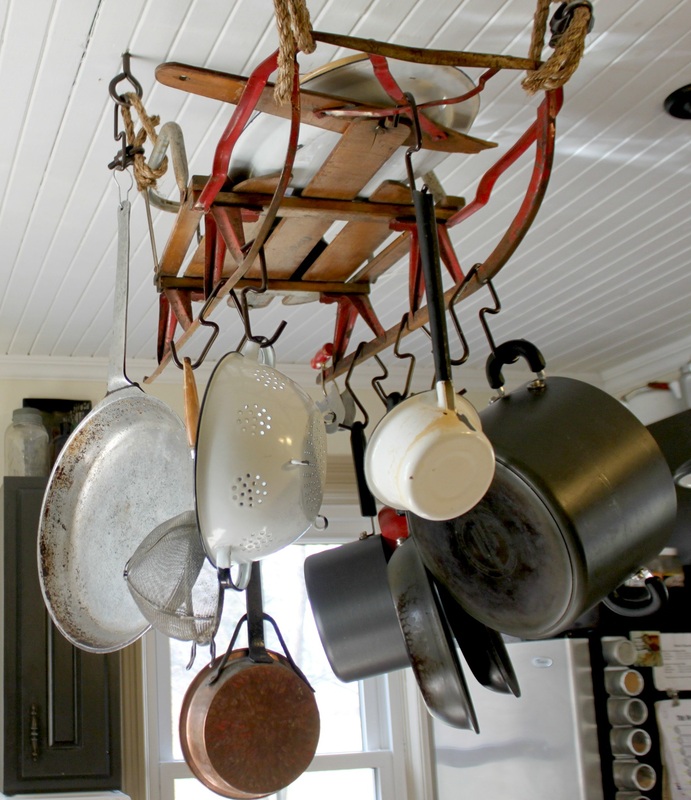 This project felt long in coming, but I was so glad when it was finished as it gave me the extra cupboard space I needed, and it was so unique and fit my house perfectly! Hazaa! Bubble Blowing Life Hack 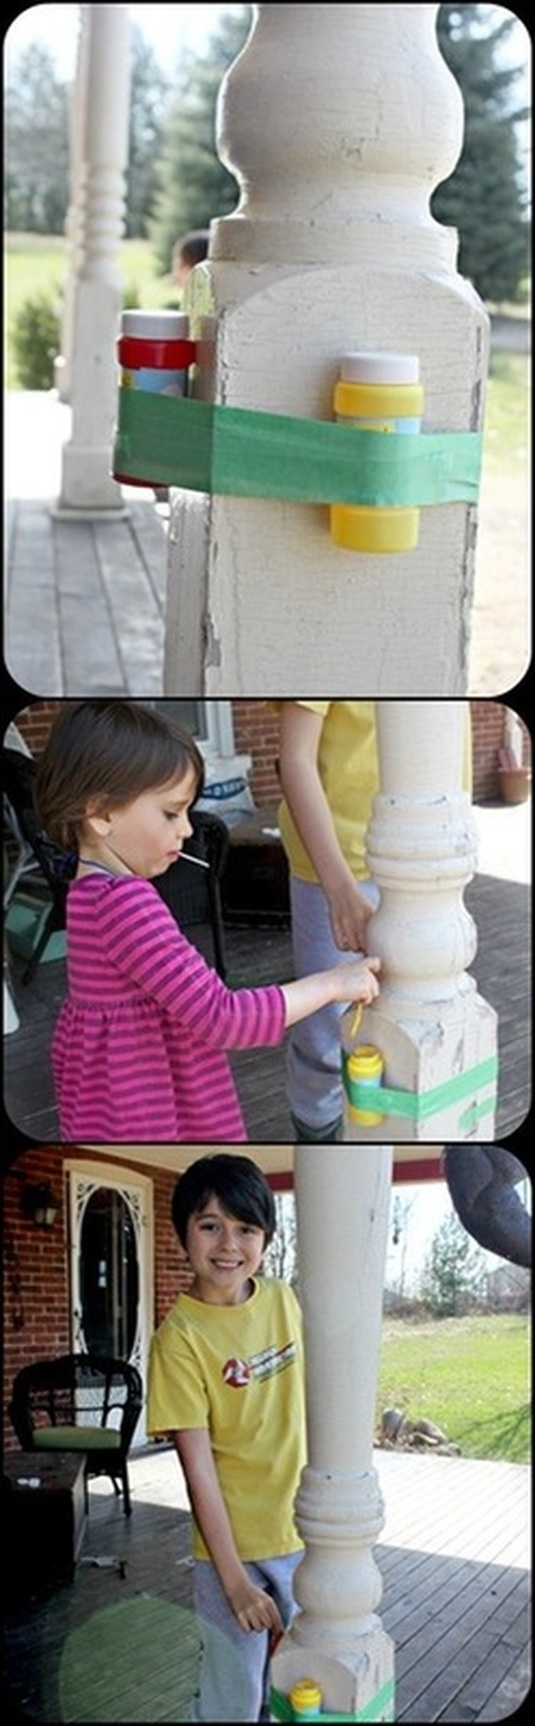 Just do this and thank me later. :) Paleo Favourites 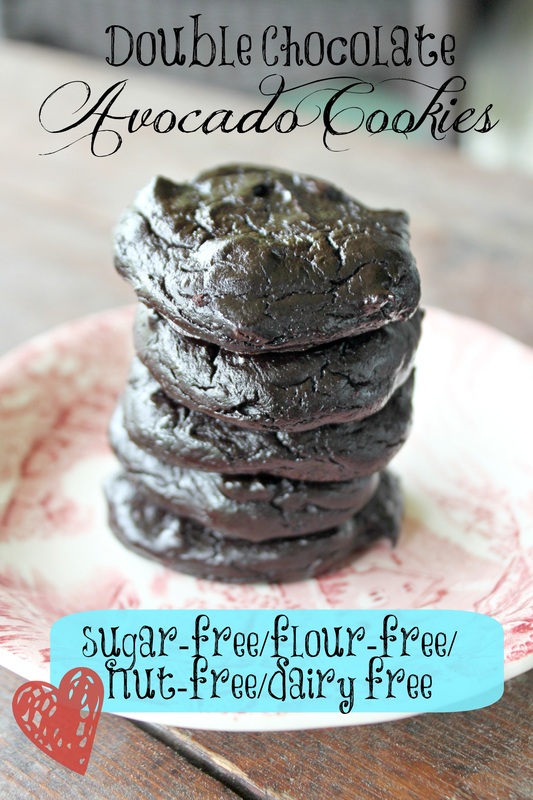 I never thought these slightly strange looking cookie would be so popular, but it just shows you can't judge a book (or a cookie) by it's cover! The Huffington Post even had this cookie in one of it's online articles, making this ugly, humble cookie my most viewed recipe EVER with over 20,000 views! 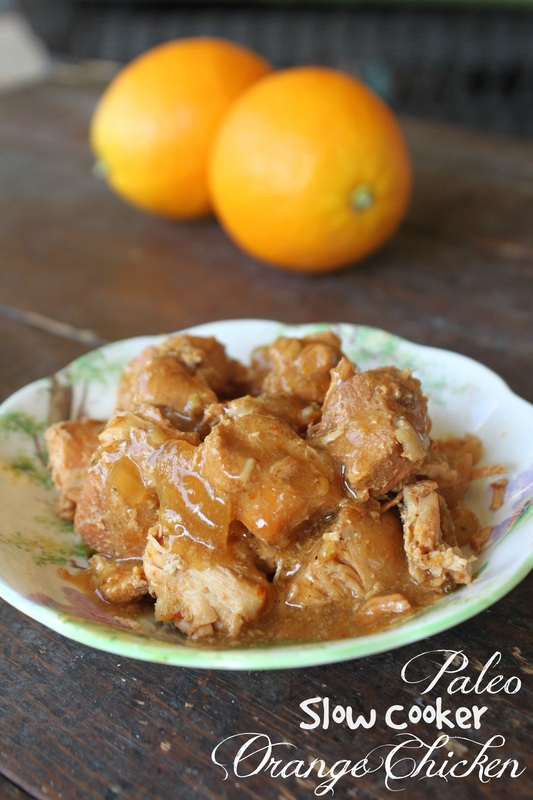 This easy-peasy recipe has been pinned on Pinterest more times than I thought it ever would be. It may be paleo, but it's crazy simple to make, has all regular pantry staple ingredients, and you can't beat a crock pot meal that's ready for you at super time! Autism Favourites  I love this post because it was all Caleb! His answers to my questions, and "hearing" what he thought about different things. It shows how sweet, and strange, and fantastic he is.  This post was the first I ever did on autism. It was inspired by the fact that he was getting a Terrific Kid award at school for empathy. I still admire how he sees the world through very empathetic eyes, and I try to practice empathy whenever possible. Gluten-Free Favourites  I am always amazed by this recipe, and how often it is viewed and pinned on Pinterest. It literally was a recipe of. "oh crap! People are coming over! What do I have!", but I think that kind of recipe hits home for a lot of people! It is simple, but tasty. Win/Win! 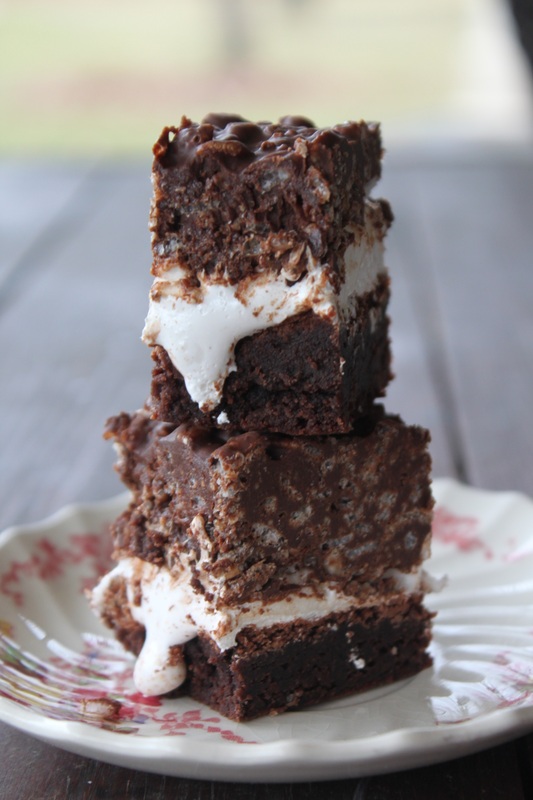 This dessert is a layer of brownie, a layer of mallow fluff, and a chocolate peanut-butter Rice Krispie layer! What? I know! I wanted to pick my all time favourite post, but I couldn't! In fact, my little Dory (from Nemo)-like brain was actually going through the blog and going, "oh yeah....I forgot about that....". Whomp whomp. Memory fail.
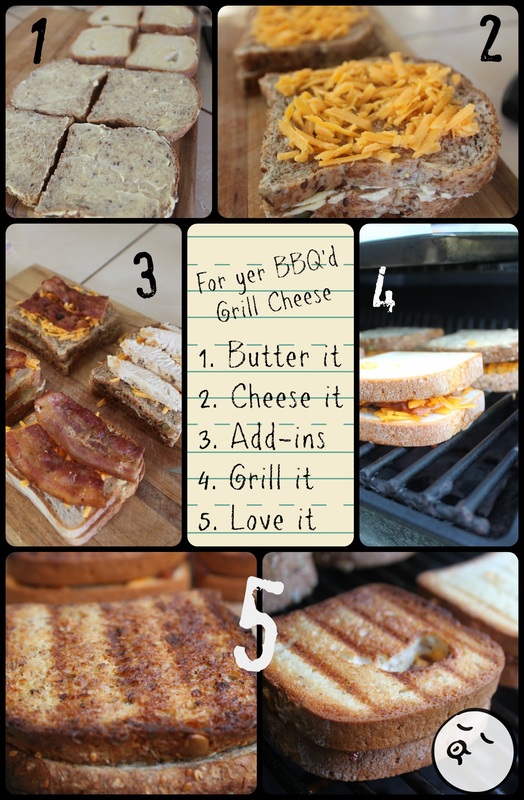
Suffice it to say that writing this blog has (so far) been a blast. I have enjoyed being more experimental in the kitchen, getting some of my thoughts out of my brain, and knowing people like a few of the recipes and articles is a great big cherry on this Sunday! I'm still writing this blog, fear not. I have been toying with the idea of buying my domain (instead of having it hosted by Weebly), and maybe changing my design too....but we'll see. I'm not a big fan of change! So (insert cheesy music, and hear my voice all teary like I'm winning an Oscar), to all those who read here regularly, or just now and again; to those from Pinterest and Foodgawker who share recipes and ideas (hint hint-feel free to follow or 'heart' me!), and to my Mom, who almost never remembers to read my blog, merci beaucoup! :) I know, I'm a cheeky bugger. Here's to another year! Woot woot! (I love you Mom) xoxo Amy-Lyn Well, I'm back. Not from any special holiday or anything, but we last minute decided to go visit family this past Monday, and I thought I would take a week off from my blogging obsession. It was strange, and difficult to be honest! I've grown accustomed to waking up early, having my cup-o'-coffee, and working away at the blog. I felt a smidge lost not doing it, but I survived! Anywhoooo.....this summer has not been that hot, but I still like to use the BBQ as much as possible. Making grilled cheese is a favourite, and I would rather BBQ it than have pans to wash any day! 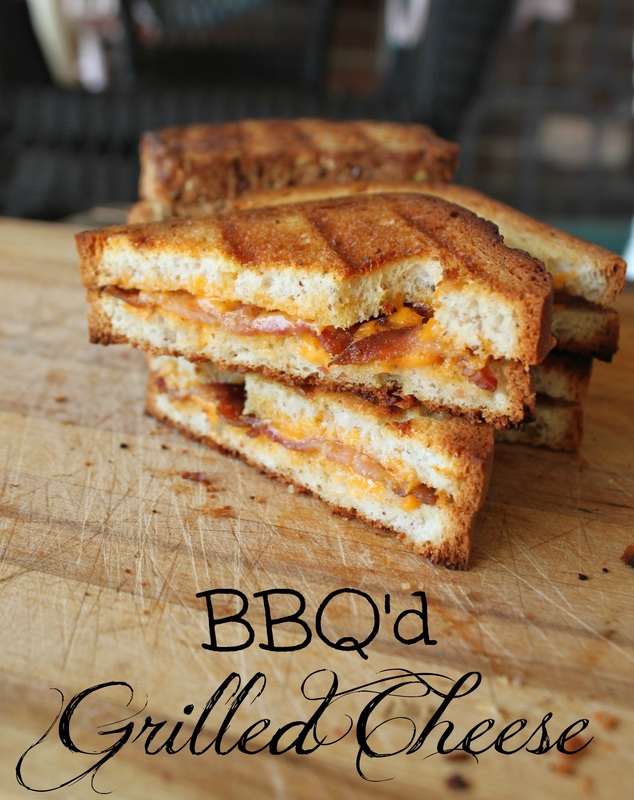
BBQ'd Grilled Cheese Ingredients:
Method:
Well, that's it for today!!! I hope everyone has a great day! It's raining here, but I'm not too worried. My gardens will be happy, and the kids and I can have some indoor fun/lazy p.j. day!
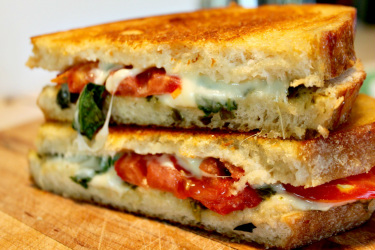 So, I have a thing for grilled sandwiches. Incase you didn't notice.... Our wonderful neighbour gave me a lot of produce this summer, and I tried to put it all to good use. One thing he gave me a lot of was tomatoes, and basil (well, and cucumbers, but they are not in this sandwich!) 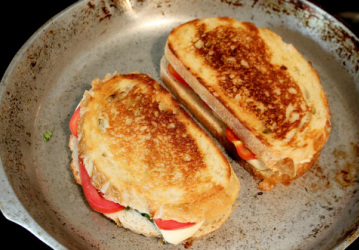 Basil, tomato and mozzarella cheese are a flavour favourite of mine, known as a caprese salad (typically this salad is just seasoned with olive oil and salt). To me, making this 'salad' into a grilled cheese only seemed natural, basically because it has cheese already! Oh boy... Caprese Grilled Cheese (for 2) 4 slices of bread (a really good, firm bread, like sourdough, works well) Butter for the bread Tomato Slices as thick of thin as you like 'em. Bocconcini cheese medallions (or regular mozzarella works too) A hand-full of fresh basil Garlic (optional-but so good, you'll want to) Heat a large frying pan to medium heat. Butter one side each of the slices of bread. Chop up your basil however you do it. If you've never used fresh basil, fear not. It is forgiving. Just don't use the stems, fyi. 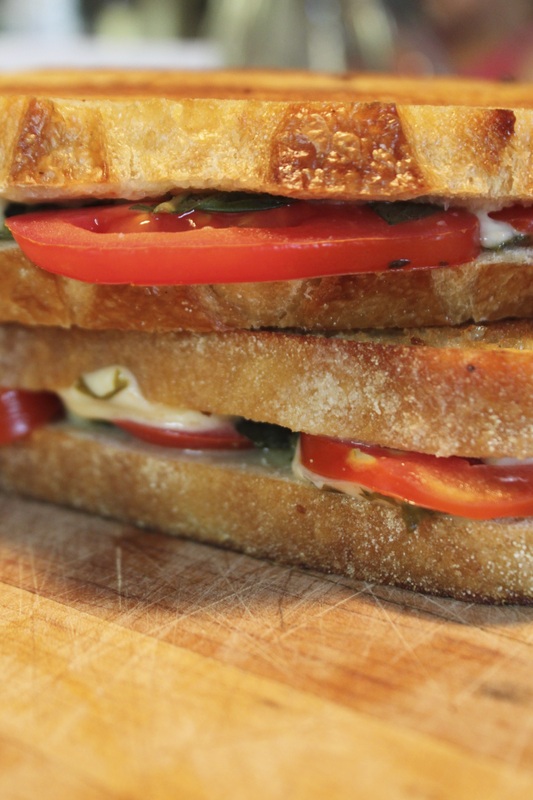 Now assemble your sandwich! My BIG grilled cheese tip (when adding other yummies besides cheese), is to layer your cheese! If you don't layer, you won't have enough "cheese glue" as I call it, and your masterpiece will slide apart! So, I do something like Bread Cheese Tomato Cheese Basil Cheese Bread Lots -o- glue! So, assemble (with buttered sides of bread facing out). Put into hot pan, and toast. If the bread is toasting too fast and the cheese isn't melting yet, turn the heat down, and put a lid on the pan to give that cheese some good quality melting time! Once sufficiently melted and toasty (should take 10-15 minutes, less if you used regular mozzarella and not the bocconcini), remove from pan. The BEST part (though I said it was optional), it that when that bad boy comes out of the pan, if you have used a "firm" bread, take a fresh peeled clove of garlic, and rub it onto the toasty outside on the sandwich. Trust me....do it. 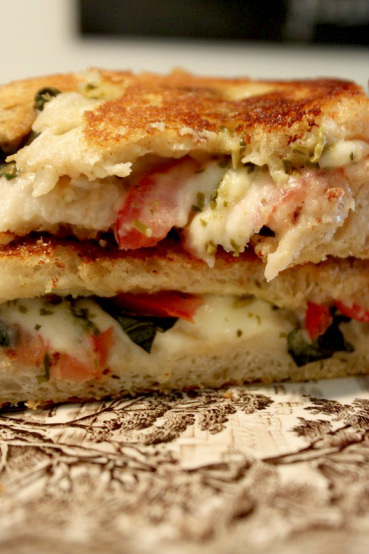 If you didn't use a firm bread, you will just smoosh your bread, so, don't rub the garlic on. Don't worry, it still tastes yummy without it.
Amy-Lyn Oh boy.  A few years ago my brilliant (read-evil!) sister created this recipe. If you love Nutella, peanut butter, and marshmallows, and have them in your pantry on a semi-regular basis....then, well, this recipe will change your life. Dessert grilled sandwich (for 2): Butter 4 slices of bread Nutella (enough for the sandwich, and for eating a spoon full of it while they cook) Peanut Butter (for amount, see note with Nutella) 2 large (or a handful of small) mallows Icing sugar (optional, but it's so good) Heat a large frying pan to med-high Butter one side each of bread Spread Nutella on one (un-buttered side) of a slice of bread Spread peanut butter on the other slice of bread (on the un-buttered side). If using big mallows, cut in half, and stick to either Nutella or the p.b. If using minis, just stick 'em in. Put sammies in the warmed pan. Allow to toast and warm, but if it takes too long, the p.b. and Nutella melts out. So, be sure your pan is hot enough to get these bad boys golden without it taking forever. Remove from pan, and dust with icing sugar (if using) 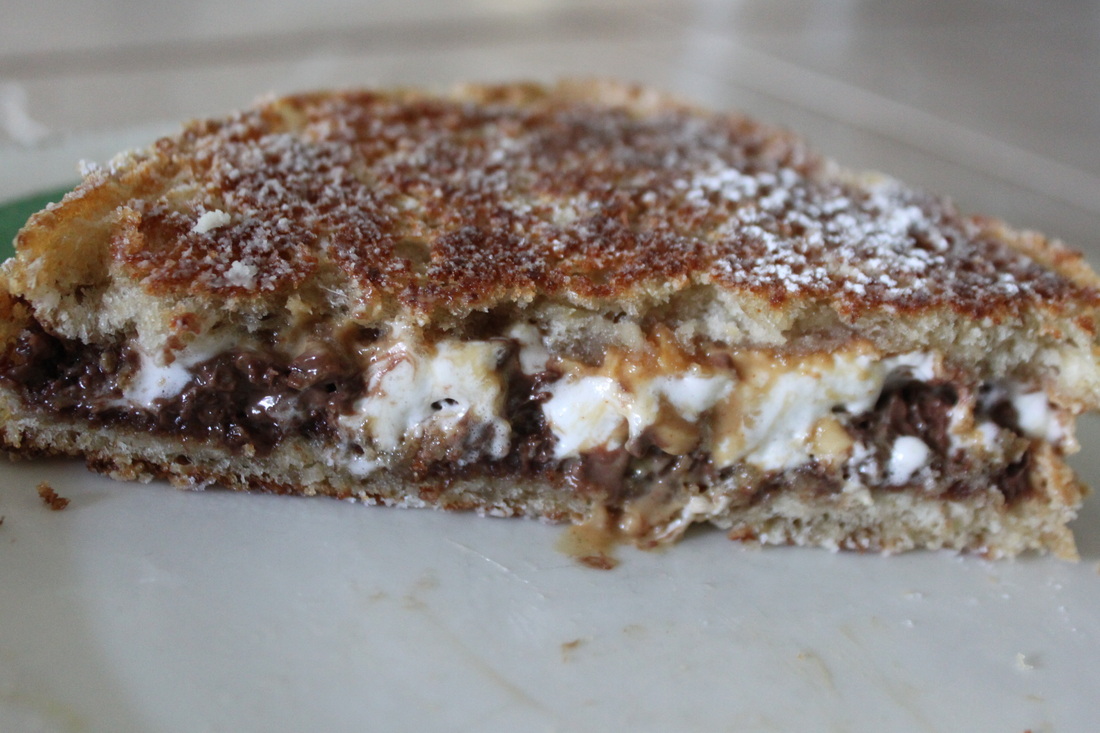 Now eat it!
It's good, you won't regret it. Amy-Lyn I wanted grilled cheese for lunch. But I wasn't exactly in the mood for plain-jane grilled cheese. So, I opened my fridge, and I had an idea....based on the random things I had. I had a tomato. I had some medallion slices of bocconcini cheese (and also a random amount of cheese I had shredded the night before). I had red onion. And I had pepperoni. It was meant to be. 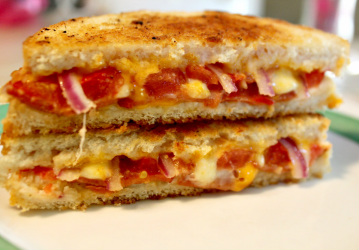 Pizza Grilled Cheese (for 2) 4 slices of bread Butter for bread 4 slices of tomato 1/4 red onion, sliced thin 2 bocconcini medallions Approx. 1/4 cup shredded cheese (I had a mozzarella and cheddar mix) 10-12 slices pepperoni Heat large skillet on medium heat Butter one side each of the 4 slices of bread Divide ingredients among the 2 sandwiches, and assemble them with buttered sides of bread facing out (tip: add cheese first, and in between each of the other ingredients, add cheese so that it all melts and sticks together. If you don't, you'll just find that the sandwich slides apart for lack of cheese "glue"). Put the sandwich on the frying pan, and let warm slowly while toasting (it took about 20 minutes to be "just right" for me). If you do it quick, the cheese won't melt sufficiently, especially the bocconcini. I ate mine as is, but my husband dipped his in caesar dressing (as he would pizza). 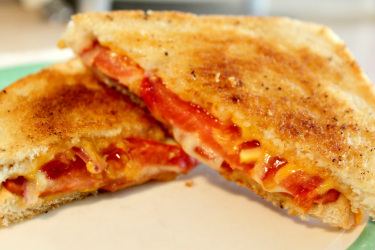 This was a good grilled cheese. Goo-ood!
Have you ever made a "special" grilled cheese? Don't be a hog, share the recipe! Amy-Lyn |
Hi, I'm Amy-Lyn! 
I am the lady behind this here blog! I live in the sticks with my animals, my super handsome husband, and my
3 amazing kids! Here you'll find things from recipes (gluten-free, paleo, and strait up junk food!), DIY ideas, thoughts on raising a son with autism, and whatever else pops into my brain! : ) Read more about me by clicking here! Want to Stay Connected?
Find What
|
 RSS Feed


