|
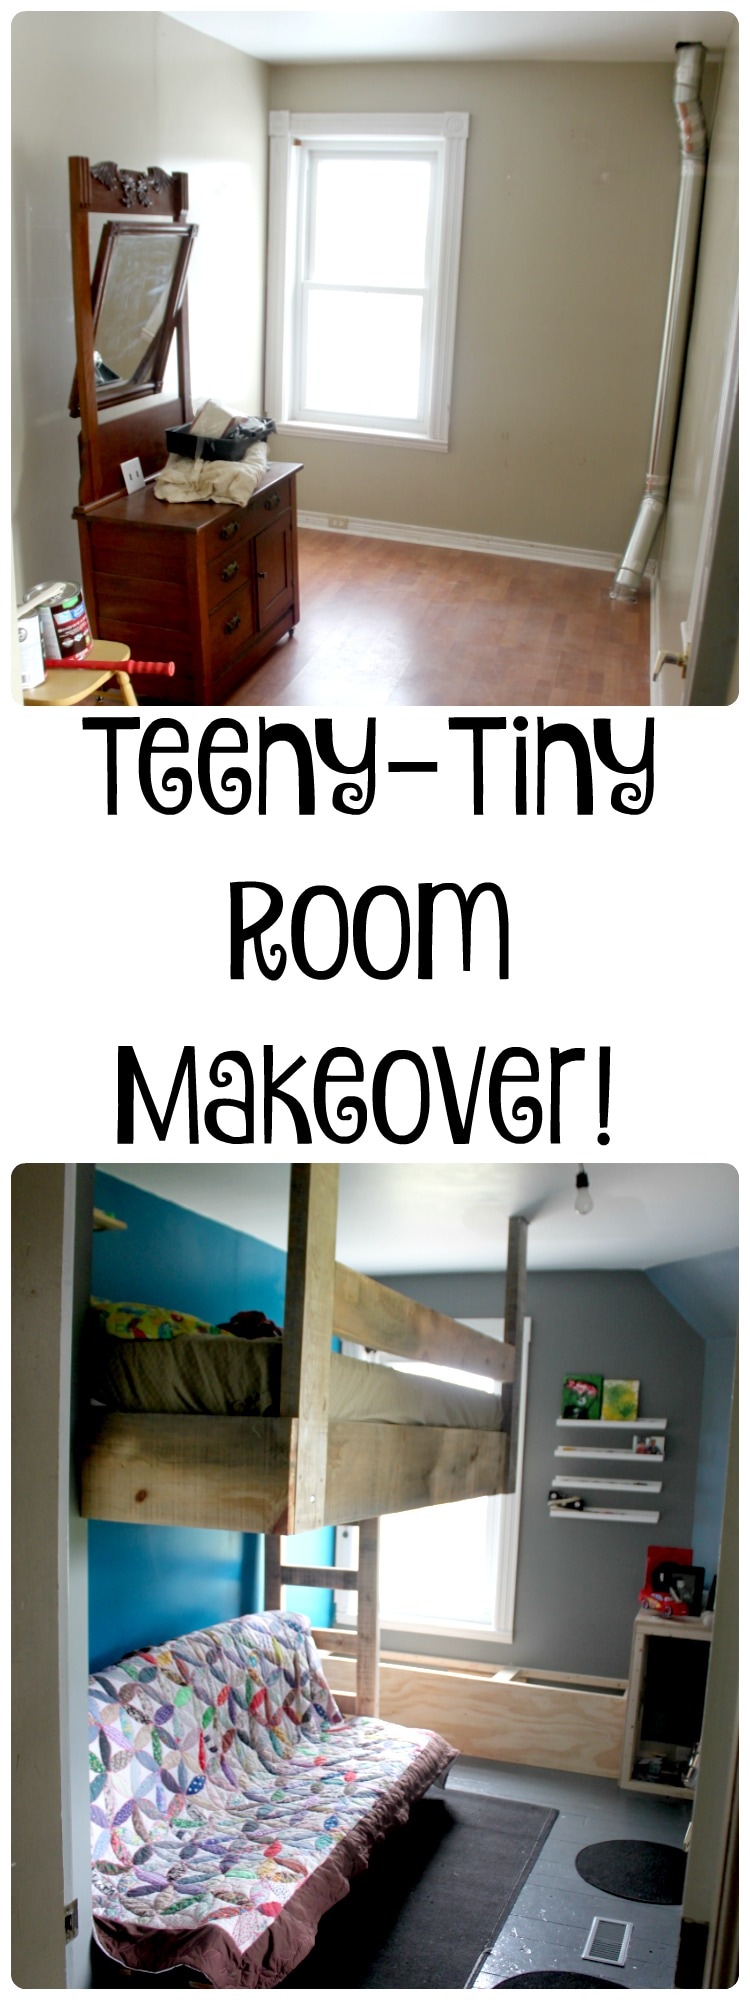
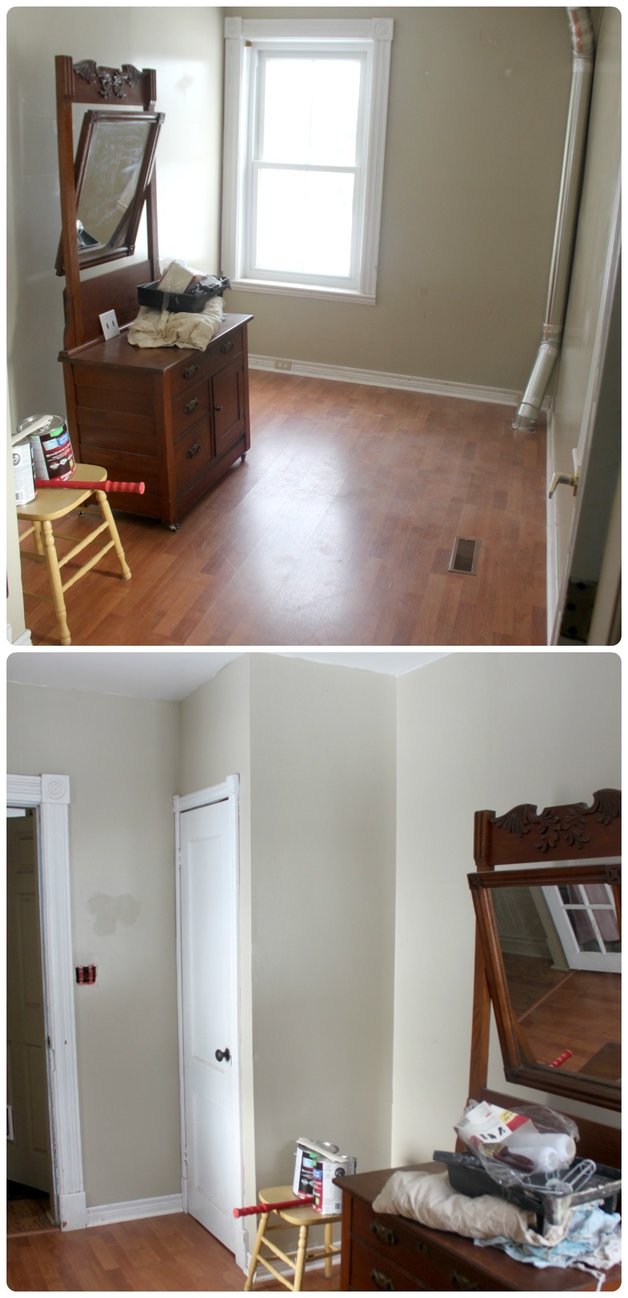
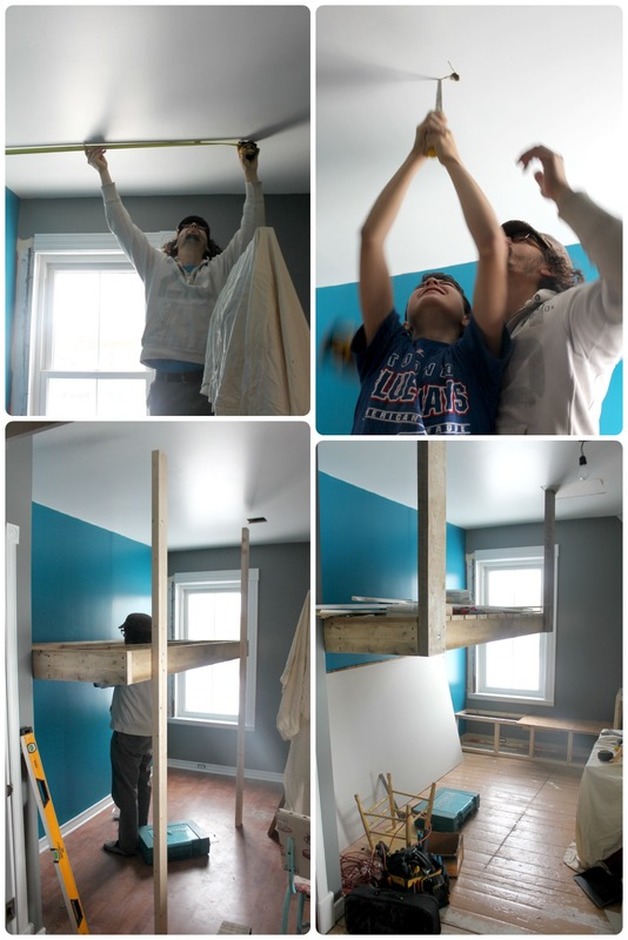
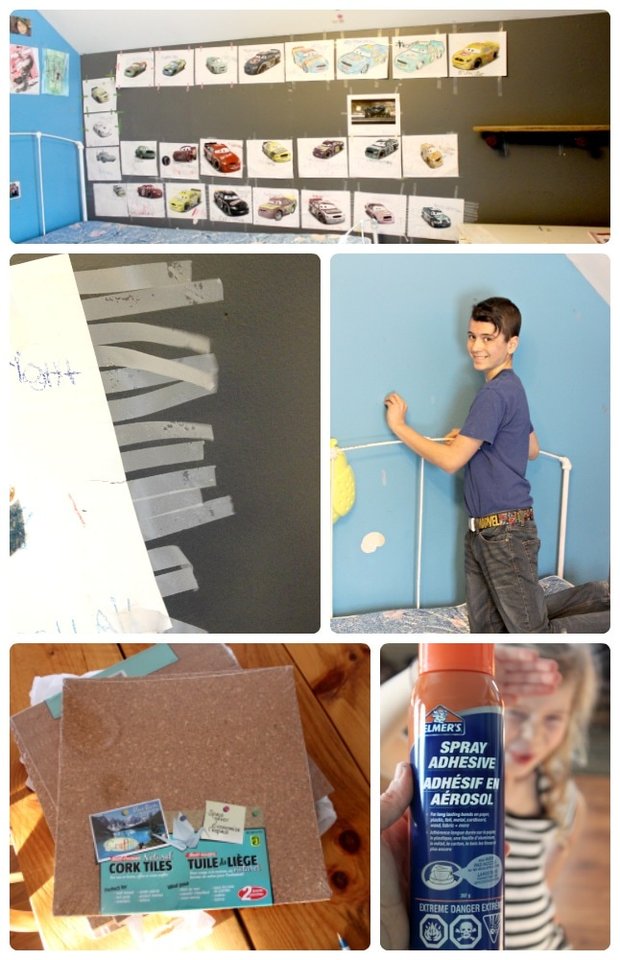
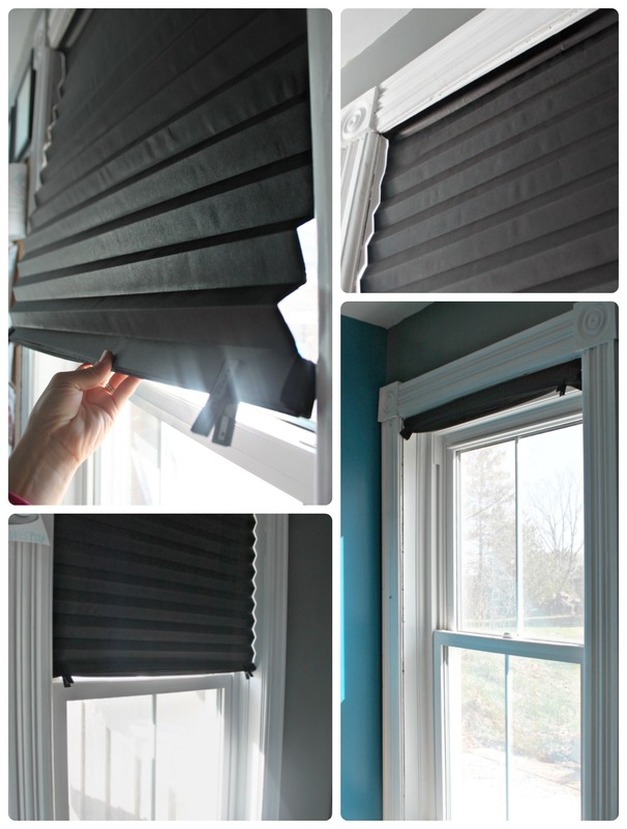
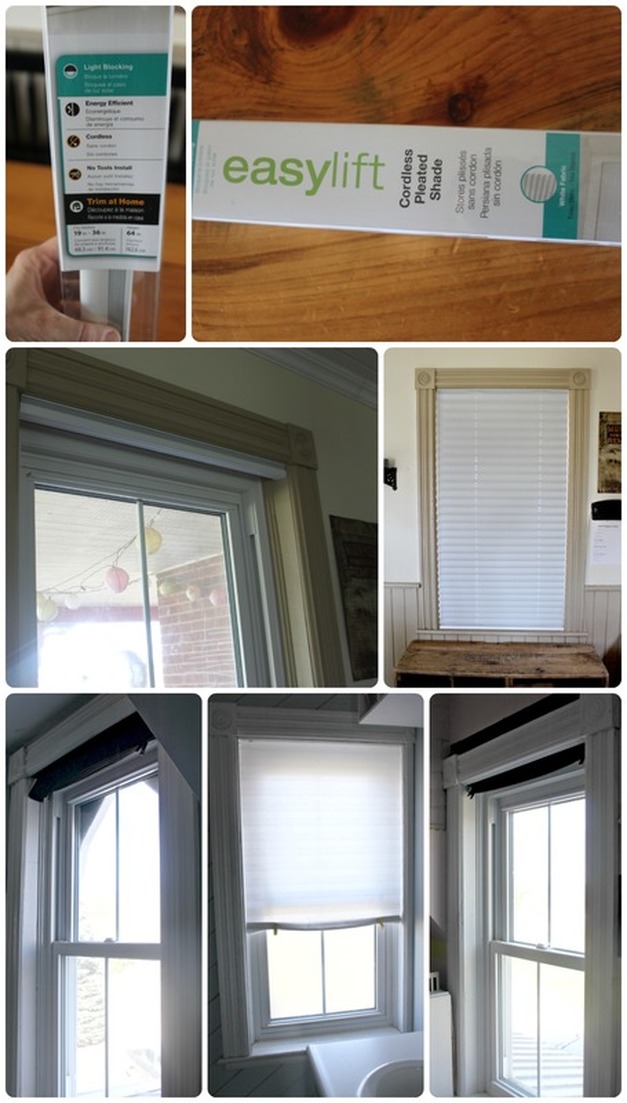
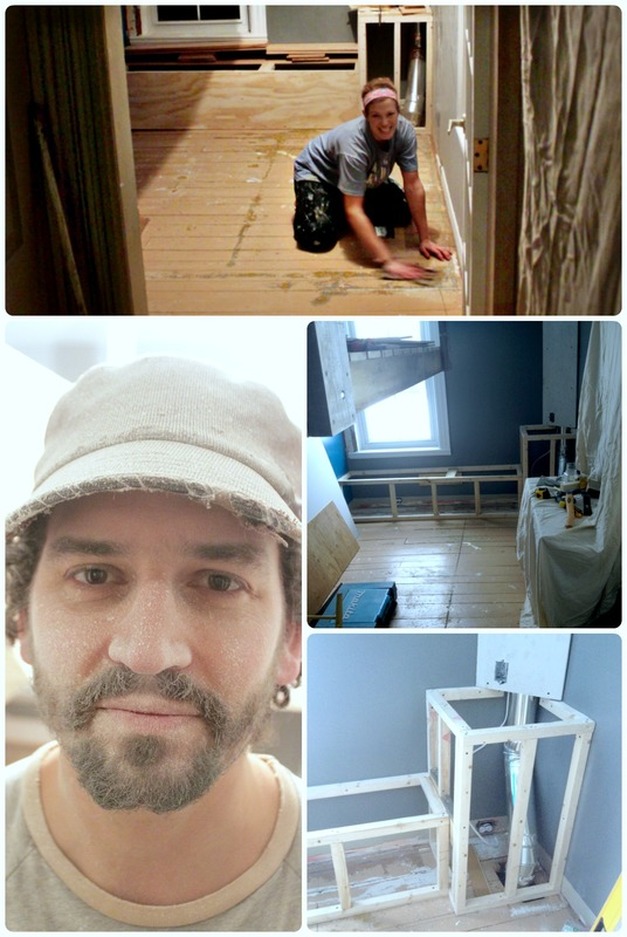
This post contains affiliate links. Although I was sponsored for the publication of this post, all opinions and thoughts are my own! See the Advertising Affiliate Disclaimer for more details! Hey there! Thanks for checking in! I am so excited to share with you today the transformation of our guest room into our son’s new room! I’ll share some of the obstacles that we needed to sort out to get the room together, and I’m also so happy to be sharing a product that I LOOOOOVE! It’s something I was introduced to years ago by a friend, and I’ve sort of been hooked ever since! It’s a very, very affordable, clean looking, complementary to every and any décor solution for window fashion! It’s a fabulous product called Redi Shade! Seriously, I’m using Redi Shade in 6 rooms in our house (we only have 8 rooms total in our house), and am planning to add them to the 2 final rooms in our house soon!! I’ll be sharing some photos below! Now, there were two MAJOR problems we faced as we went to work on Caleb’s new room. One, the room we were working in is a meager 7 ½ feet by 12 ½ feet! Oi vey! The other problem (which was compounded by the first problem) was how enormous our son was growing everyday! In the time it took us to actually complete this project (about 3 weeks-actually, it’s “technically” not even finished. Just being real!), Caleb grew an additional 4 inches! I mean, what the frick?!? Another more minor problem was that we didn’t just want to plunk a bed into Caleb’s new room, and then if he had guests, or if we had foster kids (which we’ve finally been fully approved for! Yipee!), his room would be useless! He’s way too big for a single bed (trust me, he was in a single bed, and his ever growing {now} 5’7 frame was edging closer and closer to the ends of his bed {which in Canada, measures to about 6 feet}!). So…what should we do? Well, something gosh-darned crazy happened........my husband starting digging around on Pinterest (yes, MY husband on Pinterest! He's not ordinarily a Pinterest lover), and he came upon “loft beds”, and immediately knew that was what we needed to do. Not only would it give us the room to make Caleb a bigger bed, it wouldn’t take up extra floor space to do so! And, we’ve had a futon in our room since we moved into this house 5 ½ years ago, and I was desperate to get it out! It was just taking up space in our room, but getting rid of it wasn’t an option because every time we had visitors sleeping over, we needed that futon! But, bringing Caleb’s bed up off the floor gave us that extra floor space to bring the futon downstairs to Caleb’s room, tucked up in it’s couch form, creating a fun space for Caleb and anyone else to hang out in! So…bad news…I have no real “plans” to show you for the bed, because we were winging it! We started with a mattress we just happened to have (I think my father-in-law gave it to us), and it was a strange size (47" x 83"- considered a “super-single” for a waterbed insert mattress size), and so we went from there. Adam (my husband) started by creating a frame made up of 4- 83” 2x4’s, and 2- 48” 2x4’s. This made up a basic frame, and we anchored this into the wall at the height (minus the mattress) we thought would be good for Caleb to sit up in bed. We also had some 2" x 4"’s helping to hold up the frame as we worked at getting it fastened to the floor joists in the ceiling. My husband fastened 2”x 6” boards to the outer corners of the bed to floor joists in the ceiling (we cut holes in the ceiling, then re-dry walled them after) above by using 2 carriage bolts at the bottom and 2 at the top (if you want more pictures or more details of this, shoot me an e-mail, and I’ll make my hubby get back to you!). After the boards were fastened from the bed to the ceiling, we took away the support 2" x 4"'s we had on the outer corners of the bed (see the bottom 2 pictures below). We then installed 20 pieces of 1"x 4”x 48” deck board across the top of of the frame, creating a “deck” of sorts that the mattress would sit on. We did all of this after I’d cleared the room out and painted, btw. I wanted to get the painting out of the way, and decided I would rather do the full job up front, and have a few touch-ups to do after the job was done, rather then try to paint the whole room oh-so-carefully around a new bed, bench, etc., later on. Anywhooooo…. Once we had the bed well under way, I started thinking about what things would make this tiny room feel like it had more space. So, we decided to build a bench under the window, and a small “table” in the corner (this was also a necessity as we’d recently had a new furnace put in, and we had new pipes fitted throughout the house…...one of which ran right up the corner of Caleb’s room! So, we needed to frame that in, and make that slightly irritating corner more useful)! So, full disclosure, this a real blog, and I am a real human with a real (working, busy) husband, and stuff doesn’t always get finished….and, well, I’m posting this “room reno” blog, and the bench and small table aren’t finished! But, I’m not comfortable enough with my skills to want to mount hinges and doors and finish those 2 items myself, and I was tired of waiting for them to get finished so I could publish this post, so I thought I’d send this out into the WWW as a for-real-life reno!!! Not quite done! Be honest, you’ve got a few nearly-done things happening in your house right now. Right? Maybe? Anyway, moving on! The bench was a real space saver as it houses all of Caleb’s cars and toys. And the small table will eventually hold his books…but for now they’re just in the bench with his toys (you can see the making of the bench in the photo of the bed getting installed. It's in the bottom right hand photo)! Another thing I decided his new room needed was a cork (bulletin) board. His old room had slowly turned into a room completely plastered with colourings he’d done! Not only that, but every time he put up a new picture, he’d use 400,000 pieces of tape to do it! So, I thought a cork board would help keep his drawings tidy, and would also help him not use up so much freakin’ tape, and I hoped would encourage him to hone in on which pictures he really, truly wanted to see all the time stuck up in his room. I started by using the plywood from his old single bed. The bed itself was garbage, but that piece of plywood still had some life left to give. Because I was using cork tiles from Dollarama that came in 12"x 12" pieces, I cut the plywood down to fit the tiles. Basically, it was easier for me to cut the plywood then to have to trim the cork tiles! I pre-drilled some holes where I needed the screws to go, then mounted it directly on the wall, using E-Z Anchor screws. I then used the cork tiles from Dollarama, and spray adhesive, and for some pieces, Weld Bond, and worked on sticking all the tiles to the plywood board. Some corners were creeping up, so I used teeny-tiny nails to set them back down. Once the tiles were dried and secured, I created a “frame” for the cork board by using random, mis-matched pieces of trim I dug out from our barn. Much to my husbands’ chagrin, I didn’t do perfect angles and make a “real” frame. Instead, I simply cut 2 pieces long enough for each side, then cut 2 more pieces to fit across the top and bottom – minus the inch or so trim I’d cut for the side pieces. If that makes sense? The board was 3' x 5', so I cut 2 -3' pieces for the sides, and then 2 - (approx.) 4' pieces for the top ad bottom. The end result is terrific, and Caleb was really pleased with it and had a good time picking out which pictures would make it to the board! 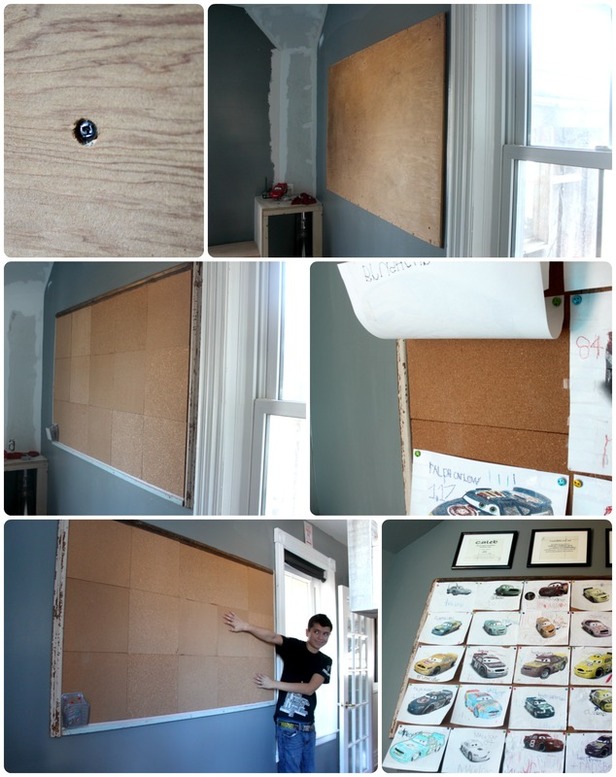 Cork board all ready! Cork board all ready! Can I just get back to the Redi Shade now? For me, finding blinds or curtains is painful! They can be expensive, you usually need to know the exact size (for blinds), and then it all requires screws and anchors, and way more hassle than I’m ever interested in! Another issue for me and finding blinds or curtains for our current house is that fact that it’s technically a 1 ½ storey, and a lot of the ceilings upstairs are sloped, or the windows are (beautiful) and “framed in” by the ceiling, making finding any room for a curtain rod nearly impossible. When we first moved in we daftly stuck nails and screws into our beautiful, original (100 year old) wood window trimming in an attempt at hanging up blinds and curtains. Makes me wanna cry. Well, we had friends who had these blinds, Redi Shades, and my reaction was kinda “huh?... They’re just sticky blinds?... There’s no strings?... And they cost what? That’s not very much!?”. So, I went out and easily found them at my local Home Depot, and at Lowes, and as soon as I could, I bought a shade for our bathroom (one that lets light in), and a shade for Caleb’s room (a room darkening one so he wouldn’t wake up with the sun!), and I was hooked! Those 2 blinds we put in over 5 years ago are still holding strong! The only “mishap” we’ve had was that the cat got all fired about catching a bug that flew behind Caleb’s blinds, and she made a few rips in it while attempting to catch said bug! I literally just used a small piece of tape and fixed them! As far as simplicity in installation, cost effectiveness, clean looking, and letting every bit of day-light in when open goes, these blinds are the winner, head and shoulders above all the rest! I’m not just saying that! My husband who works a rotating shifts (meaning he works days and nights), loves the room darkening blinds in our room. They block out all the bright day light so he can sleep during the day in preparation for his night shifts. I recently tried a different type of shade from Redi Shade called the Easy Lift shade, and it’s amazing!!! The original shades you need to put up (like an accordion) and clasp together at the top with the clips they provide, but these Easy Lift blinds have a small string inside that allow you to gently pull down to close, or easily glide up to open without the use of clips. The Easy Lift blinds are still very safe though (and by “safe” I’m referring to the dangers often associated with the cords and strings that hang down from regular blinds), but just offer a little more ease in use than the regular, Original Redi Shade. So, in case you hadn’t gotten the gist, I am a wee bit obsessed with these blinds! Just look at the pictures though - nice, tidy blinds, so much light when I want it (because there's no curtains blocking any of it), no curtains for anyone to grab at and pull down (the number of times I've had to try to re-mount curtain rods because of the kids pulling them down! Sheesh!), easy to install (no tools needed except a knife!), and affordable. I mean, c'mon, what more do you want from a window covering!?! I don’t even want to mention the floor, but I will, briefly. We were just going to leave the laminate tongue in groove fake wood flooring, but then when my husband was working at something in the room I heard a “craaaack”, and went into see what had happened…he’d pulled up the floor and was ripping up the subfloor, which was particle board, and it was making a horrible cracking sounds as it came up! Anyway, I was shocked, but happy to see the nice, original pine board floors underneath, and decided it looked much nicer having the boards run the short way (you can see the laminate flooring ran the long way through the room, but the pine runs the short way, giving the room a wider, less long and narrow feel in my opinion). I spent a few days sanding the floor as it had been thoroughly mudded to be even in preparation for the subfloor and laminate floor. So, I sanded it down, and put 3 coats of a high-gloss, alykd enamel paint onto the floor. It was a standard grey colour, I literally bought the cheapest, construction grade paint. I didn’t really care exactly what colour it came out to be because I knew we’d have a carpet laid down, and also, I’m cheap. There, I said it. 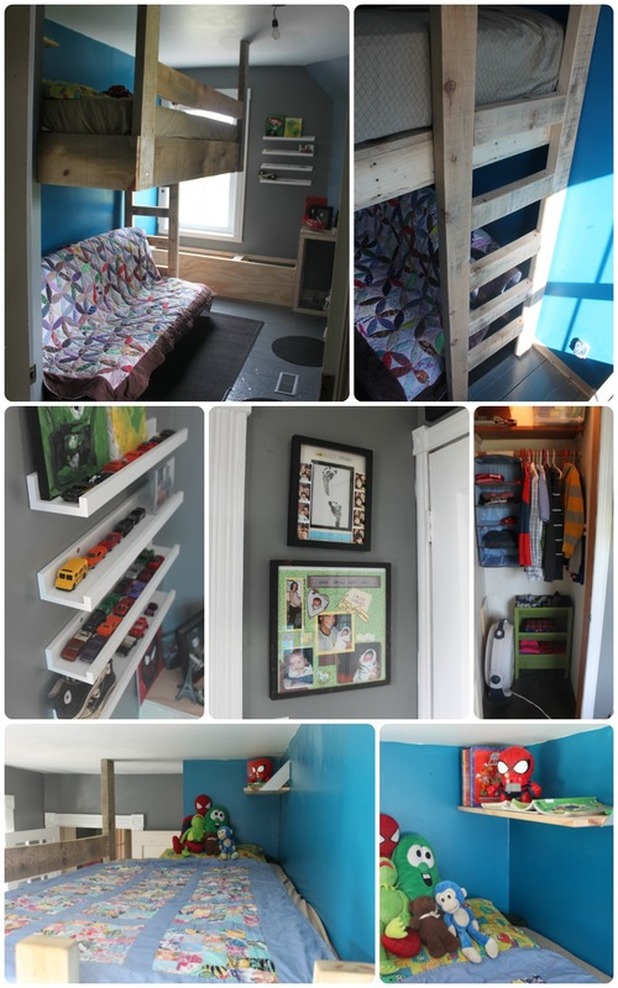 So, the finishing touches included putting up some small Ikea shelves for some of Caleb’s cars, putting up some of his pictures and paintings, installing a small shelf up in his bed for his books and alarm clock, and touching up some of the paint that got scuffed during the installation of the bed. We also needed to make his closet functional because of the fact we decided his tiny room couldn’t handle a dresser! (see middle right hand photo above) So, we hung a simple storage organizer from Ikea, and installed some shelves, and I stuck in a strange piece of furniture I’d purchased years ago. The shelves hold his extra toys in a bin (we rotate them), as well as some “off-season” clothing. The hanging organizer holds his pants and shirts. The picture of this looks pretty empty (laundry day!), but that thing holds all of his 9 pants, and 14 t-shirts. His jammies, socks and underwear are in that bizarre piece, and his sweaters and button-up shirts are hanging up. We can even fit his fan in there (white noise for sleeping!) Because his room is right next to the laundry room, I didn’t give him a laundry basket, he simply walks his dirty laundry directly to the laundry basket in the laundry room each night! Overall, I am so pleased with how the room turned out! Yes, we’re not actually finished, but we’re finished enough, and Caleb moved in, and he loves it! I stand by my "real life" post and sharing this with you before it's actually finished, and not being sorry about it either! :)
If you have any questions about anything, don’t be afraid to e-mail and ask me! I will happily respond with any help I can offer! Don't forget to check out Redi Shade! I'm sure you'll love them as much as I do! Thanks for stopping by!!! xoxo
6 Comments
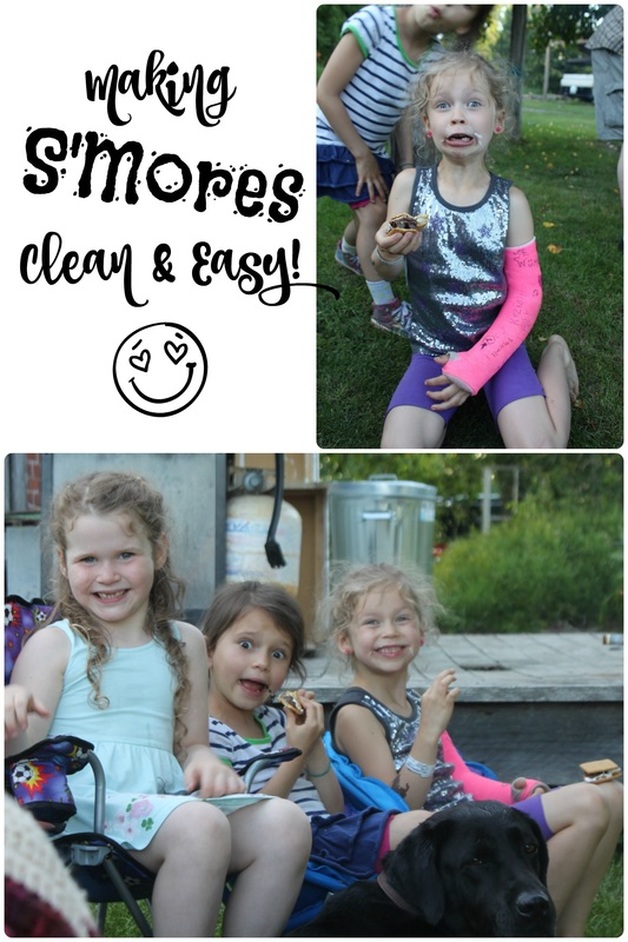
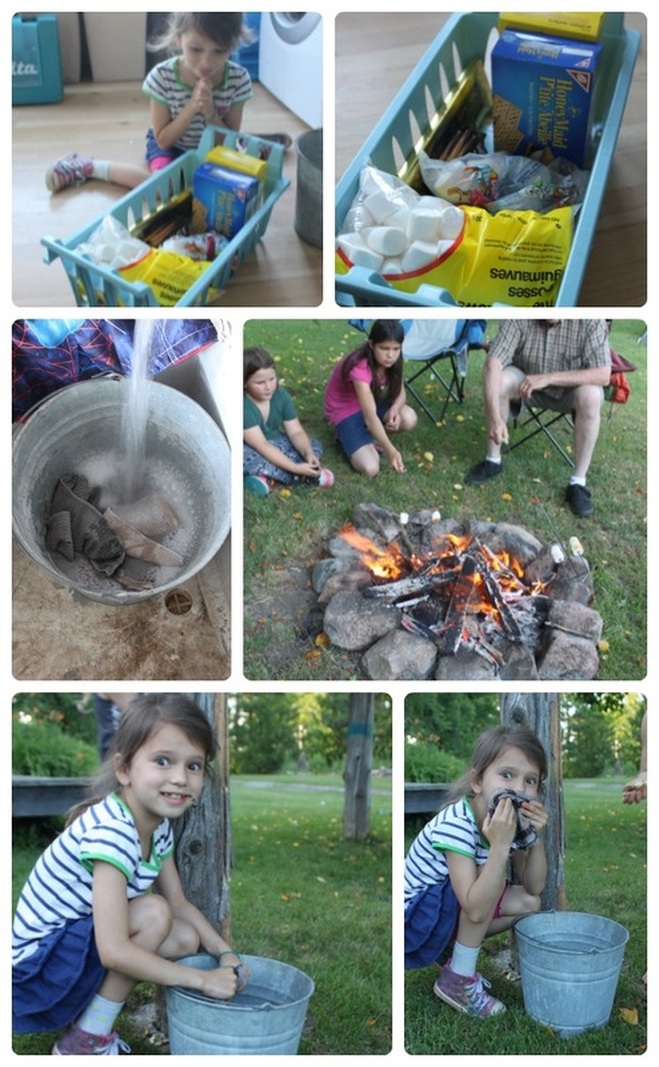
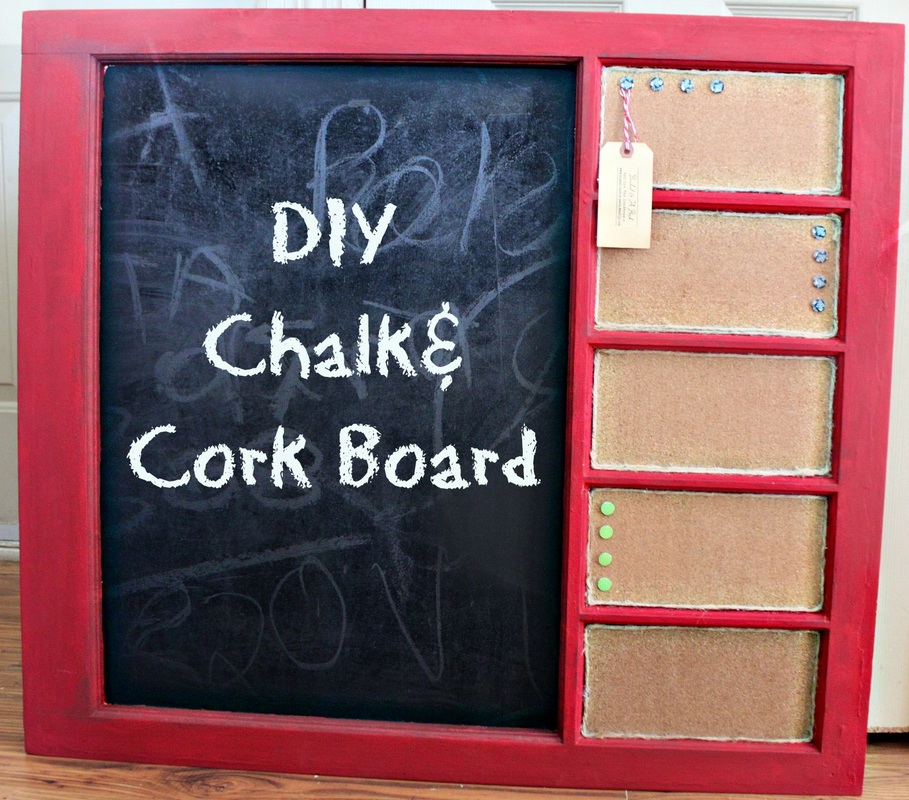
There are a few simple and easy things you need to make a campfire with s'more an event that doesn't end in everyone having melted marshmallows in their hair, and chocolate smeared on everything! All you need is a bucket, and a basket!......basically. : ) So, first, you'll need to find a basket, any basket will do (we use an old basket that was once from a deep freezer!), and load it up with all your s'more items! This may seem like a "duh", but having all the ingredients in one basket together helps to keep it from getting squished under someones foot, eaten by an unattended (and sneaky) dog, and it's just easier to have it all together instead of having your mallow all toasted and ready, then realizing the graham crackers are no where to be seen, and the chocolate was set too close to the fire and melted! So, once you've got all your things ready, you'll wanna grab a bucket, throw some wash clothes into it, a generous squirt of hand washing soap, and hot water. Now, just bring your bucket and basket out to your camp fire, and make your s'mores! Do keep the wash bucket away from the s'more ingredient basket though - you don't want soapy hands dripping into your food! That's it! It's not rocket science, but it sure makes campfires and s'more making a lot more fun! Well, maybe it's just my kind of fun...things tidy and clean.... : ) Things are gearing up, and we're leaving for camp this week. I won't lie, I am feeling completely overwhelmed. Not necessarily by the job itself anymore, but by the getting ready to go, and the great unknown that lies ahead. I am NOT a big fan of the great unknown!!! So, I hope to put out a few posts this summer, but right now (with all this "unknown" business!), I'm not sure what I'll be able to do. Don't forget me, I'll be back. xoxoxo Last summer we replaced the windows in our house. There were 16 windows total (so, 32 small windows-ya know? They were double hung?). Anywho, When the guys working on the windows went to load up our old windows, I came out in a panic, "No, no! Oh please, leave me these windows!". The guys thought I was hilarious/crazy. Both are pretty accurate. I gave a few windows away to friends, and worked on a few to sell. I (....my husband...) remembered that these windows were the originals to our circa 1880 farm house and they would be more special if kept here and used around our own house. Anyway, I've since bought a bunch of windows from a few different & favourite antique dealers around me, and even found a beautiful one at the Tweed dump. I know, yuk, but I've found a lot of seriously wonderful things at the dump that other people thought were trash! And, as a bonus, an older man saw me dumpster diving for the window and gave me his phone number and address because he had a whole bunch of old windows he would sell me. Do you think I would have gotten that awesome window connection without rooting through trash at the dump? Nope. :) Anyway, wherever you find an old window, snatch it up! I have a few hanging in my house as plain old windows, and some made into new and useful things. Today I run you through a cork/chalk board window. Enjoy! You'll need:
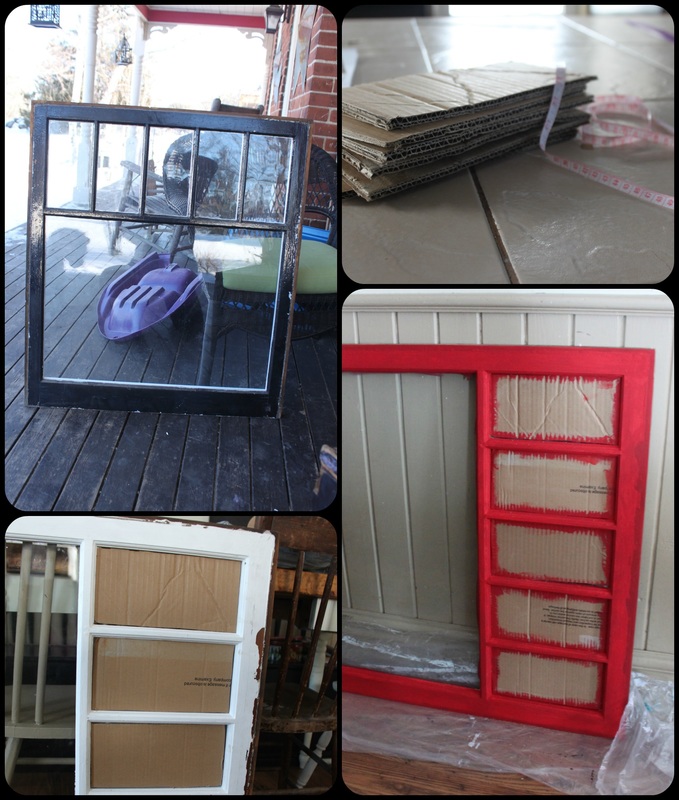
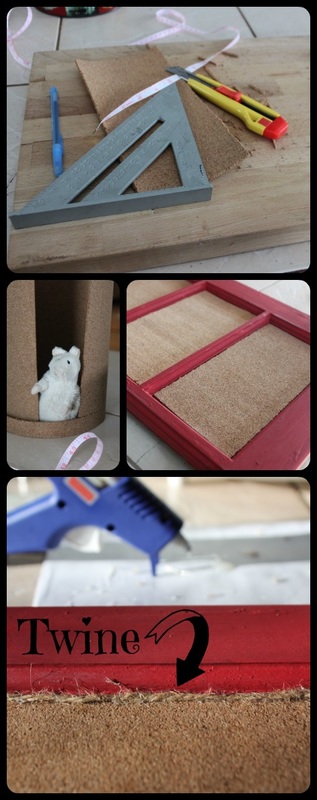
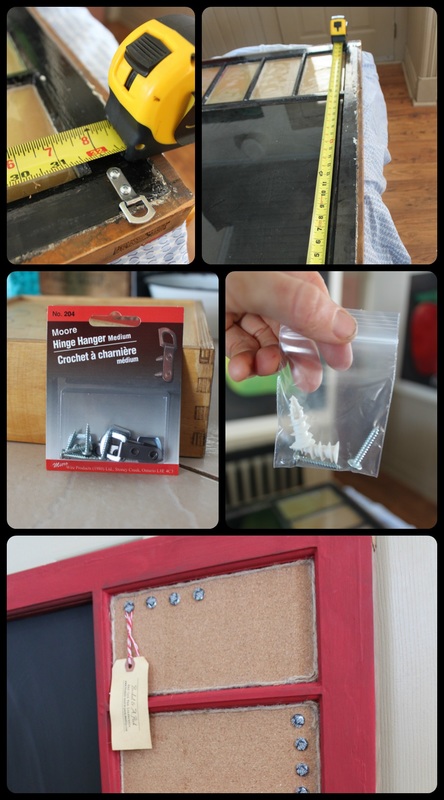
Method:
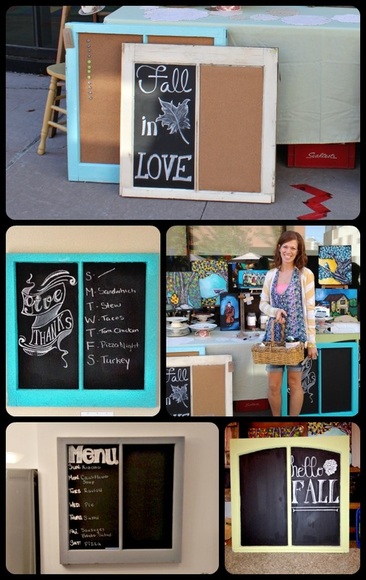
Steps 1-6 Measure the cardboard, adhere it to the glass and paint the window. I use cardboard to back the cork board because otherwise the cork is too thin and any pin or tack you use is too long. You'll end up with a tack that is sticking out from the cork too far. And cork DOES NOT stick to cork without an enormous amount of glue in varying types. Trust me.... Steps 7-9 Keziah was home from school one day while I was working on this and she gave this Ikea mouse a home in the cork roll. :) Like I mentioned in the method, I used twine to cover imperfections. Measuring the cork and cutting it carefully and hoping it fits just so is stressful...so I cut myself some slack and used twine to trim out the window. It was an extra step, but a relatively easy one. Step 11 I like to pre-drill a hole for the screws for the hooks to be sure the screws go in without splitting the windows. When I give a window away or sell it I include anchors and screws for hanging the window up. I know I said to measure the hardware to 16inches so you can hang the window to studs (without needing anchors), but if your window ends up in between studs for some reason you will need anchors. An antique window with original glass is very heavy and you don't want it ripping a hole in your wall and crashing to the floor! Here are some other windows I've made, some as full chalk boards, some as full cork boards, and some half and half. The bottom left photo was made special and because they wanted it exclusively as a menu board I used acrylic paint to write to the word "menu" as well as the abbreviations for the days of the week, that way it could be wiped and cleaned with the menu and days staying put. The other windows just had some fun fall-themed chalk art to make them pretty to sell.
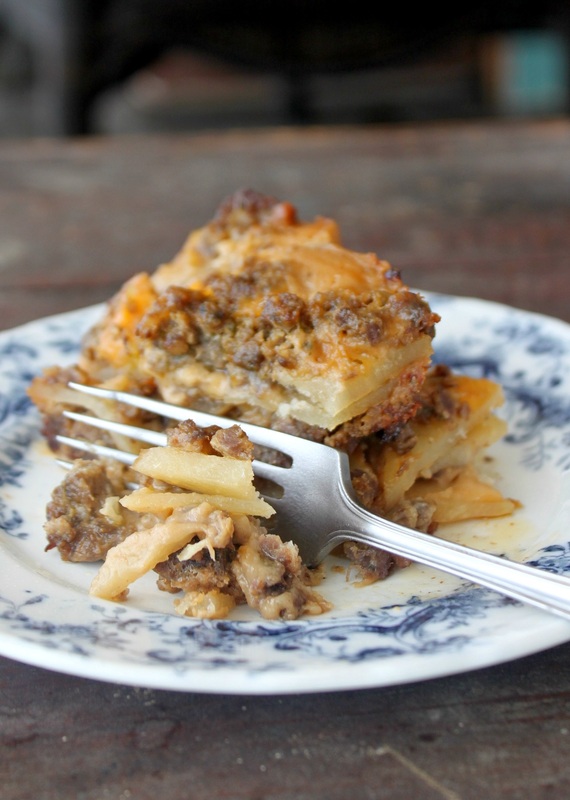
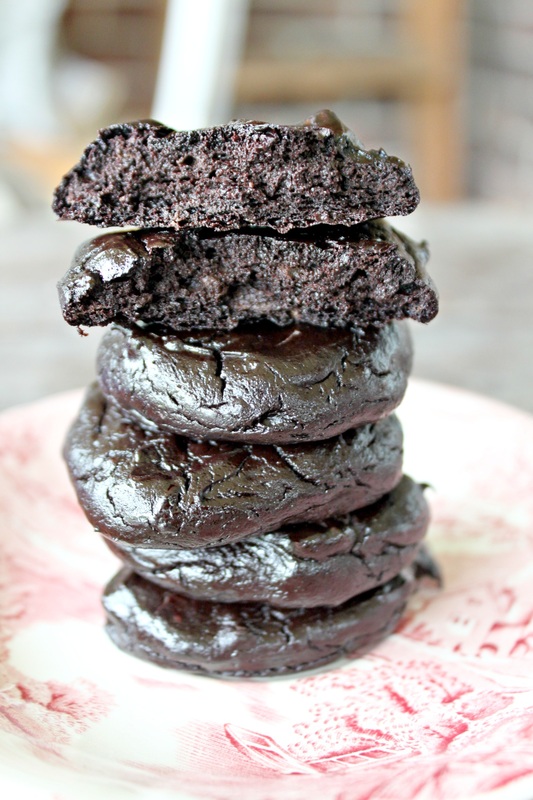
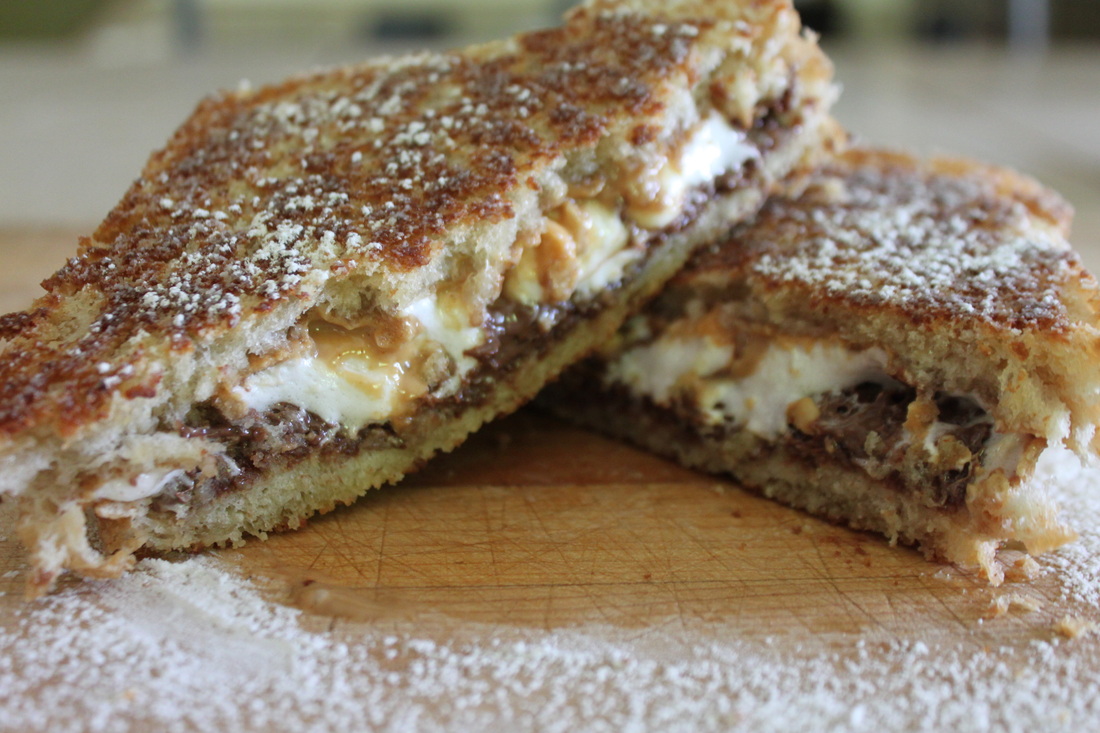
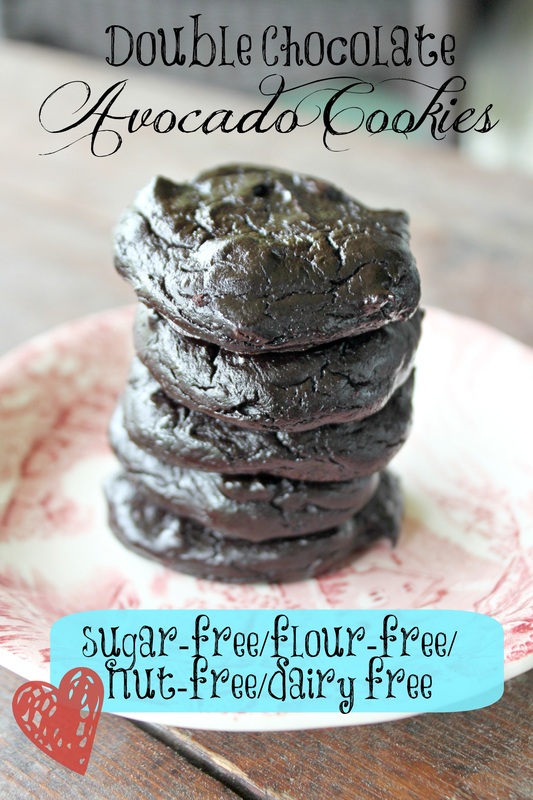
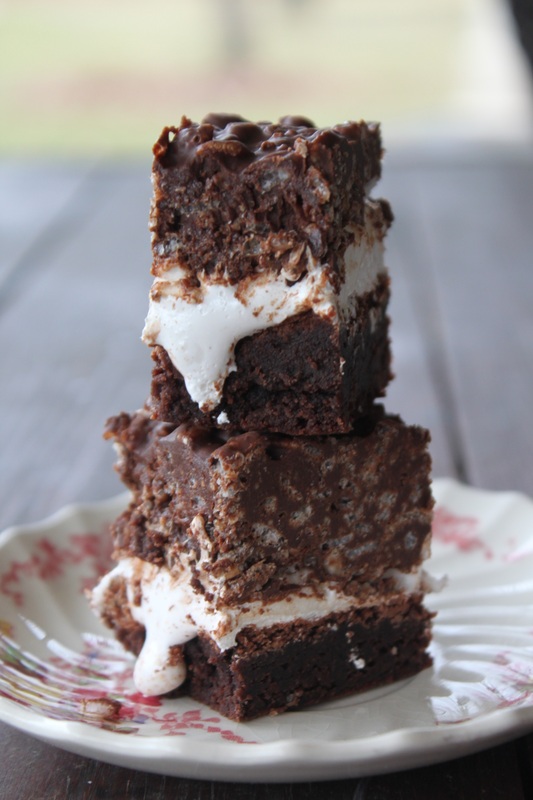
So, the task of converting an old window to a chalk or cork board, or both, can be a little time consuming, but it's worth it (I think!). I take custom orders, btw, and can make one for you ('you' being someone within a reasonable driving range of me!). :) If you take on the task of making one yourself, share your results with me!!! I literally cannot believe that I have been writing this blog for a whole year (technically a whole year tomorrow the 18th, but geez)! This year has been an up and down one, and parts of it have been chronicled here! On the first day I decided to start the blog I put up 6 posts! Haha, I remember my sister saying something about being a little ambitious, and I just thought, "I dunno! I just had a bunch of things I wanted to post! I used up an entire weeks worth of ideas in one day! Fail. :) Anyway, I wanted to take today to highlight some of my favourite recipes, DIY and life hack ideas, and some of my posts about autism. I hope you take the time to click through and enjoy bits and pieces of what I enjoy! ...But first, I want to give you a little history here on a bushel & a peck! Not history about me, but the term itself! Because I know you were dying to know! ;) Well, a real bushel & a peck are dry measurements in agriculture. There's a pint, quart, gallon, peck, and a bushel. But the real reason people know the phrase, "I love you, a bushel & a peck" is from a song written for the musical "Guys & Dolls". Back in 1950 the song was recorded by many artists, and the song was already so well known before the musical even opened that they moved the number from the second act to the first. In the context of the show, "A Bushel and a Peck" is the intro to the Hot Box, a night club in which the headliner is Miss Adelaide. Doris Day (among many others) recorded a version of this song, but she changed the lyrics a bit to remove some of the more direct references from the show and to clean it up for 1950's radio. And there you have it! If you've never seen Guys & Dolls, you should, it's a good show! Now, onto my favourite and most popular posts (p.s., just click on the green titles to go to that recipe!)! Bad-For-You Favourites! This pie....oh this pie!!! It is honestly just the tastiest thing you'll ever eat! The homemade graham crust, the chocolate in the form of semi-sweet chips and chocolate bars of your choice, and gooey mallows....drool.... When my sister invented this evil little sandwich I loved her so much! :) Inside of that lovely, grilled and icing sugar dusted bread is peanut butter, Nutella, and marshmallows. Oh my goodness gracious, it is too good to be true. D.I.Y. & Life Hack Favourites This project felt long in coming, but I was so glad when it was finished as it gave me the extra cupboard space I needed, and it was so unique and fit my house perfectly! Hazaa! Bubble Blowing Life Hack Just do this and thank me later. :) Paleo Favourites I never thought these slightly strange looking cookie would be so popular, but it just shows you can't judge a book (or a cookie) by it's cover! The Huffington Post even had this cookie in one of it's online articles, making this ugly, humble cookie my most viewed recipe EVER with over 20,000 views! This easy-peasy recipe has been pinned on Pinterest more times than I thought it ever would be. It may be paleo, but it's crazy simple to make, has all regular pantry staple ingredients, and you can't beat a crock pot meal that's ready for you at super time! Autism Favourites I love this post because it was all Caleb! His answers to my questions, and "hearing" what he thought about different things. It shows how sweet, and strange, and fantastic he is. This post was the first I ever did on autism. It was inspired by the fact that he was getting a Terrific Kid award at school for empathy. I still admire how he sees the world through very empathetic eyes, and I try to practice empathy whenever possible. Gluten-Free Favourites I am always amazed by this recipe, and how often it is viewed and pinned on Pinterest. It literally was a recipe of. "oh crap! People are coming over! What do I have!", but I think that kind of recipe hits home for a lot of people! It is simple, but tasty. Win/Win! This dessert is a layer of brownie, a layer of mallow fluff, and a chocolate peanut-butter Rice Krispie layer! What? I know! I wanted to pick my all time favourite post, but I couldn't! In fact, my little Dory (from Nemo)-like brain was actually going through the blog and going, "oh yeah....I forgot about that....". Whomp whomp. Memory fail.
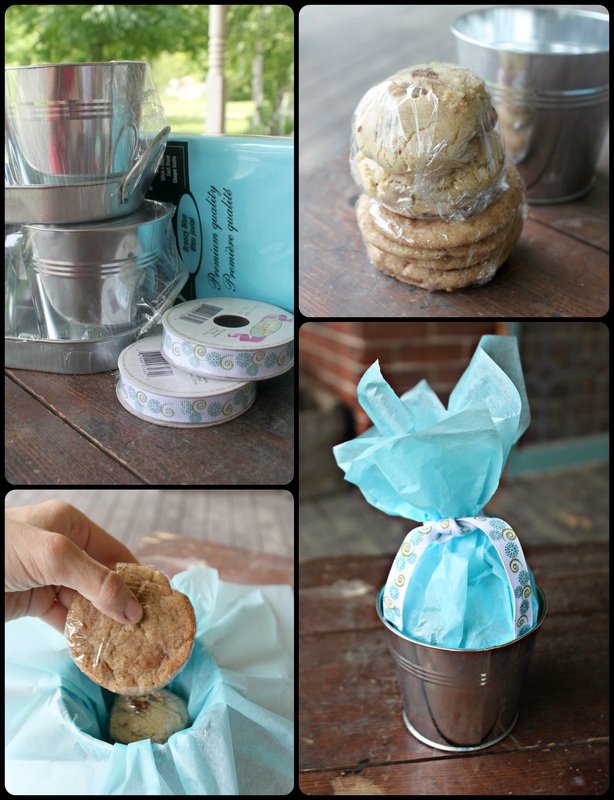
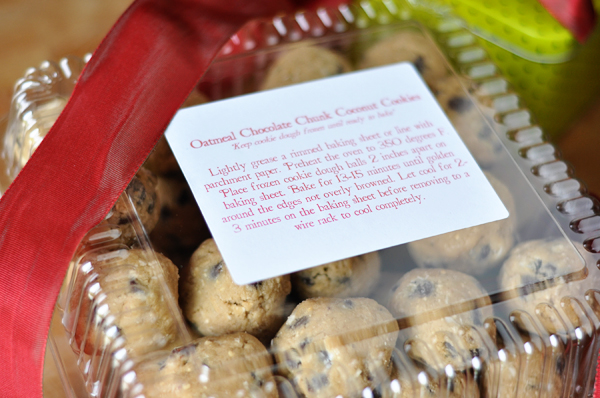
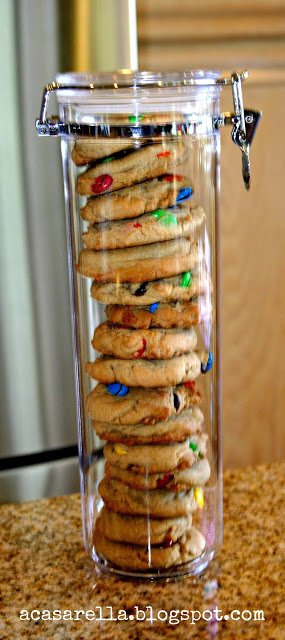
Suffice it to say that writing this blog has (so far) been a blast. I have enjoyed being more experimental in the kitchen, getting some of my thoughts out of my brain, and knowing people like a few of the recipes and articles is a great big cherry on this Sunday! I'm still writing this blog, fear not. I have been toying with the idea of buying my domain (instead of having it hosted by Weebly), and maybe changing my design too....but we'll see. I'm not a big fan of change! So (insert cheesy music, and hear my voice all teary like I'm winning an Oscar), to all those who read here regularly, or just now and again; to those from Pinterest and Foodgawker who share recipes and ideas (hint hint-feel free to follow or 'heart' me!), and to my Mom, who almost never remembers to read my blog, merci beaucoup! :) I know, I'm a cheeky bugger. Here's to another year! Woot woot! (I love you Mom) xoxo Amy-Lyn I like to do end of the school year gifts. I know not everyone does, and that is completely fine! I personally like to because teachers (and e.a's, and principals, and the secretary!) have a really hard job! I couldn't be a teacher (well, not a good one!). End of year gifts can be as simple or as complex as you want them to be, and can cost a lot or a little, depending on what you have in mind. I'll just let you know though; I asked my friend who used to be my son's e.a., and she said a good gift is homemade stuff like jams, cookies, etc. Just FYI. :) Anyway, so today I'm just going to share with you some of my favourite gifts from Pinterest, and the gift the kids and I made. It's not too late to whip something up to say "thanks"! The kids and I made Cinnamon & Sugar cookies, as well as Kit Kat cookies (I'll share that deeeee-licious recipe soon!). I wrapped each type in it's own plastic wrap so the flavours wouldn't smoosh, and placed them into a little bucket with tissue paper I found at the Dollarama. Then we just tied 'em up with some cute ribbon. You can package baked goods in whatever you have available, but a little effort can make a simple gift really pretty. Also, don't feel that each person needs a 2 dozen cookies or squares. Just a few will do the trick; enough they could share if they wanted, but not so much that they end up throwing some of it away because there was too much. At Mel's Kitchen Cafe, she shows you (what I think) is a brilliant idea of making Cookie Dough Tins. So, basically instead of baking cookies for people, you make the dough roll it and freeze it, then give people the frozen dough balls with instructions. This idea is great because the gift receiver can make the cookies whenever they want, and there won't be any "these cookies are too old now, just throw them away" problems. If you do this idea though, be sure to bring it to the school yourself, or attach a note so that the person getting the gift doesn't just tuck it away, but actually puts it into the freezer until they are ready to go home. A post called Facilitating the Appreciation over at A Casarella gives a great idea of using a cheap spaghetti canister to hold a stack-o-cookies as a gift. I like this idea because you can see all the yummy cookies. The last gift I want to show is this cupcake holder idea. Really, if you were pinched for time, but wanted to give some gift, you could get some store bought cupcakes, and separate them into their own little 9 oz cup as a gift for one (no sharing allowed!). She tells you that to get the cupcake out you need to stab it with a fork and lift it out, but I would even suggest tying a fork to the top so it can be eaten out of the little cup.
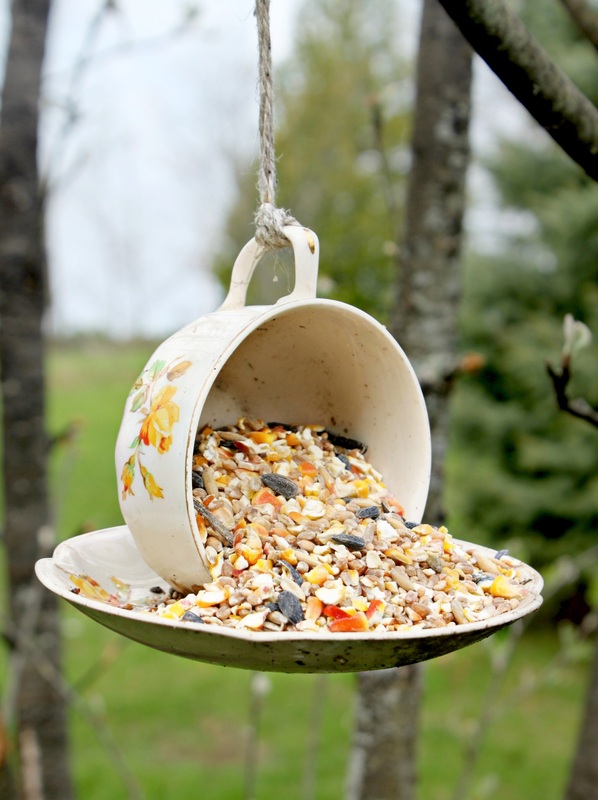
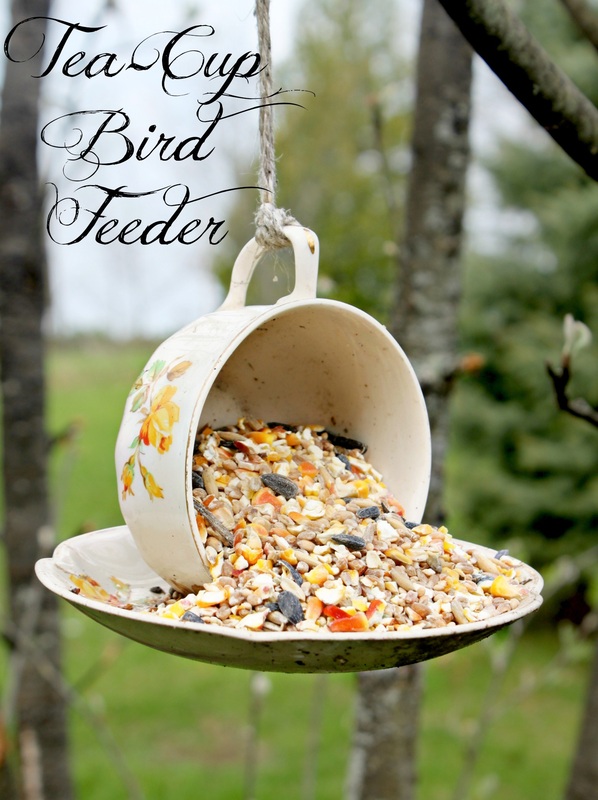
Well, I hope that even if you have no teachers you need gifts for, you can still get some nice baked goods packaging ideas from this post. And if you never give away baked good, well, I'm not sure we can be friends anymore. I joke. You are all my friends....and saying stuff like that makes me feel pretty crazy because I feel like I'm talking into the vast world wide web and not any real person! On that cra-cra note, it's time to bow out gracefully(ish). Feel free to make me feel a smidge less coooky by leaving a comment about anything you want, whether it's related to this post or not! :) xoxo Hey there! Just a quick DIY that is so easy to make, and is a great gift for many "hard to buy for" people. I realize I should have/could have posted this pre-mother's day, as it could have been a good gift for that, but I failed. I get it. Sheesh. To make this beautiful feeder, all you need is some glass and ceramic glue (I use Elmer's, it costs less than $5), some string or chain to hang it, and a tea cup and saucer you like from a second hand store (I don't buy them from Value Village, they tend to price even the most hideous sets at coo-coo-crazy prices). The set in the picture cost 25 cents from "Hidden Treasures" in Tweed. Simply clean the cup and saucer, make sure they're dry, then set the plate down. Run a strip of glue on the saucer, not in the middle, but from the middle to the edge, then with the handle pointing upwards, set the cup over the strip of glue, and gently press it into the glue. Depending on how thin the set is, the cup may be able to sit up on it's own, or you may need to gently wrap a towel around it to keep it in place while it dries.
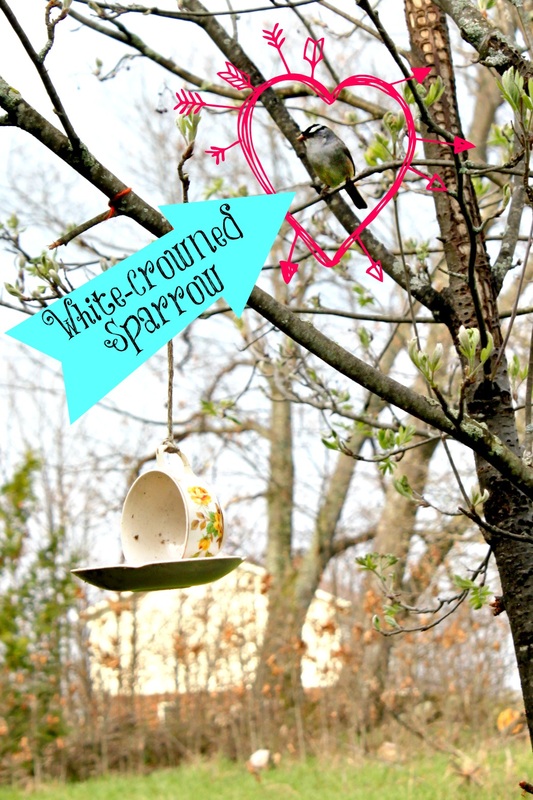
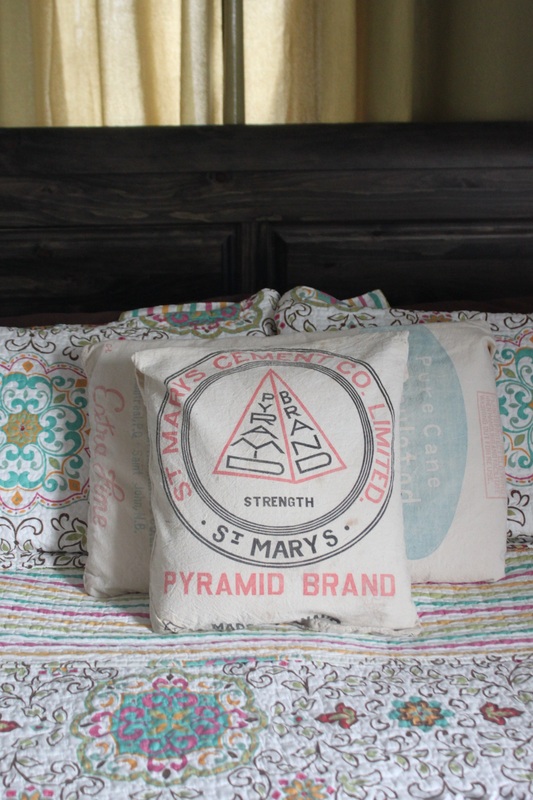
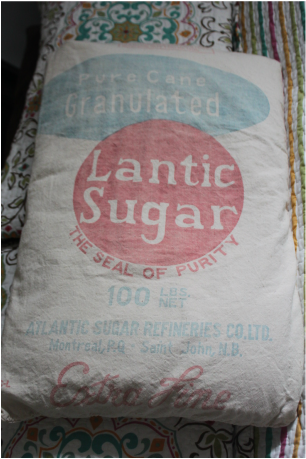
Once it's dry, fasten a string to the handle, and taa-daa! At our place we have 4-5 different types of birds who will eat out of this feeder, and it hangs outside our kitchen window so the kids can see it while they're eating breakfast at our island. They are always so excited about the birds. And that's it! It's unique, it's simple, it's beautiful. The End. Just a quick post today about re-using old things as new! One of my favourite things! These pillow cases are old sacks that I've purchased at antique and flea markets and washed (and washed again), and simply slid another pillow into. In my living room I also had 6 other old sacks as pillows, but instead of putting a different pillow into it, I bought them stuffed with "pillow fluff" (stuffing), and sewn shut. They are a little more tricky to wash though....so, I would personally recommend just slipping a different pillow into the sack, and if you want it to close, just sew a zipper, or some cute buttons. Well, we're heading home today, and I will be able to rest my head on my lovely pillows again! :)
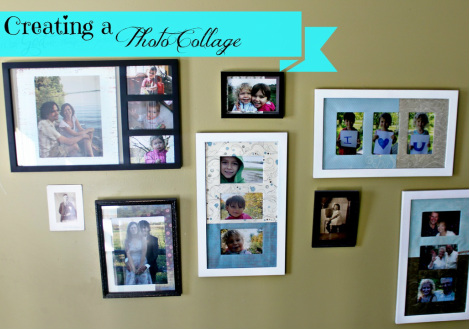
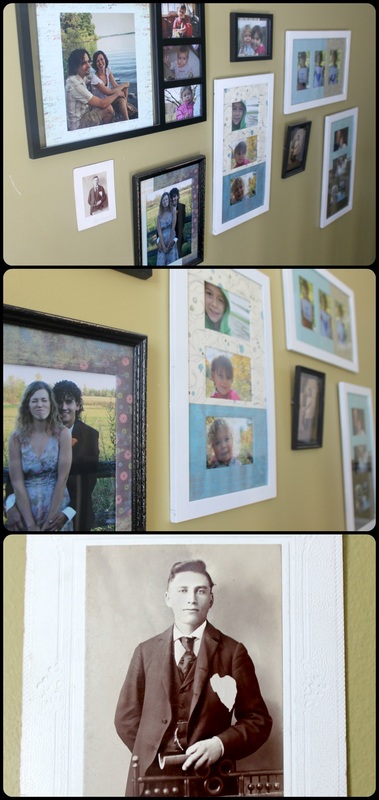
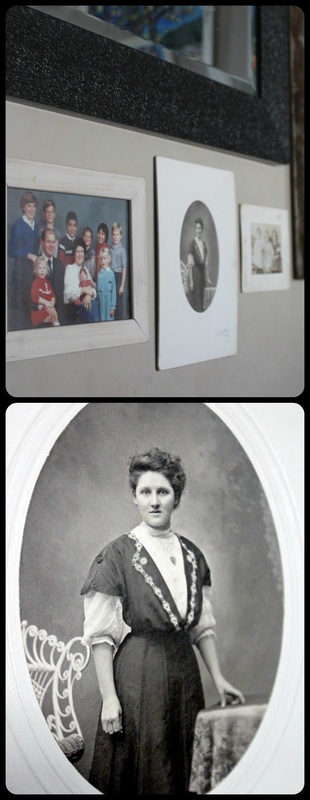
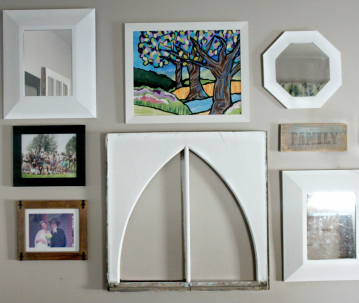
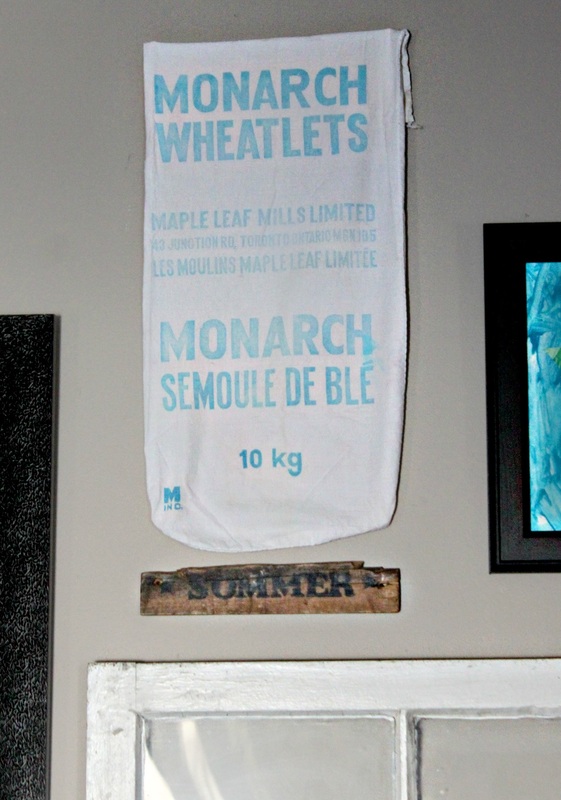
Hello there! Today really is April 1st (incase you're wondering, I thought yesterday was!)! We currently have at least two feet of snow still in our yard, but I am hopeful that spring (not that silly date on the calendar), but the real spring is coming! That really has nothing to do with today's post! In one of our houses we had this huge wall behind our sofa. The room opened up into the dining room, and so, what it really turned into was one, enormous, long, empty wall! I looked at some art that we could buy, but for the sizes we would need to fill the space it would be too much $$$ (I did start painting two large pictures for the dining room side, but I still had a whole lotta wall that needed something!). Anyway, the walls stayed empty, until one day on Pinterest I saw this! A beautiful photo collage that made me say, "oh yeah! I don't need one BIG art piece, I could fill the space with 20 smaller/different sized pictures!" Duh. For real, I hadn't even thought of doing it before! There is no real trick to creating a nice collage, but there are a few rules that (I think) should be followed so that you have a "piece" that looks good. Firstly: Just decide if you want it to be a perfect square, or rectangle (fyi, this can add a lot of extra time to the project), or if you want one with no borders. You will want to know this before you start. Secondly: Make sure you have big & small frames. If all your frames are too small, it will look more like a jigsaw puzzle (and people won't really be able to see all the pictures). Thirdly: I would personally recommend having your frames be similar colours (or all one colour), or a general colour scheme. Think all white, all black, all earth tones, or if you're living on the edge, all jewel tones! Fourthly: Try to have a general spacing idea. You can be strict (everything will be one inch apart from each other), or within a rule (everything will be between 1-3 inches apart from each other). The point is that when you step back from your collage it feels like it belongs there, not like you just helter-skelter put some stuff on the wall! I need to change out some photos here and there, but I have enjoyed adding things (besides photos) to make the collages/tell a story. Don't feel confined to photos, add art you like, random things you like, just go for it, and make it personal! To know what you want before you start making holes in the walls, take everything you plan to use, measure the size of the space you will be using on the floor or a bed (in the room you are putting these up in), and lay your photos/art, etc. down within those confines. This way you can get it "right" before making the commitment of a nail or screw in the wall! The gal in the tutorial link (from Pinterest) shows you this. The wall collage above has pictures, art, lots of mirrors (it's a dark room, so the mirrors make it feel more open), a "family" sign I made from some old barn board (out of our barn), and one of the old windows from our bedroom (the window guys thought I was a little coo-coo for wanting to keep ALL our old windows!) That Wheatlets bag is a beautiful cloth bag I got for $6 at an antique place. The "Sommer" sign is one I took from my horses stall when she was put down (years and years ago).
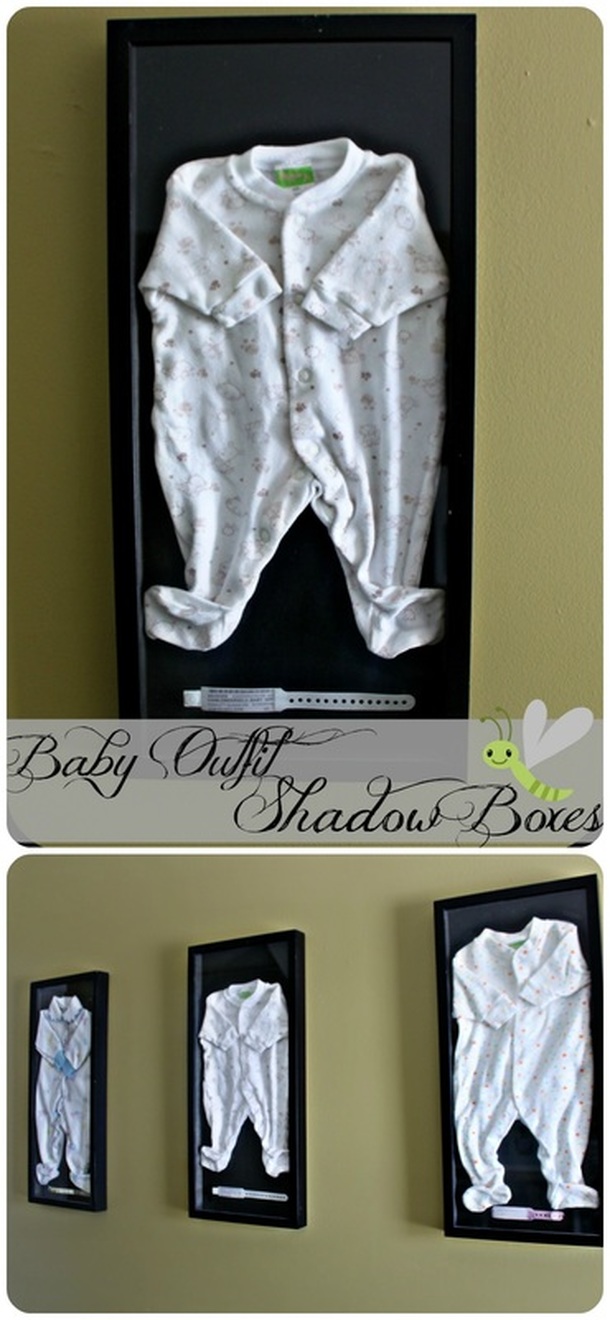
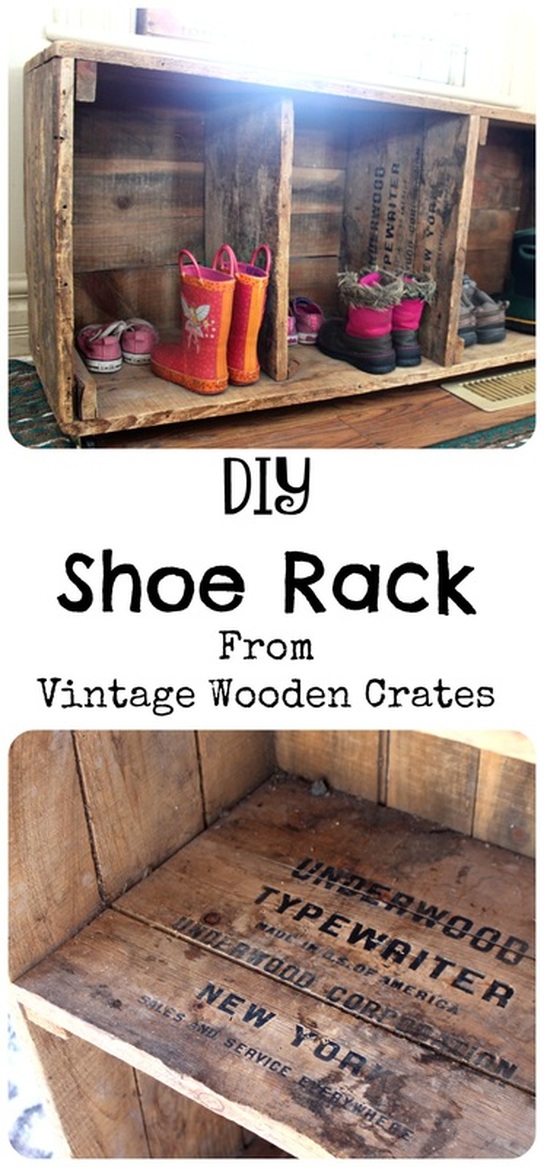
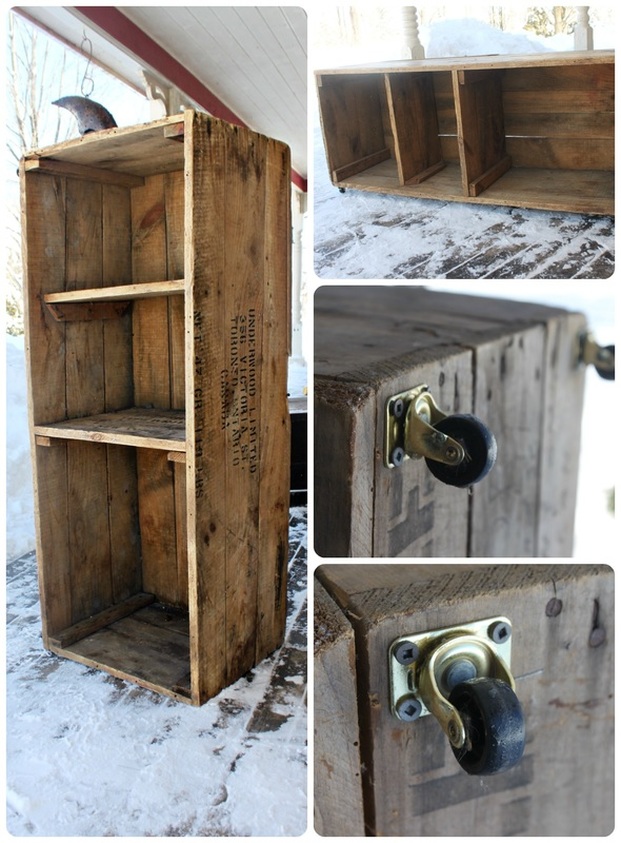
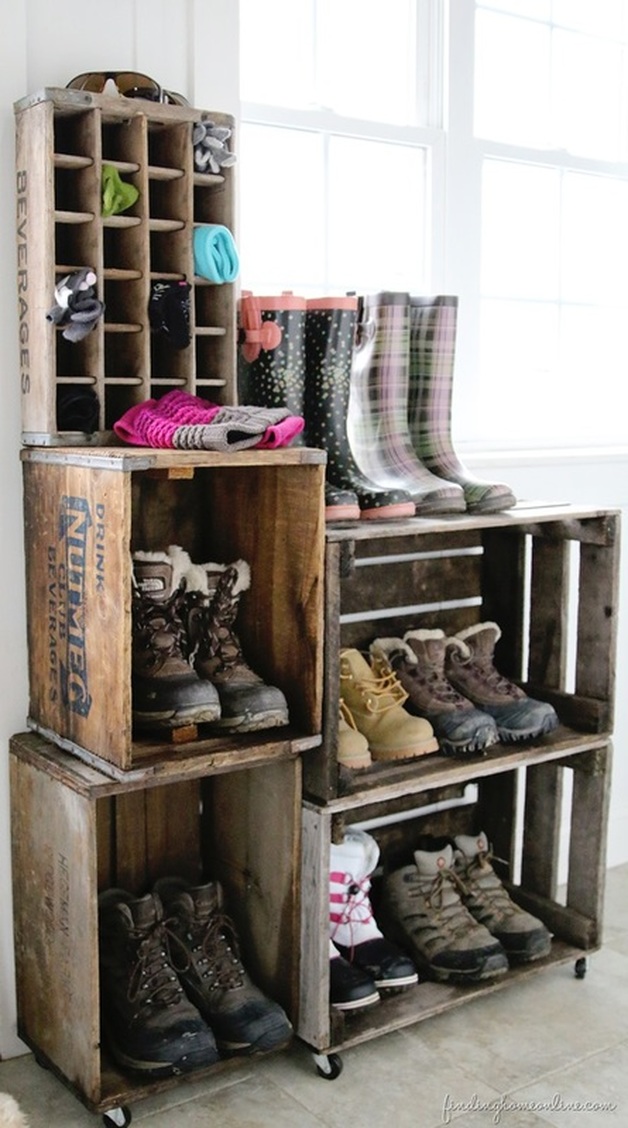
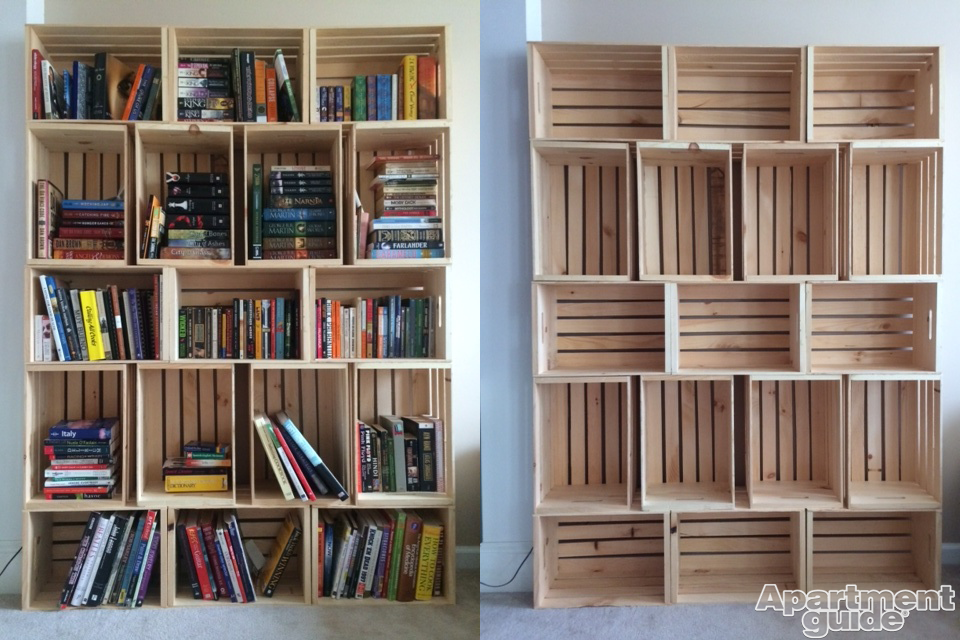
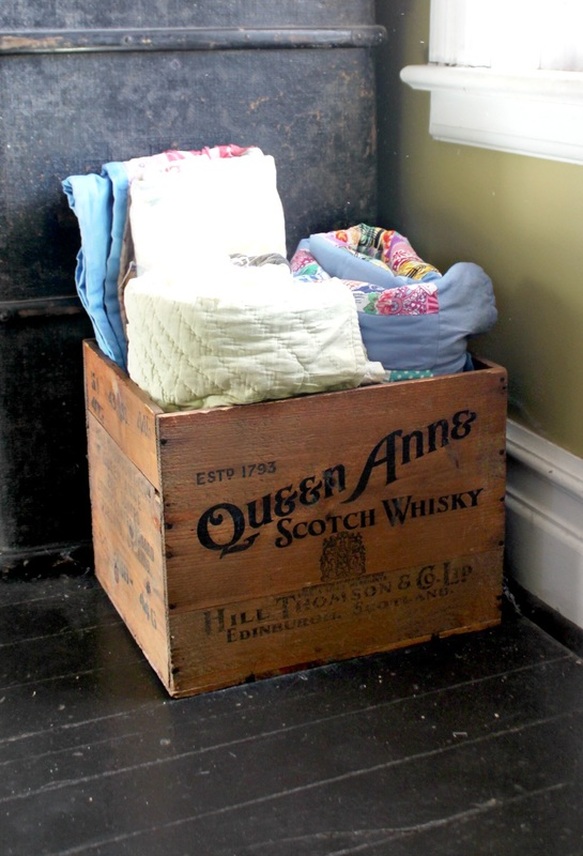
The point is not just to fill a space, but make a story. Create you, in collage form, in art form, on the wall! Not everyone keeps the outfit they brought their baby home from the hospital in (or the first thing they put on the baby if it was a home birth). I did though, because I wanted to remember how small my baby was, and as a special thing for them to be able to see when they were older. Only problem is that keeping a cute outfit in a baby box tucked away in a closet is not that special! I know, big surprise! So, this idea is beautiful, and a nice way to display that outfit. Two of my sisters have done this (or something similar), but I'm not sure who I stole the idea from! Either way, only one blogged about it here (the other sisters' shadow boxes made an appearance on that post too). Check out that post! The art store "Michaels" often has good sales on their frames, and that's when I bought mine. They also always have a 40% off coupon in the flyer every week, so if you just need/want one frame, go for that! You can probably check online for a coupon too, but I'm a little old school and just bring in my little flyer clipping. It is a fairly easy process, the shadow box comes with double sided tape (though you may want to buy more, just in case). In some spots I needed to double-side tape the inside of the outfit as well (like in the collar) to keep it from hanging open-ish. Other than that, it was a fairly quick process getting it all together and hung. Pictured above is our Keziah as a newborn, wearing her first ever "outfit". You can see this outfit on the far right of the wall of our shadow boxes. I enjoy seeing these hanging in the hall, and am glad I stole the idea from one (or both) of my sisters! : ) xo When we moved into this house, I found this "shelf" in the barn. Someone had taken the box that a typewriter had been delivered in, stood it on it's side, and used the top they would have taken off to build some shelves in it. It was cool. I knew I didn't want this beauty hiding in the barn, so I took it to the house, and cleaned it up. I also knew I didn't want/need it as a standing upright shelf-thingy. So, I decided it might be serviceable as a shoe holder at our front door. I picked which side I like best to be the top, and fastened some simple, inexpensive casters to the bottom four corners. I knew I would want caster for two reasons: First-This box would sit slightly over a heating vent, and I wanted to get it from sitting right on top of it all the time. And second-so that I could easily drag this out of the way for easy cleaning. Because this was just one large box, and someone had it as a standing shelf (pictured above), all I needed to do was attach casters, and we were good to go! Even without the dividers though it would have been an excellent shelf. I really do like how it looks at our front door, and each of my three kids has their own little "cubby" as we call it. They know to put their stuff in their, and it keeps all the kids from crowding (and fighting) in front of our cramped front closet! Other Ideas! Knowing that huge typewriter boxes aren't always readily available, and that not everyone will find one in their barn, I've included some other shoe racks from wooden crates for you to be inspired by! At Finding Home Farms there is this beautiful shoe rack from multiple wooden crates. Find the tutorial here. If you can't find/can't be bothered to find vintage crates, you can find new ones at stores like The Home Depot, Canadian Tire, Michaels, and Wal-Mart. Apartment Guide has a tutorial on how to accomplish this shelving from these new wooden crates. It shows the shelves with books, but it can obviously be made to the size you need and used for shoes & boots! Click here for that tutorial! Some of my other uses for old wooden boxes (and steamer trunks) can be seen here. I love finding old things, and bringing them back with a new job, it often saves us money, and is always one-of-a-kind! |
Hi, I'm Amy-Lyn! I am the lady behind this here blog! I live in the sticks with my animals, my super handsome husband, and my
3 amazing kids! Here you'll find things from recipes (gluten-free, paleo, and strait up junk food!), DIY ideas, thoughts on raising a son with autism, and whatever else pops into my brain! : ) Read more about me by clicking here! Want to Stay Connected?
Find What
|







 RSS Feed
