Bushel & A Peck
  • Blog
  • Health & Fitness
  • Artist Biography
  • Paintings
  • Photography
  • Drawings, etc.
  • About Me
  • Contact Me


DIY Chalk & Cork Board

4/14/2015

0 Comments

 
   Last summer we replaced the windows in our house. There were 16 windows total (so, 32 small windows-ya know? They were double hung?). Anywho, When the guys working on the windows went to load up our old windows, I came out in a panic, "No, no! Oh please, leave me these windows!". The guys thought I was hilarious/crazy. Both are pretty accurate.
   I gave a few windows away to friends, and worked on a few to sell. I (....my husband...) remembered that these windows were the originals to our circa 1880 farm house and they would be more special if kept here and used around our own house. 
    Anyway, I've since bought a bunch of windows from a few different & favourite antique dealers around me, and even found a beautiful one at the Tweed dump. I know, yuk, but I've found a lot of seriously wonderful things at the dump that other people thought were trash! And, as a bonus, an older man saw me dumpster diving for the window and gave me his phone number and address because he had a whole bunch of old windows he would sell me. Do you think I would have gotten that awesome window connection without rooting through trash at the dump? Nope. :)
   Anyway, wherever you find an old window, snatch it up! I have a few hanging in my house as plain old windows, and some made into new and useful things. 
   Today I run you through a cork/chalk board window. Enjoy!
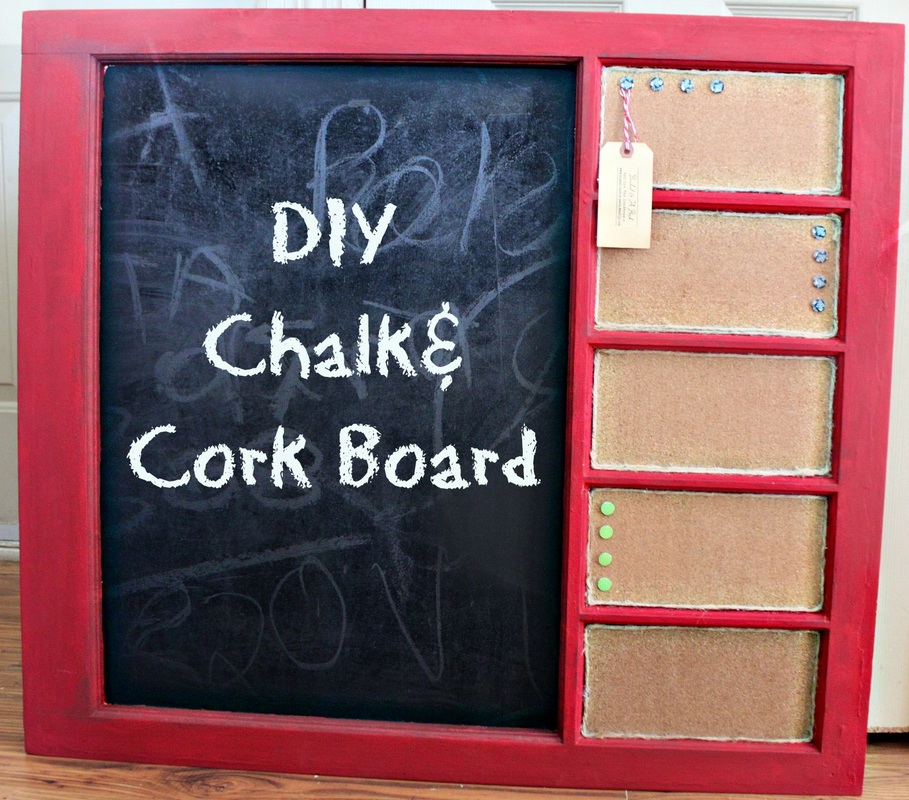
Picture
You'll need:

  • Old window
  • Measuring tape
  • Cardboard
  • Exacto knife (or good scissors or a knife)
  • Super glue
  • Cork board
  • Contact cement (it's a glue)
  • Twine
  • Hot glue gun (and the glue too)
  • Paint for the frame if you wish
  • Paint brush
  • Chalk board paint
  • Small paint roller and tray
  • Hardware to hang the window (hooks, screws and anchors {if needed|)-and a screw driver or drill 


Method:

  1. Start by cleaning the window properly
  2. Prime the window if necessary (if you're painting it)
  3. Use a measuring tape to measure your cardboard to fit the windows panes you want cork in. Cut out using the exacto knife or scissors
  4. Use the super glue to attach the cardboard into the panes. You will likely need to weigh it down to keep the cardboard flat while it dries fully. I used cartons of almond milk
  5. Alrighty, now you can go ahead and paint the window pane if you want to
  6. Once you've painted the window and it's fully dry, you may move on :)  
  7. Now measure the cork board to fit over the cardboard, and use the contact cement to adhere the cork to the cardboard. You'll need to weigh this down to keep it flat as it dries (follow the directions on the glue for drying time) 
  8. Once the cork is completely stuck and the glue has dried, measure the twine to fit around the inside of each pane. I did this for one main reason, and it wasn't to look good....it was to cover up the fact that each piece of cork didn't fit perfectly! If your cork fits just right and you're happy with how it looks, you can skip the twine!
  9. Anywho, if you're using twine, warm your hot glue gun and begin to adhere the twine to the pane/cork slowly in small sections until you've completed it all
  10. Now you can begin painting your chalk board. This part can be fussy...I don't use tape to cover up the painted window, I just carefully "cut-in" with a brush, and then use the roller to finish the rest. It can take 2-3 coats of paint to fully cover the glass. Let each layer dry completely to make sure each layer is smooth
  11. Once the paint is completely dry, attach the hardware that you've chosen. Setting the hooks to 16inches insures you'll find a stud (in the wall) when you hang it. Little building info: the main studs in a wall (behind the dry wall) are set at 16 inches. If you want something to hang sturdy without using anchors, find the studs!
  12. That's it!
Picture
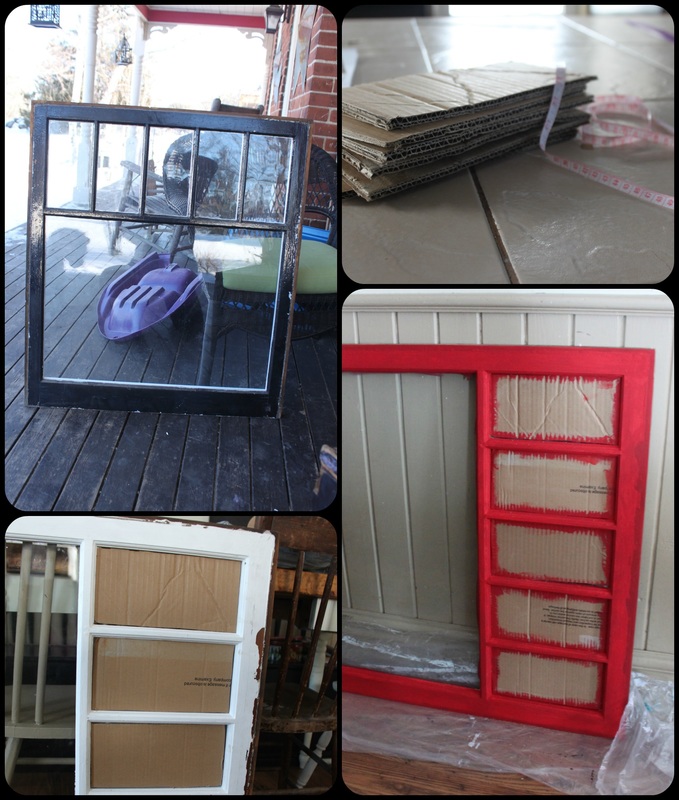
   Steps 1-6 
   Measure the cardboard, adhere it to the glass and paint the window. I use cardboard to back the cork board because otherwise the cork is too thin and any pin or tack you use is too long.  You'll end up with a tack that is sticking out from the cork too far. And cork DOES NOT stick to cork without an enormous amount of glue in varying types. Trust me....
Picture
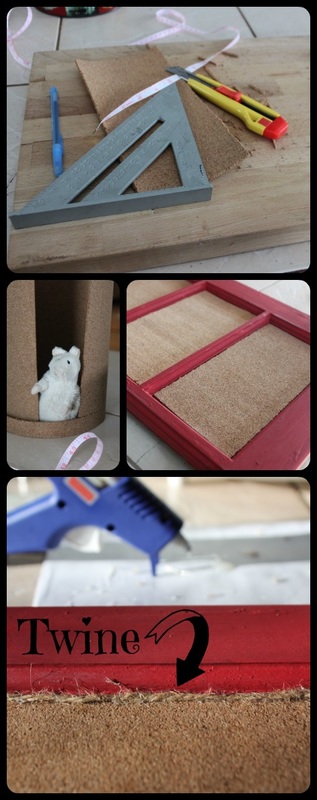
   Steps 7-9
   Keziah was home from school one day while I was working on this and she gave this Ikea mouse a home in the cork roll. :)
   Like I mentioned in the method, I used twine to cover imperfections. Measuring the cork and cutting it carefully and hoping it fits just so is stressful...so I cut myself some slack and used twine to trim out the window. It was an extra step, but a relatively easy one.
Picture
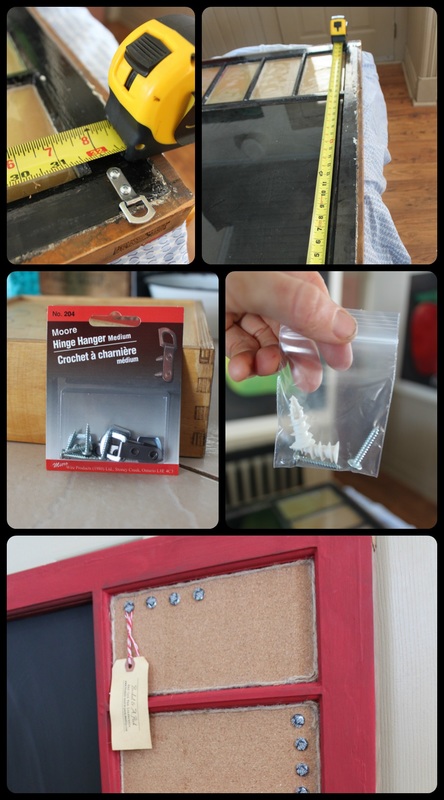
   Step 11
   I like to pre-drill a hole for the screws for the hooks to be sure the screws go in without splitting the windows.
   When I give a window away or sell it I include anchors and screws for hanging the window up. I know I said to measure the hardware to 16inches so you can hang the window to studs (without needing anchors), but if your window ends up in between studs for some reason you will need anchors. An antique window with original glass is very heavy and you don't want it ripping a hole in your wall and crashing to the floor! 
Picture
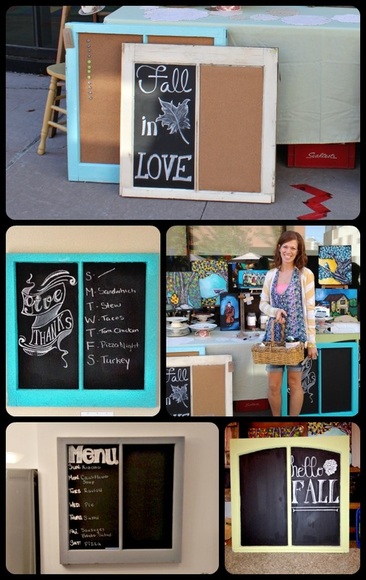
   Here are some other windows I've made, some as full chalk boards, some as full cork boards, and some half and half. The bottom left photo was made special and because they wanted it exclusively as a menu board I used acrylic paint to write to the word "menu" as well as the abbreviations for the days of the week, that way it could be wiped and cleaned with the menu and days staying put. The other windows just had some fun fall-themed chalk art to make them pretty to sell.

   So, the task of converting an old window to a chalk or cork board, or both, can be a little time consuming, but it's worth it (I think!). I take custom orders, btw, and can make one for you ('you' being someone within a reasonable driving range of me!).  :)  
   If you take on the task of making one yourself, share your results with me!!! 
0 Comments


Leave a Reply.


    Welcome To
     Bushel &
    A Peck!

    Hi, I'm Amy-Lyn!

    Picture
    I am the lady behind this here blog! I live in the sticks with my animals, my super handsome husband, and my
    ​ 3 amazing kids! 
    Here you'll find things from recipes (gluten-free, paleo, and strait up junk food!), DIY ideas, thoughts on raising a son with autism, and whatever else pops into my brain! : )  

    Read more about me by clicking here!

    Want to Stay Connected?

    RSS Feed


    Subscribe to my mailing list!

    * indicates required

    Find What
    ​You're Looking For on the Site!


    Vitacost.com

     Most Popular Posts

    Meat & Potato Casserole
    Gluten-Free Meat & Potato Casserole
    Picture
    D.I.Y Tea Cup Bird Feeder
    Picture
    Mini Caprese Kabobs

    Featured in The Huffington Post

    Picture
    Paleo Double Chocolate Avocado Cookies

    Featured in Woman's Day

    Picture
    Chicken Bundles


    Categories

    All
    Antiques
    Autism
    Birthday
    Breakfast
    Chocolate
    Dessert
    Diy
    Family
    Five Minute Friday
    Giveaway!
    Gluten Free
    Health-fitness
    Lunch/Dinner
    Miscarriage
    Motivational Monday!
    Muffins
    My Thoughts...
    Nifty Ideas
    Paleo
    Primal
    Recipes
    Sandwiches
    Soup
    Tea Party


    Some of my favourite products! 


    Archives

    September 2017
    August 2017
    June 2017
    May 2017
    April 2017
    March 2017
    February 2017
    January 2017
    December 2016
    November 2016
    August 2016
    July 2016
    June 2016
    May 2016
    April 2016
    March 2016
    February 2016
    January 2016
    December 2015
    November 2015
    October 2015
    September 2015
    August 2015
    July 2015
    June 2015
    May 2015
    April 2015
    March 2015
    February 2015
    January 2015
    December 2014
    November 2014
    October 2014
    September 2014
    August 2014
    July 2014
    June 2014
    May 2014
    April 2014
    March 2014
    February 2014
    January 2014
    December 2013
    November 2013
    October 2013

    my foodgawker gallery
  • Blog
  • Health & Fitness
  • Artist Biography
  • Paintings
  • Photography
  • Drawings, etc.
  • About Me
  • Contact Me