Bushel & A Peck
  • Blog
  • Health & Fitness
  • Artist Biography
  • Paintings
  • Photography
  • Drawings, etc.
  • About Me
  • Contact Me


There's Still More S'mores?

7/1/2016

0 Comments


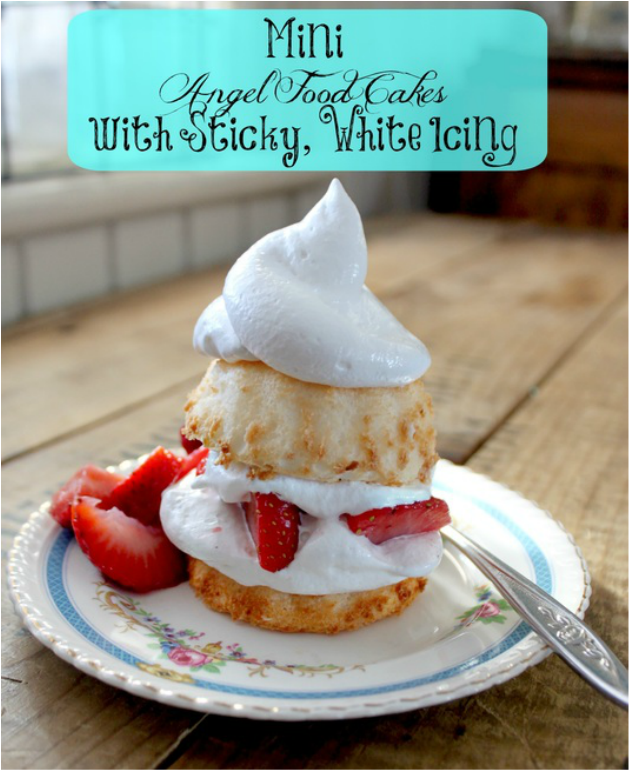
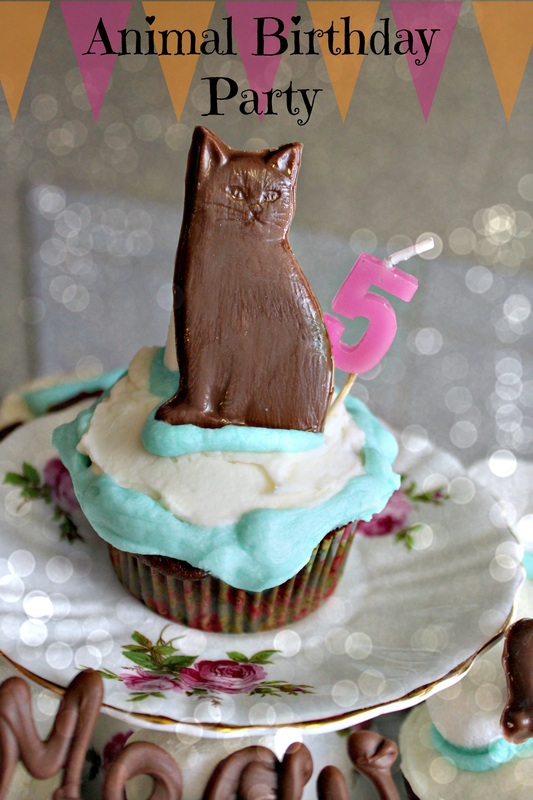
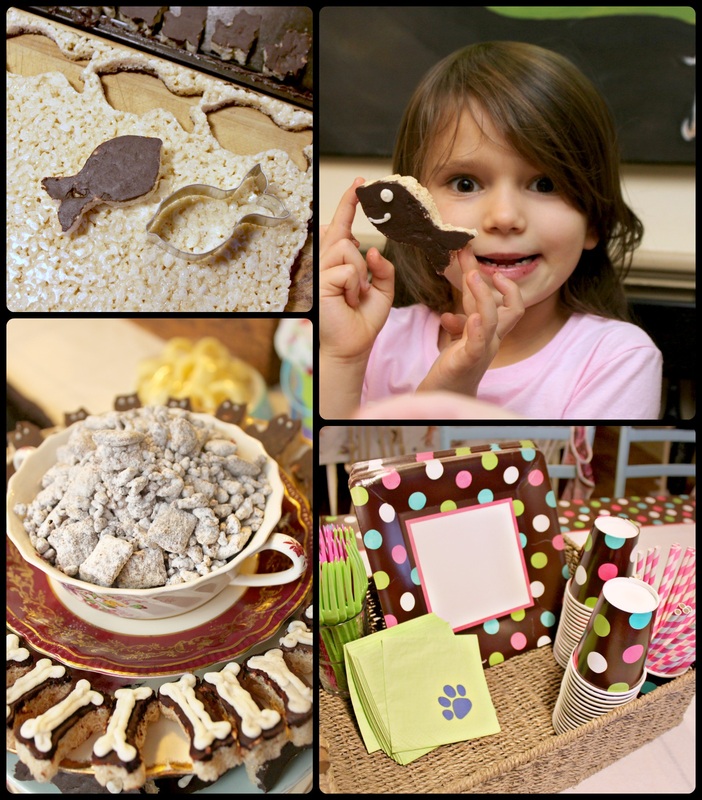
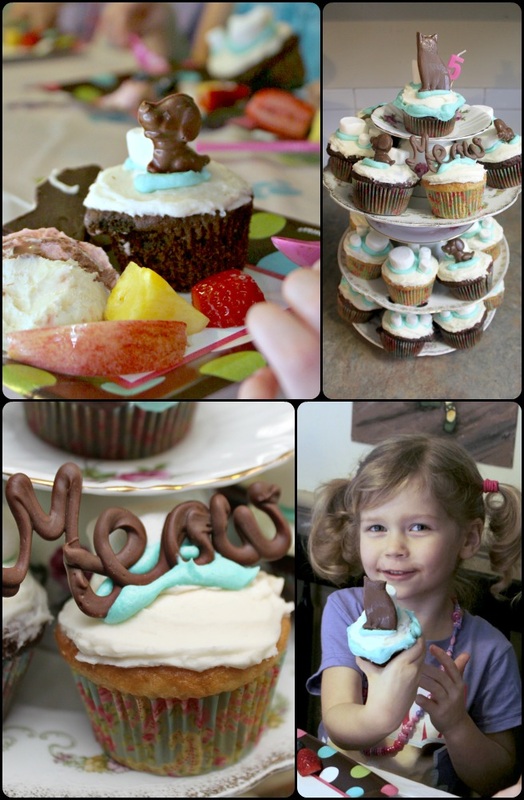
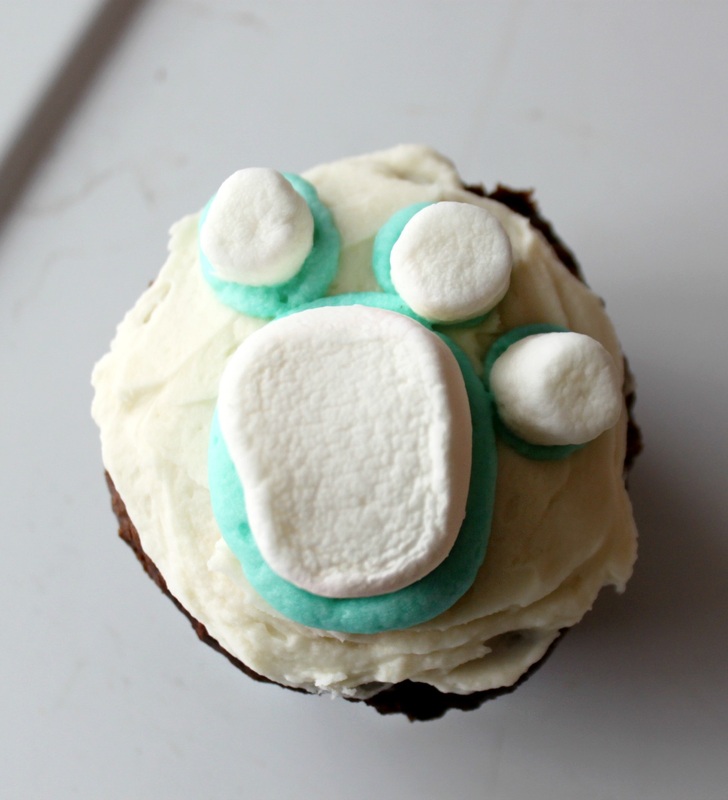
    Oh yes, dear friends, there is definitely still more s'mores ideas out there!

     ....Hello. How are we today? I am EXHAUSTED!!!!!! : ) 

     No, but seriously, I've been more stressed lately than I ever thought I could possibly
be - I've had a constant headache for a week, my body is aching, I have hardly slept, and I even developed a canker sore on my lip!!! 

     K, I'm done now. I'm  just whining to all of you, to whoever will be a listening ear! 

     I think it's time we got back to s'mores though, because s'mores always make me feel better! : )  


    In August of 2014 I wrote a s'more compilation post called "Please Sir....I Want S'more...", and last July I compiled another list of s'more-ific ideas in "It's Time For S'more!".

    I love-LOVE-LOVE  s'mores! They have been a passion of mine for years and years!  So, when I recently received an e-mail from Julia Arangure of Shari's Berries with a request to share their 9 unique s'more ideas on Bushel & A Peck, I thought, "well, it's worth looking at".

    Let me say that when I opened the link she sent, I went "whaaaaaaaaaaaaaa?!?!?!".

     For.  Realz. 

     When Julia said "unique" she meant it, and I have honestly never seen s'mores like the ones she shared with me, and that I am going to share with you!

    These amazing s'more ideas where created and photographed so beautifully, and I want to try every single one of them! 
    
​    So, here they are -9 unique ways to make s'mores from Sharis Berries! 
     

Nine Unique Ways to Make Smores

........I mean, c'mon, right?!?!

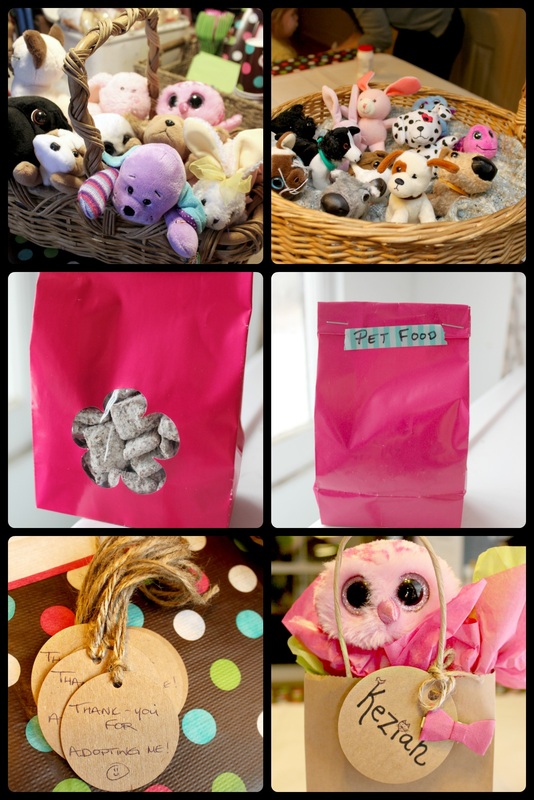
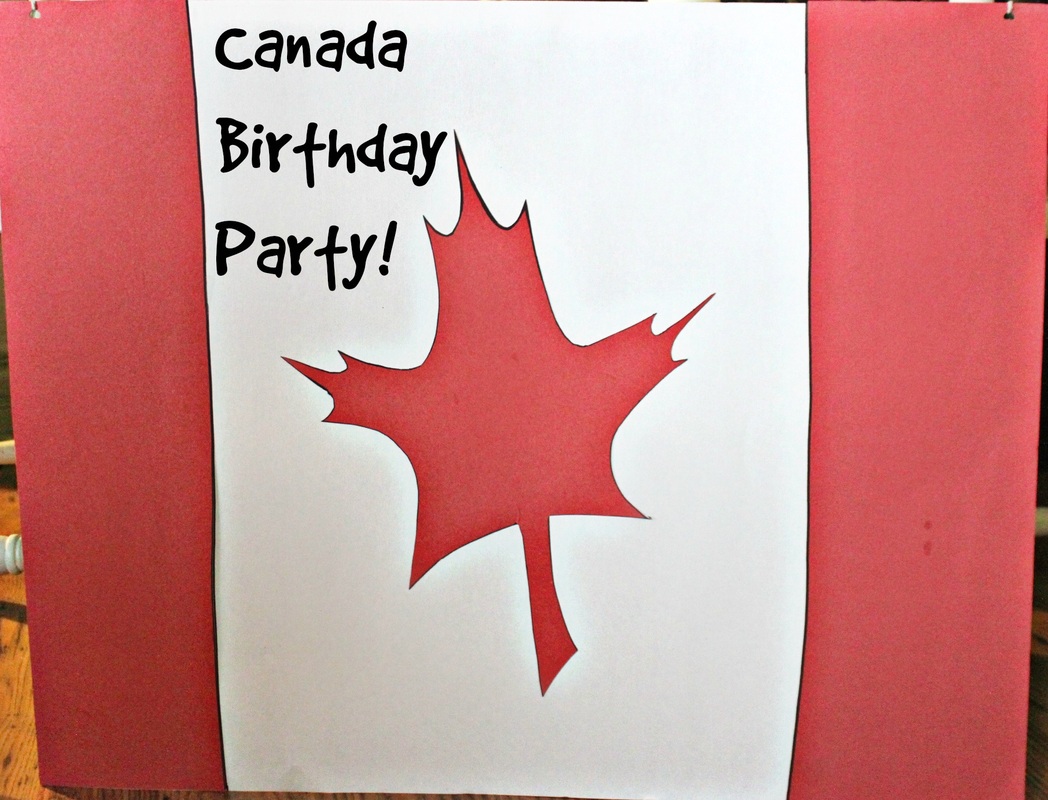
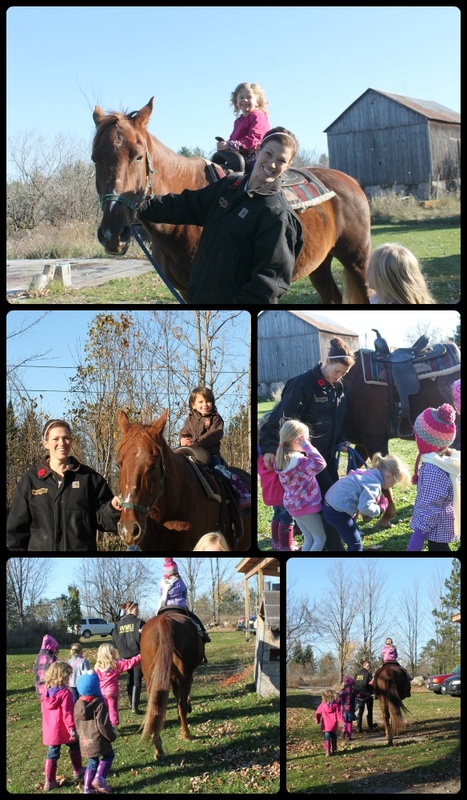
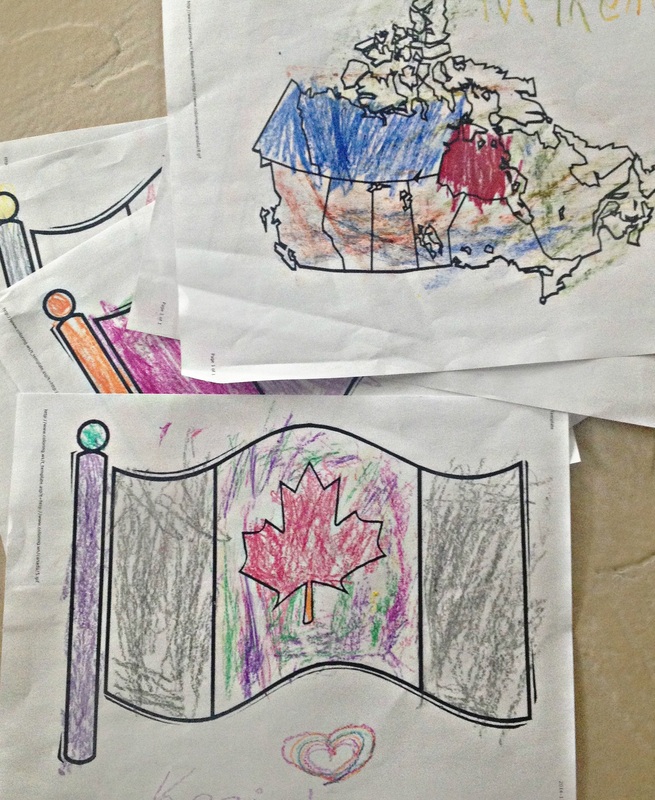
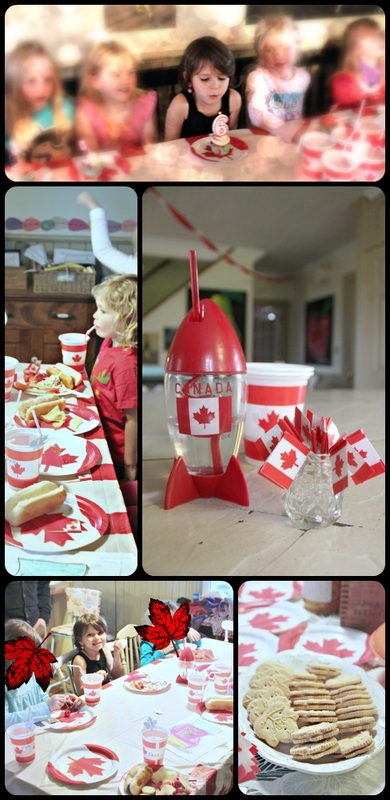
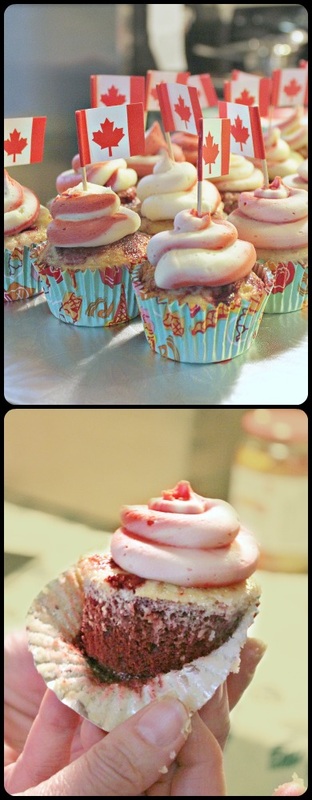
     I am so excited about these s'mores, and I think I want to try the birthday one first! TO find out how to make all of theses, hop on over to Sharis Berries and the original post about these 9 amazing and unique s'more ideas! 

     Today is Canada Day here in (obviously!) Canada! We've got the usual fun things to do in our wonderful little town of Tweed: a parade, face painting, boat tours, kids crafts, fireman water activities, live entertainers, hot dogs and cupcakes! Then, this evening we're heading to a Canada Day BBQ, where we'll be saying goodbye to some military friends who are moving to Seattle. Thumbs down to people leaving.

     Anyway, I hope if you live in Canada you have a wonderful Canada Day! If you live outside of Canada, have a wonderful Friday! Either way, any day is a good day to try out a new s'more (in my opinion, at least!). 

    On Tuesday I'm going to share with you how we do s'mores around here so that it isn't a complete and utter disaster! 

     Have a great weekend! 
  

​
0 Comments

Two-Bite Brownie S'Mores

2/5/2016

1 Comment


    S'mores in February? Is that even a question?!? If you love s'more the way I love s'mores, then any occasion is a s'more occasion! : )  Needing a campfire for a s'more is for amateurs....haha, I take s'moring (the art of making s'mores) very seriously!! I made up that verb "s'moring", but I like it! 

   Wow, anywhoooo......with Valentine's Day approaching, people start thinking about special treats they can make for special people in their lives. I'm not just talking about people in a romantic relationship, either. I'm talking about people who want to show love to anyone they love (or appreciate)!  I'm talking about neighbours, co-workers, parents, children, friends--anyone you think could use a sweet little treat to say "you are valued, and I love (or appreciate) you!". 

   Years ago, when we lived in Bancroft, we were invited to a New Years Eve party by a good friend who, at the time, ran a catering business with a friend of hers.

   That night, they made the most ridiculously yummy and simple dessert--they took store-bought two-bite brownies, smooshed half of a large marshmallow on top of each, stuck 'em under the broiler for a quick melt and roasted top, then drizzled dulce de leche over them.

    I mean, c'mon! Doesn't that sound amazing! I couldn't get over how yummy they tasted, and how simple they were to whip up!

   I've been making variations of this dessert now for years, always starting with a store-bought two-bite brownie, and a half marshmallow, then drizzling with melted peanut butter, cookie butter, Nutella,  butterscotch, or a dollop of raspberry jam

   It's easy to make this gluten-free too, as you can now find gluten-free two-bite brownies and graham crackers in most grocery stores.   

   The version I am sharing with you today is a favourite version though. A lovely two-bite brownie, topped with a perfectly roasted mallow, then a piece of graham cracker shoved into it?!? Oh yeah..... 
   
Picture
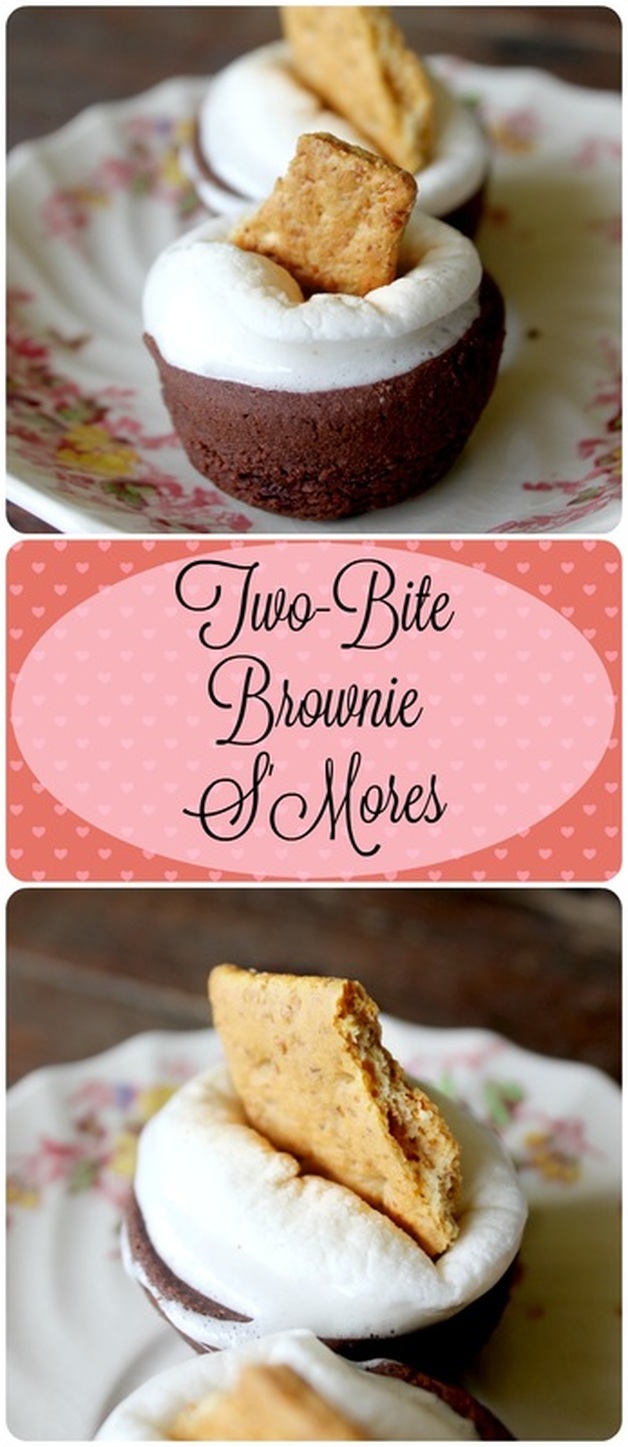
Two-Bite Brownie S'mores

Ingredients:
  • Store-bought two-bite brownies, (regular or gluten-free). As many as needed
  • Large marshmallows, cut in half, equaling the number of brownies you plan to make
  • Graham crackers (regular or gluten-free **See comment below**), broken into long pieces, enough to top each brownie

Method:
  1. Turn oven onto broil, and place an oven rack about 3/4 of the way up in the oven (not the highest level, but not in the middle either)
  2. Place desired amount of brownies onto a baking sheet.
  3. Squish/press half a marshmallow onto the top of each brownie (without totally crushing the brownie, obviously!)
  4. Place under broiler for about 1 minute (keep your eye on them!) until they are the desired golden-ness (I don't think that's a word...maybe it is?)
  5. Pull the brownies out of the oven once the tops of the mallows are perfectly golden, and shove a piece of graham cracker down into each brownie
  6. Let cool slightly before serving, or let cool completely and store in an airtight container for a day or two--but no longer than that as the mallows can get hard, and the graham crackers can get soft/stale. Bleh, thumbs down! 
​
Picture

    
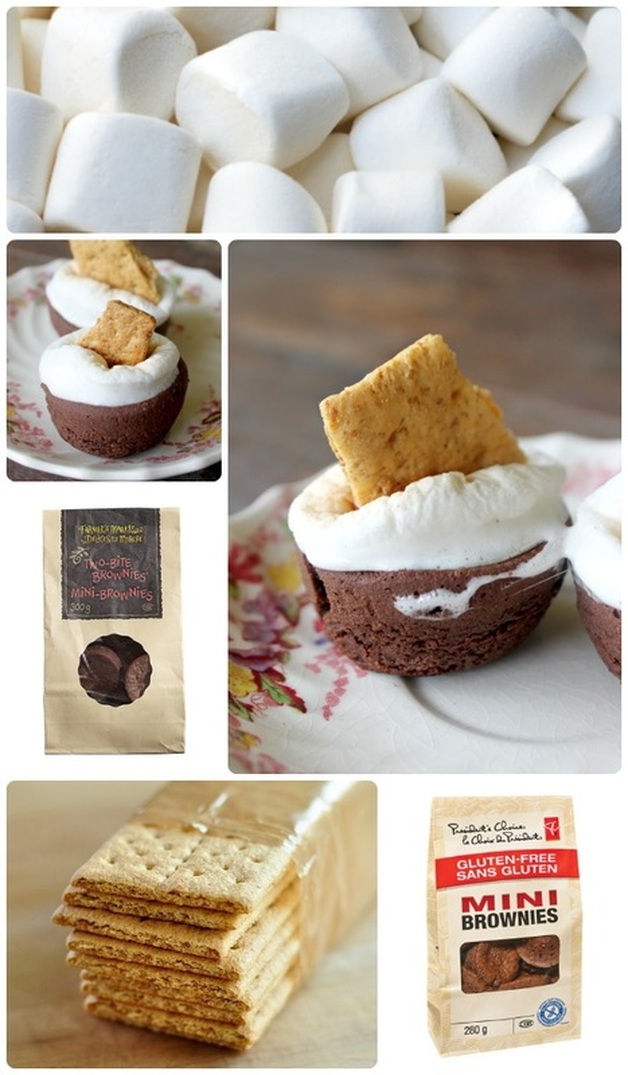
     These little treats are the ultimate in lazy-lady desserts!!! Right?!? Bonus (for me) is that I most often get the bag of two-bite brownies for 50% off! Don't know why, but there always seems to be a few bags marked down, so I like to grab one, and put it into a zippered plastic bag and toss it into the freezer until I want to use them. If you do this, just be sure to pull them out of the freezer and let them thaw before you start.

   **Side note.....because I think gluten-free graham crackers taste like cardboard dipped in sawdust (ok, not exactly, but they are basically the nastiest gluten-free food item ever! P.S., the brand I tried was Kinnikinnick. I'm not trying to bash them, but I want to spare anyone the grief of wasting their money on those graham crackers), I will sometimes cut a gluten-free cookie in half (my sons' favourite are the chocolate vanilla cream kind from Glutino), and I'll shove that into the brownie and mallow. Still really yummy and pretty, but of course that wouldn't make it a s'more anymore though! But hey, if you have found a brand of gluten-free graham crackers that don't taste awful, go with those! And if you want to share your finding with me, please do! Pretty, pretty please!   

​    
     So......I've been trying to wake up early again, like I used to in the "old days" : )  These "old days" are really just a year ago or so, but I sure had gotten used to sleeping until I needed to get my kids up for school around 7:45....then my husband pointed something out to me. He said I always seemed a little less frustrated with my day when I woke up early and got my blog post published. What happens when I wake up with my kids is that I sit down to publish my post after they get on the bus at 9am, and if my post isn't totally ready, I could be sitting at the computer until 10:00....10:30......11:00.......it can take hours and hours to get one single post ready!!! By the time I'd send my thoughts and recipes into the world wide web, I'd feel like my day was half gone--which it basically was!!! So, with time stolen from my day, I felt like everything else I was doing should have already been done, and I was behind in my list of to-do's. So, by evening, I would feel defeated, like I hadn't gotten as much done with my day as I wanted, like I had un-finished business with my day. Bleh. All because I was lazy and wanted to sleep in (.......I love sleep.....).

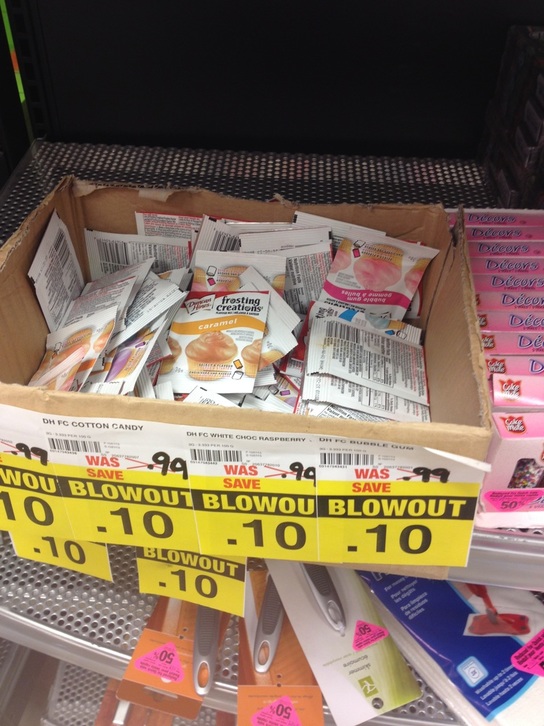
   So, I've started doing something different. I realized that I used to get up early without a problem because I was bursting with ideas for blog posts! I used to publish a post every day! Geepers! I still have ideas, but that purpose that got me out of bed in the morning had faded a smidge....and I needs me a reason to get out of bed early! So, I stopped making my husbands lunch at night, and decided to leave it to the morning. To clarify for any feminists who are having a conniption, I enjoy packing my husbands lunch! I am the meal planner, the budget maker, the "make sure you eat your vegetables!" person in our house....I may also have a slight control issue, and all those things combined mean I want to (need to!) know what's going into my husbands lunch! 

   Saving this job until the morning (and me wanting/needing to do it) means I need to wake up early....like, 5:30 early. 

   This gives me time to make my love some lunch, (and some coffee!) before he heads out the door at 6am, and then I get 2 full hours to work away at my little passion of writing and blogging in my little (tiny!) corner of the internet! 

   This also gives me time to have at least 2 cups of coffee before my kids get up which really seems to make them more lovely somehow.....  :)  

   This morning though, I got a better reward....I let our dog out for a wee, and stopped to look into the sky. At 6am at this time of year, the stars and the moon are still out. And I couldn't believe how brilliant and beautiful the sky was!!! I felt overwhelmed by how amazing it looked, and thought, "if I were still asleep, I would have missed this!". I felt so blessed, somehow.

    I live out in the sticks with no lights from any city to cloud the view of the moon and stars. I felt empowered that I had started my day before my town had even started it's day with the sun. I beat the sun to this day! That's an accomplishment!!! 

   
   So, maybe you're really not into getting up early......that's ok! The point of my story wasn't to tell you that you should wake up early because I do! The point was really this....what is it that makes you put your head down on your pillow at night and think, "this day was good"? My (wonderful) husband saw that I was more miserable than I should be. He saw that I was getting a lot done in a day, but somehow still feeling crappy about my day when I went to bed in the evening. I hope you have a spouse, or mate, or best friend or sibling or somebody who knows you who can say, "Are you feeling you best? Maybe you should (fill-in-the-blank)? Or, I hope you can step back from yourself and say, "what used to make me feel like I'd accomplished something?".

     I don't know what that might be for you, but I encourage you to find that thing (uh....within reason....don't do anything illegal or that damages the people around you!). Life isn't about making yourself happy (eeek! I know, I know! How contrary to what we're always being told!!!), life is about purpose. But, get this, well placed purpose will leave you feeling happy. What a trick, eh! I was trying to make myself happy by sleeping in....which left me feeling miserable! But having purpose & waking up, packing a lunch, and sitting down to write before the sun has even thought about coming up? That makes me happy!

    Well, I've shared/rambled now for too long....and it's probable no one will even read this far....but that's ok! : )  I write for you out there, but I also write for me. This is an online diary of sorts. You get recipes, DIY ideas, parenting tips, or whatever, but you also get my inner thoughts, what my heart lets out when it's going to burst. 

    If you have read this far, thank-you!

    I honestly appreciate everyone who stops by Bushel & A Peck. I don't know many of you at all, but I like to think we are connected by way of this site. So, if you want to, leave a comment. Let me know you stopped by!  Share with me what gives you purpose!

   Oh, and don't forget to share with me a brand of g.f. graham crackers that aren't terrible too! :)   

    
​xoxo 

  ​
1 Comment

Cotton Candy Meringue Cookies

1/15/2016

2 Comments


    Hello hello!!!

    Today I've got a lovely and simple recipe for you! I first made it for my middle daughter's birthday, because her theme was "teal" (yes, just the colour teal!), and I wanted to have something besides just the cake for her and her friends. I was also aware of the fact that the cake I had made was not gluten-free, and therefore my Caleb couldn't have any. Mind you. he's 11 years old and "technically" wouldn't have been invited to the party if it weren't for the fact that he is the birthday girls' brother! But, he's 11 with autism, so, that does change things. And besides, I want to let him have a special treat at a birthday too!  

    So, as per what often happens to me, I thought I had a brilliant idea.....only to Google it and realize someone else had already done it! I think that still counts as my idea though because I thought it up not knowing it had already been done! : )   
'
   Ok, well, at one of the grocery stores I go to, they had Duncan Hines flavour packs on clearance for $0.10! Woot woot! I love when things are on clearance! I grabbed a bunch, not having an exact plan for them, but knowing I would be using them (they are great to add to homemade buttercream icing, btw!)

   Anywhoooo, these tasty little bites of sweetness are delightful, pretty simple to make, and BONUS, last for quite a while in an airtight container! After my initial batch for the birthday I made a double batch (using the less pretty colour, but delicious flavour of caramel), and crushed some to put with buttercream into the middle layer of a chocolate cake I had made. Yummm-o x 10000! Anyway, I had too many and just had the extras in an airtight container for, oh, I dunno, a month, with the kids and I just having one here and there. They tasted just as nice at the end as they did in the beginning, so, that's just a little FYI. 

​   So, let's get on with it, shall we!?! 

Picture
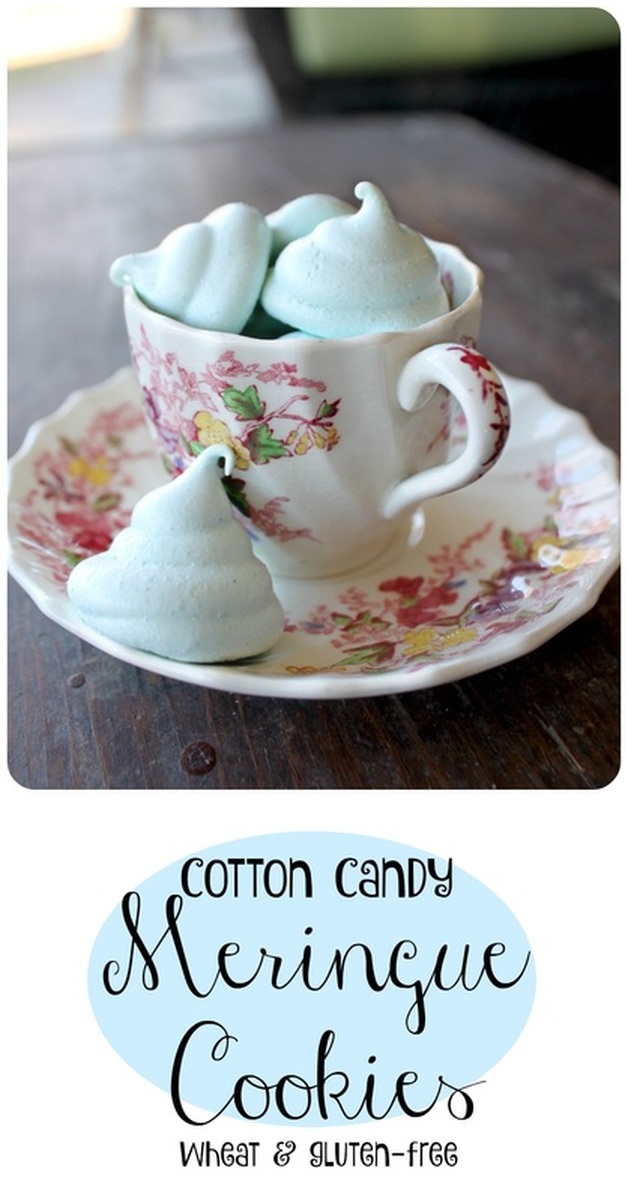
Meringue Cookies
From Duncan Hines


Ingredients:
  • 1 packet Duncan Hines Cotton Candy Flavour Mix
  • 4 egg whites (it's best to separate eggs while they are cold, then let the whites come to room temperature before beginning making the cookies)
  • 1/4 Tsp salt
  • 1/4 Tsp cream of tarter
  • 1 1/3 Cup white sugar


Method:
  1. Set oven to lowest possible temperature, between 170-200
  2. Line large baking sheet with parchment paper and set aside
  3. Using an electric mixer (if you have a stand mixer, use that, if not, you'll just have a slightly tired arm like me!), beat egg whites at medium speed until white and foamy
  4. Add in cream of tarter and salt while continuing to beat
  5. Continue beating on medium until soft peaks form
  6. Here comes a bit of a slow part...set timer for 7 minutes. Change mixer speed to high, and slowly sprinkle in sugar taking almost the whole 7 minutes to do so (this is important as it helps give the sugar time to work into the egg whites and dissolve)
  7. Once mixture forms hard peaks slowly add in Duncan Hines Cotton Candy Flavour Mix (or whatever flavour you've chosen!), and beat for another 1-2 minutes
  8. Fit a piping bag fitting with a large, round tip (a 2A, I believe is the size I used), or another tip that has a large opening
  9. Fill the piping bag with your meringue and pipe meringue into little cotton candy-ish swirls, no taller then 1 inch
  10. Bake in middle of oven for 1 1/2 hours until they are dry
  11. Let cool before gently removing them from the baking sheet
  12. Enjoy! :) 

​
Picture

   I loooves me some good clearance!
​
Picture

​
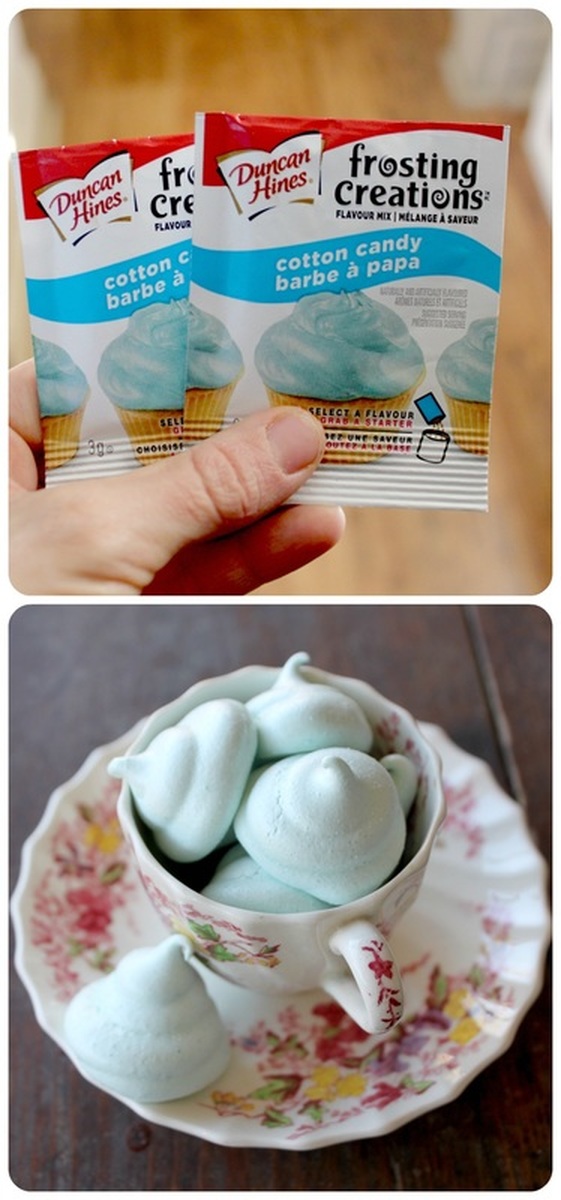
    So, what do you think? Cute, right?! And although this recipe involves beating egg whites, slowly adding sugar, piping and a long bake time, everything is simple, right? Does that make sense? Maybe it's not simple and I'm delusional? Please do let me know if I am delusional and you think this recipe is the worst! Be nice about it though. : ) 

   Wanna see Abby's enormous teal cake I made for this birthday? 
​
Picture

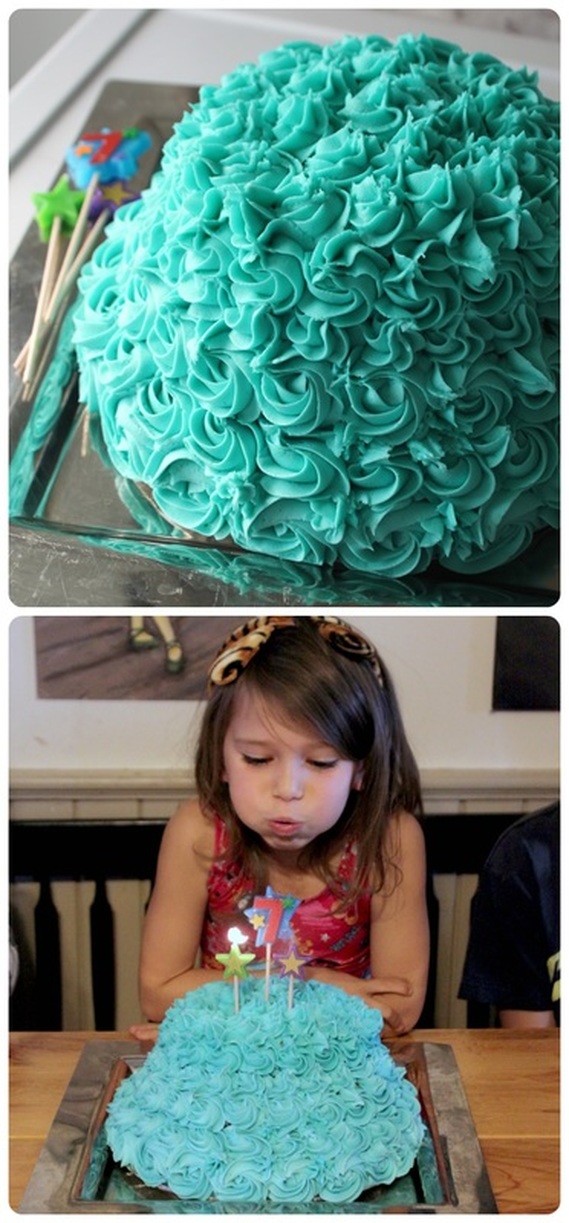
    It was a triple layer cake with a simple (though moderately time consuming) swirly/flowery buttercream frosting. Abby said it looked like a hat......and I was inclined to agree.  : )   It was clearly not a thing worth sharing about in a post (poor hat cake), well, unless I was sharing about not-so-great piping skills! Seriously, I'm not that great at piping. But it was delicious, and that's important! 


   Well, today we have another birthday party, only for our youngest! She couldn't decide on a theme (she literally changed her mind everyday!!!), so we finally landed on cupcakes as a theme! The common thread in all her birthday ideas was decorating food (it made sense since coming off Christmas where they were decorating gingerbread houses & gingerbread people, and gingerbread trees, yadda yadda). So, her friends are decorating their own cupcakes! I'll make one special one for her to have a candle on to blow out, but other than that, I haven't anything else to fuss over! I love making and decorating cakes, but I am also more than happy to not to! : )  So, I've got decorations to put up while the kids are at school, veggie tray to put together, cupcakes to pull out of the freezer, buttercream to make, and a ridiculous amount of candy to have ready for cupcake decorating! Seriously, I bought waaaay too much candy! Wait, is "way too much candy" even a real thing? Silly me.

    Happy weekend to all!


2 Comments

Peaches & Cream Honey Cake

10/30/2015

4 Comments


   Hello there! How are we today? 
  
   I've been struggling the last few weeks with the blog....I feel "niche-less", or too "niched". I write here for myself, it's true, but I want to reach people and become part of something in peoples' lives. But, when you've got a blog like mine, unless you are me, you won't come back because I post about super healthy recipes, super-unhealthy recipes, simple recipes, difficult recipes, writing about family & autism, DIY projects, health & fitness, not to mention the rest of my site which is dedicated to my art!!!! Good golly!!!

   To top it off, one particular recipe on here has been going viral, which is very exciting, but it leaves me feeling like nothing else I've done matters here...?

   Seriously, this month, only 20 pages were viewed on the site, which isn't bad, except I have hundreds and hundreds of pages! Let's take a look at the seedy underbelly of Bushel & A Peck, shall we? The top 3 numbers look like this:

~24, 609 views on the Meat & Potato Casserole  
~2, 414 just opening to my blog 
​~1, 270 on my Double Chocolate Avocado Cookies

     There's a difference of more than 23,000 views between one recipe and the next! Geepers!

   Anyway, I'm not complaining exactly.....I'm thinking out loud....thinking out type? I dunno what we should call this. 

   A few days ago I came to a realization though....I cannot fit myself or my thoughts into one niche on this blog! It's me, this is who I am! 

   Bushel & A Peck, to me, is like a flea market! You can never be quite sure what you'll get, but it's always worth coming to check, just in case! Dig around, see what you can find, see what you love, share about it, talk about it, make it, create it, fill your own bushel!!!

   I want to always share what I love, what I'm passionate about, and not get bogged down in the "but I need a niche" talk that circulates around the blogosphere! My "niche" is me!

   I think I've talked myself into a better mood!....I also turned on the sound track for The Music Man, so, I mean, that cheers me up too! : )   Also singing karaoke to show tunes (on YouTube) makes me feel better, so I'll be doing that once I'm done here!

   Thanks for listening to me rant.....shall we move on then? Great!       

Picture
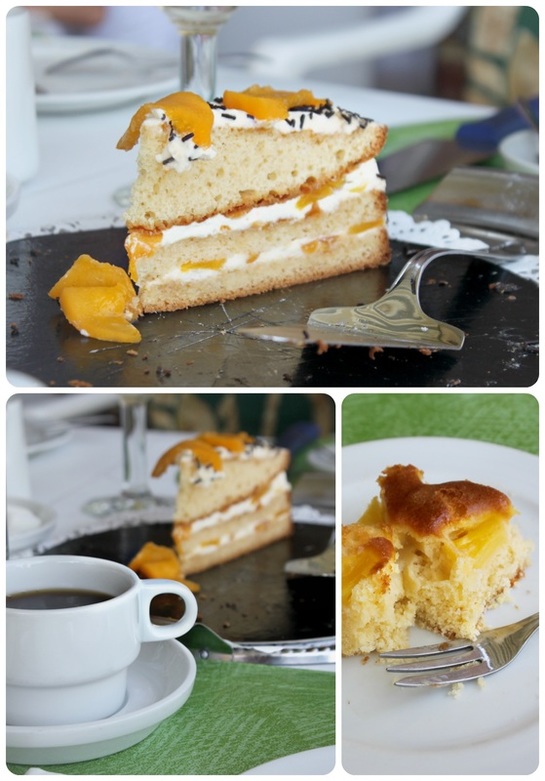
The beautiful treats we were served visiting family in Belgium

    
​   In the summer when my husband, father-in-law, mother-in-law & Grandpa went to Europe, our first stop was at Grandpas cousins house in Haaltert, Belgium. I already shared part of what they served for dinner (shrimp stuffed tomatoes! Super simple, and really tasty!), but before dinner (yes before!), they served us coffee, beer, wine and cakes. I did say cakes on purpose, they served us 2 different kinds! 

   One was a beautiful pineapple topped vanilla cake, and the other was a fabulous layered peaches & cream cake. Oh, with chocolate sprinkles added! : )

   I decided I wanted to make my own peaches & cream cake when I got home, but wanted to make it paleo. I also thought it would be so tasty to incorporate a fantastic Dutch dessert, honey cake, or honingkoek, into this dessert. I like peach cobblers and crisps with nice spices, so I was sure having a spiced honey cake with the peaches and cream would be a winner!  T'was, t'was indeed! 
​
Picture
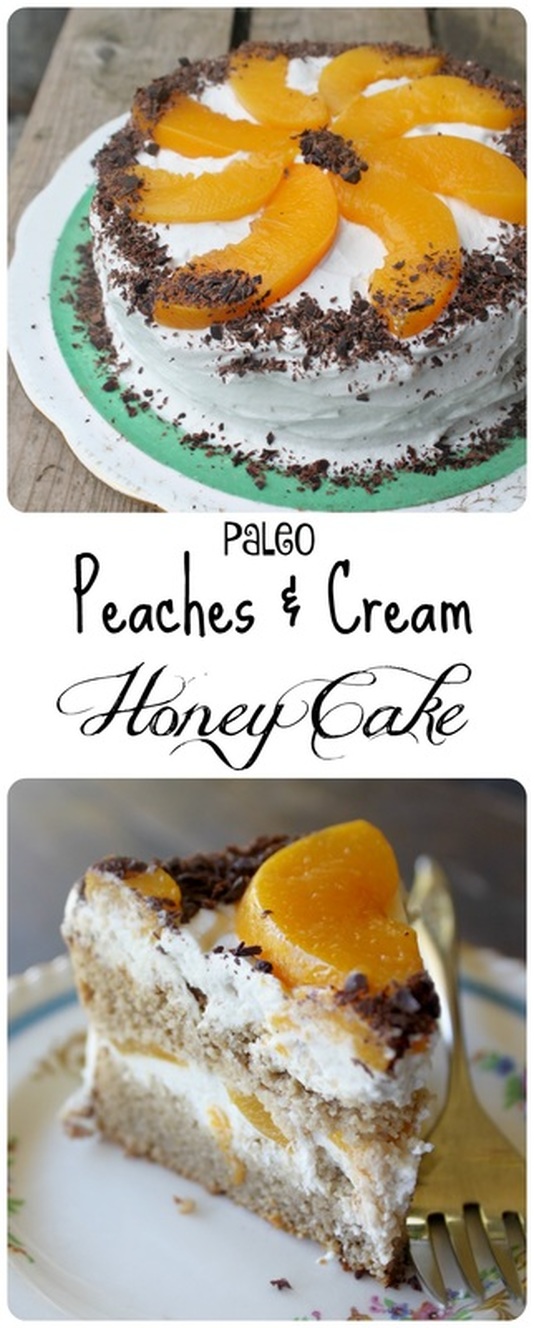
Peaches & Cream Honey Cake
Adapted from The Dutch Table & Plated With Style


Ingredients:
  • 1/2 Cups almond flour/meal
  • 1/2 Cup arrowroot flour
  • 1 Tsp Baking soda
  • 1 Tbsp cinnamon
  • 1 Tbsp All Spice, or 1 Tsp ground cloves & nutmeg
  • Pinch o' ginger
  • Pinch o' salt
  • 4 Eggs, separated
  • 1 Tsp cream of tartar
  • 1/4 Cup honey
  • 1/4 Cup coconut sugar
  • 1/2 Cup coconut or almond milk
  • 1/2 Cup coconut oil or ghee
  • 2 Tsp vanilla
  • Coconut whipped cream (from Oh She Glows). I add 1-2 Tsp tapioca or arrowroot while whipping it to ensure it stays stable for the cake 
 You can also use store bought coconut whipped cream, (check that there isn't anything funky in the ingredients) or regular cow's milk whipped cream if you can tolerate dairy
  • Peaces, fresh or canned (sugar free). About 1 can or 2-3 peaches, sliced 
  • Shaved dark chocolate (2-3 tbsp), about 1/4 ounce


Method:
  1. Preheat oven to 350F. Line the bottom of 2- 6 inch round pans with parchment and grease slightly. You can also cut the recipe in half and only make one round pan and cut the cake in half to create a layer
  2. Sift or mix the almond flour and arrowroot flour, baking soda, spices and salt in a large bowl, set aside
  3. Take your egg whites and cream of tartar and beat with a hand or stand mixer (or a lot of arm power!) until stiff peaks form (meringue-ish), and set into the fridge to wait until you need it
  4. In a medium sized sauce pan, warm your honey, coconut sugar, milk and oil (or ghee) and stir together until it's all melted and combined
  5. Once this sweet mixture is ready, remove it from the heat and  add in the vanilla and egg yolks and whisk until very well combined
  6. Add the wet ingredients to the dry, and mix well
  7. Now take your whipped egg white from the fridge and gently fold into the cake batter
  8. Pour the batter into prepared pans, and bake for 20-30 minutes (check at 20 minutes, then every 5 minutes after up to 30 minutes total) until a tooth pick inserted in the centre comes out clean
  9. Once cooked, set on cooling rack for 15-20 minutes until it's set and almost cooled
  10. To assemble, put some whipped cream onto one cake, add some sliced peaces and a little more cream, and top with the second cake
  11. Cover cake completely with whipped cream, and top with peaces, and shaved chocolate
Picture
Picture

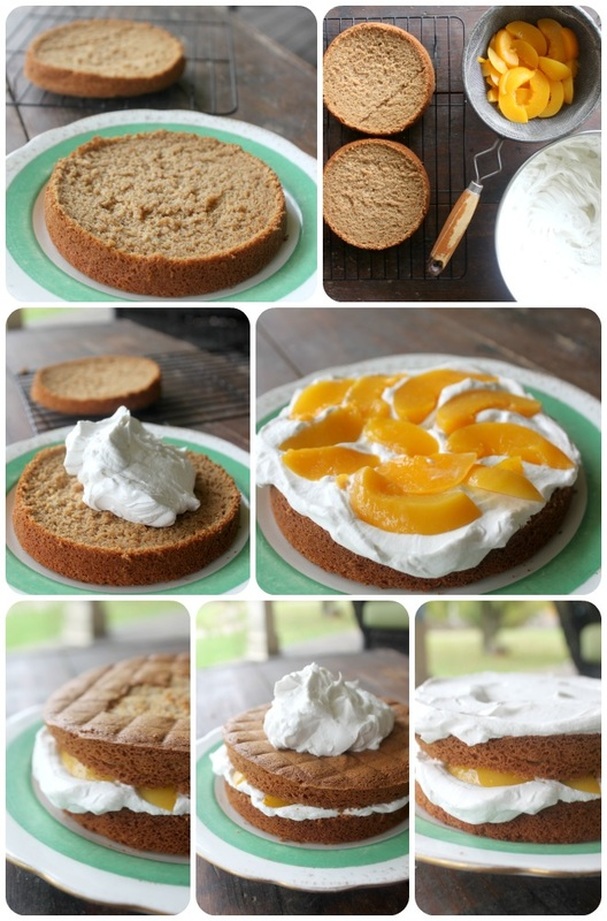
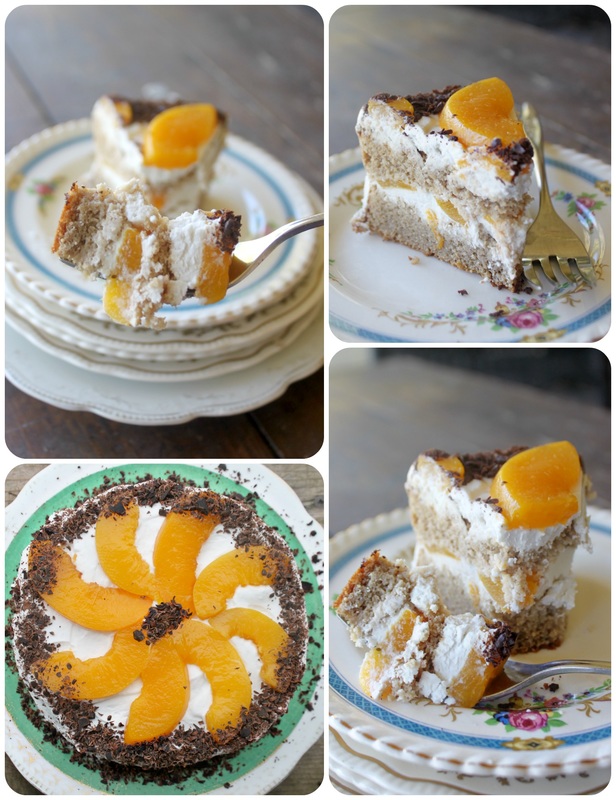
    If you've ever had a regular dutch honey cake, you'll know that it is heavy & dense, but still soft all at once, and this paleo version was too! You could distinctly taste the honey and spice, and the peaches and cream really brought a cool sweetness to the whole dessert. If store at room temperature the cake stays nicer, but if your whipped cream isn't super stable you'll need to refrigerate it. It still tastes great, but the cake seems more dense once it's bee in the fridge. Best plan? Just make it to share and have it eaten sooner than later! : ) 

   And that, my friends, is all I've got for you today! 

    We'll be out tomorrow night dressed up and collecting tummy aches (candy!!!) for Halloween, and our sweet middle child has her 7th birthday party on Sunday which will be fun (as long as it's not raining and the kids can play outside!!!) : )  Fingers crossed!

    Please leave a comment if you want to say "hi" or anything! Don't be afraid, I love comments! 

​xoxo
4 Comments

Buffalo Chicken Crock Pot Dip

10/23/2015

2 Comments

 
   Ya know what makes a great party? No, it's not the friends, or the conversation.
   It's the dip.

   Ok, I am kidding, but for realz, a great dip makes an awesome party awesomer! : )  Awesomer may not be a real word, but it is in my house with a 5 & 6 year old, and it describes this dip!

   First up....I took crappy photos of said dip. Thumbs down. I was (happily) busy getting ready for my birthday party, and only stopped briefly to take a few pictures. The starting point for this recipe can be found here, at mom4real and her photo of the dip gives it a little more justice. 

    "Buffalo Chicken" refers to hot wings, btw. When I was young, I really and truly believed that these "buffalo wings" that I heard grown-ups talking about were some sort of genetic mutation specialty food....buffalo with wings? Yikes! Well, let me put your mind at rest, according to the internet (where all pieces of information are true-haha), Buffalo wings got their name from their originated location, Buffalo, New York. I read this enlightening piece of information here, on todayifoundout.com. I know I went, "ohhhh, Buffalo, New York!" when I found out. I knew as an adult the wings weren't part of a buffalo, but my brain blanked beyond that and never thought of the New York city! Duh. 

   Typically, Buffalo wings are served with blue cheese dressing, and other Buffalo chicken dip recipes use blue cheese, but I can't. I loooves me some cheese, but blue cheese? Nope. Can't do it. Anyway, ranch is equally as popular now for chicken wing eaters, and well, there's no rules when it comes to wing eating or dip making!   

   Anywho, the real surprise twist here is what we did with the leftovers....oh good golly, it was gooooooood. 

​   But first, the dip!
Picture
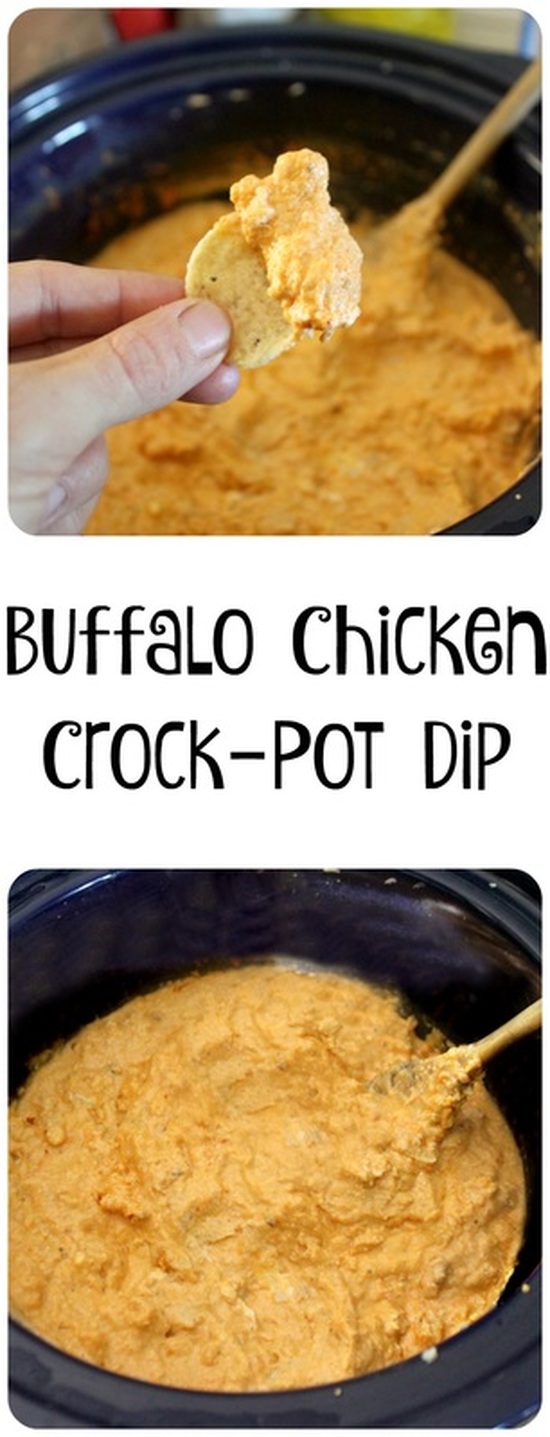
Buffalo Chicken Crock Pot Dip
Adapted from mom4real


Ingredients:

  • 1 Cup Frank's Red Hot Sauce 
  • 1 Package of (dry) ranch dip mix (I found this hiding on the highest shelf in the bottled salad dressing isle, fyi!) : )  
  • 4- 170g cans of Chunk White Chicken (this about 2-12.5 ounce cans for my American friends). You could also use cut-up rotisserie chicken 
  • 2- 8 oz bars of room temperature cream cheese, cut into 1 inch pieces
  • 1½ cups of shredded cheddar cheese (an older, or sharper cheese is great, but any cheese will do!)
  • A slow cooker (I used  3 quart)
  • Corn chips, crackers, veggie sticks, whatever you want to have to dip into this! 

Method: 
  1. Pour the hot sauce into the slow cooker, then empty the contents of the ranch dip mix into the hot sauce and stir to combine
  2. Now empty the cans of chicken into the pot and stir to combine
  3. Place the cream cheese and shredded cheese into the pot, and stir until everything is covered in hot sauce
  4. Place the lid on the crock pot, turn to low and allow the mixture to melt and come together, depending on how hot your crock pot runs (they really are all different!), this melting can take 2-4 hours. Mine is sufficiently melty in about 2 hours
  5. Serve with whatever your heart desires! I think corn chips are the bees knees, but some people prefer bread (cut up baguette, for instance), pita chips, crackers or veggie sticks


    Well now, you can see the pic below ruining the surprise of what we did with the leftovers! We made it into the most fantastic grilled cheese sandwich ever!!! I guess if you're not a grilled cheese lover this won't be that appealing to you, but let me tell you, this treat day dinner was right up my alley!  

   We buttered some fresh bread, then prepared the sandwich by loading it with leftover dip, an extra splash of Frank's Hot Sauce, a drizzle of ranch dressing, and a little extra grated cheese. 

   This sandwich could be replicated without making the dip too. Simple empty the contents of a can of chunk chicken into a bowl. Mix in some Frank's, ranch dressing, and a little cream cheese (if you have any). Mix up well! Then, butter 2 pieces of bread and put some shredded cheese on the non-buttered side of one piece, top with some of the filling, add a little more cheese, then finish with the second piece of bread (butter side up. Then grill to melty perfection! 
Picture

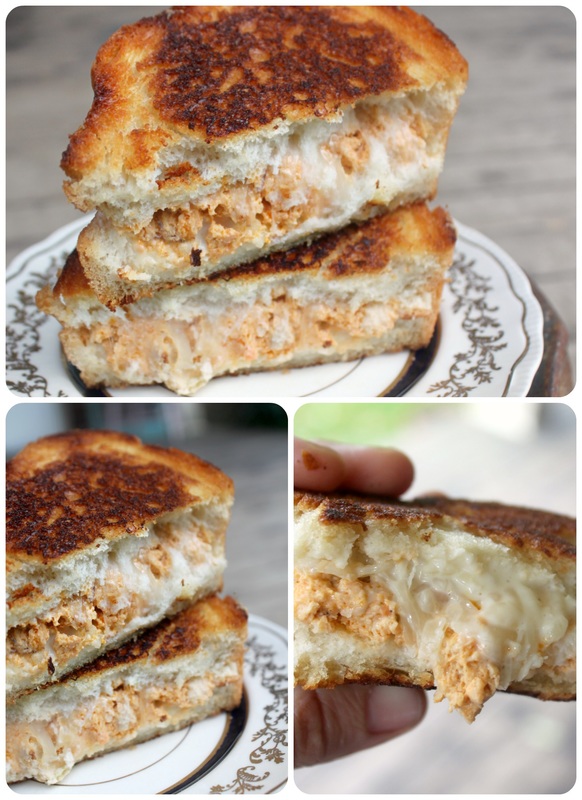
    Let's talk about my Jekyll & Hyde thing I've got going here, shall we? 

   On Monday I started my new Health & Fitness page. So....where does cheese laden dip and buttered smothered grilled cheese fit into this? 

   I eat Paleo....80%-90% of the time. Paleo is a whole foods lifestyle with lots of fresh veggies and fruits, meat, nuts and seeds, and avoiding things like grains, (refined) sugar, and dairy. But I am (at heart) a food lover. A lover of ALL food!

   So, 5-6 days a week I eat strictly Paleo, but the 1-2 days a week I don't eat Paleo, my "treat day(s)", I don't worry about what I eat! Sounds crazy? Maybe. But it works for me, it keeps me on track, really. If I looked into the endless future, knowing I would never again enjoy a grilled cheese, a or a bowlful of Maynard's gummy candies.....I would be so sad. So very, very sad.

   I love healthy food, and I love how I feel when I create something delicious with it, and how I feel knowing my body is being well fuelled. But, taking a break mentally from good eating re-charges me to keep eating healthy! 

   So, to ya'll going, "whaaaaat?" to the seemingly random recipes I post, this is the "why" to your "what". : ) 

   Happy Friday everyone! Please leave a comment if you stop by here, or share this recipe with someone you know would love it, or make it for your next party so that you'll be the most awesome person ever! Awesomer.


​xoxo       
2 Comments

Gluten-Free Chocolate Cake

8/21/2015

4 Comments

 
   Hello, hello, hello! It's Friday! Ok, well, in the summertime, Friday means little, unfortunately. Especially when my husband is on a weekend of night shifts. :(   Still, for the sake of those who feel elation by their Fridays, then happy Friday to you! 
   Today I am going to share with you the recipe for the chocolate cake I used for Caleb's birthday, as well as show you how I made his cake.
   When making gluten-free recipes, usually using a regular recipe and adapting it doesn't always work out. In fact, it's often a complete flop! But here's the thing: If you have a great gluten free flour blend, then add a little extra "glue" (like xanthan gum, guar gum-if your blend doesn't already have it), you can tweak at it, and make it into something delicious! 
   That is the case with this cake. The original recipe is from the back of a Hershey's Cocoa Can. It's really an old recipe, but it seemed tried and true. 
   With a few personal tweaks like using sour milk instead of regular, and coffee instead of water, then of course, using gluten-free flour, this cake turned out moist, super tasty, and  
was really easy to make!
Picture
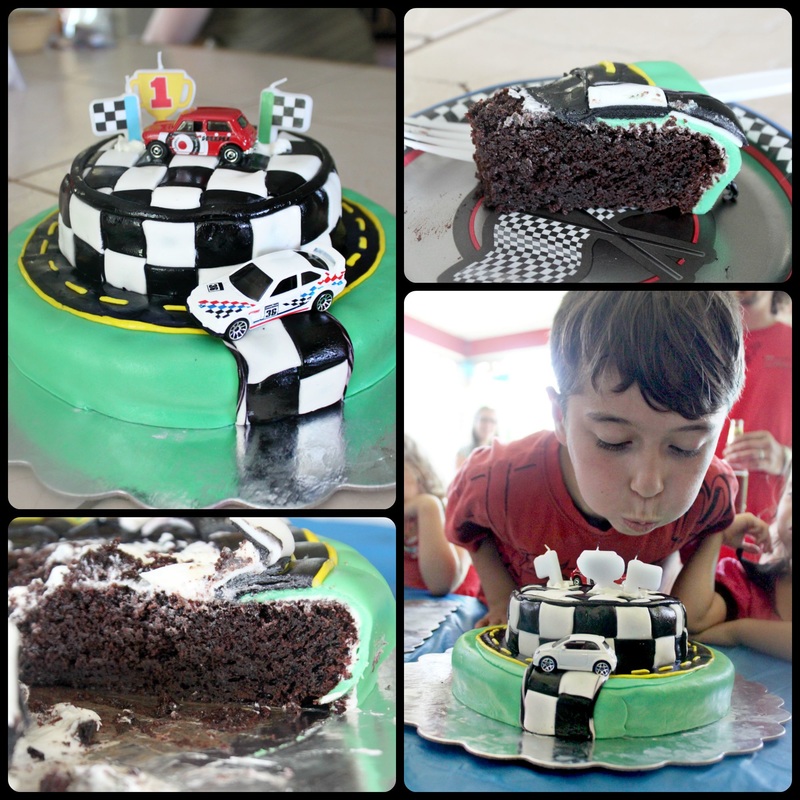
Gluten-Free Chocolate Cake
*As with many baking recipes, this turns out better if the milk & eggs have come to room temperature *

I'm sorry I don't (can't) offer a "PRINT" button, but you can click on and download the document if you'd like!  :) 
gluten-free_chocolate_cake.docx
File Size: 92 kb
File Type: docx
Download File


Ingredients:
  • 1  1/2 Cups white sugar
  • 1/2 Cup brown sugar
  • 1  3/4 Cups gluten-free flour blend
  • 1 Tsp xanthan or guar gum (omit of your blend has it)
  • 3/4 Cup cocoa powder 
  • 1 Tsp baking powder
  • 1 Tsp baking soda
  • 1 Tsp sea salt
  • 3 Eggs
  • 1 cup sour milk (place 2 tbsp of lemon juice into your measuring cup, then fill with milk to 1 cup. Let sit until curdled, about 5 minutes)
  • 1/2 cup oil (light tasting olive oil, avocado oil, or melted butter or coconut oil)
  • 2 teaspoons pure vanilla extract
  • 1 cup hot (decaffeinated) coffee


Method:
  1. Preheat the oven to 350 degrees
  2. Grease two 8-inch cake pans with cooking spray, and dust with cocoa powder. Set aside (for this cake I used a 6 inch pan, and a 9 inch pan)
  3. Combine the sugars, flour, xanthan or guar (if using), cocoa, baking powder, baking soda, and salt in a large mixing bowl. Whisk to combine
  4. In another bowl, whisk the eggs, sour milk, oil and vanilla, then add this to the dry ingredients, blending well
  5. Now carefully whisk in the hot coffee (this will make the batter runny, that's ok!)
  6. Evenly distribute the cake batter between the two prepared pans and bake for 30-35 minutes, or until a toothpick inserted in the middle of the cake comes out clean
  7. Let the cakes cool in the pans for 5 or more minutes, then turn out onto a rack to finish cooling completely. The best way to turn out a cake for cooling is to place the cooling rack on top of the cake pan, then gently flip the pan and cooling rack over so that the rack is now on the bottom, and the cake pan on top, upside down. Gently tap the cake pan to loosen the cake if it hasn't already come out 


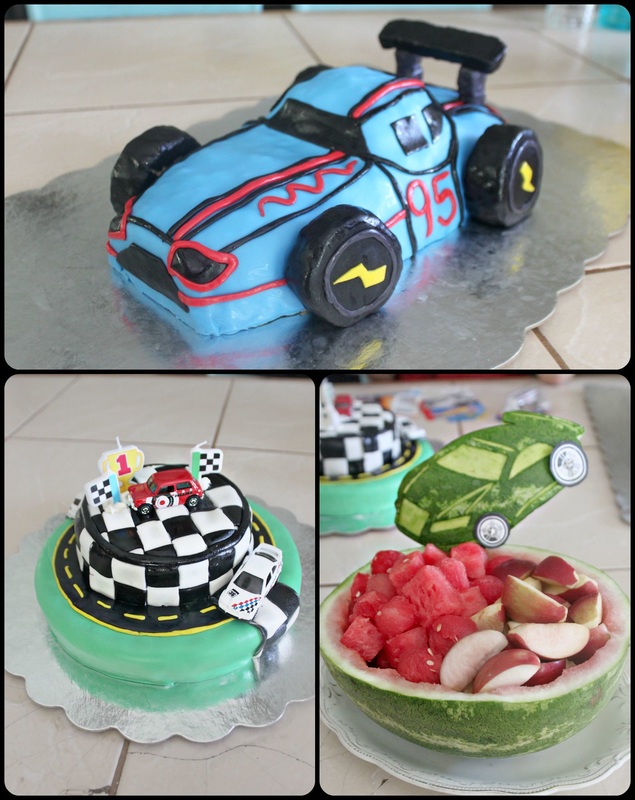
Making a Checkered Cake
Picture
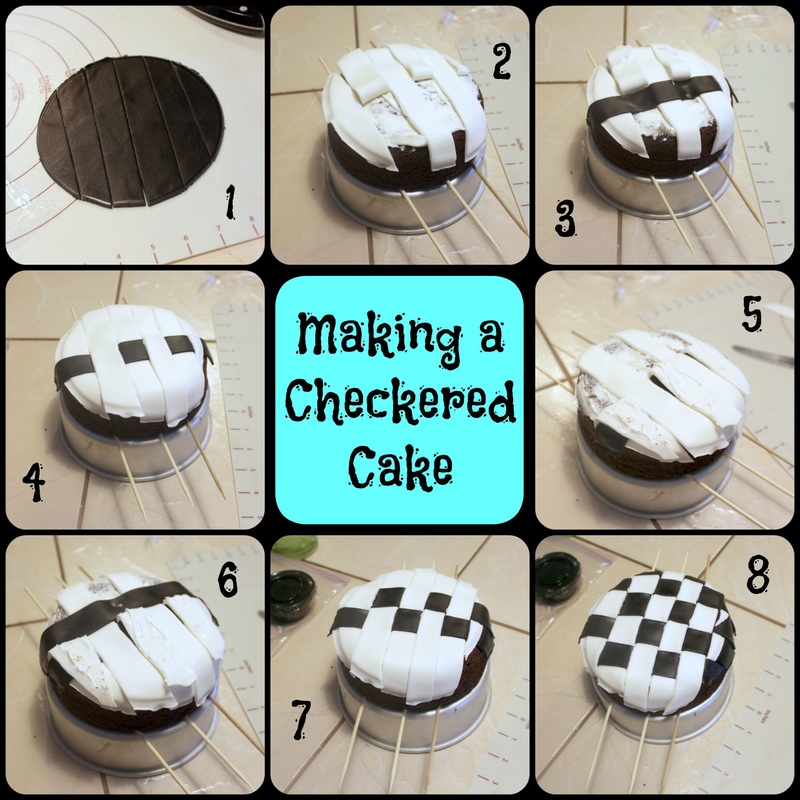
   So, in looking for ways to make a checkered cake, the only suggestions on the www were to cover the cake in white, then cut out black squares and stick 'em on. Seriously. Who wants to do that, and who could make their squares perfect, and stick them on perfect? Not me, that's for sure! 
   I decided instead to make the checkers like I would a lattice top for a pie. It worked out really well, and was not too difficult. I started by putting skewers onto the cake pan, and setting the cake onto it. I used the skewers as a "just in case" for lifting the cake off later. I didn't really need them, as it turned out, but I wanted to explain why they were there in the photos. :) 
   I used a vegetable shortening fondant (instead of marshmallow fondant) this time because marshmallow fondant can dry out faster and I knew I'd be fussing with the fondant for a while and needed it to stay soft and workable. Also (if you follow the recipe in that link), make some of the fondant with 1/4 cocoa and 3/4 icing sugar as a base for making black fondant). As a general rule, keep your shortening handy and keep rubbing it onto your hands as you work to help keep the fondant from drying out. Start by applying a layer of buttercream to the top of the cake as "glue" for the fondant. 

  1. In the first photo, you see the black fondant rolled out and cut to fit the top of the cake. I used the cake pan to measure the size I needed. I then cut it into (approximately) 1 1/2 inch strips. I did the same with white fondant 
  2. I started with the white fondant, and placed it onto the cake. Then, taking alternate strips, I folded them over at the centre
  3. Now, take a black strip of fondant and lay it over the white fondant, just tucked up close to the strips you folded back
  4. Lay the folded white strips over the black strip you just placed down
  5. Now, take the opposite white strips from what you just had flipped, and carefully pull them over the black strip you laid down
  6. Take another black strip of fondant, and lay it down, tuck up close to the folded back white strip
  7. Fold the white strips down over the black
  8. Continue this every other white strip and laying down a black strip until you have the top finished. You can carefully trim around the edges a bit once you've got the top done


   This is not a difficult method, but you do need to be a little focused to make sure you're paying attention and actually pulling back every-other strip, and alternating strips properly.
Picture
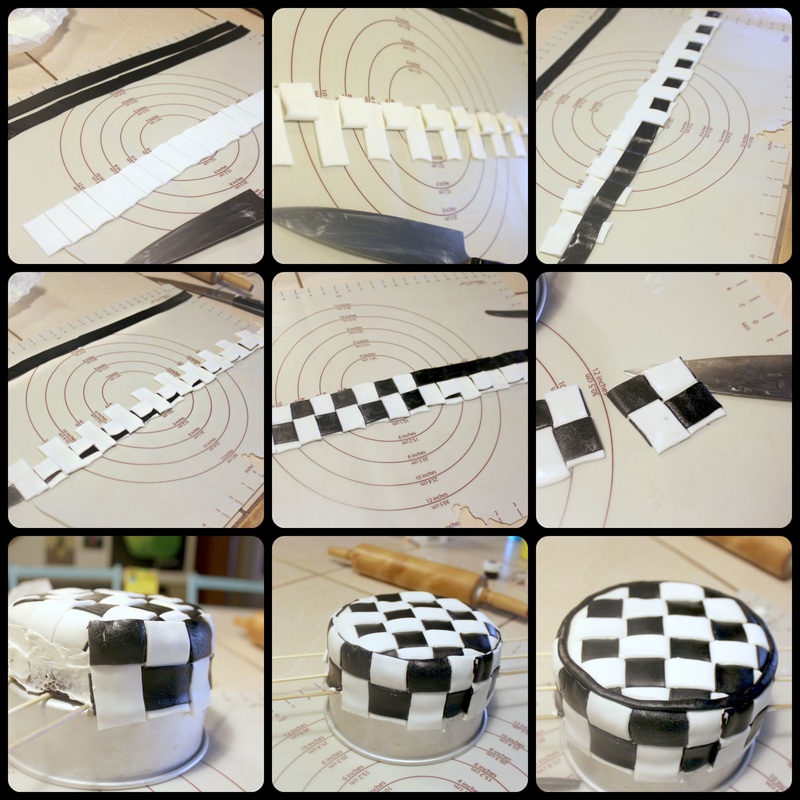
   Making the side checker uses the same process of folding every other piece back (photo 2), laying down the black, then folding the pieces back up (photo 3), and repeating with the opposite pieces (photo 4 and 5).
   Once you've got that finished, apply some buttercream to the sides of the cake for "glue". Cut the long checkered piece you've made into sections of about 4 (moving the whole, long strip of checkered fondant was too fussy), and attach to the side of the cake, pressing each section into the buttercream to make sure it's well attached (photos 6 and 7).
   The final photo shows a little trim I added (by rolling out some black fondant)
   Wrap this top portion of the cake in plastic wrap as you work on the bottom of the cake, you don't want it drying out!
Picture
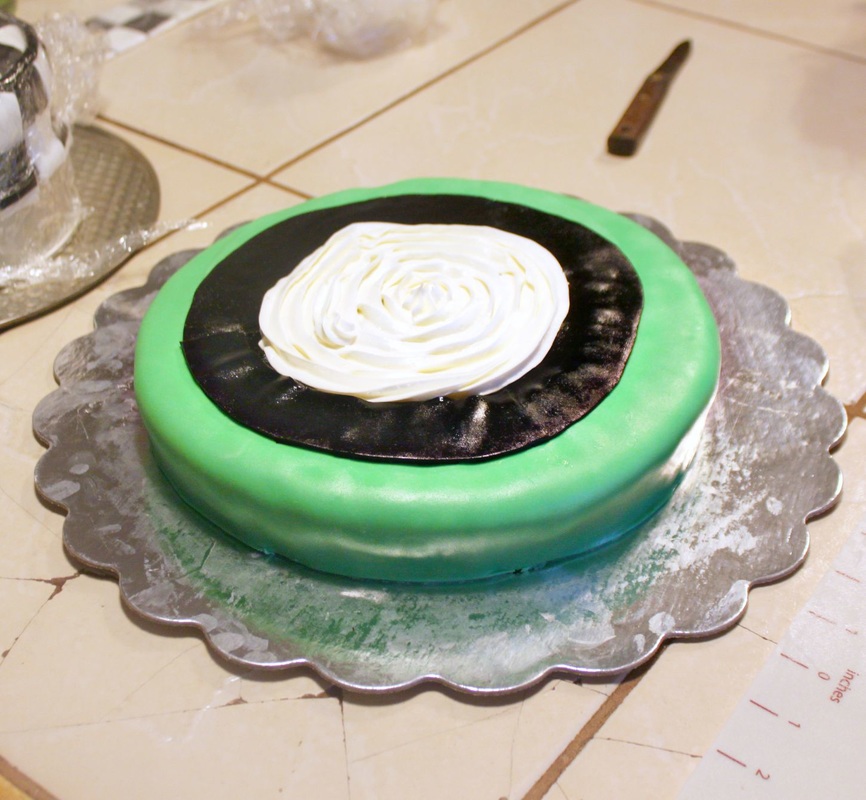
   The bottom of the cake was just covered in buttercream for "glue", and then green "grass" fondant, and a little black fondant "track". Then I added a little more buttercream to the spot where the top layer would be sitting.
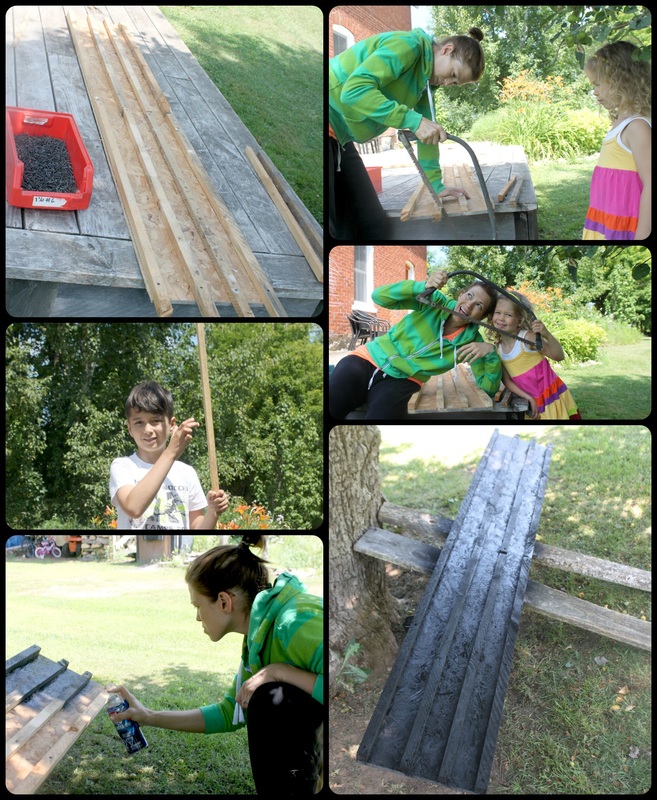
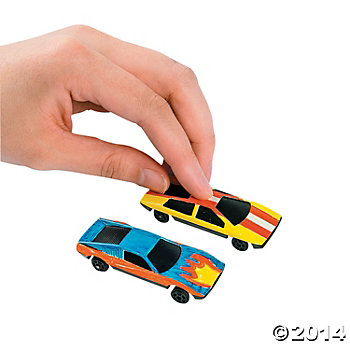
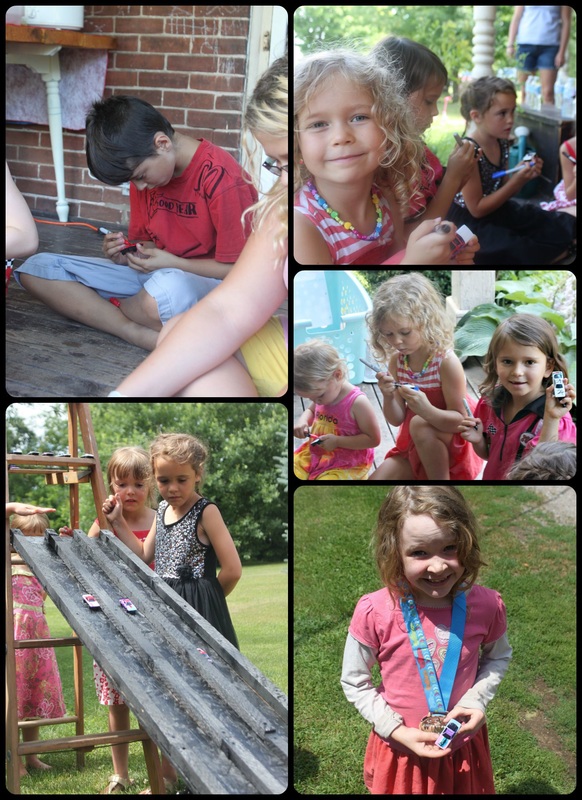
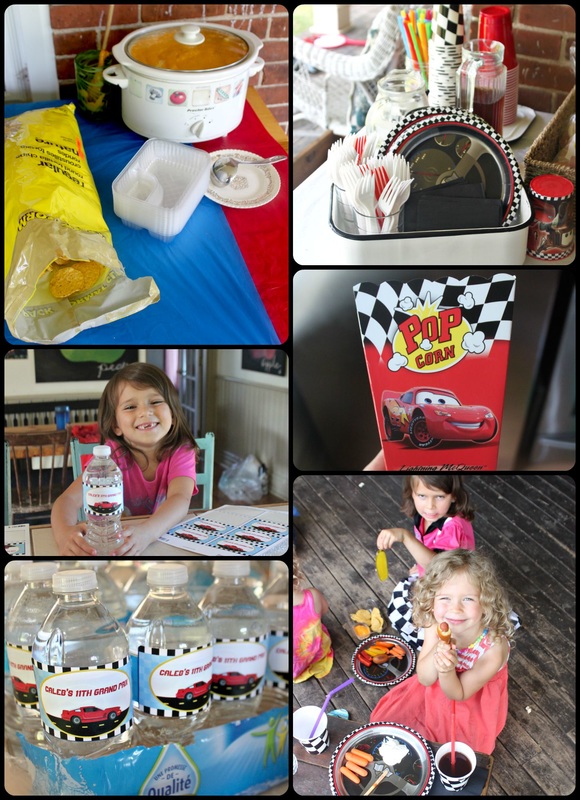
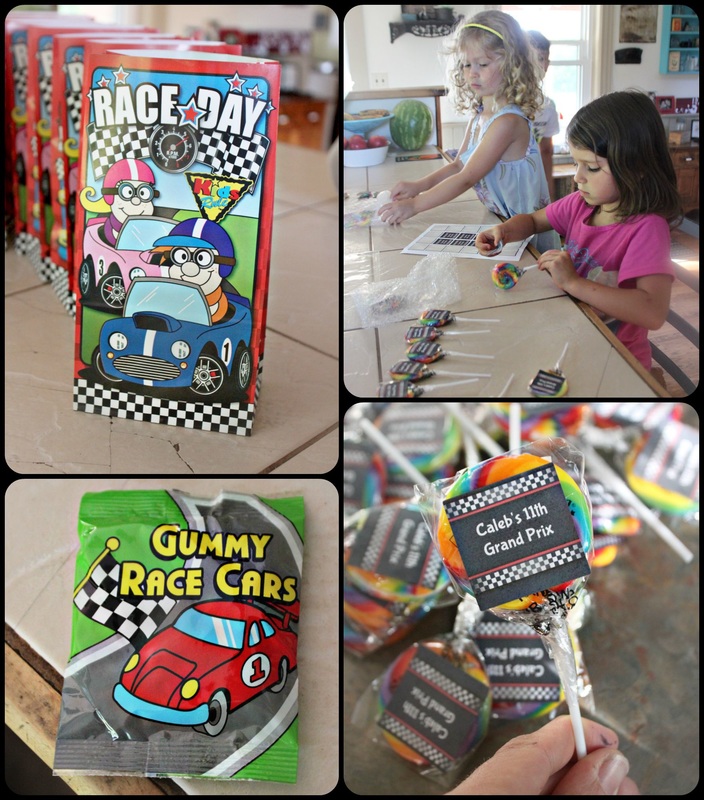
   Now to put the 2 cakes together I left the plastic wrap on top of the top-layer cake, I then put my hand onto the top of the cake, and carefully flipped it over (onto my hand), and set it down onto the base. Oh, uh, remove the skewers (if you were using them) before you place the top of the cake onto the bottom.  
   After this I added some details like using the leftover checker I had from the sides and added them, and also adding a little yellow dotted line on the "road", and I also added some more trim with rolled out fondant. Then I added Caleb's favourite (and throughly cleaned) cars and candles to it. Oh, and don't forget to wipe off your serving plate/tray/whatever. See the photo above and all those greasy little smudges I made?  

   I'll share next week how I made the other car for Caleb's party! 

   Sometimes it's so difficult to come up with an "ending" for a post! How about "the end"? Perfect!

The End   :)  Oh, and have a great weekend! 


4 Comments

Race Day Birthday Party

8/18/2015

0 Comments

 
   Weeks and weeks ago we had Caleb's 11th birthday party! I wasn't able to post about it sooner because of being busy having family over, and planning for our trip, but I still want to share about it. He wanted a Lightening McQueen (From Disney's Cars movies) theme, but he happily agreed to just "race cars", with a touch of "Cars" (the movie) here and there..  
Picture
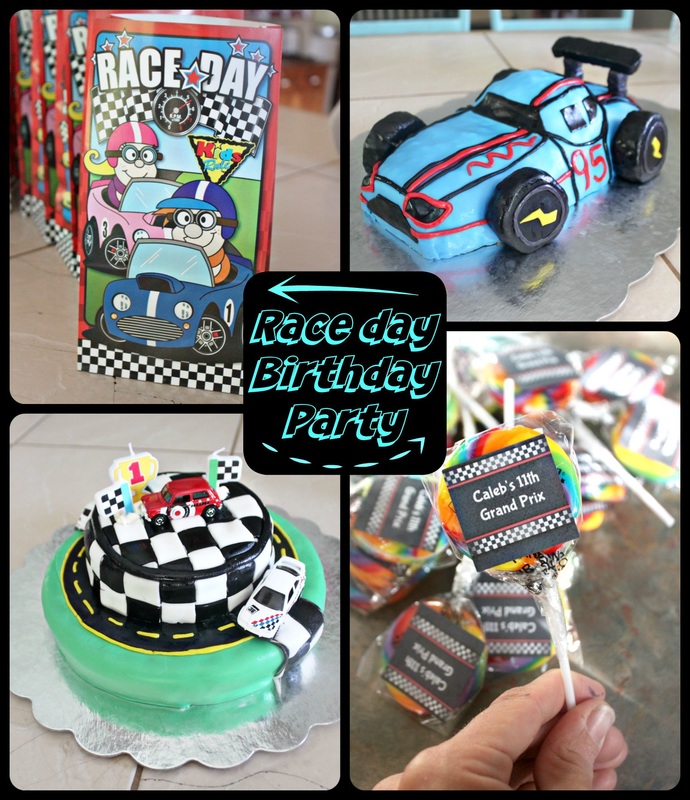
  It was a lot of work in some ways, and fairly simple in other ways. For instance, making the cakes (which I'll share about later this week) took hours to put together, but really, that can be expected. Having activities for the kids to do stressed me out a little more than usual this year though. In years past we've rented a big bouncy castle/waterslide thingy. But Caleb passed the age and weight restrictions on it this year, so we didn't get one. That was the activity we usually "planned" on for his parties! So, after some Googling and Pinterest hunting, we came up with a simple plan for a car race using cars the kids would decorate themselves


The Race Track

Picture
   So, I had seen a few different ideas on Pinterest about making a race track, and I had settled on an idea where you cut a pool noodle in half lengthwise and use that, but I could not find any pool noodles that had a big enough hole through the centre to make that work! Plan B was to root though my barn loft, get some wood that might work, and make my own race track! That plan worked out, and it was really very simple to do. 
   I used a (roughly) 8ft x 2 ft piece of chip board, and some 1x1inch strips to make the track. I used 1 1/2inch screws to attach the strips to the chip board, then I simply used a saw to trim the edges. After that I spray painted the track black, that took about 2 coats.  
    To set up the track, I simply stood it in an a-frame ladder, and that was it!


The Cars

    We bought the cars through a website called "Open A Party". I choose that website for this party because they had the most race car themed supplies. You can find the cars by clicking here.
   These DIY race cars were affordable ($14.99 for 30 cars), and were easy for the kids to colour using permanent markers. 
Picture
   We simply put the cars into a bowl, had a bunch of permanent markers, and let the kids colour! 
   Then my husband took care of the racing part, working it out "round robin" style, so that each child raced against each other, and from each race the winner became part of the final races and so-on until we had a winner!  
Picture


The Food

   We decided on the super tasty, and extremely unhealthy option of serving race-track food for the party! 
   We had hamburgers (regular and sliders), Pogos (regular and minis), nachos and cheese, and also veggies and dip. There was also little boxes of popcorn for the kids to munch on while they decorated their cars and during the races. 
   I bought a huge can o' nacho cheese sauce from our grocery store that has a bulk section, and the big bag of nachos from there too. I dumped the can of cheese into my slow-cooker, and it was good-to-go. Everything else was just regular grocery items, though hunting down mini Pogos proved harder than I wanted it to be! I finally found them at FreshCo. in Belleville. 
   I bought the plates, cups, etc. from Open A Party. The popcorn boxes were on clearance for $0.59 for a 6 pack! Woot woot! The plates can be found here, and the cups here. I liked the variety I found on Open A Party, but their search engine/names of products is fussy, so I had to look up a variety of names to find everything they had to offer under this theme. Just an FYI. 
   I had water bottle labels made from Zazzle, and they turned out really well. This is a detail that wasn't necessarily important, but Caleb really liked them, and that was the point! The girls helped me attach the labels to the water bottles.
   Oh, and I got the nacho and cheese "trays" from a super-duper nice vendor at the Tweed Fair! I had been looking for those trays that divide the nachos from the cheese, but couldn't find them (except online in packs of 500 or more!). Anyway, I just asked a vendor if he would be willing to sell me 30-40 trays, and he happily obliged! 
Picture


Dessert

   I'll show in detail how I made the cakes later this week, but for now, I shall share some photos! We also had fruit with dessert. I used this website, as the inspiration for the watermelon bowl with the race car. I didn't use any special tools though, just a regular knife to cut it out, and a spoon to scrape/etch in the details. I just looked up different race car images and decided on the one I wanted to use, then I printed off images of tires and attached those...to the wrong spots. See that? I put the bigger tire on the back of the car, and the smaller on the front. Oops. 
Picture


The Treat Bags

   I bought the bags (I can't find them on the website anymore?), gummy car candies, and suckers & labels from Open a Party. I added some extra candy too. The girls helped attach the labels to the suckers. They were great helpers! 
Picture
   
    I also bought some shirts from our local thrift store, and used a permanent marker to make them into specific shirts: The owner, the crew chief, and a race car driver.. I wanted to make pit crew shirts for the girls too, but couldn't find any red shirts at the thrift store, so yup,  that was that! 
Picture
   And that was Caleb's party! The weather was nice, the kids had fun, and it all went really well! The best part was how happy Caleb was. He was pooped (x100000) by the end of the day, but he was happy! I love that kid!
0 Comments

Mini Angel Food Cakes with Sticky, White Icing

4/27/2015

0 Comments

 
   Hey there! It's Monday morning!....and I feel like poo poo...
   It was a weekend filled with visiting people, staying up too late, and also dealing with an issue we had with Caleb (our oldest child), and trying to emotionally process that while carrying on with life 'as usual'. In a lot of ways, being busy was the best because whenever we stopped we started to really think, and thinking made us anxious. Everything will be fine, in case anyone is wondering, but we're just trying to get a hold of a situation and figure out what is best for everyone involved. 
   Anyway, on Friday night we stayed late at some friends who we don't get to hang out with nearly enough, then Saturday we had friends stop by first thing in the morning (...we were literally just rolling out of bed as they pulled in the driveway!), then I went to a friends for a girls night, and we had a great time chatting and looking through Glamour, Seventeen & Cosmopolitan magazines from the '70's and '80's (they were alarming, amusing, and educational!). Sunday night we went to a surprise birthday party, and had a great time. 
   Now, I'm pooped. I'm completely socialized out!!! 
   Today I have no rehearsal (phew...), but I do on Tuesday, Wednesday and Thursday, and I would on Friday too except the cast from my show is going to support another theatre nearby and see their show. If you live around here, The Pirates of Penzance is playing at The Regent Theatre in Picton this Thursday until Sunday!

   Anywho, angel food cakes! 
   My husbands birthday was waaaaaay back in February. His favourite cake (because his Mom always made for him growing up) is angel food cake (with that fantastic sticky, white icing). Now, making an entire angel food cake if we have a group of adults coming over to help us eat it seems exceptable. Making one for our family seems excessive. Especially because Caleb is gluten free, I (mostly) eat paleo, and Adam doesn't actually like sweets that much. The girls would eat an entire cake to themselves, but they really shouldn't... 
   So, I wondered if I could make half a cake recipe into mini cakes? A lot of what I read (on the www) said that I couldn't without a mini angel food cake pan (who the heck owns one of those?!?), but I thought, "meh, I'm going to try anyway!".
   I own some beautiful antique mini cake pans (they are really jelly moulds, I think) and thought they would make darling mini cakes. They did. 
   These cakes can also be made as mini cupcakes, or regular sized cupcakes (with adjusted baking times), but I think I will never go back to a fussy, full sized angel food cake. These were such a lovely size, stored easily, kept well, and made perfect little portions. 
   Now, the sticky, white icing is a dessert marvel! There are a few ways to make it, but my way is the best. ;)  No big deal.
   Most "7 minute icing" recipes need a double boiler, a candy thermometer, two separate steps of boiling the sugar and water, then whipping the egg whites, then slowly pouring on into the other, then whipping some more. Mine (a recipe from my Mum) uses NO candy thermometer, a metal bowl set over a simmering pot (a make-shift double boiler), and you just throw everything in all at once and stand there whipping it up. Ta-daaa!!! 
Picture
Picture
   Lovely, right? You have to (ok, you don't have to, but it's the best) to have some fresh, cut up strawberries to go with this. Yumm-o.
   
   Alright, Monday, here I come! 
   I've been working on a list of "spring-time clean up" things, though I'm a little stuck at the moment. I want to re-organize my pantry, but (hopefully) in June we'll be doing our kitchen re-do, and I want to rip this pantry out and build/create/acquire a more fitting to our house piece. I guess that's not going to happen for over a month, but I want to organize the pantry with baskets, jars, etc., but I don't know 100% yet what the new pantry will look like and if I will end up needing/wanting whatever I get now to organize the pantry...I suppose I could just use whatever I get now someplace else if they end up not being needed in the new pantry....I'm just rambling to myself, ignore me!  
   Have a great day one and all! 

Mini Angel Food Cakes
*This makes about 24 mini cupcakes, or 12 regular sized ones (or 16 small jelly moulds)

Ingredients:
  • 4 large egg whites (roughly 1/2 cup)-room temperature
  • 1/2 tsp cream of tarter
  • 1/4 cup sugar
  • 1/2 tsp vanilla extract
  • 1/2 cup sifted powdered sugar
  • ⅓ cup sifted flour
  • Pinch of salt


Method:

  1. Add egg whites to a bowl and let them sit at room temperature (can take up to one hour) if they aren't already room temperature
  2. Preheat oven to 350 degrees F.
  3. Line a mini-cupcake pan with cupcake liners (or set mini liners inside a larger cupcake pan if you don't have a mini pan). For my jelly moulds I only super-duper lightly greased it. Angel food needs to be able to cling and rise up the sides of it's pan, so over greasing can keep it from rising. F.Y.I. 
  4. Whisk together the powdered sugar and flour in a bowl
  5. In another bowl, beat egg whites with an electric mixer until they are foamy
  6. Add cream of tarter, then beat at medium-high speed until soft peaks form (about 5 minutes)
  7. Add sugar while continuing to mix on medium speed, then add the vanilla extract
  8. Add ⅓ of the dry ingredients over the egg whites and gently fold with a spatula until combined
  9. Repeat with the rest of the dry ingredients until everything is combined. Make sure you do not over-stir the batter
  10. Use a small Pampered Chef scoop, or a tablespoon to fill each (mini) liner with batter until 3/4 full
  11. Bake for 20 minutes, or until tops are lightly brown (you'll need to bake a little longer for full sized cupcakes)
  12. Let cool completely


White Sticky Frosting


*This icing should only be made when your cake is ready and cooled. It is very sticky, and develops a 'skin'  after its been made and is sitting out. That's fine, as long as it's on your cake/cupcakes already! :)  


Ingredients:

  • 2 egg whites
  • 3/4 cup white sugar
  • 1/3 cup corn syrup
  • 2 tablespoons water
  • 1/4 teaspoon cream of tartar
  • 1/4 teaspoon salt
  • 1 teaspoon vanilla extract


Method: 

  1. Place a pot with a few inches of water onto the stove and bring to a simmer 
  2. Meanwhile, in a metal bowl (that will fit onto the pot without touching the bottom of it/the simmering water), place all of the ingredients. Yes, all of them!
  3. Place bowl over simmering pot, and, using a hand mixer, start to whip up the ingredients on med-high speed. 
  4. Keep whipping until stiff peaks form and you've got an amazing, fluffy icing! 
  5. It's magic! :)  The End.
0 Comments

Animal Birthday Party....again....

1/20/2015

5 Comments

 
Picture
   My youngest was turning 5 and asked for a pet shop birthday....which is exactly what she had asked for last year! Oh well, I appreciate her unwavering love of all things furry! 
   We decided to make it a pet shop (NOT Littlest Pet Shop {the show|, as you actually can't find much in the way of party products for that brand, but I am more than happy to not have a commercial birthday!). 
Picture
   As far as food goes at this shin-dig, Keziah wanted hamburgers, so that's what she got! Nothing animal themed about it...well, except for it being an animal product....?
   I just realized that I didn't take any pictures of lunch, except for dessert! Oh well, we had (as mentioned) burgers, and also popcorn and chips (served in dog food dishes!), & veggies and dip. 
   As part of dessert I made a cookie sheet of Rice Krispie treats, poured melted chocolate over it, and let it set. Then I cut out fish and dog bones using a cookie cutter, then added some detail with the buttercream I had made for the cupcakes. You can see the bones in the bottom left picture of the above collage, and my middle goof-ball daughter is holding a smily fish in the top right photo. 
  I also made up a batch of my peanut butter macaroons to be, well, animal poop, and we had fresh fruit as well. Oh, and ice cream! 
   I bought the paper ware for the party from Party City (I usually order stuff online from Party City, but an actual Party City store opened in Belleville so my middle kiddo and I went to have a looky-loo. It was fun!)
Picture
   Last year I made her a fancy cake (you can see it here), but we were planning on having her birthday so close to us getting home from holiday visiting and New Years Eve that I knew I wouldn't have the time to really work on a cake. So, before we left for Christmas (3 weeks before the party), I made a batch of chocolate and vanilla cupcakes and stashed them away in the freezer. I took them out of the freezer to thaw one day before the party and decorated them with a simple buttercream. 
   Then to some I added chocolate animals I had made from some moulds I had gotten from my Mother-in-law. I made one cat for my daughters cupcake, and a few puppies for some other cupcakes. I also wrote "meow" in moulding chocolate (by putting it into a ziplock bag and cutting a small corner off to making a piping bag).    
Picture
   The last thing we (my sister and I) did for the cupcakes was to make some paw prints out of buttercream and marshmallows. We simply piped some buttercream onto the iced cupcakes as 'glue', then added 3 mini mallows, and a cut-in-half big mallow to create a paw.  
Picture
   For grab bags I decided that the kids could each 'adopt' a pet from the 'pet shop'. 
   Instead of spending a crazy amount of money on new animals, and also to be mindful of the wastefulness of the toy industry, I set out to find cute stuffed animals at second hand shops. My sister found a whole bunch of them at Value Village in Brantford, and I found some at The Salvation Army and St. Vincent De Paul in Belleville. Getting "stuffies" was important because I was able to throw all the toys into my washer and give them a nice hot wash, then dry them until they were super fluffy and good as new!
   Seriously, in total (and this includes a bunch of stuffies I didn't end up using) it cost roughly $6 to buy all the animals you see in the baskets in the collage above! 
   To the grab bags I also added "puppy chow" which is a seriously, seriously, seriously yummy and addictive snack made with Chex cereal, peanut butter and chocolate, and icing sugar. Mmmmmm.....puppy  chow......Google it for a million variations on the recipe! 
   You can see the puppy chow in the pink bag in the collage above, and we also served it with lunch (in the first collage in this post). 
   There were a few other treats in the bags too; a few Swedish Fish and some fruit flavoured candy sticks-these were meant to be, well, fish (duh), and dog bones. I got those candies from Party City. You could buy 15 candies for $1, and the candy sticks and fish were individually wrapped, so it was handy and sanitary! 
Picture
   Here's me! :)  I am (like my middle child) quite unable to make a normal face for a photo. There is endless proof of this, but we'll leave that for another time!  
    Anyway, it was a good party; attendance dropped dramatically when I announced to the guests (via e-mail) that Keziah had chicken pox, and although she would likely not be contagious by her birthday party, it was likely that her sister would be.
   She still had a few friends over, and my sister and brother-in-law came with their many, many children, and that's a party right there!  
   I didn't plan anything except to print out some animal colouring pages. Kids generally are happy playing with new toys at someones house, and I have found that planning 100 games isn't always necessary. In fact, it can just make things more stressful! 

   So, that's it! I hope if you're planning an animal party you can glean some ideas from here (or from last years animal birthday post!) and that you have a grand party! And if you were just looking for fun....well, you may want to examine your idea of fun. Whomp whomp. Gotcha there. 

:)  
5 Comments

Canada Birthday Party! 

11/10/2014

0 Comments

 
   Nope, this is not a super late post for a Canada Day party, it's a birthday party my daughter wanted with a Canada theme! My darling middle child said she wanted her birthday to be Canada themed ever since Canada day, and I thought she would have changed her mind between then and now, but she didn't! 
   Anyway, I didn't take any great photos of the day, I didn't take great photos of the food or grab bags, I just didn't feel like it! I dunno, I was just in the mode of having a laid-back birthday (as laid back as a birthday party can be with ten 6 year old girls running around screaming!). Anyway, I did want to share the day though, and some of the ideas we had. 
Picture
   The decorations were simple and homemade. I made this (above) flag with red and white bristol board, and I also made a poster that said happy birthday and it had some maple leaves drawn on it. My husband hung red and white streamers, and we blew up red balloons that we didn't hang up because, let's face it, kids just ask if you can pull them down so they can be played with! So, we blew up 2 dozen balloons, and tossed them onto he floor!  Haha, gosh, it sounds so lazy now to type that  out, but it was really and truly on purpose! 
Picture
   I'm not much for planning activities for parties, mostly because kids tend to find their own things to do! However, this party we did plan to give the kids a ride on our horse, and we printed out some colouring pages from the www for the kids to work on if they wanted to. We didn't have a structured colouring time, we just played outside and rode the horse, and then we all came inside and could colour, play with toys and balloons and dress up in our costumes.  
Picture
   The map of Canada colouring page I found here, and the Canada flag colouring page I found here. FYI. 
Picture
   Do you like how I blocked out kids faces! Whomp whomp....I didn't have permission to show other kids faces, and I didn't want to assume I could, so you get what you get! :)  The only faces you see are of my own lovely kids! 
   We purchased the Canada plates, cups, tablecloth and toothpicks from Party City.   
   P.S., and FYI, if you're into throwing Canada Day parties for the actual Canada Day, I would buy some supplies now as they are super cheap...ya know, since Canada Day was 4 months ago, and won't be back for another 8 months!  
   The other Canada things we bought (like that rocket ship cup) were from Old Navy-again, super cheap seeing as it's not Canada day! They had a bunch of Canada stuff stashed in a cupboard behind the checkout and they let us pick from it when I asked if they had any Canada things. 
   Other items (like pencils, stickers and tattoos) that we found for the grab bags we got from various dollar stores. It took a bit of hunting, but we found quite a few things. We beefed the grab bags up with red candies like Big Foot, and with bags of Skittles (the original kind of course so the bag was red!). 
   We served good ol' Canadian hot dogs (tongue-in-cheek), and had fruits and veggies as well as chips and snack mix. And we also had Dare maple cookies with the cupcakes for dessert. 
Picture
   To make the cupcakes patriotic I made vanilla and red velvet and intended on them being in one cupcake together. The first batch struggled though because I tried to do a red layer, then white layer, then red layer like our flag. They were fine (the bottom picture in the collage above), but the two batters didn't quite cook together properly, I dunno. It's hard to explain, but they just didn't really work. 
   So, the second batch I just scooped in some vanilla batter, then red velvet batter, and swirled them with a tooth pick to make a red and white marbled cupcake. They baked up great and rose nicely, as opposed to the red/white/red cupcakes.   
   The basic vanilla cupcake recipe I use is here, and the red velvet cupcake recipe I like is here. 
   I tried a new buttercream technique where you put 2 colours into the piping bag to get 2-toned icing. I'm not a great piper (I'm imagining myself now with bag pipes....), but I think they turned out nicely. If I had read the tutorials on how to actually do this technique they may have turned out nicer....but, duh, I thought I knew how to do it! I just saw pictures of 2-toned icing and went, "cool, I'm going to try that!", and never bothered to find out the best way to do it! Alright, well, I did find out that high-end chefs do it the way I tried to, but I am neither a high end chef nor am I terribly skilled when it comes to using my piping bag (haha, bag pipes....). I tried to use a spoon to put my red icing on one "side" of the piping bag, and the white icing on the other "side", but the first few cupcakes only had white frosting, then the red finally came out and looked good, but, ya know.
   Sooooo, the two ways that people do this 2-toned technique are either by filling 2 separate bags with frosting, and placing them into one larger piping bag and attaching them to the same tip like in this example, or by brushing gel food colouring in stripes into a piping bag, filling with another coloured buttercream, and piping it out, like these bad boys. 
   So, I think that's everything! 
   I hope you enjoyed this slightly boring romp through the Canada themed birthday party we had! :)   
0 Comments
<<Previous


    Welcome To
     Bushel &
    A Peck!

    Hi, I'm Amy-Lyn!

    Picture
    I am the lady behind this here blog! I live in the sticks with my animals, my super handsome husband, and my
    ​ 3 amazing kids! 
    Here you'll find things from recipes (gluten-free, paleo, and strait up junk food!), DIY ideas, thoughts on raising a son with autism, and whatever else pops into my brain! : )  

    Read more about me by clicking here!

    Want to Stay Connected?

    RSS Feed


    Subscribe to my mailing list!

    * indicates required

    Find What
    ​You're Looking For on the Site!


    Vitacost.com

     Most Popular Posts

    Meat & Potato Casserole
    Gluten-Free Meat & Potato Casserole
    Picture
    D.I.Y Tea Cup Bird Feeder
    Picture
    Mini Caprese Kabobs

    Featured in The Huffington Post

    Picture
    Paleo Double Chocolate Avocado Cookies

    Featured in Woman's Day

    Picture
    Chicken Bundles


    Categories

    All
    Antiques
    Autism
    Birthday
    Breakfast
    Chocolate
    Dessert
    Diy
    Family
    Five Minute Friday
    Giveaway!
    Gluten Free
    Health-fitness
    Lunch/Dinner
    Miscarriage
    Motivational Monday!
    Muffins
    My Thoughts...
    Nifty Ideas
    Paleo
    Primal
    Recipes
    Sandwiches
    Soup
    Tea Party


    Some of my favourite products! 


    Archives

    September 2017
    August 2017
    June 2017
    May 2017
    April 2017
    March 2017
    February 2017
    January 2017
    December 2016
    November 2016
    August 2016
    July 2016
    June 2016
    May 2016
    April 2016
    March 2016
    February 2016
    January 2016
    December 2015
    November 2015
    October 2015
    September 2015
    August 2015
    July 2015
    June 2015
    May 2015
    April 2015
    March 2015
    February 2015
    January 2015
    December 2014
    November 2014
    October 2014
    September 2014
    August 2014
    July 2014
    June 2014
    May 2014
    April 2014
    March 2014
    February 2014
    January 2014
    December 2013
    November 2013
    October 2013

    my foodgawker gallery
  • Blog
  • Health & Fitness
  • Artist Biography
  • Paintings
  • Photography
  • Drawings, etc.
  • About Me
  • Contact Me