|
Last summer we replaced the windows in our house. There were 16 windows total (so, 32 small windows-ya know? They were double hung?). Anywho, When the guys working on the windows went to load up our old windows, I came out in a panic, "No, no! Oh please, leave me these windows!". The guys thought I was hilarious/crazy. Both are pretty accurate. I gave a few windows away to friends, and worked on a few to sell. I (....my husband...) remembered that these windows were the originals to our circa 1880 farm house and they would be more special if kept here and used around our own house. Anyway, I've since bought a bunch of windows from a few different & favourite antique dealers around me, and even found a beautiful one at the Tweed dump. I know, yuk, but I've found a lot of seriously wonderful things at the dump that other people thought were trash! And, as a bonus, an older man saw me dumpster diving for the window and gave me his phone number and address because he had a whole bunch of old windows he would sell me. Do you think I would have gotten that awesome window connection without rooting through trash at the dump? Nope. :) Anyway, wherever you find an old window, snatch it up! I have a few hanging in my house as plain old windows, and some made into new and useful things. Today I run you through a cork/chalk board window. Enjoy! 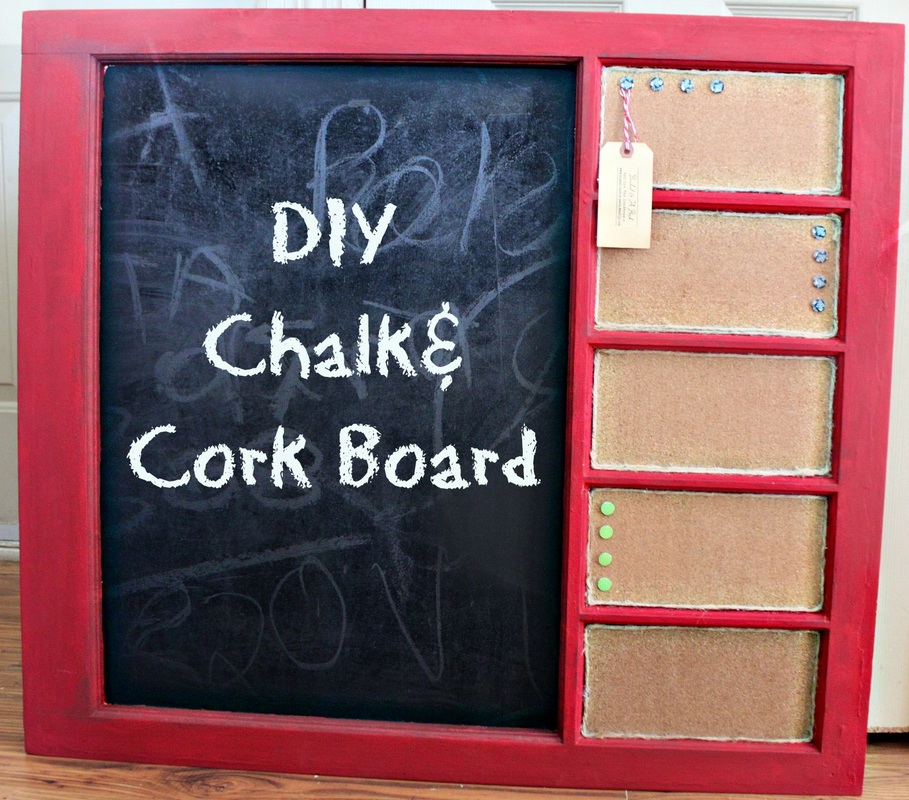 You'll need:
Method:
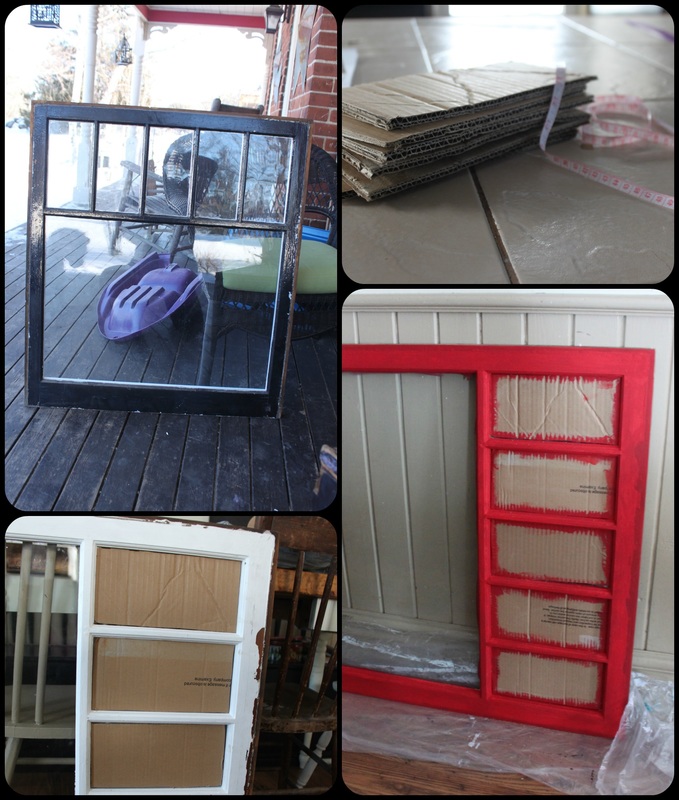 Steps 1-6 Measure the cardboard, adhere it to the glass and paint the window. I use cardboard to back the cork board because otherwise the cork is too thin and any pin or tack you use is too long. You'll end up with a tack that is sticking out from the cork too far. And cork DOES NOT stick to cork without an enormous amount of glue in varying types. Trust me.... 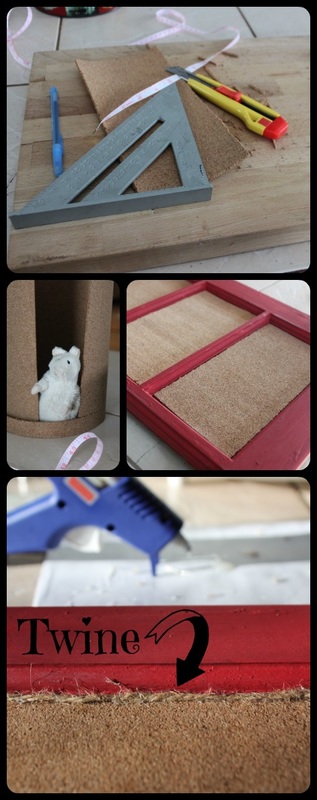 Steps 7-9 Keziah was home from school one day while I was working on this and she gave this Ikea mouse a home in the cork roll. :) Like I mentioned in the method, I used twine to cover imperfections. Measuring the cork and cutting it carefully and hoping it fits just so is stressful...so I cut myself some slack and used twine to trim out the window. It was an extra step, but a relatively easy one. 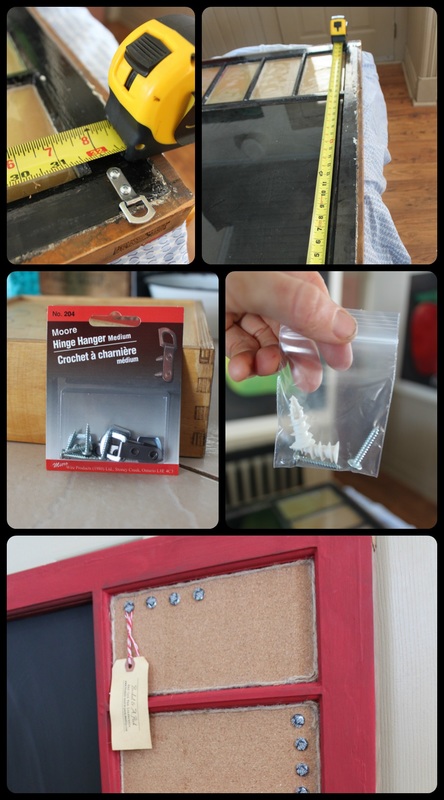 Step 11 I like to pre-drill a hole for the screws for the hooks to be sure the screws go in without splitting the windows. When I give a window away or sell it I include anchors and screws for hanging the window up. I know I said to measure the hardware to 16inches so you can hang the window to studs (without needing anchors), but if your window ends up in between studs for some reason you will need anchors. An antique window with original glass is very heavy and you don't want it ripping a hole in your wall and crashing to the floor! 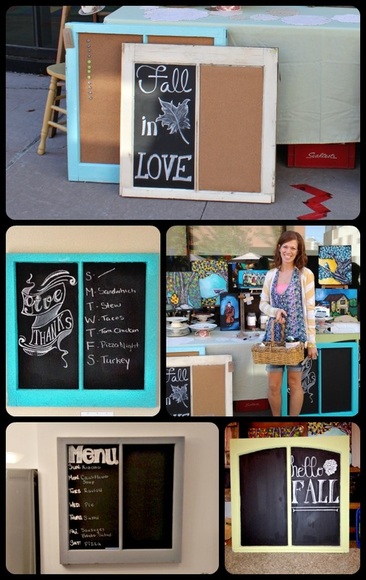 Here are some other windows I've made, some as full chalk boards, some as full cork boards, and some half and half. The bottom left photo was made special and because they wanted it exclusively as a menu board I used acrylic paint to write to the word "menu" as well as the abbreviations for the days of the week, that way it could be wiped and cleaned with the menu and days staying put. The other windows just had some fun fall-themed chalk art to make them pretty to sell.
So, the task of converting an old window to a chalk or cork board, or both, can be a little time consuming, but it's worth it (I think!). I take custom orders, btw, and can make one for you ('you' being someone within a reasonable driving range of me!). :) If you take on the task of making one yourself, share your results with me!!!
0 Comments
Hey there! Just a quick DIY that is so easy to make, and is a great gift for many "hard to buy for" people. I realize I should have/could have posted this pre-mother's day, as it could have been a good gift for that, but I failed. I get it. Sheesh. 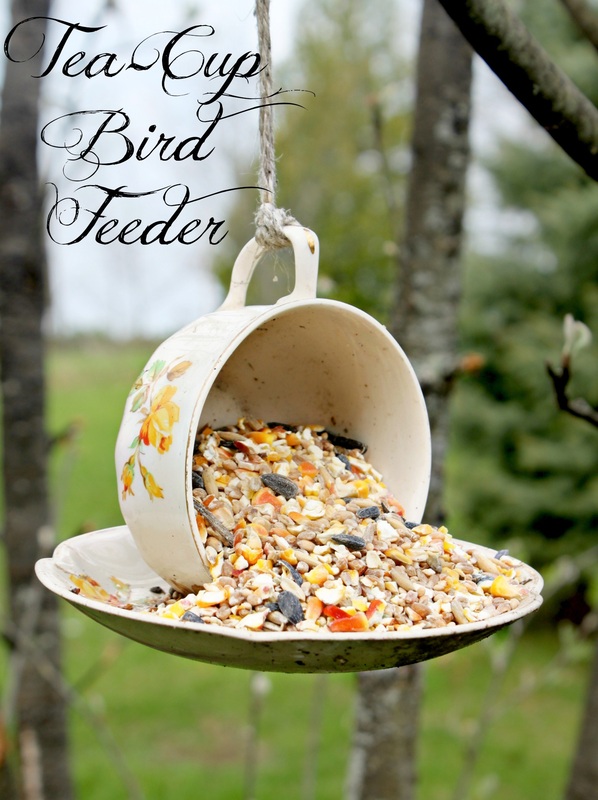 To make this beautiful feeder, all you need is some glass and ceramic glue (I use Elmer's, it costs less than $5), some string or chain to hang it, and a tea cup and saucer you like from a second hand store (I don't buy them from Value Village, they tend to price even the most hideous sets at coo-coo-crazy prices). The set in the picture cost 25 cents from "Hidden Treasures" in Tweed. 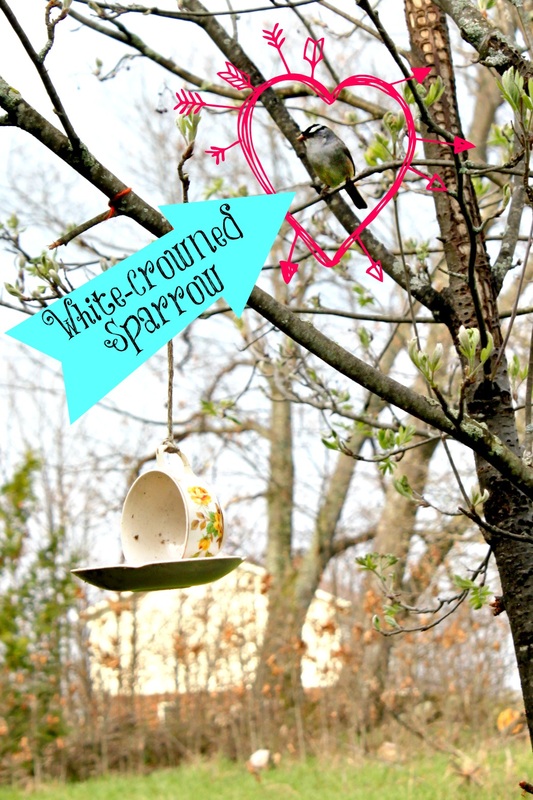 Simply clean the cup and saucer, make sure they're dry, then set the plate down. Run a strip of glue on the saucer, not in the middle, but from the middle to the edge, then with the handle pointing upwards, set the cup over the strip of glue, and gently press it into the glue. Depending on how thin the set is, the cup may be able to sit up on it's own, or you may need to gently wrap a towel around it to keep it in place while it dries.
Once it's dry, fasten a string to the handle, and taa-daa! At our place we have 4-5 different types of birds who will eat out of this feeder, and it hangs outside our kitchen window so the kids can see it while they're eating breakfast at our island. They are always so excited about the birds. And that's it! It's unique, it's simple, it's beautiful. The End. Just a quick post today about re-using old things as new! One of my favourite things! These pillow cases are old sacks that I've purchased at antique and flea markets and washed (and washed again), and simply slid another pillow into. 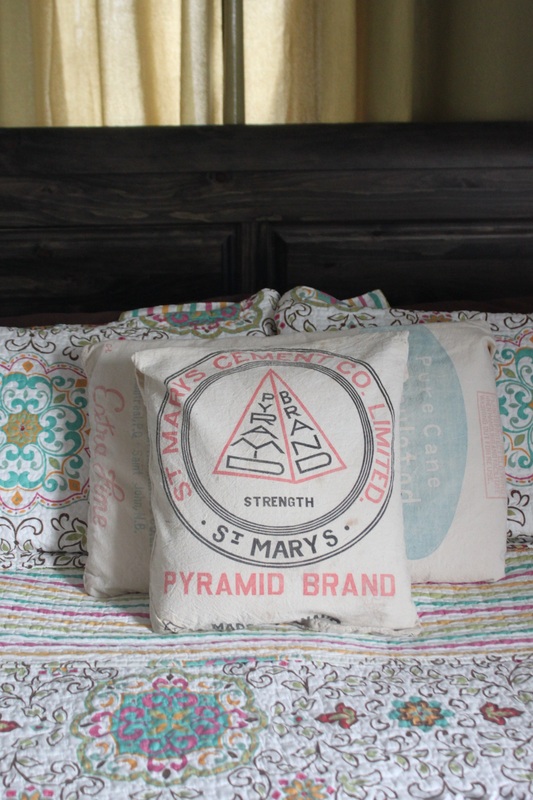 I bought this particular pillow case because years ago my husband worked for an industrial vacuuming company, and they would do regular jobs vacuuming the huge tubes and tunnels at the cement plant in St. Mary's. In my living room I also had 6 other old sacks as pillows, but instead of putting a different pillow into it, I bought them stuffed with "pillow fluff" (stuffing), and sewn shut. They are a little more tricky to wash though....so, I would personally recommend just slipping a different pillow into the sack, and if you want it to close, just sew a zipper, or some cute buttons. 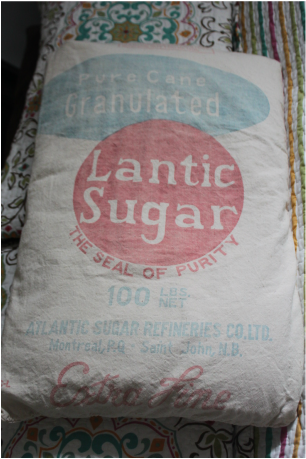 Well, we're heading home today, and I will be able to rest my head on my lovely pillows again! :)
A while ago I posted about The Rawleigh's Man (from a 1928 flyer). Well, a friend from the Theatre Guild, Sean Scally, knows I love to read old books, so he lent me "Dr. Chase's Third, Last & Complete Receipt Book & Household Physician" (I know, its got a ring to it...). This beauty is from 1893! In an act of pure irony (o.k., not real irony, more like Alanis Morissette's idea of irony), while reading this book, I would often be sitting with the iPad or laptop so I could look up the many (many!) things I wasn't sure about! Anywho, I just wanted to share some snippets I enjoyed from this amazing book! 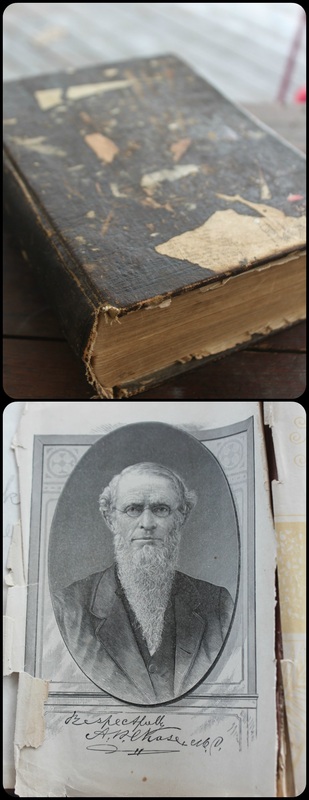
The book, and the inside cover with a picture of Dr. Chase. Gotta love the beard style!
People always say "back when things were more simple"-um, I bet if you lived back in the day with Dr. Chase you may argue that point! There is 3 whole pages alone about making butter, and problem solving, etc. That doesn't sound terribly simple! The book is divided into many parts, the first two are "Symptoms of Diseases", & "Treating Diseases". One title in treating diseases is "FAT PEOPLE-Food to Reduce Their Fleshiness". Yikes, that was harsh. Or how about the simple cure for "LIQUOR-A Cure for the Love of it". The advice is to eat an orange in the morning, half an hour before breakfast. As a patient told Dr. Chase, "I have done so regularly, and find that liquor has become repulsive. The taste of the orange is in the saliva of my tongue, and it would be as well to mix water and oil, as rum, with my taste". Wow, that was easy. Oh boy. 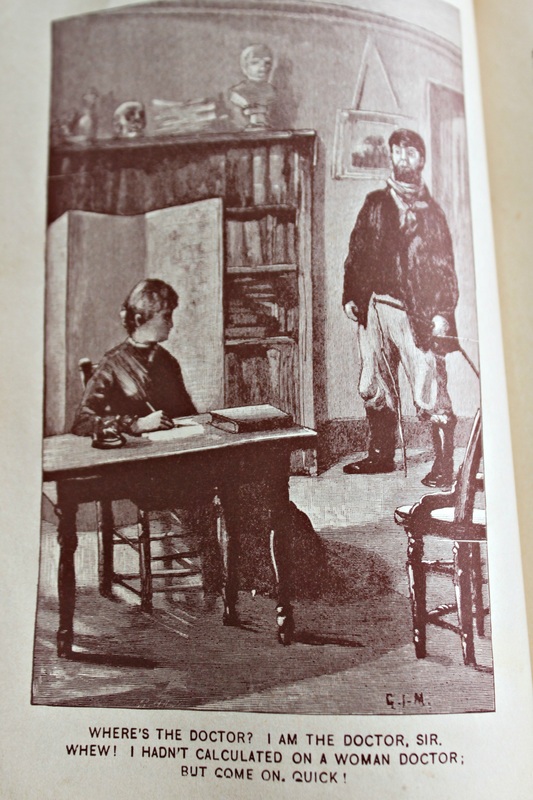
For real, read that fantastic caption under the picture!
A third of the book is dedicated to "receipts" or recipes. Dr. Chase clarifies (because I know you were wondering) that a "recipe" is directions with proper spelling, but a "receipt" is written in "much the more common manner of speaking", and can often be found in a poem or a song. One of my favourite parts of the food section of the book is Dr. Chase's remarks on good flour: "The first requisite to good bread is good flour (and sifted to enliven it and make it mix more readily). If the very best seems too expensive, make up the difference in cost by eating less cake. With really delicious bread you will do this naturally, and almost unconsciously". Isn't that the best? I love it. Fun (disgusting...) fact: What we think of as "Minced Meat Pie", is really called a "Mock Minced Pie". As a child I never wanted to try "minced meat pies" because the name had meat in it, but it appeared disguised as a fruit pie! My Mom assured me it was just raisins, currants, etc., but I wasn't feeling good about it. Well, reading a section of this book confirmed what I thought to be true! Here is a snippet for a recipe for proper Minced Meat Pie: "Boil a fresh beef's tongue, remove the skin and roots (and any remains of the wind-pipe, blood vessels, etc.), and chop it very fine. When cold add one pound of chopped suet (my note: this is the hard, white fat from the kidney's or loin of cattle, sheep, and other animals); 2 pounds each stoned raisins; english currants; citron, cut in fine pieces; 6 cloves; 2 teaspoons-ful cinnamon;....(etc., etc.)". For real....FOR REAL!!! I knew Minced Meat Pies had meat in them! And it's worse than I thought because it's cow tongue! At least now I know I was right, and so was my Mom, who's pie would just be "Mock Minced". Phew. 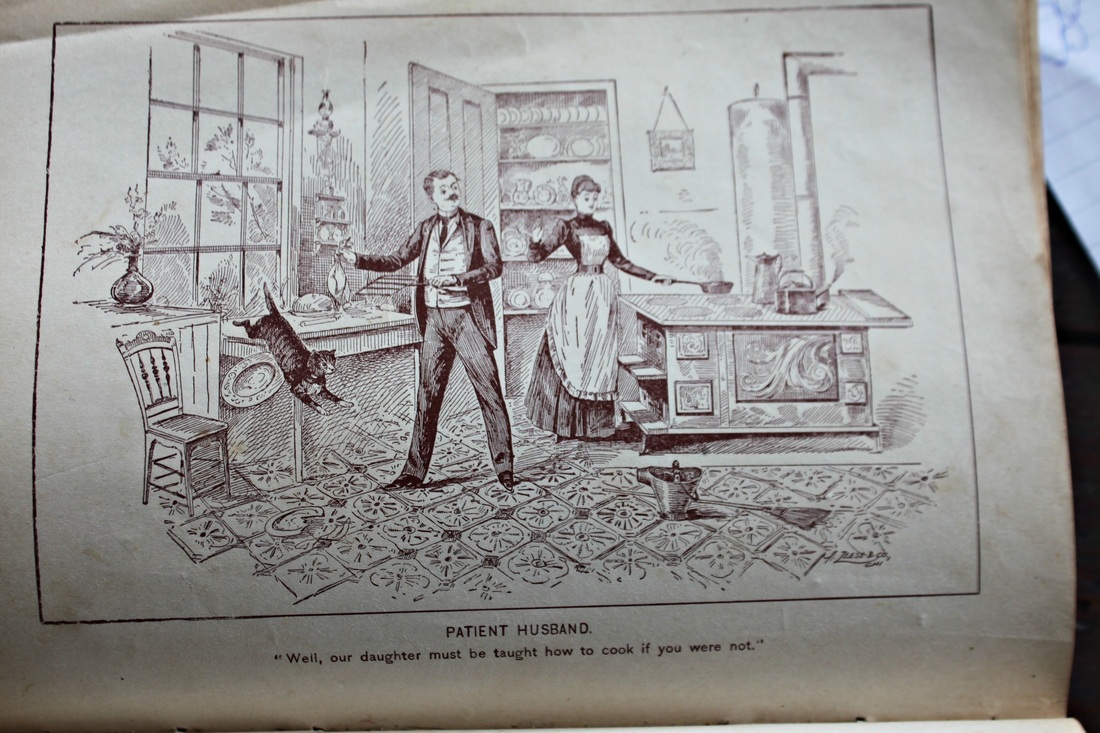
The caption under this photo reads: Patient Husband. "Well, our daughter must be taught how to cook if you were not".
I could go on all day about this book! From health, to cleaning, receipts and recipes, even animal care (including bee-keeping!)-Dr. Chase pretty much knows it all (maybe he's related to my family...?). Seriously though, it is quite the collection of knowledge all put together in one book. This bad boy is 816 pages, minus the glossary, medical index, and general index.
The "Publisher Notice" at the beginning of the book says, "We desire to place a copy of this work in the hands of every family, and if the neighbourhood has been canvassed and there is no agent through whom it can be purchased, we will send by mail, free of postage, single copies to any address on receipt of the regular subscription price". Apparently they felt strongly about how awesome this book was! I plan on attempting some of these recipes in the near future (even some of the hand written recipes that were tucked in between pages), so, you'll be hearing more about Dr. Chase! Hello there! Today really is April 1st (incase you're wondering, I thought yesterday was!)! We currently have at least two feet of snow still in our yard, but I am hopeful that spring (not that silly date on the calendar), but the real spring is coming! That really has nothing to do with today's post! In one of our houses we had this huge wall behind our sofa. The room opened up into the dining room, and so, what it really turned into was one, enormous, long, empty wall! I looked at some art that we could buy, but for the sizes we would need to fill the space it would be too much $$$ (I did start painting two large pictures for the dining room side, but I still had a whole lotta wall that needed something!). Anyway, the walls stayed empty, until one day on Pinterest I saw this! A beautiful photo collage that made me say, "oh yeah! I don't need one BIG art piece, I could fill the space with 20 smaller/different sized pictures!" Duh. For real, I hadn't even thought of doing it before! 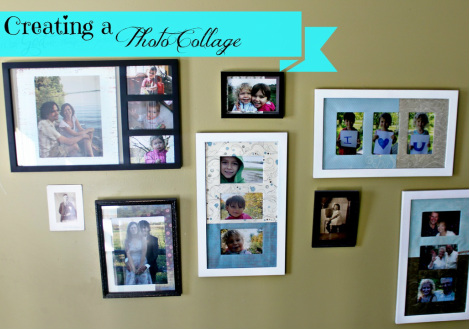 (Ahem) Please ignore the crocked photo! This is a small collection of photos going along our stairs. I am going to keep adding to it. There is no real trick to creating a nice collage, but there are a few rules that (I think) should be followed so that you have a "piece" that looks good. Firstly: Just decide if you want it to be a perfect square, or rectangle (fyi, this can add a lot of extra time to the project), or if you want one with no borders. You will want to know this before you start. Secondly: Make sure you have big & small frames. If all your frames are too small, it will look more like a jigsaw puzzle (and people won't really be able to see all the pictures). Thirdly: I would personally recommend having your frames be similar colours (or all one colour), or a general colour scheme. Think all white, all black, all earth tones, or if you're living on the edge, all jewel tones! Fourthly: Try to have a general spacing idea. You can be strict (everything will be one inch apart from each other), or within a rule (everything will be between 1-3 inches apart from each other). The point is that when you step back from your collage it feels like it belongs there, not like you just helter-skelter put some stuff on the wall! 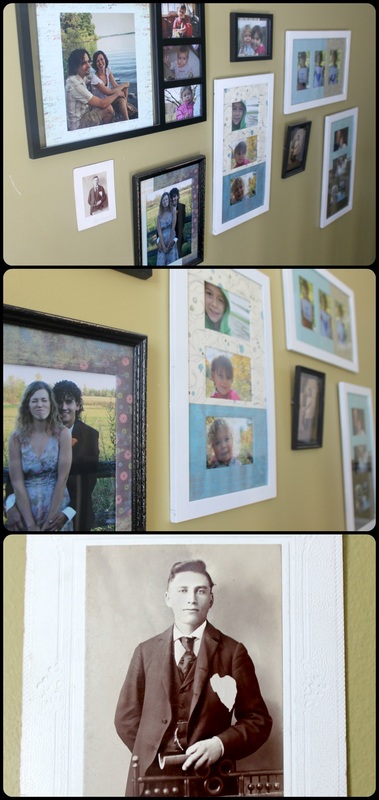 I thought it was important you saw my terrible face in the photo in the middle. Also, this young man in the last photo is of no relation to me, but I found him at the St. Jacobs Antique Market, and thought him quite interesting. :) I need to change out some photos here and there, but I have enjoyed adding things (besides photos) to make the collages/tell a story. Don't feel confined to photos, add art you like, random things you like, just go for it, and make it personal! 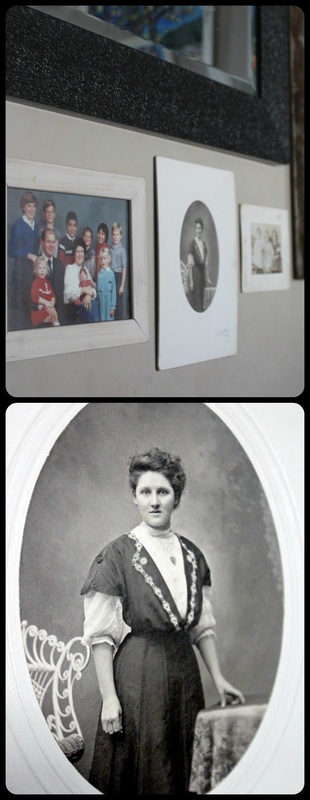 The family photo in the top left is an oldie. That's me in my Mom's lap in the front. I was brand-new! :) And that beautiful women in the bottom is (again) not related to me, but I like her, and I call her Diana Barry! To know what you want before you start making holes in the walls, take everything you plan to use, measure the size of the space you will be using on the floor or a bed (in the room you are putting these up in), and lay your photos/art, etc. down within those confines. This way you can get it "right" before making the commitment of a nail or screw in the wall! The gal in the tutorial link (from Pinterest) shows you this.  Can I just point out how dirty that bottom right mirror is! Yikes! The wall collage above has pictures, art, lots of mirrors (it's a dark room, so the mirrors make it feel more open), a "family" sign I made from some old barn board (out of our barn), and one of the old windows from our bedroom (the window guys thought I was a little coo-coo for wanting to keep ALL our old windows!) 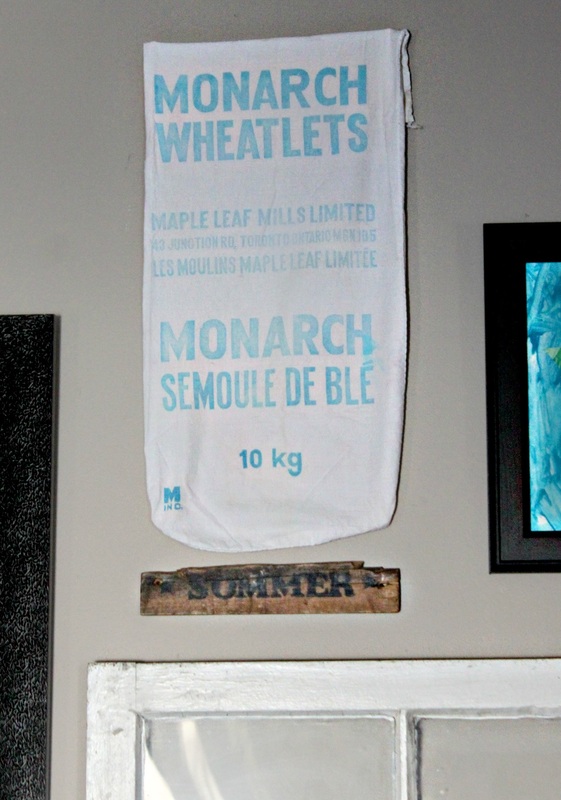 That Wheatlets bag is a beautiful cloth bag I got for $6 at an antique place. The "Sommer" sign is one I took from my horses stall when she was put down (years and years ago).
The point is not just to fill a space, but make a story. Create you, in collage form, in art form, on the wall! When we moved into this house, I found this "shelf" in the barn. Someone had taken the box that a typewriter had been delivered in, stood it on it's side, and used the top they would have taken off to build some shelves in it. It was cool. 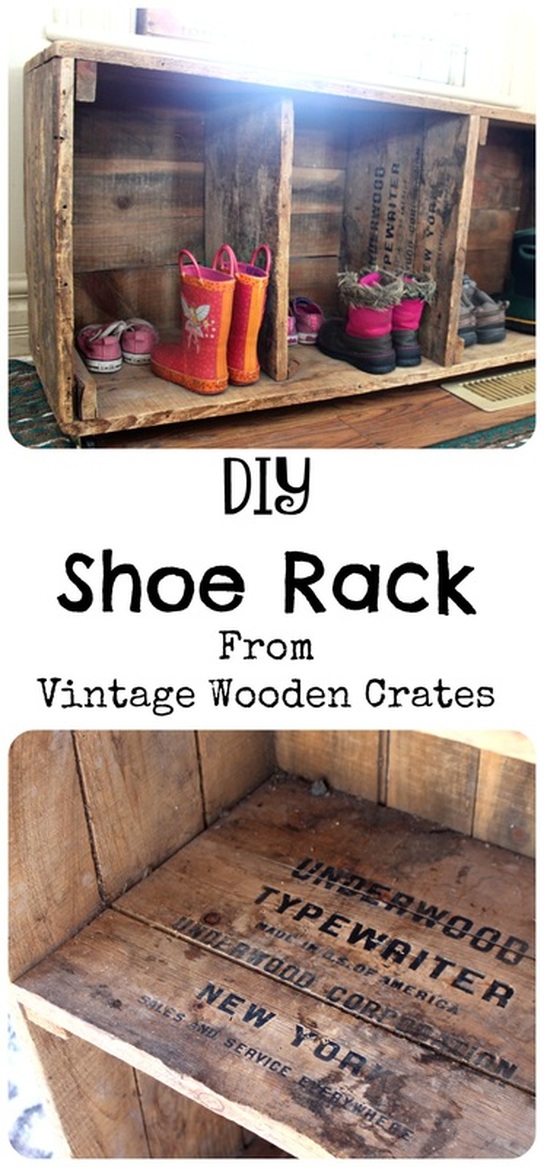 I knew I didn't want this beauty hiding in the barn, so I took it to the house, and cleaned it up. I also knew I didn't want/need it as a standing upright shelf-thingy. So, I decided it might be serviceable as a shoe holder at our front door. I picked which side I like best to be the top, and fastened some simple, inexpensive casters to the bottom four corners. I knew I would want caster for two reasons: First-This box would sit slightly over a heating vent, and I wanted to get it from sitting right on top of it all the time. And second-so that I could easily drag this out of the way for easy cleaning.  Because this was just one large box, and someone had it as a standing shelf (pictured above), all I needed to do was attach casters, and we were good to go! Even without the dividers though it would have been an excellent shelf. I really do like how it looks at our front door, and each of my three kids has their own little "cubby" as we call it. They know to put their stuff in their, and it keeps all the kids from crowding (and fighting) in front of our cramped front closet! 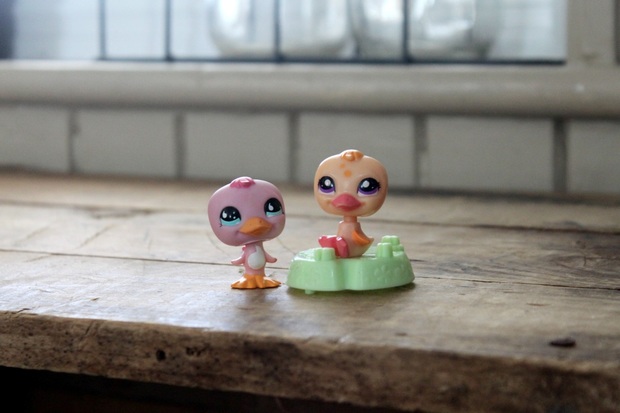 My daughter wanted me to take a photo of her ducks on the shoe shelf :) Other Ideas! Knowing that huge typewriter boxes aren't always readily available, and that not everyone will find one in their barn, I've included some other shoe racks from wooden crates for you to be inspired by! 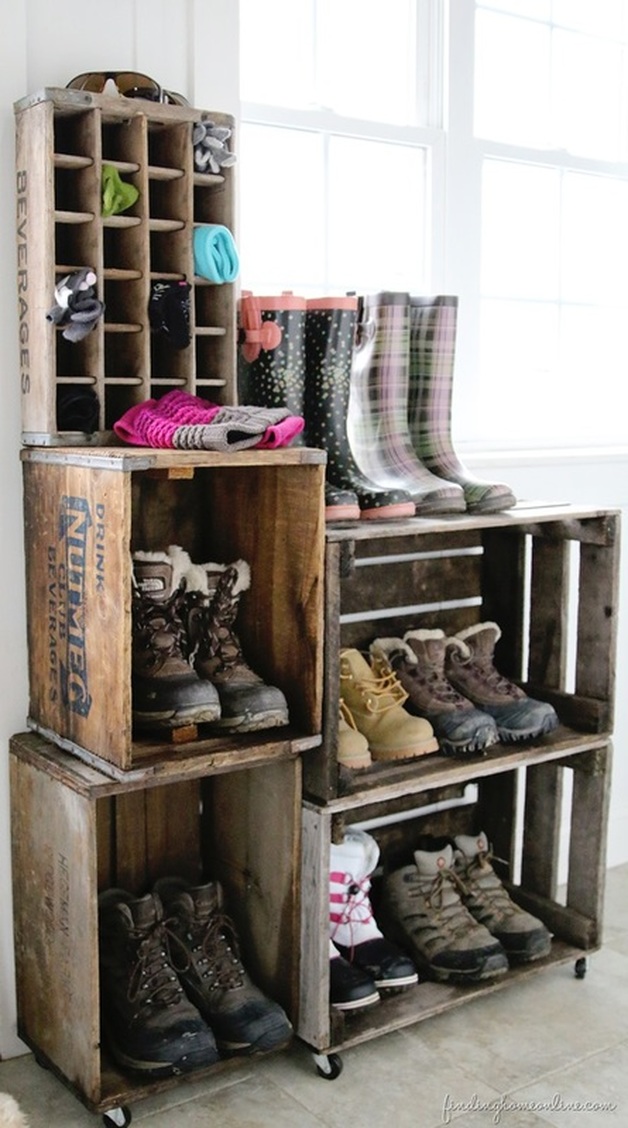 At Finding Home Farms there is this beautiful shoe rack from multiple wooden crates. Find the tutorial here. 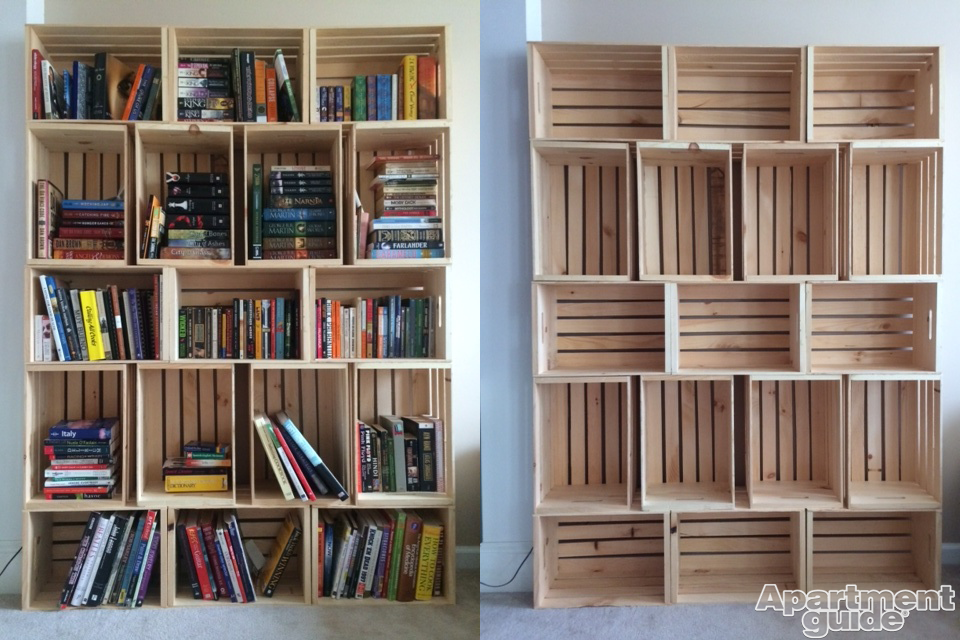 If you can't find/can't be bothered to find vintage crates, you can find new ones at stores like The Home Depot, Canadian Tire, Michaels, and Wal-Mart. Apartment Guide has a tutorial on how to accomplish this shelving from these new wooden crates. It shows the shelves with books, but it can obviously be made to the size you need and used for shoes & boots! Click here for that tutorial! 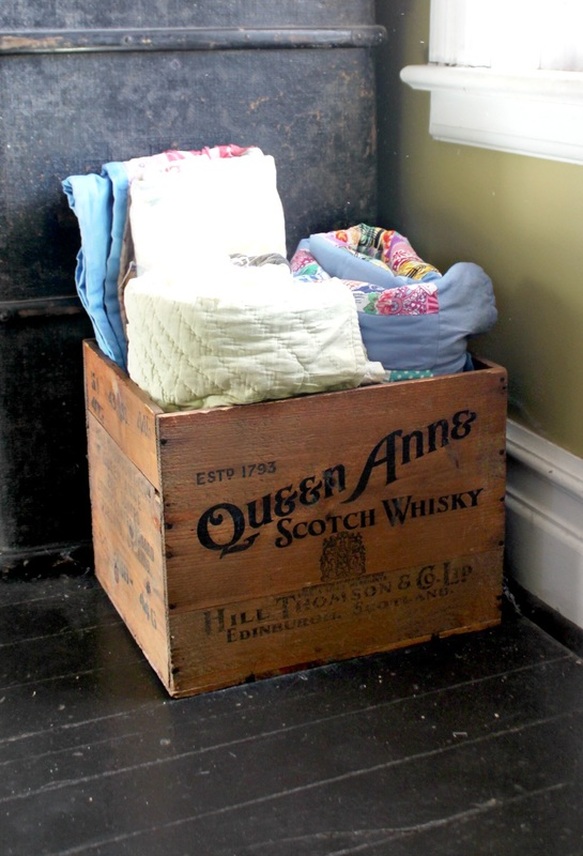 Using an old crate to hold quilts for display and for guests to be able to grab if they are sleeping over and are freezing in our old house! Some of my other uses for old wooden boxes (and steamer trunks) can be seen here. I love finding old things, and bringing them back with a new job, it often saves us money, and is always one-of-a-kind! When our 2 girls finally got out of their cribs, I wanted to get bunk beds. But, the set I wanted cost $1000....so, no thanks! Yikes! 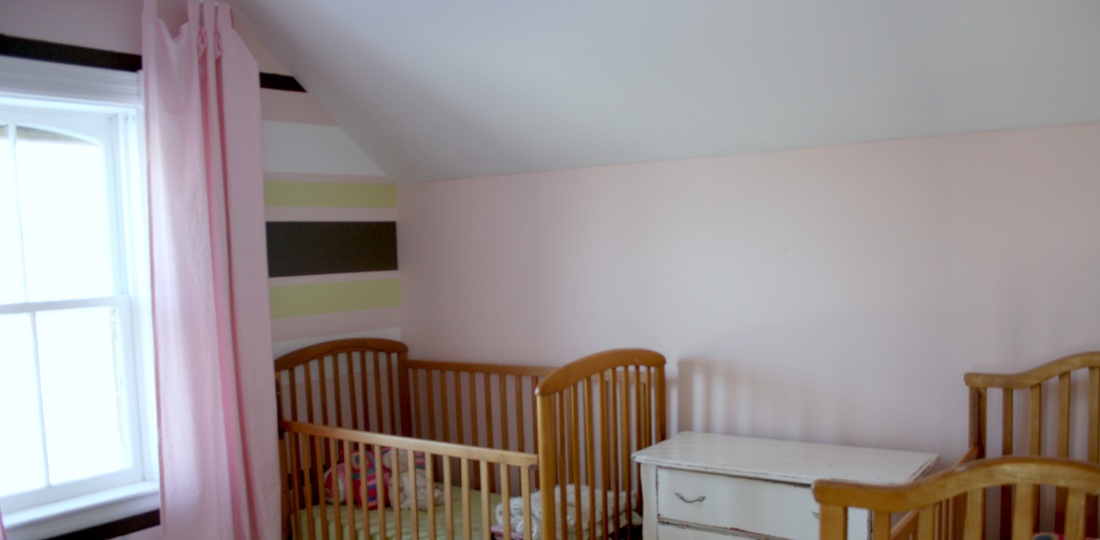 The girls' room with 2 cribs So, to tackle the issue at hand, I got creative and thrifty! My 2 fav. things! 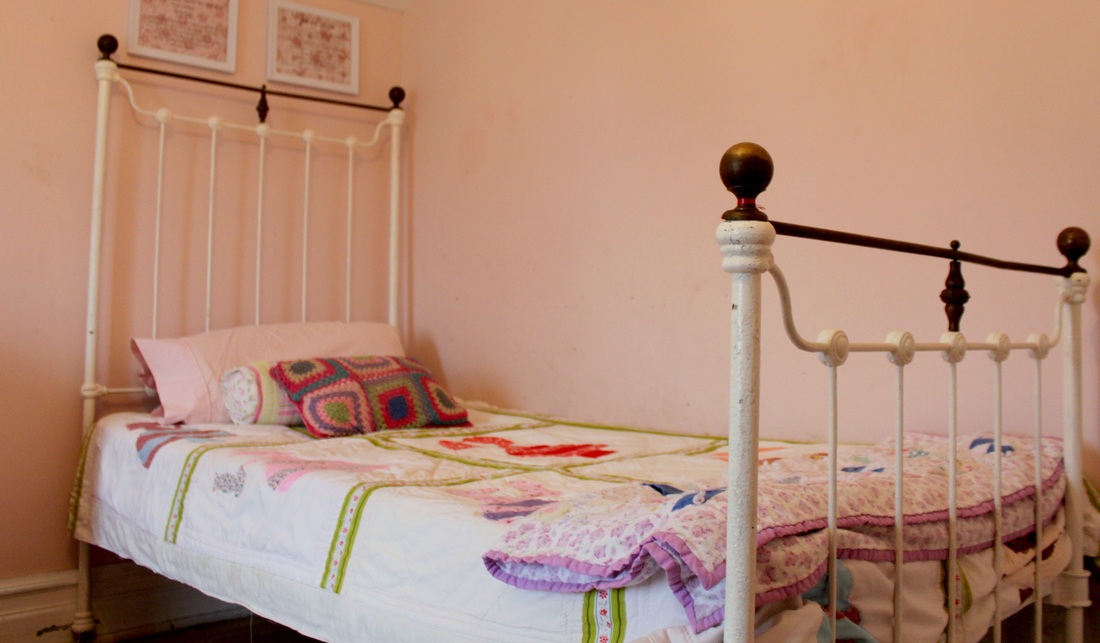 The brass and wrought iron bed we purchased. It's like a princess bed! For $75 we bought a brass and wrought iron antique "single" bed. So, to offset that cost, I found (through Kijiji) a metal bed frame (just the legs, and the frame to hold the mattress), a box spring, and 2 mattresses-all for free. We also needed to buy a sheet of plywood to go under the mattress on the antique bed (which cost about $18, with leftovers). But now, we needed a second headboard to match the one we bought. Enter: 1980's inspiration! Back in the day, faux finishes were all the rage. People painted fake brick, fake marble, and fake head boards (among other things). Done right, you could fool people, but done wrong, well, it just looked crappy (and usually hilarious)! 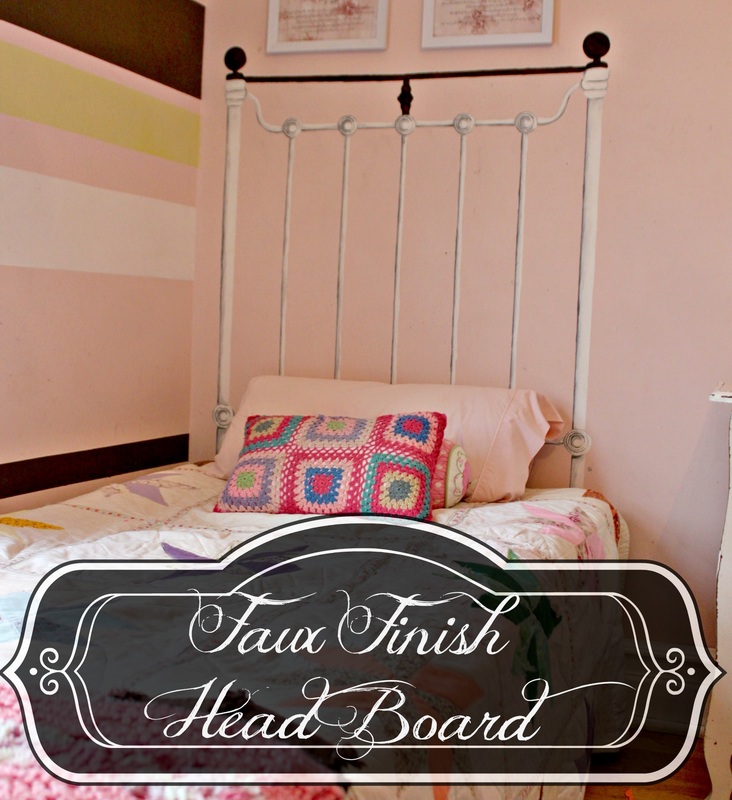 The "faux" headboard So, it was honestly pretty simple to do. I just held the real headboard up against the wall where I needed the "second" bed. Then, I traced it! I then used a small sugar dish to trace and do the circles properly. If you want to do a headboard, but aren't doing a matcher, and therefore don't have something to trace, my advice would be to keep it simple. This headboard is actually very simple. You could use a yard stick to trace the strait bars, a small circular object to get the circle parts right, and create a few simple stencils to do the wavy parts so that they are balanced. 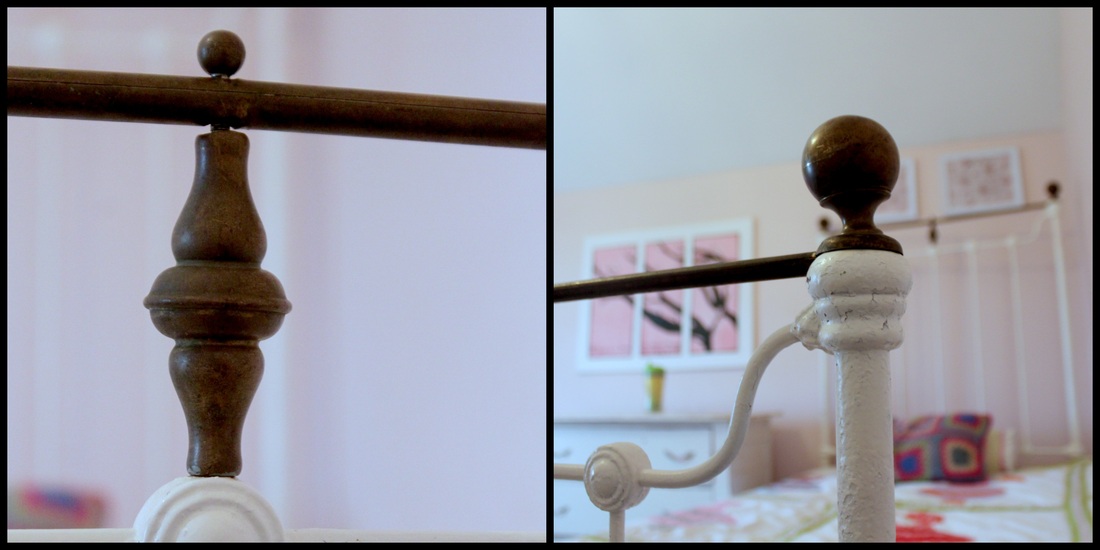 The details on the real bed that I needed to re-create. Starting with white, I filled it in, and then with 2 shades of grey I added dimension. I decided not to add a "shadow" because the real bed would have a different shadow at different times of the day, but the fake bed would have a perma-shadow in one direction. Illusion wrecker! To simplify the intricate designs along the bed, I used a cereal box and an exacto knife to cut out stencils (draw your design on the cardboard, then place onto a cutting board and use the exacto knife to cut it out). I just put the stencil in place, dabbed on some paint, and moved to the next spot. 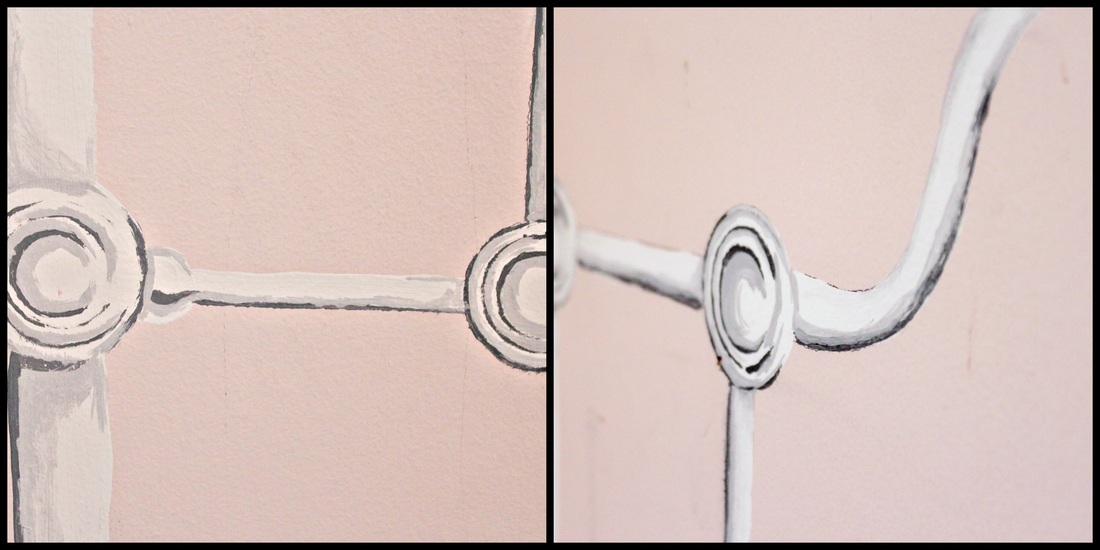 The details I simplified by making a stencil People (almost everyone who has come over since) has walked past the room, then done a double take and can't believe the one bed is just painted on the wall. The only thing missing is the footboard, but we're o.k. with that because it's a really small room.  The completed room! For $93 (antique bed, plus plywood), a bit of Kijiji hunting, and a few hours of painting, our girls have beautiful, matching beds for their room!
I have a duelling personality. One side of me loves old things to the point of clutter, the other side of me wants a place for everything, and everything in it's place. So, I starting repurposing the things I had acquired so that I could have the best of both worlds! 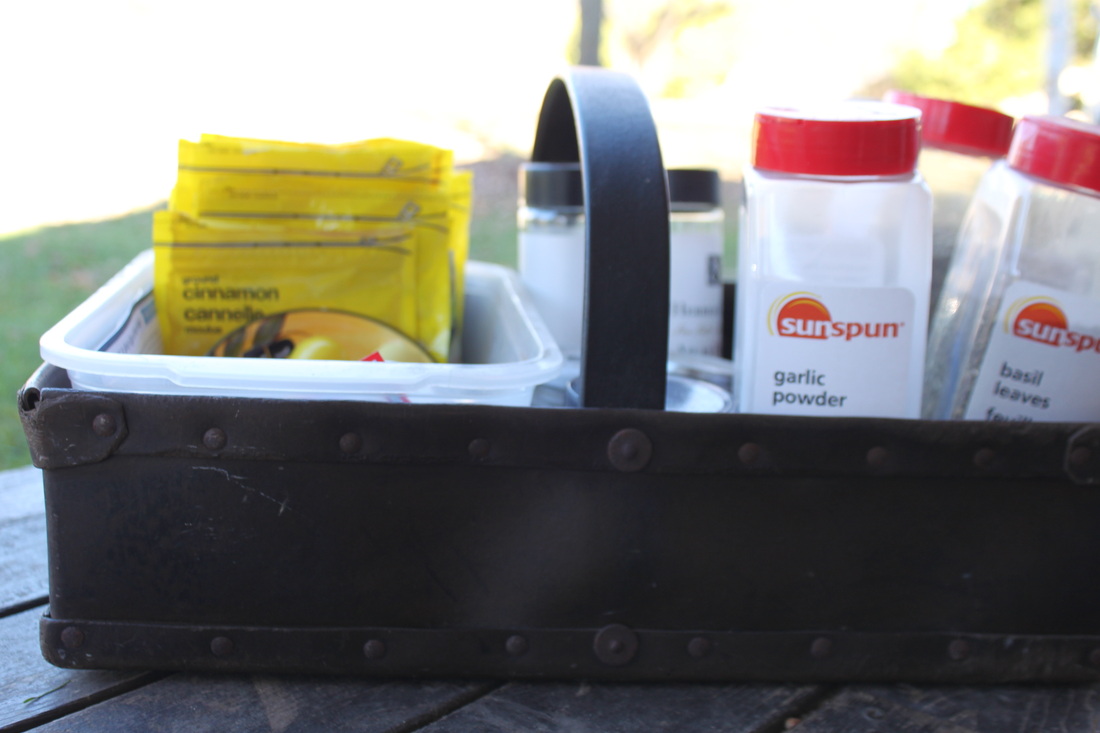 This beautiful, WWII era homemade leather "basket" serves as a spice rack, of sorts. It also was used at my son's summer birthday party to hold drinks. 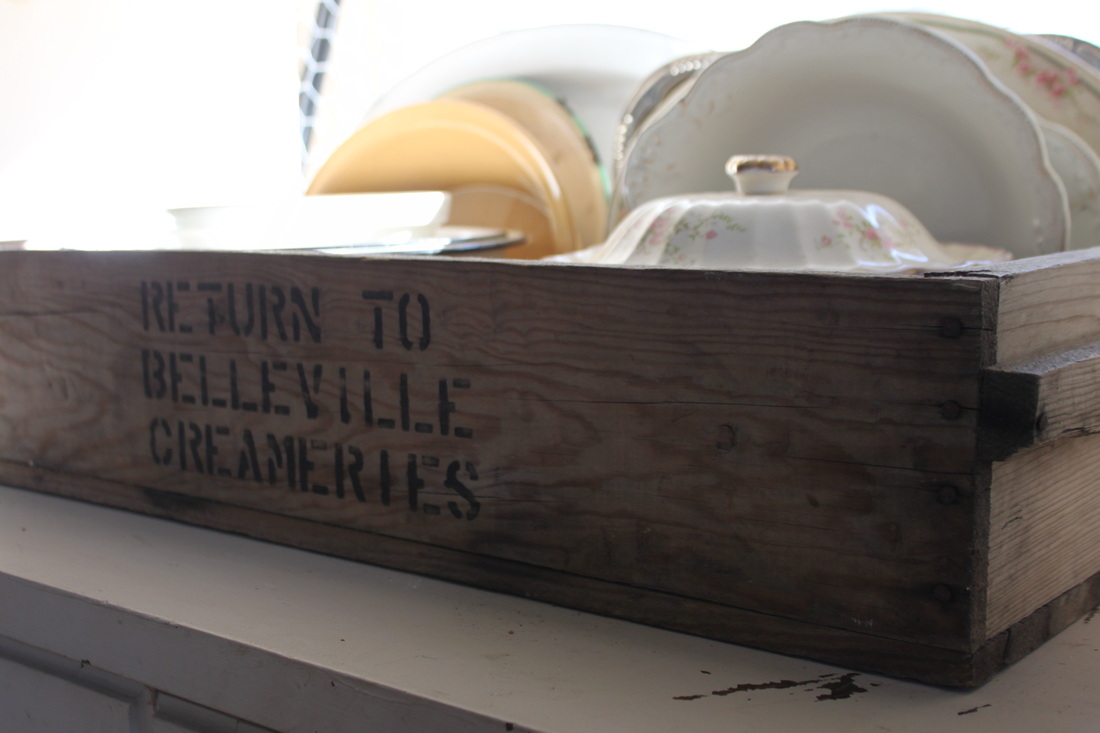 My Belleville Creameries box helps keep my mixing bowls, serving dishes, and platters all tidy and accessible. 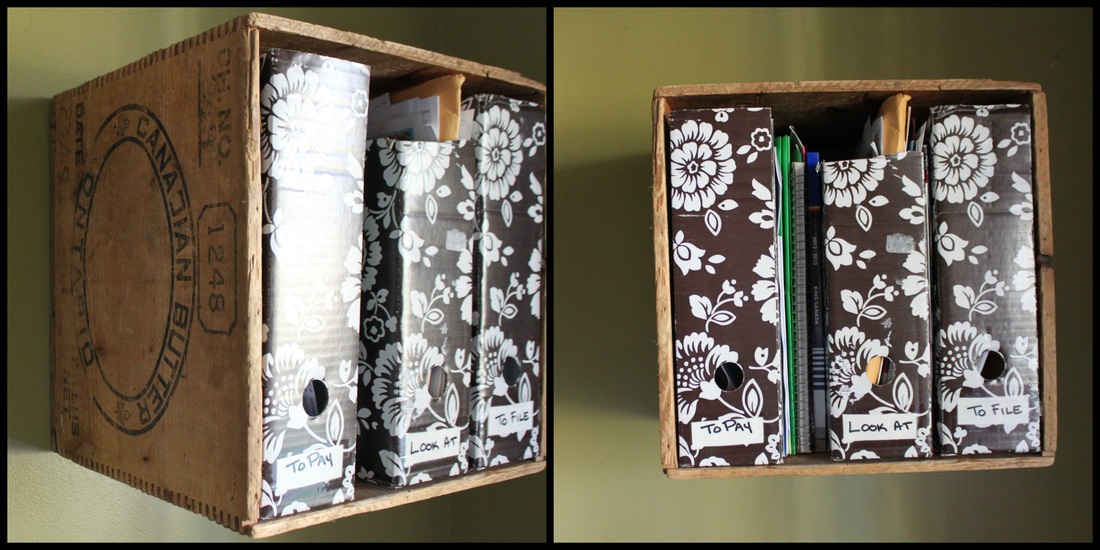 I've had this Canadian Butter box for a while, and it has had many, many jobs. It was a "night stand" sitting on the floor when I had a low bed. Then it served at many parties as a bags of chips holder. It was used very temporarily to hold our cardboard and paper that we would take out to burn (a very undignified job for such a lovely box). Finally, I was trying to get our computer nook in order, and I anchored and screwed it to the wall as a shelf. 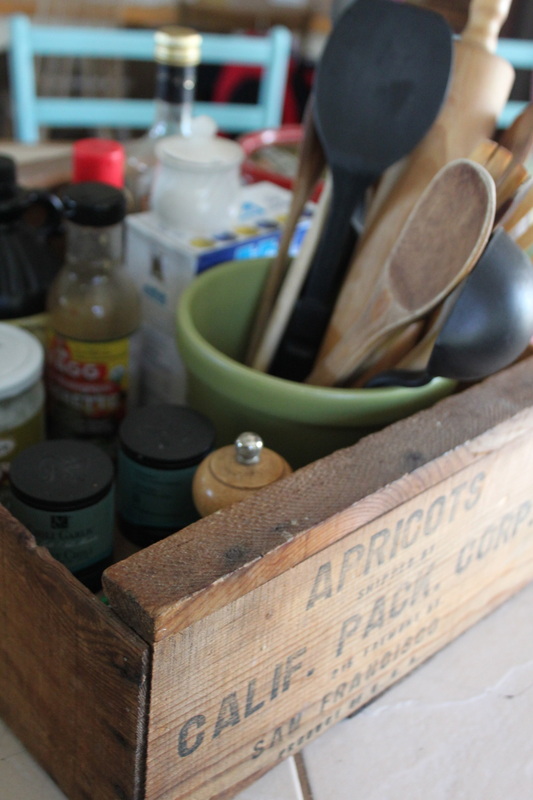 This box sits next to my stove and holds my cooking utensils as well as oil, vinegar, salt and pepper. 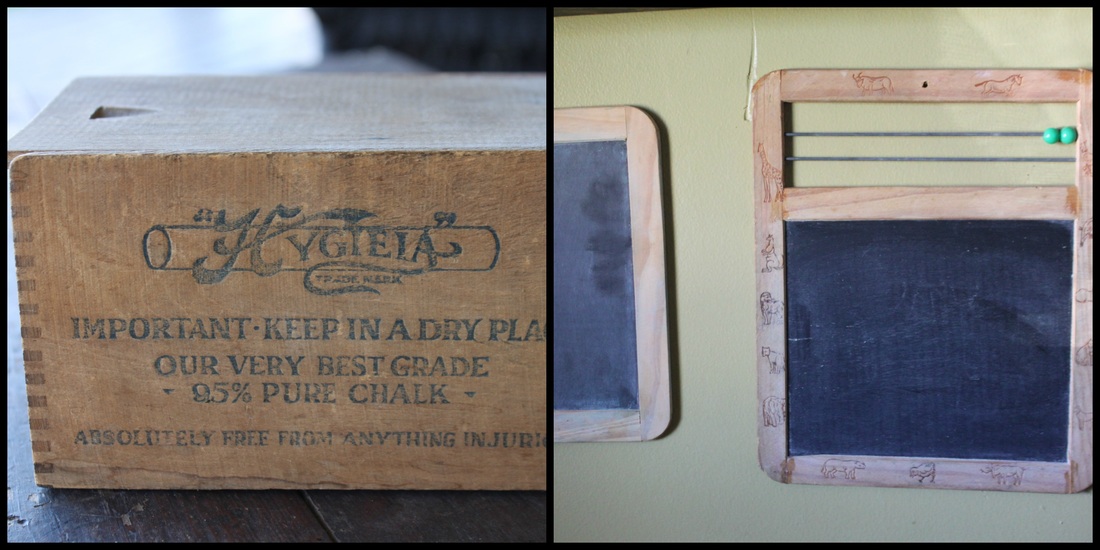 This box literally has not been re-purposed at all, and holds the chalk for our little chalk boards! 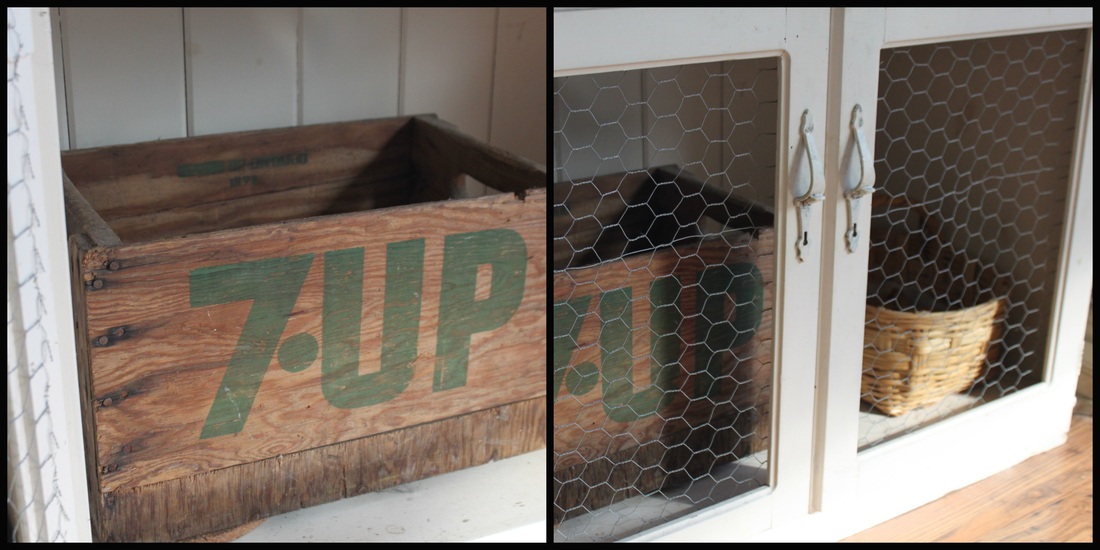 I got this box a long time ago to hold toys for my son in his room, but it has since become the potato holder in the kitchen. 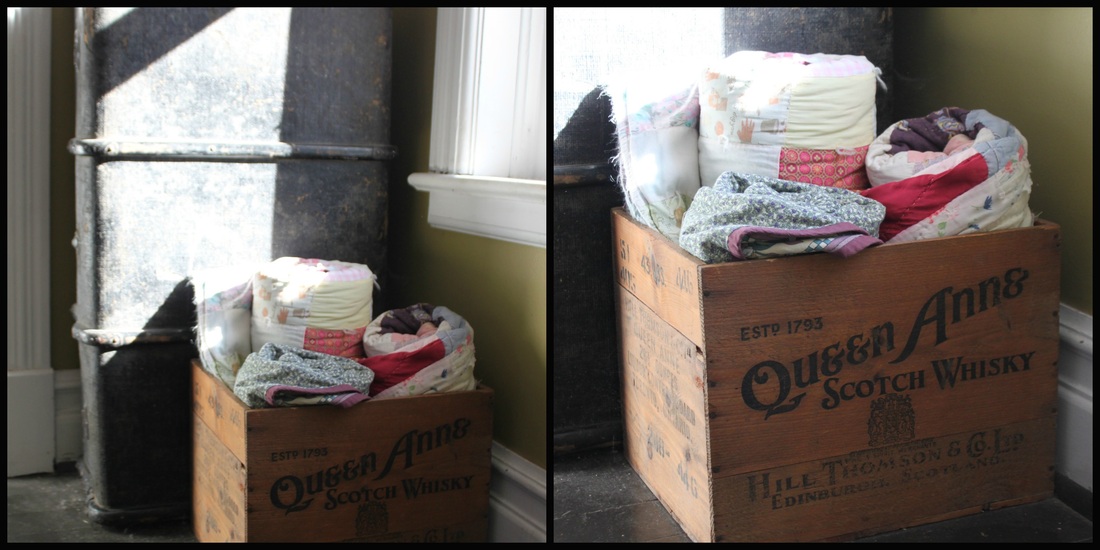 An old whiskey box holds extra quilts in the hall incase guests need an extra blanket in the night, then they don't need to go rooting through my linen closet! 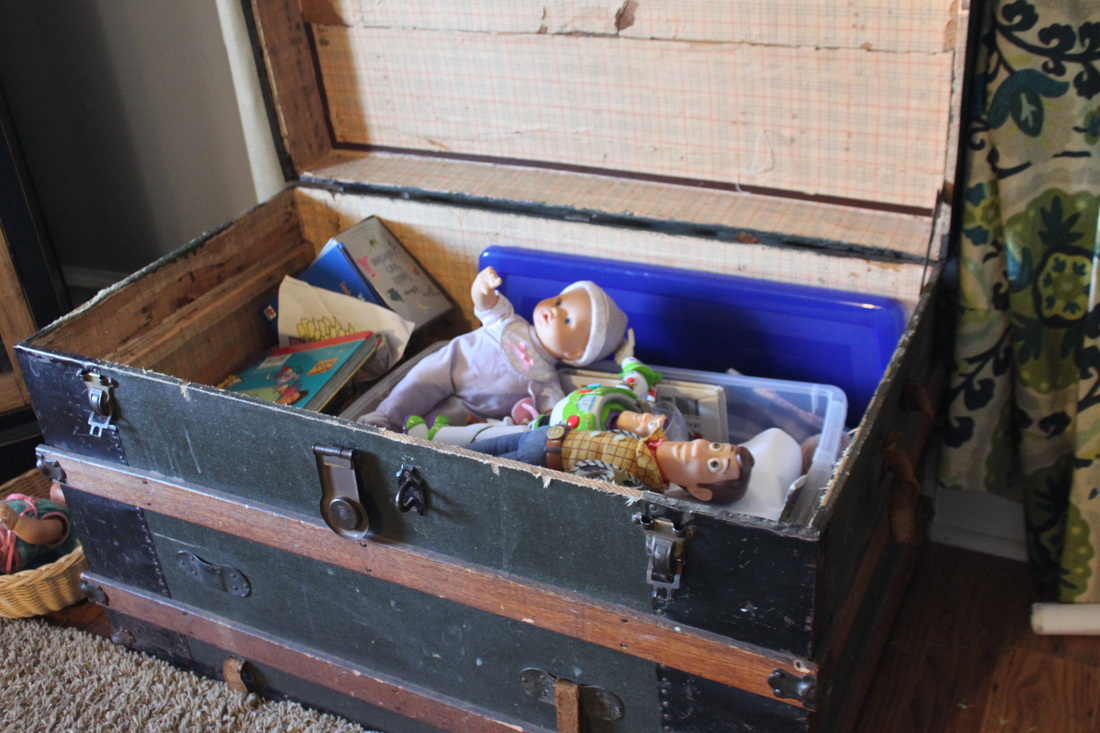 An old steamer trunk holds my kids toys. At night, the toys get tossed in there, and my living room looks like an adult, relaxing place instead of an isle from Toys R Us! 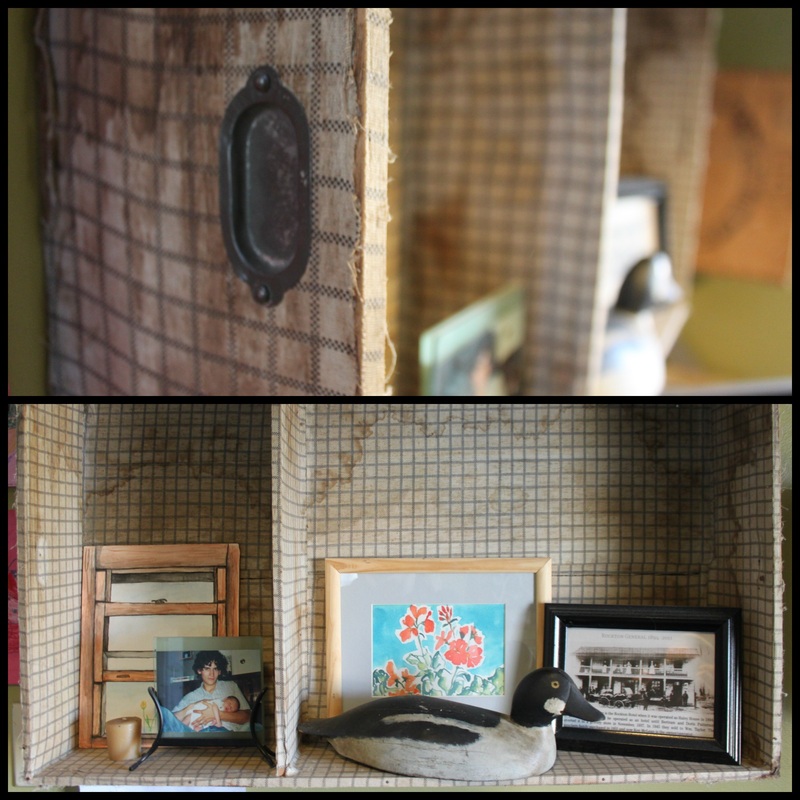 Speaking of steamer trunks, my kids also have one on the front porch to hold outside toys, but the lift out part of it (that most old trunks you'll find have missing), needed a job. So, it got added to our computer nook as a shelf. 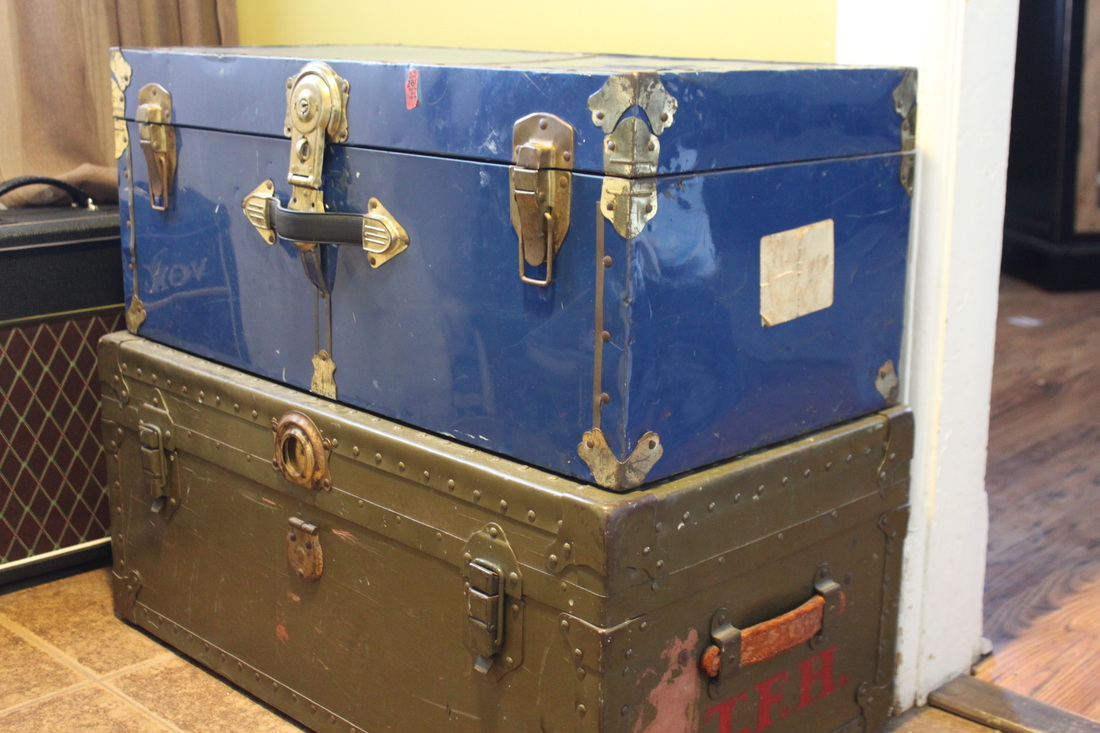 More steamer trunks….o.k, I have a problem….but let's not dwell on that right now. These stacked trunks are also in our computer space, the bottom one is actually a little empty, but the top one has our computer paper, and some other office-y things like binders and files. 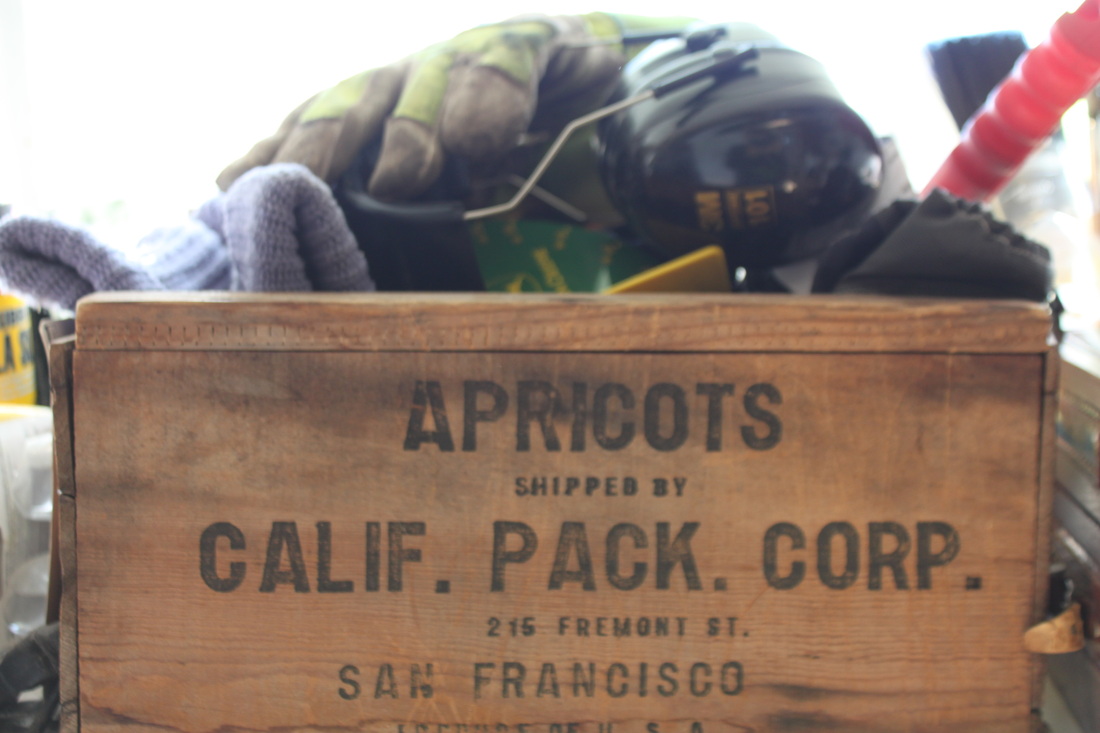 Just so you don't get it in your head that I am perfectly tidy, I am also sharing this photo from my fairly messy back room. This lovely box holds, as you can see, anything that lands in it! In here you'll find things ranging from dog treats, to a thermometer, mitts and a hat, lost nails and screws, and sidewalk chalk. So, (I want to say "in conclusion" as though I am completing an essay) you can love something, but also put it to good use. These beautiful bits of history are a part of our house, a part of us and who we are, and they help keep things tidy! I call that a win/win....um, win!
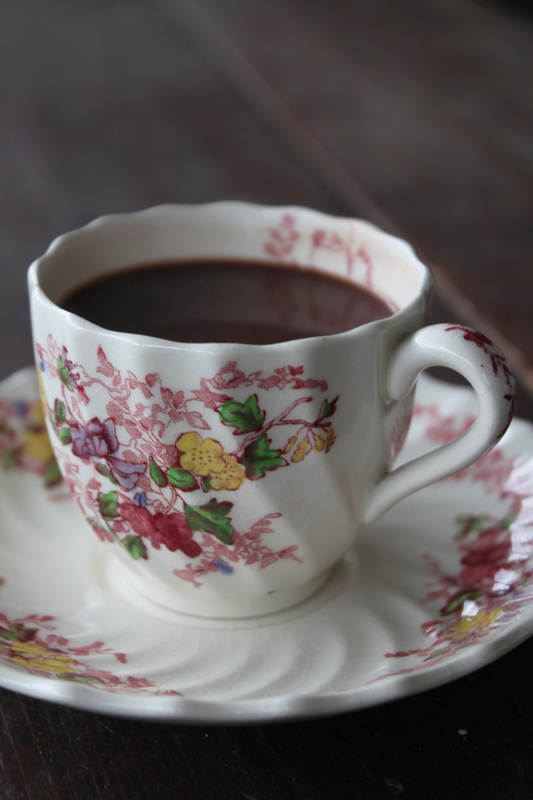 Word on the street is that chocolate is healthy. It's true (and not true....). It's true that cocoa has many health benefits, but over processed, full-o-sugar chocolate isn't really the greatest for you. Cocoa being a healthy thing isn't new though. 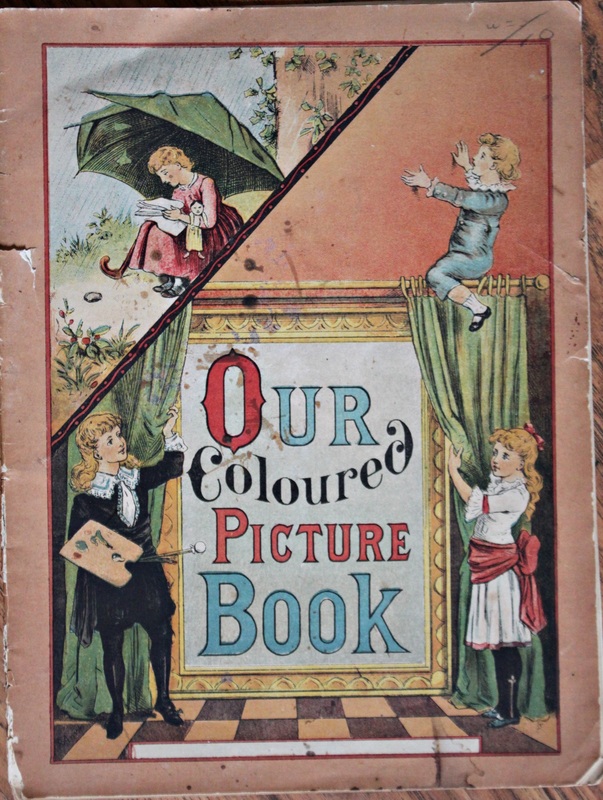 In a book titled "Our Coloured Picture Book" (I am not sure of it's exact publishing date), there is a beautiful ad for Fry's Cocoa. 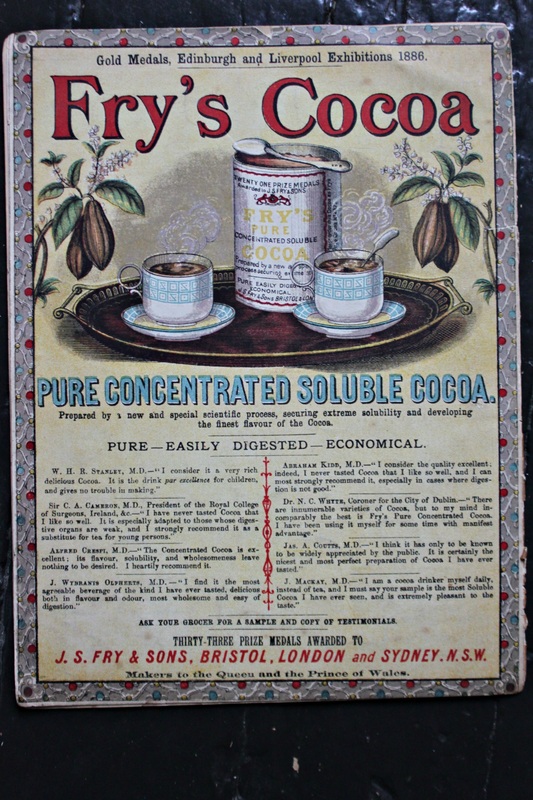 Fry's Cocoa Advertisement At the bottom of the ad are testimonials regarding the quality of Fry's cocoa, but also the health benefits. 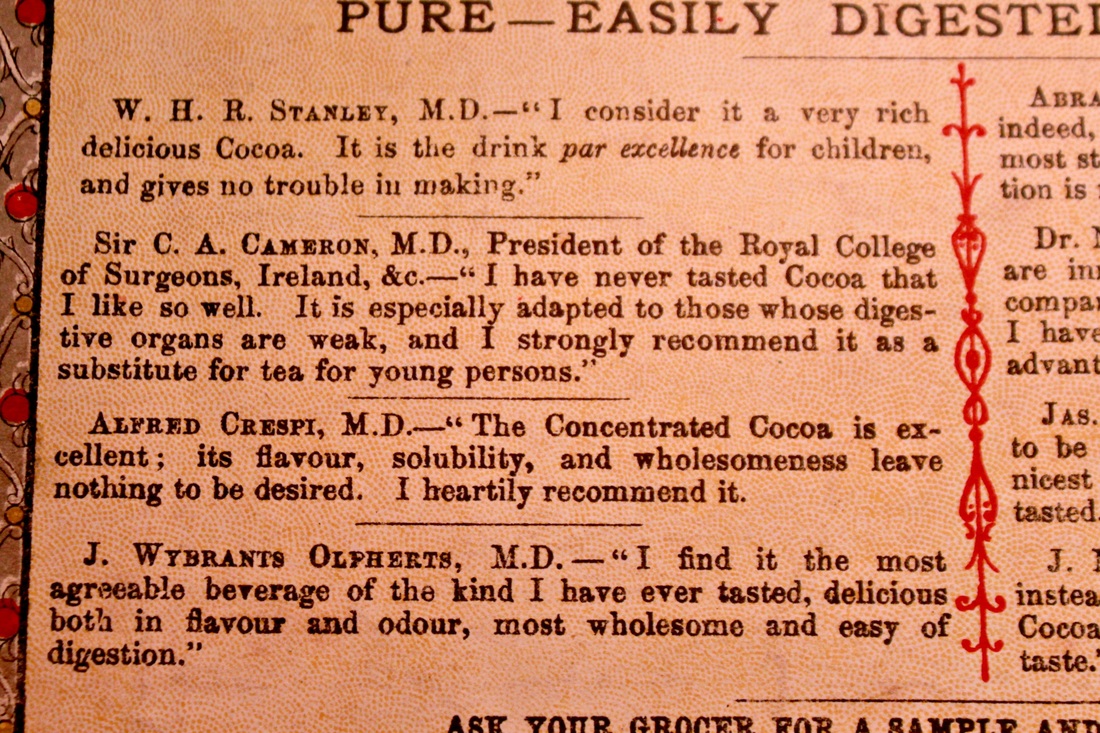 Testimonials My favourite testimonial is from Sir C.A. Cameron, M.D. President of the Royal College of Surgeons, Ireland, & C. (who, by the way, passed away in 1921, so, he would have said this before he died, as a clue for the age of this publication) "....It is especially adapted to those whose digestive organs are weak, and I strongly recommend it as a substitute for tea for young persons". I love that he recommends it as a tea substitute for "young persons"….young persons in Ireland drink a lot of tea, apparently. Anyone read "Tis"? 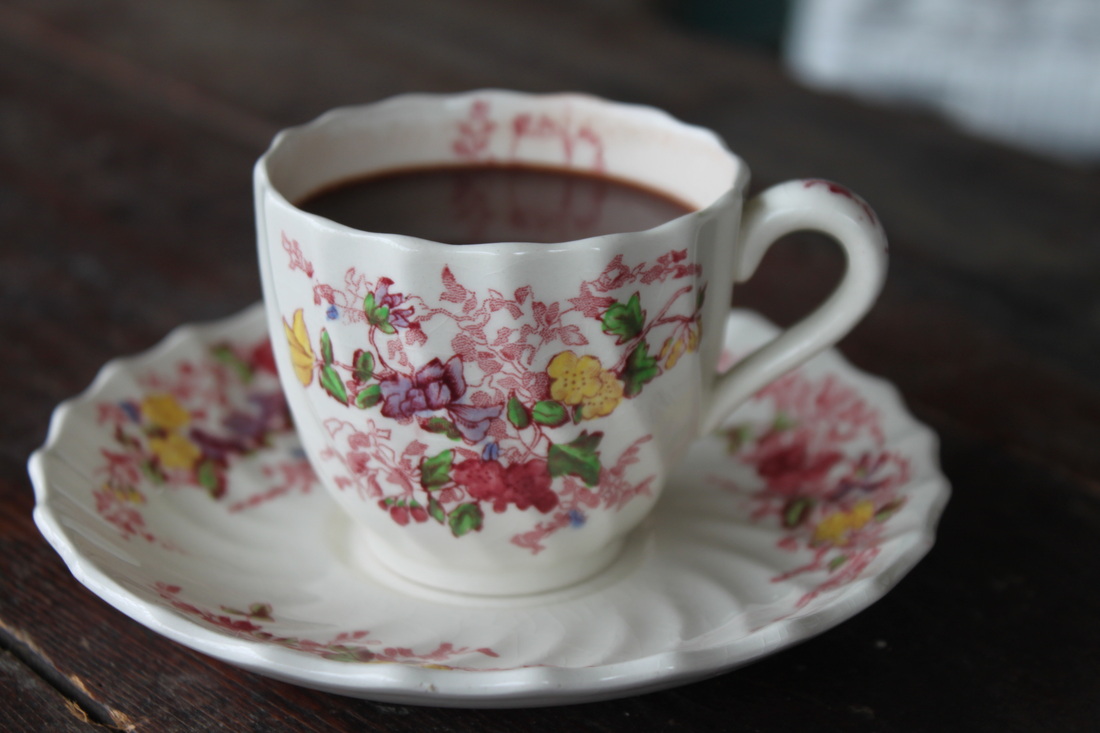 The recipe for making hot chocolate in a Rawleigh's "Good Health Guide" that I have from 1929 involves a double boiler, another saucepan, and using a Dover egg beater (ya know, one of the old school beaters that you hold with one hand, and turn the handle for the mixer with the other). So, instead of sharing that recipe, I will share my favourite recipe, from one my favourite blogs, Chocolate Covered Katie: http://chocolatecoveredkatie.com/2012/01/26/the-perfect-hot-chocolate/  Photo courtesy of Katie over at Chocolate Covered Katie. As the colder weather creeps in, it's good to have a yummy, healthy hot chocolate recipe on hand. Enjoy!
Some people we knew were moving out of their house that they had lived in for 40 years. They had asked if we wanted a few things (which turned into many things!), but it wasn't all bad. They had managed an estate of an elderly woman years ago, and had some of her things that they gave us. 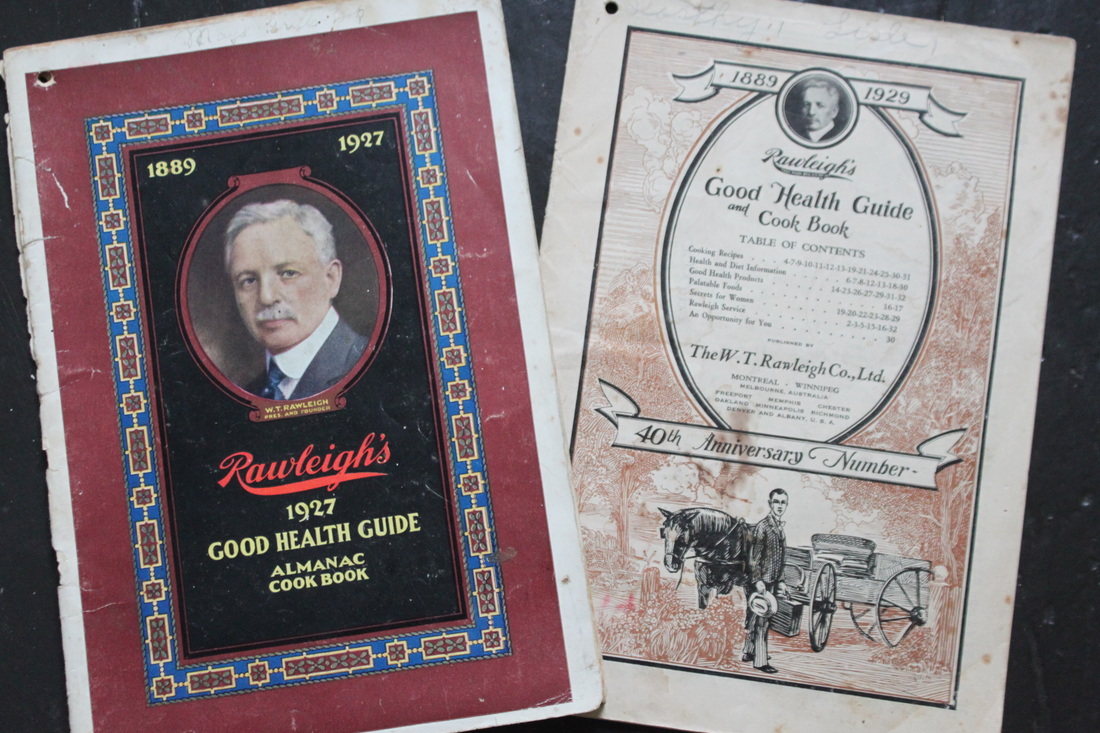 The two Rawleigh's "Good Health Guides" dated 1927, and 1929 that we were given. Inside a beautiful old Bible (that, by the notation inside, was given as a gift on Christmas day, dated 1882. Wow!), I found two copies of Rawleigh's "Good Health Guide". They were dated 1927, and 1929. The picture below is for a "recipe" that I thought was beautiful, and telling of how children were raised then compared with now (generally). Can you actually imagine seeing this "recipe" anywhere now? 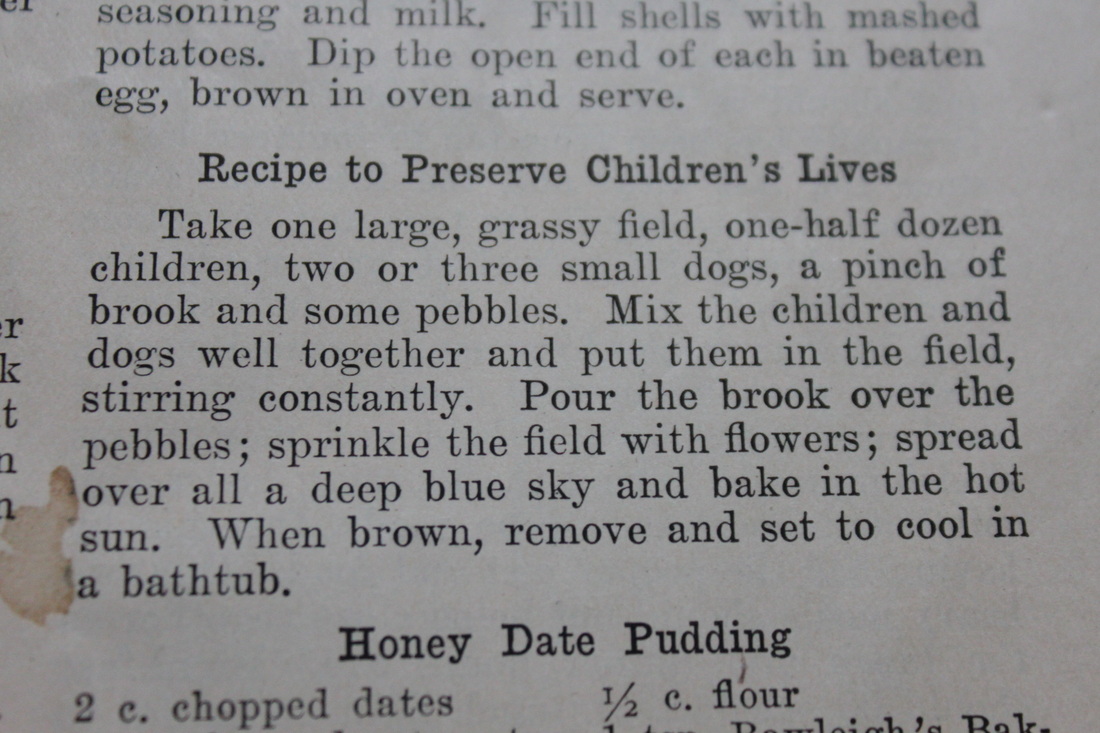 A "Recipe" from the "Good Health Guide" I was also struck by the length of the ads in the Guides. Ads now are meant to cater to our fast-paced society where we can't be expected to read anything over a one-liner. Pictured below is an ad I thought was sort of funny (though it's original intent was not to be). 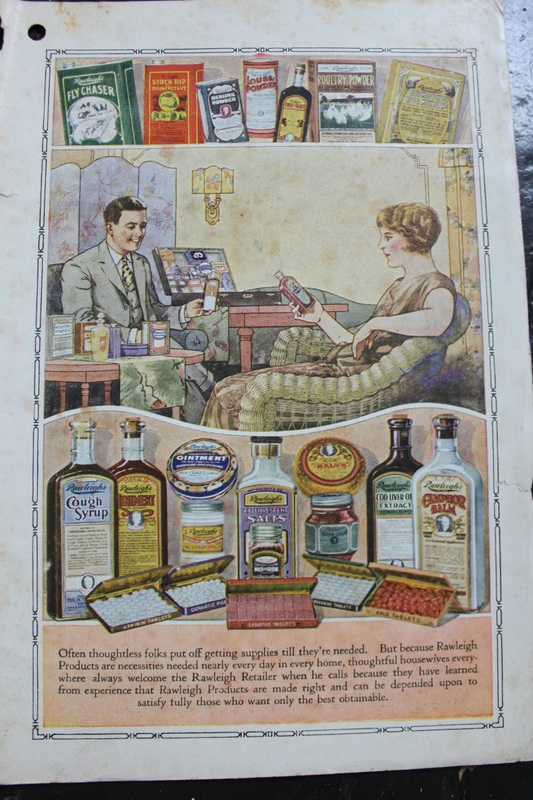 An ad in the "Good Health Guide" The caption in the ad reads: "Often thoughtless folks put off getting supplies till they're needed. But because Rawleigh Products are necessities needed nearly every day in every home, thoughtful housewives everywhere always welcome the Rawleigh Retailer when he calls because they have learned from experience that Rawleigh Products are made right and can be depended upon to satisfy fully those who want only the best obtainable". 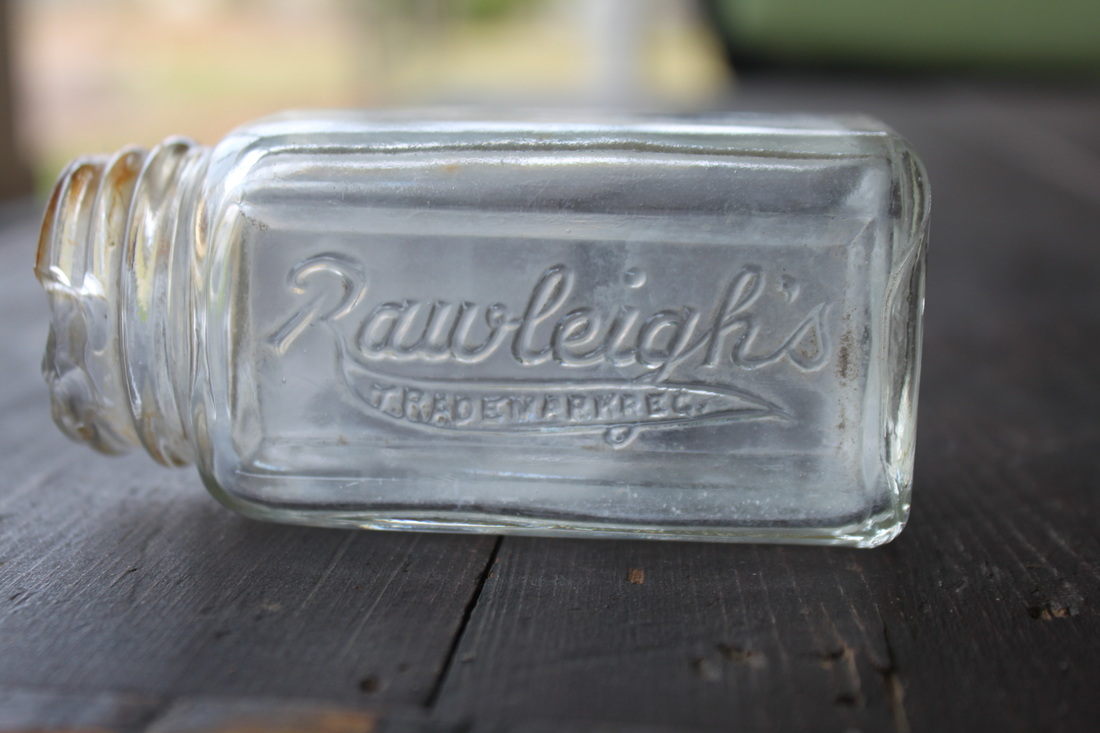 A Rawleigh's bottle that I own. Can you imagine having a door to door retailer now? It actually sounds kind of nice! Especially if you're like me, and live out in the sticks!
I love history, and having been given these two old copies of the Rawleigh's "Good Health Guide" made me feel like a kid on Christmas! I'm such a geek! |
Hi, I'm Amy-Lyn! 
I am the lady behind this here blog! I live in the sticks with my animals, my super handsome husband, and my
3 amazing kids! Here you'll find things from recipes (gluten-free, paleo, and strait up junk food!), DIY ideas, thoughts on raising a son with autism, and whatever else pops into my brain! : ) Read more about me by clicking here! Want to Stay Connected?
Find What
|
 RSS Feed


