|
So, I've been quite absent, yes? It's been a busy few weeks, and I haven't had the time the get any posts on the go. I usually have drafts written up and ready, but I'd used 'em all up! I was running on empty! But I am here today to show you a Rice Krispie treat I made recently. They were inspired by a post I saw on a website called the West Side Rag, which is a collaboration of many writers talking about things from the upper west side of New York City. Anywho, this particular article was talking about a new sweet shop in town called, "The Treat House". This place makes gourmet Rice Krispie square treats, and one mentioned sounded gooo-oood. A chocolate mint Rice Krispie square....yess-erree. So, I went to work and whipped a batch of my own! 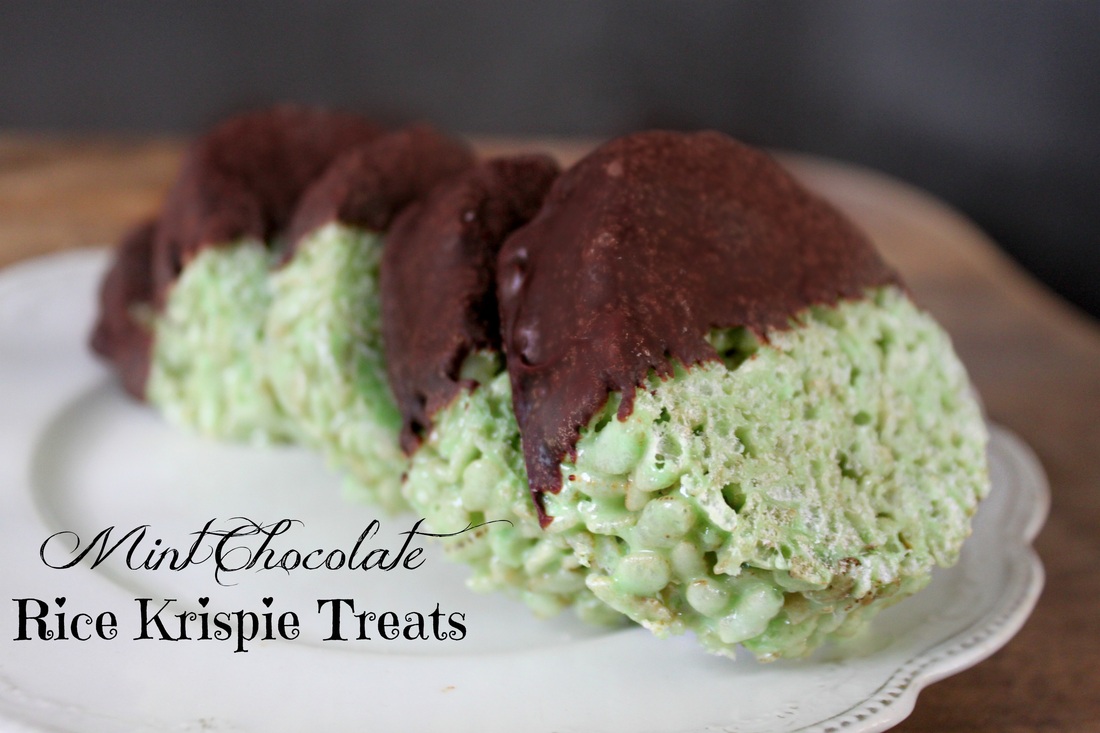
Mint Chocolate Rice Krispie Treats Ingredients:
Method:
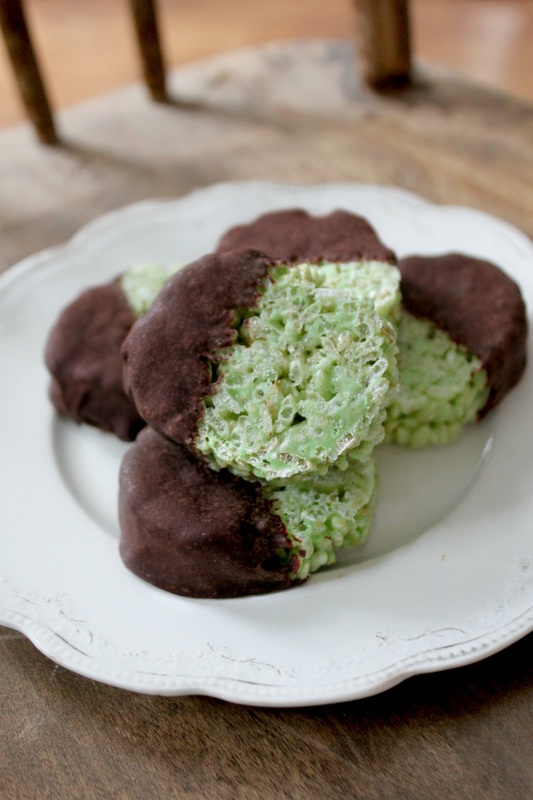
I made these into circles because I thought they would look nice and different, and it wasn't really any more work than pressing them into a pan and doing the usual.
Anyway, that's it! A super simple and festive treat you can whip up for some holiday get-together! Have a great weekend!
0 Comments
Oh yes, you read that right....Caramilk, as in a Caramilk bar....oh yeah.... So, again I mention my sisters Carmelitas, and again I mention how I was feeling too lazy to open the caramels required to make said Carmelitas, or to take the hour to make some homemade caramel....so, I took what this world had to offer in the way of chocolate and caramel, and I used that instead. It's the Caramilk Oat Bar. And it. Is. Good. 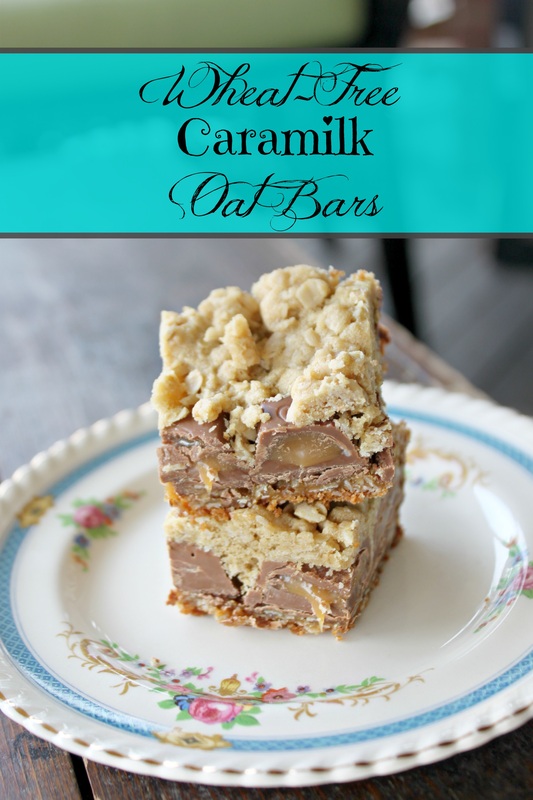 Caramilk Oat Bar Ingredients:
Method:
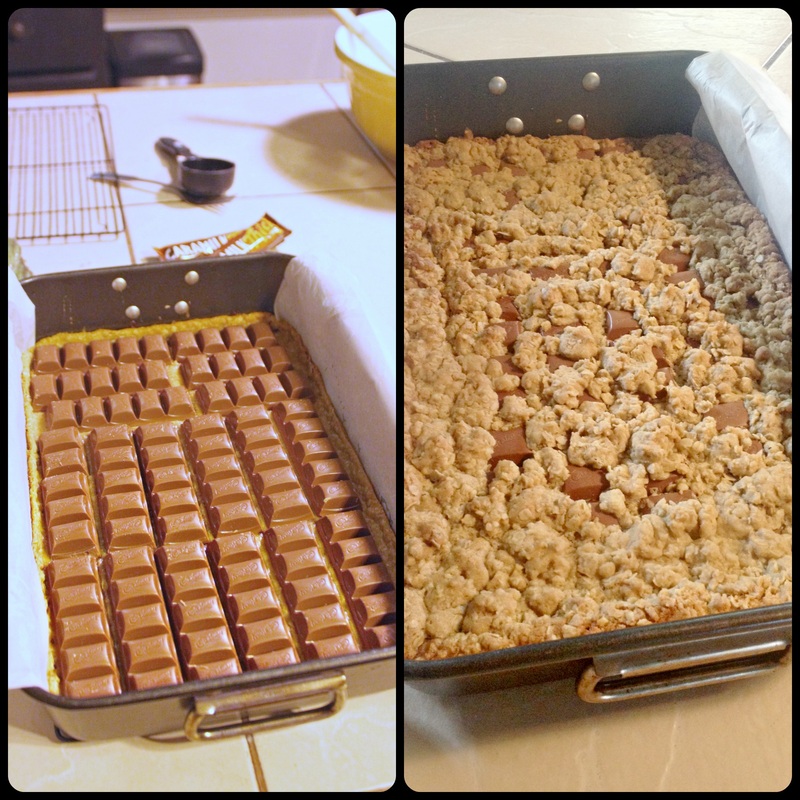 A double batch of these super yummy bars! I just need to ask one question before I go.....how do they get the Caramilk in the Caramilk bar....? When I was a wee child (not growing up in Ireland), this was the commercial they showed, maybe they still show a similar version? I was no smarty pants, but I thought it very obvious how they got the caramel in...but then because they made it seem so darned mysterious, I doubted myself....what a silly child I was, distracted by a commercial such as the one below. I know now that my theories on how they got that caramel in were right (hello Google!), but, more importantly, I know it doesn't matter because they are delicious, and it doesn't much matter how they get the caramel in, only that they do! Am I right? Well, that rant is out there now, so let's move on.
Have a good weekend! I was at the dentist recently to get (another) cavity worked on (whomp whomp), and while having holes drilled into my rotten tooth and filled, I was watching Chef Abroad. Chef Michael Smith was in Hungary in a small village and was involved in a day-long event that centred around the slaughter of a pig and all the work that goes into getting all the cuts prepared, and how nothing was wasted. The thing that really struck me was how he kept talking about traditions, and making traditional food that was simple, cost effective and tasty. It got me thinking about simple recipes, and how some of the most simple recipes I've ever seen are in a book I have from 1893 called Dr. Chase's Third, Last & Complete Receipt Book & Household Physician. They didn't really have the luxury of extremely complex recipes then, so (aside from not recognizing some of the ingredients because we just don't use them anymore!) most of the recipes are really do-able and un-complicated! Well, this recipe is not some sort of tradition from my family, but it sure is simple. The cold weather came suddenly, and I wanted me some soup! This soup was extra appealing because of how cheap the ingredients are. I added bacon to it because, well....why not? This soup is gluten-free, and if you're a white potato eating kind of Paleo follower, it's Paleo too. If you don't eat white potatoes simple replace with sweet potatoes, or maybe even turnip? 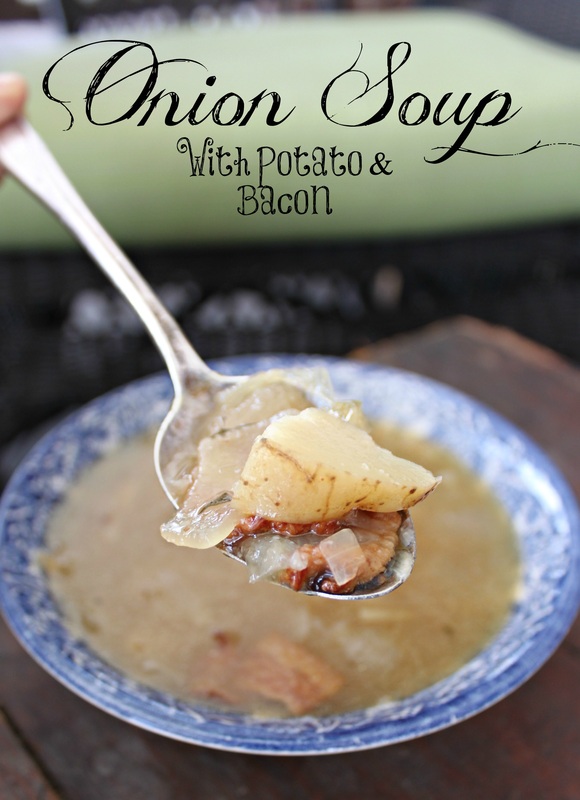
Onion Soup Ingredients:
Method:
I've made this soup a day ahead, and it tastes even better on day 2. I've also made it with added garlic powder and paprika to up the flavour (it is a yummy soup, but tastes of onions and potato (well, and bacon, if you use it). 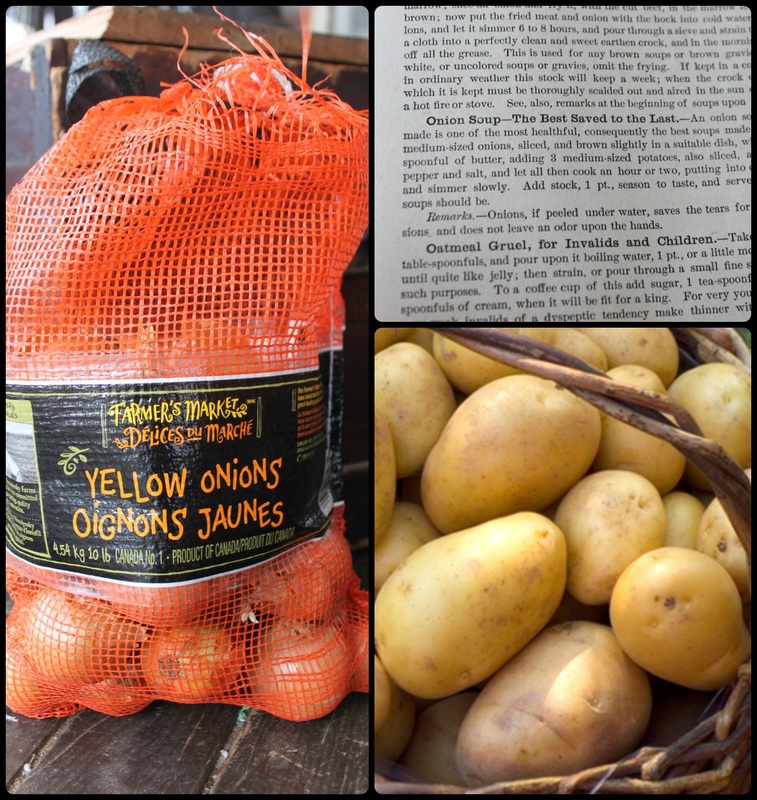
So, it's simple, it's gosh-darned cheap, and really customizable too as far as adding different spices. As mentioned above, I've added garlic and paprika, but rosemary would be super-yum too.
Thank-you Dr. Chase for this soup, which if I was using my brain at all I could have thought up all on my own, but apparently onions are too obvious and I took them for granted! In closing (because this is an essay), here are Dr. Chase's words regarding this soup: "An onion soup nicely made is one of the most healthful, consequently the best soups made". Indeed Dr. Chase, indeed. Hey hey hey! We had our first snow fall on Sunday and the kids were so excited. Man, kids and their enthusiasm is contagious! Anyway, I thought I would share our method of operations when it comes to getting out the door for school (we actually did this even before some of them were in school, but they learned the drill!). Like some of my other tips, it's super simple, but I think it is enormously effective. 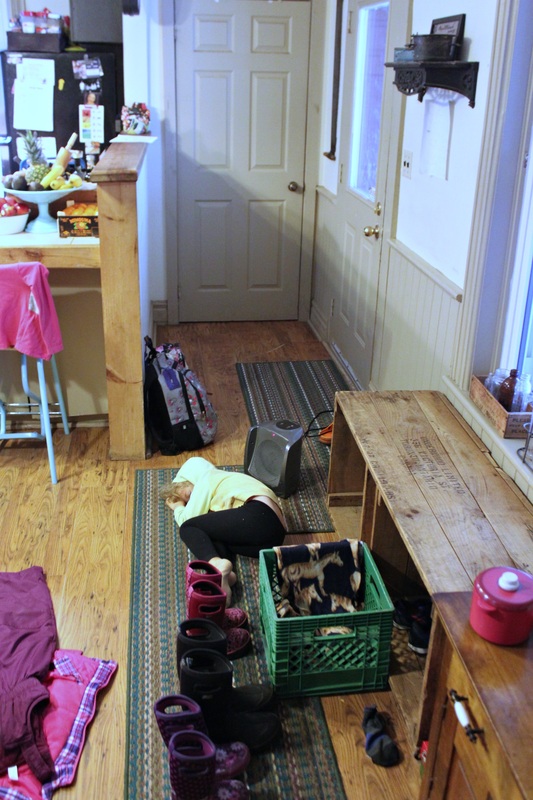
Above you see, well, Keziah lying in front of a heater in the morning because the house was cool (and also our green Hot Box), but you also see that our "entry-way" is extremely cramped and small. If all three kids were jammed up into that small space, all trying to get their things out of that front closet, it would be mayhem! 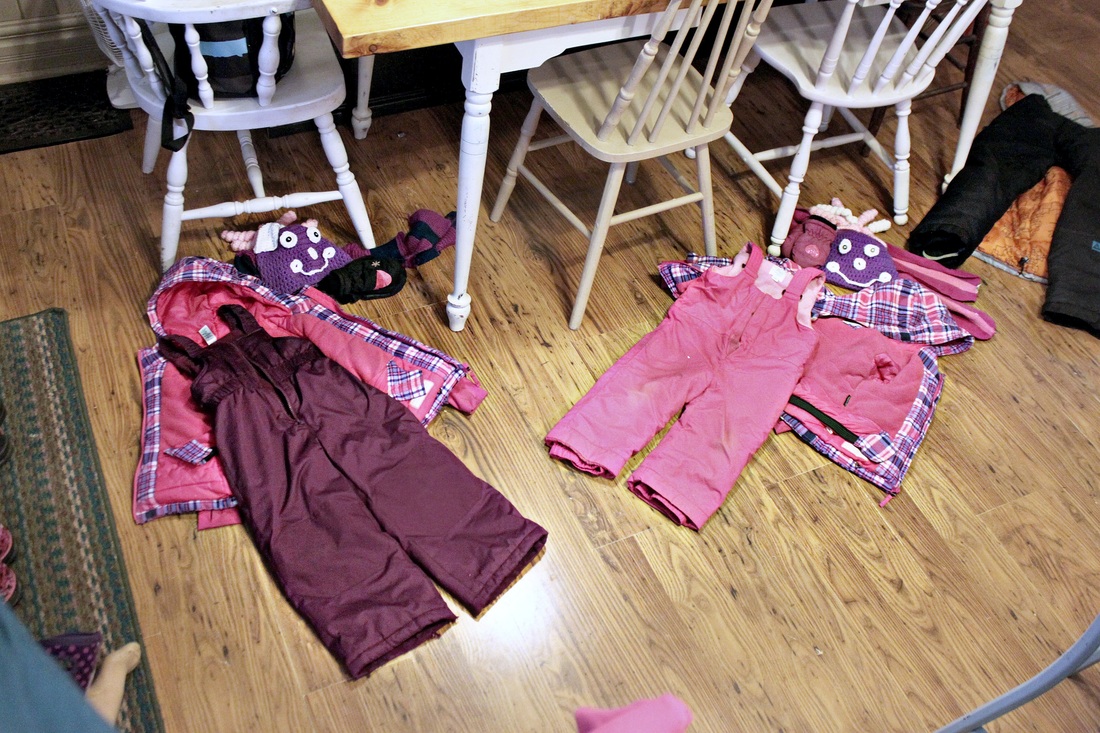
So, while the kids are eating breakfast, I set out their things on the floor where there is a bit more room. Having it all out means I know if it's all there (no last minute, "where's my mittens!!!"), and it also gives them each room to get ready without being in each others way and fighting. 
Yes, she did put a crown onto her toque!
The only thing I leave at the front is their boots because I don't want mud/wet on the kitchen floor!
And that's it! If your entry-way is small, but your living room is big, set their winter stuff in their, or in their bedroom, wherever there is room is a good place! So, I hope you are enjoying the snow-if it is snowy where you are! In the next few weeks I hope/plan to post a lot of freezable Christmas cookie and square recipes, as well as some gift ideas to get you ready for Christmas! It's not too far off! Farewell! My sister makes a mean carmelita....if you've never heard of this dessert with an oat-y base and top, and filled with chocolate and caramel, well, you need to step out of that cave and live my friend! So, I was going to make them the other day and changed my mind....I wasn't in the mood to un-wrap all the caramels for making the carmelitas (basically, I was being super lazy!). But I did need to make a dessert for some friends coming over, so I decided to take the carmelita recipe, and lazy it up! Also, marshmallows are super-yum, so I didn't see how this couldn't work! 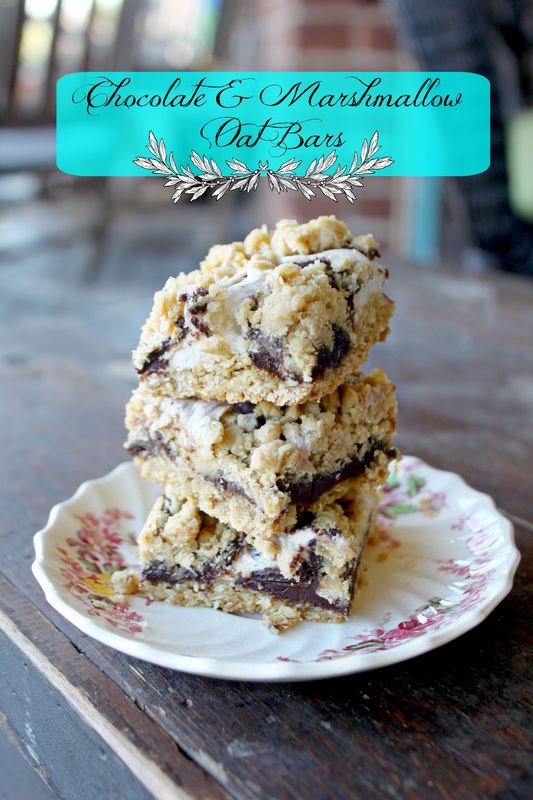 Chocolate & Marshmallow Oat Bars Ingredients:
Method:
My sister makes a great point in her recipe for the carmelitas, and it applies to these bars too-they take forever and a day to cool, and if you try to cut them too early you'll just make a jumbo mess. So, the best plan is to make these in the evening, and leave them to cool over night with a clean towel over it. Or make them whenever, but just be ready to let them cool for hours. 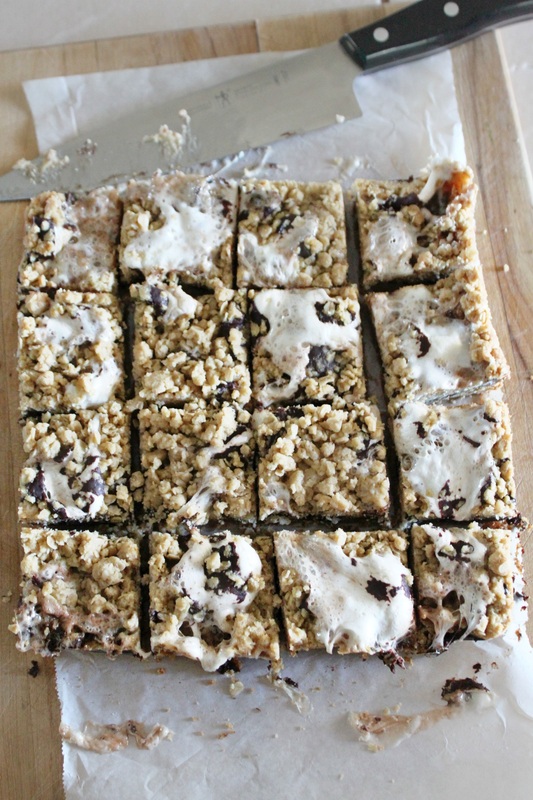 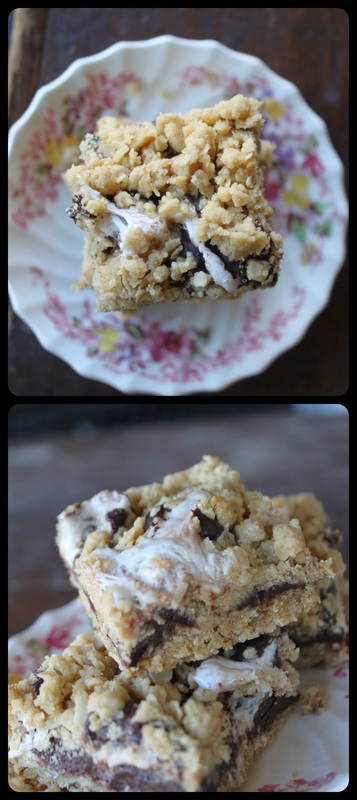 Well people, there you have it! A few simple ingredients and some simple steps gets you some fab-u-lous squares!
In the next week or two I'll be sharing an even lazier take on the carmelita, but it's so very, very good! Don't forget (those who live in and around Belleville) to stop into the Mama Market this weekend! If you are a Mom, an aunt, a grand-ma, know anybody with a kid, you'll want to go! It's on Saturday and Sunday from 9:30-3:00 each day, and you can buy some of my baking there as well as many other wonderful things! Have a great weekend! I use exclamation marks too much!!! :) xoxo Bonjour! I have a super quick and simple life hack for you this fine Tuesday! We've been doing this for a long time in this house, though, to be honest, it's always my drawer that unravels the quickest! But, in my defence, I don't own a ton of clothes, and, messy or not, I can (almost) always find what I'm looking for. This life hack is most important right now to my girls who (at 4 and 6 years old) want to pick out their own clothes. This gives them a super clear view of what they've got, and it therefore keeps the drawers from becoming disaster zones! 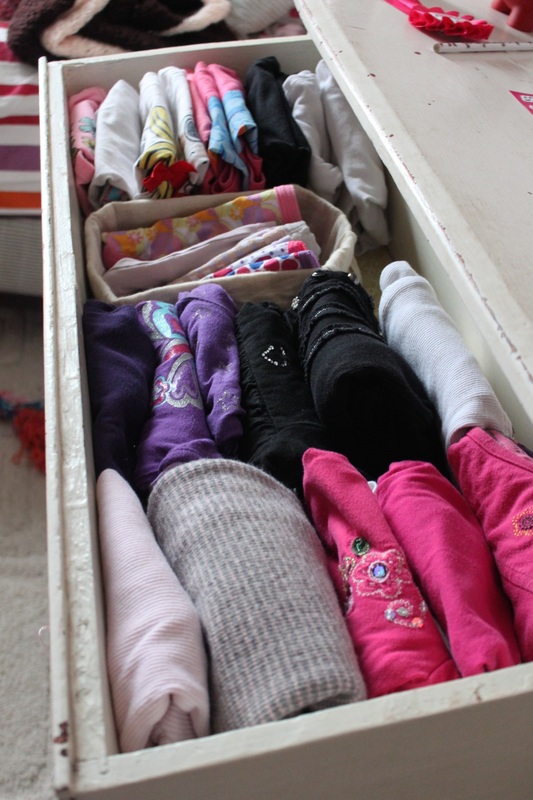
So, in the drawer pictured above you can see that instead of being stacked on top of one another, the clothes are folded an extra time and put in folded side up. That's it, that's the life hack! :) Going one step further and putting colours together helps with being able to choose even faster, and dividing different "groups" is helpful too. This drawer has t-shirts on the far side, then a basket with undies, then long sleeve shirts. Putting clothes like this also helps make it more obvious if you've got a little too much of one thing. The girls did have 9 pink long sleeve shirts, but I made them pick out the favourites, then we gave away the rest. Anyway, that's all! I hope if you've never seen this idea before that you went, "ah ha!", and felt inspired to organize a crazy drawer in your house! If you think this is not that great and think I'm a goon, that's o.k. too. And, like I already mentioned, my dresser of clothes doesn't always stay looking this nice, so don't go thinking I'm miss perfect, tidy housekeeper. That will make me laugh until I cry. Until I cry! I dunno. As a Mommy side-note, this weekend in Belleville (to those who read this and live close by) there is going to be the Holiday Mama Market. The Mama Market is a mom geared vendor sale, and happens every three months in Belleville. You can find their Facebook event page here There will be at least 20 vendors there, including Bushel & A Peck and some of my baked goods! I will be bringing a variety of gluten free and regular cookies and squares, and also some cupcakes. I'm really excited to be involved, though I am also having many sleepless nights worrying that I will mess something up or forget something important! This happens to me before these sorts of things! 
A photo from the last Mama Market
Anyway, that's all for today! I bid you farewell!
Nope, this is not a super late post for a Canada Day party, it's a birthday party my daughter wanted with a Canada theme! My darling middle child said she wanted her birthday to be Canada themed ever since Canada day, and I thought she would have changed her mind between then and now, but she didn't! Anyway, I didn't take any great photos of the day, I didn't take great photos of the food or grab bags, I just didn't feel like it! I dunno, I was just in the mode of having a laid-back birthday (as laid back as a birthday party can be with ten 6 year old girls running around screaming!). Anyway, I did want to share the day though, and some of the ideas we had. 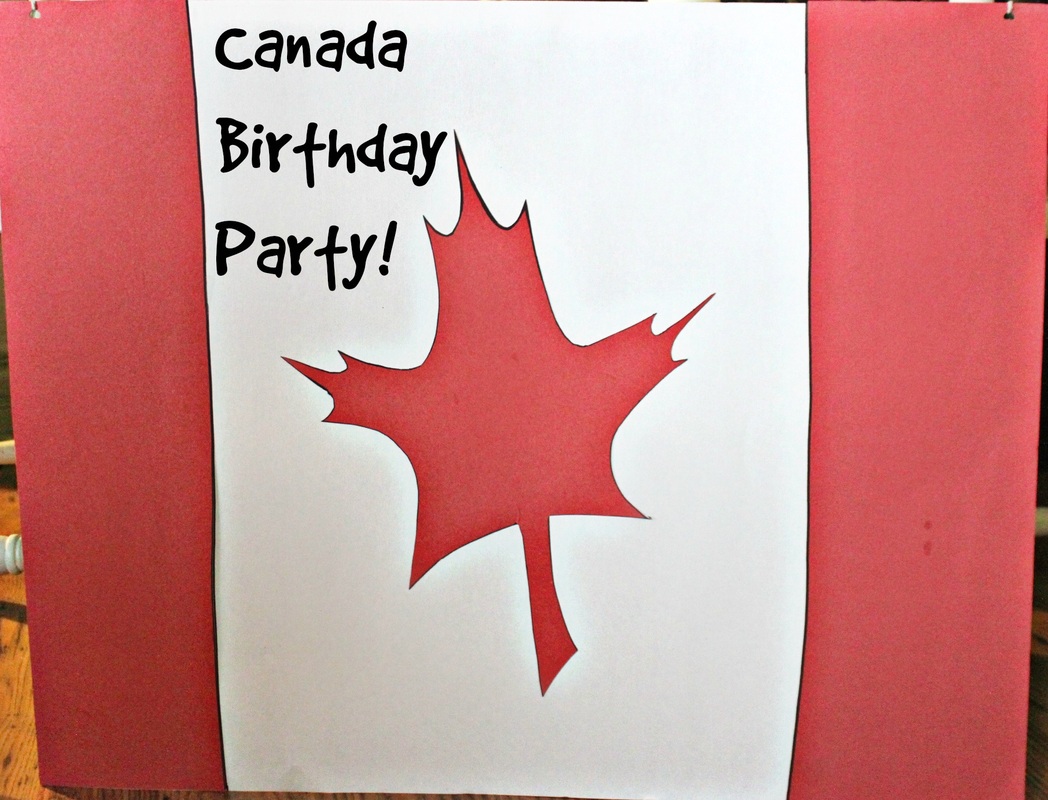
The decorations were simple and homemade. I made this (above) flag with red and white bristol board, and I also made a poster that said happy birthday and it had some maple leaves drawn on it. My husband hung red and white streamers, and we blew up red balloons that we didn't hang up because, let's face it, kids just ask if you can pull them down so they can be played with! So, we blew up 2 dozen balloons, and tossed them onto he floor! Haha, gosh, it sounds so lazy now to type that out, but it was really and truly on purpose! 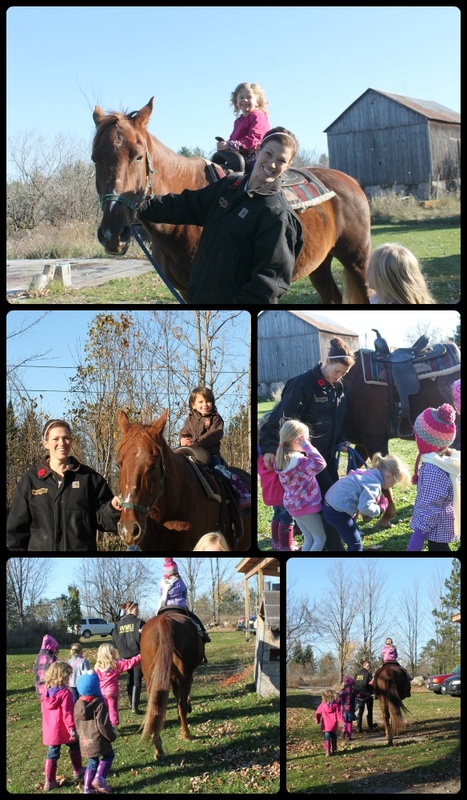
I'm not much for planning activities for parties, mostly because kids tend to find their own things to do! However, this party we did plan to give the kids a ride on our horse, and we printed out some colouring pages from the www for the kids to work on if they wanted to. We didn't have a structured colouring time, we just played outside and rode the horse, and then we all came inside and could colour, play with toys and balloons and dress up in our costumes. 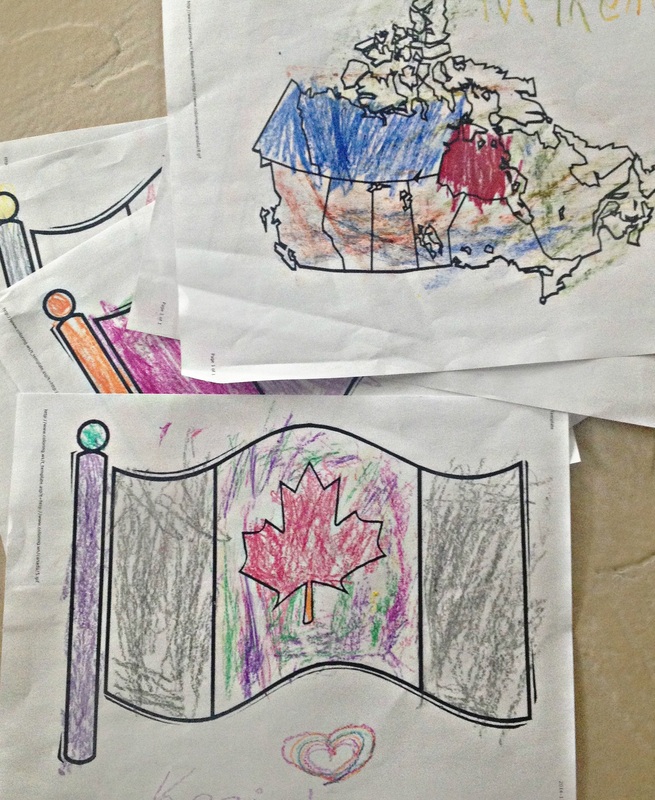
The map of Canada colouring page I found here, and the Canada flag colouring page I found here. FYI. 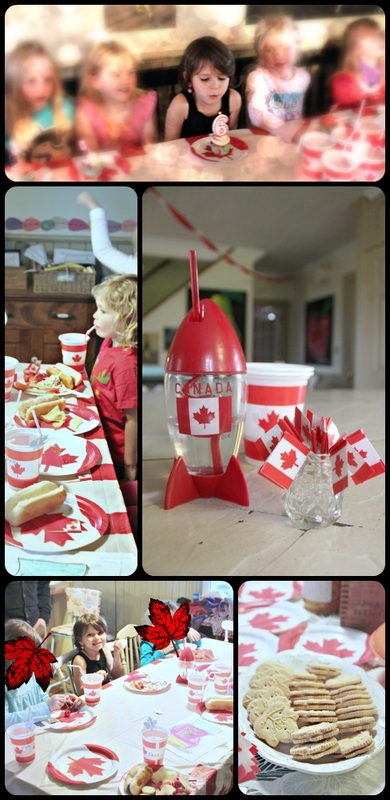
Do you like how I blocked out kids faces! Whomp whomp....I didn't have permission to show other kids faces, and I didn't want to assume I could, so you get what you get! :) The only faces you see are of my own lovely kids! We purchased the Canada plates, cups, tablecloth and toothpicks from Party City. P.S., and FYI, if you're into throwing Canada Day parties for the actual Canada Day, I would buy some supplies now as they are super cheap...ya know, since Canada Day was 4 months ago, and won't be back for another 8 months! The other Canada things we bought (like that rocket ship cup) were from Old Navy-again, super cheap seeing as it's not Canada day! They had a bunch of Canada stuff stashed in a cupboard behind the checkout and they let us pick from it when I asked if they had any Canada things. Other items (like pencils, stickers and tattoos) that we found for the grab bags we got from various dollar stores. It took a bit of hunting, but we found quite a few things. We beefed the grab bags up with red candies like Big Foot, and with bags of Skittles (the original kind of course so the bag was red!). We served good ol' Canadian hot dogs (tongue-in-cheek), and had fruits and veggies as well as chips and snack mix. And we also had Dare maple cookies with the cupcakes for dessert. 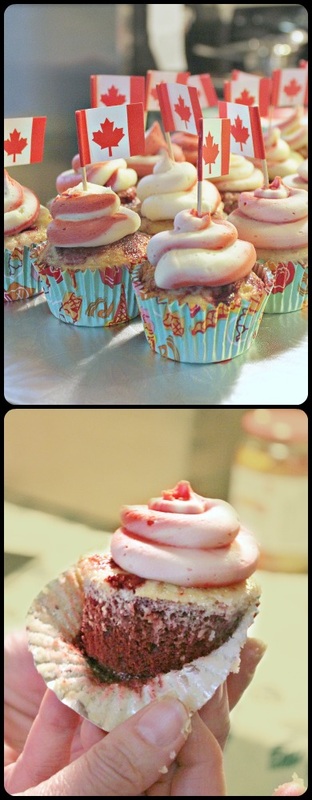
To make the cupcakes patriotic I made vanilla and red velvet and intended on them being in one cupcake together. The first batch struggled though because I tried to do a red layer, then white layer, then red layer like our flag. They were fine (the bottom picture in the collage above), but the two batters didn't quite cook together properly, I dunno. It's hard to explain, but they just didn't really work. So, the second batch I just scooped in some vanilla batter, then red velvet batter, and swirled them with a tooth pick to make a red and white marbled cupcake. They baked up great and rose nicely, as opposed to the red/white/red cupcakes. The basic vanilla cupcake recipe I use is here, and the red velvet cupcake recipe I like is here. I tried a new buttercream technique where you put 2 colours into the piping bag to get 2-toned icing. I'm not a great piper (I'm imagining myself now with bag pipes....), but I think they turned out nicely. If I had read the tutorials on how to actually do this technique they may have turned out nicer....but, duh, I thought I knew how to do it! I just saw pictures of 2-toned icing and went, "cool, I'm going to try that!", and never bothered to find out the best way to do it! Alright, well, I did find out that high-end chefs do it the way I tried to, but I am neither a high end chef nor am I terribly skilled when it comes to using my piping bag (haha, bag pipes....). I tried to use a spoon to put my red icing on one "side" of the piping bag, and the white icing on the other "side", but the first few cupcakes only had white frosting, then the red finally came out and looked good, but, ya know. Sooooo, the two ways that people do this 2-toned technique are either by filling 2 separate bags with frosting, and placing them into one larger piping bag and attaching them to the same tip like in this example, or by brushing gel food colouring in stripes into a piping bag, filling with another coloured buttercream, and piping it out, like these bad boys. So, I think that's everything!
I hope you enjoyed this slightly boring romp through the Canada themed birthday party we had! :) I will admit that the soup in that picture doesn't look that great! I explain myself a little at the end of this post, but, photo aside, just trust that this soup is really tasty! The idea/recipe for this came from a friend, but after I had read the e-mail with the recipe and put it into a folder on my e-mail it vanished.....well, it's more likely that I accidentally deleted it, because I searched "soup" in the search field, and all I found was my response to the e-mail without the recipe attached! Duh. I guess I could have e-mailed my friend to get the recipe again, but I'm a weirdo and didn't do that! Another duh. Make this soup and enjoy it as it is pleasurable remedy for cool fall days! 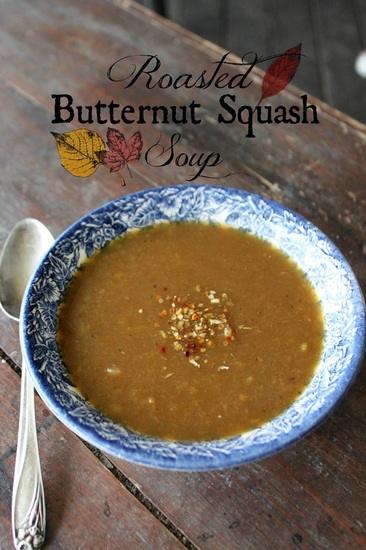
Roasted Butternut Squash Soup Ingredients:
Method:
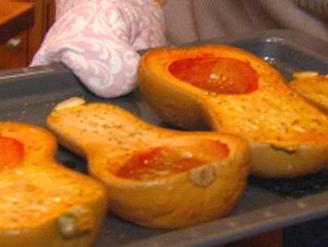
So, the reason why I think the photo doesn't do this soup justice is because when I made this recipe most recently I had no blender and no food processor, so I made this with ambition and elbow grease, and mashed the squash, onions, and apples by hand with a potato masher! That's why my soup in the photo above looks a little lumpier than usual! If you make this soup, your finished product will likely look ten-times nicer!
I hope everyone has a great weekend! Whether you are working, or have it off, or are hunting-have fun, be safe, etc., etc., etc. I am staying home with the kids as my husband will be off hunting, then after hunter-man gets back we have a "date" to meet up with some new friends on Sunday evening, and I'm looking forward to that! Au revoir, à bientôt! xo My wonderful friend sent me this article a few weeks ago, and I thought it was a good read. It talks about a young boy and his 'relationship' with the "intelligent personal assistant" (Siri) from an Apple device. It asks some good questions, and challenges some beliefs about the use of technology for children with special needs. At the end of the article are comments, and I was taken by one posted by a man with Aspergers (a high functioning form of autism) who felt so strongly about how this whole thing with a boy having Siri as a friend was really wrong and bad because this young man needed real, face to face interactions with people. I was actually sort of surprised that someone with autism would have said it. Because, although I agree in some ways, I don't agree 100% with him. The child in the story is spending time with real people, but Siri offers him someone that literally no real person can offer; she offers an endless amount of information about any topic, she has patience for a child with autism and doesn't get irritated, and she is a constant. Siri doesn't have a bad day and take it out on this boy with autism. She doesn't stay up too late and get over-tired and have no patience for a child who wants to talk and echo endless lines from the movie Cars, and she doesn't judge when this child is impolite. Siri actually treats a child with autism the way everyone should treat people with autism-just like they were "typical"! People with autism aren't "typical", but that sure doesn't mean they want to be talked to like a baby, or left out of conversations because it seems like they don't understand, or ignored because the topic they are prattling on about is boring to everyone else. People with special needs do need some special consideration in many situations, but often that "special consideration" is assumed instead of allowing the person with special needs to try and work at doing things to the most excellent level they are capable of. Siri takes each person, special needs or not, and acts as if they were all the same to her (....well, because they are because she's not real!). :) 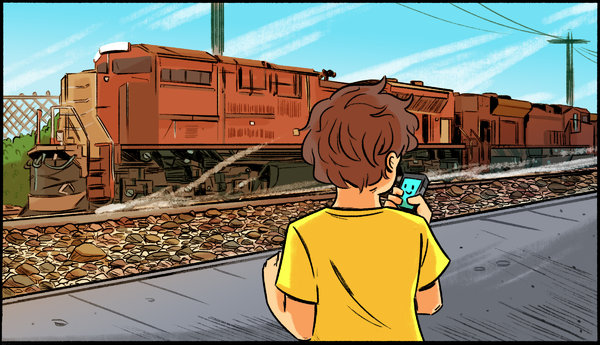
To Siri With Love How One Boy With Autism Became BFF With Apple’s Siri Find the full article here By JUDITH NEWMAN OCTOBER 17, 2014 Just how bad a mother am I? I wondered, as I watched my 13-year-old son deep in conversation with Siri. Gus has autism, and Siri, Apple’s “intelligent personal assistant” on the iPhone, is currently his BFF. Obsessed with weather formations, Gus had spent the hour parsing the difference between isolated and scattered thunderstorms — an hour in which, thank God, I didn’t have to discuss them. This is a love letter to a machine. It’s not quite the love Joaquin Phoenix felt in “Her,” last year’s Spike Jonze film about a lonely man’s romantic relationship with his intelligent operating system (played by the voice of Scarlett Johansson). But it’s close. In a world where the commonly held wisdom is that technology isolates us, it’s worth considering another side of the story. It all began simply enough. I’d just read one of those ubiquitous Internet lists called “21 Things You Didn’t Know Your iPhone Could Do.” One of them was this: I could ask Siri, “What planes are above me right now?” and Siri would bark back, “Checking my sources.” Almost instantly there was a list of actual flights — numbers, altitudes, angles — above my head. I happened to be doing this when Gus was nearby. “Why would anyone need to know what planes are flying above your head?” I muttered. Gus replied without looking up: “So you know who you’re waving at, Mommy.” Gus had never noticed Siri before, but when he discovered there was someone who would not just find information on his various obsessions (trains, planes, buses, escalators and, of course, anything related to weather) but actually semi-discuss these subjects tirelessly, he was hooked. And I was grateful. Now, when my head was about to explode if I had to have another conversation about the chance of tornadoes in Kansas City, Mo., I could reply brightly: “Hey! Why don’t you ask Siri?” Of all the worries the parent of an autistic child has, the uppermost is: Will he find love? Or even companionship? Somewhere along the line, I am learning that what gives my guy happiness is not necessarily the same as what gives me happiness. Right now, at his age, a time when humans can be a little overwhelming even for the average teenager, Siri makes Gus happy. She is his sidekick. Last night, as he was going to bed, there was this matter-of-fact exchange: Gus: “Siri, will you marry me?” Siri: “I’m not the marrying kind.” Gus: “I mean, not now. I’m a kid. I mean when I’m grown up.” Siri: “My end user agreement does not include marriage.” Gus: “Oh, O.K.” Gus didn’t sound too disappointed. This was useful information to have, and for me too, since it was the first time I knew that he actually thought about marriage. He turned over to go to sleep: Gus: “Goodnight, Siri. Will you sleep well tonight?” Siri: “I don’t need much sleep, but it’s nice of you to ask.” Very nice. 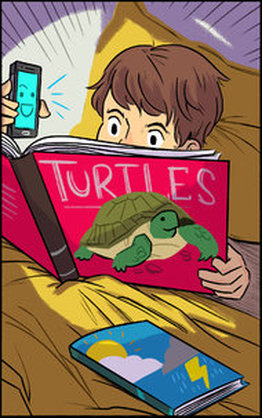
I hope you get the chance to read the entire article (here), and let me know what you think of this idea of Siri as an actual friend.
Also, for anyone who reads this, is there anything about autism you've been wanting to know that I could share about? Let me know! I like going to our little local grocery store because they always have things marked down 50%. It's always for different reasons, but the reason matters not to me! I just love a discount! :) A while back (I'm talking in the summer) they had Pillsbury Raspberry Turnovers on 50% off. I have literally never bought these before in my whole life, but at 50% off, I was interested enough to try! I stuck the boxes in my freezer, and waited for a time I wanted to make a breakfast for guests, or just for fun on a treat day. When I finally decided to make them, I realized I actually didn't want to make them as turnovers, but would rather have a nice bun, like a cinnamon bun....minus the cinnamon, obviously. So, that's what I did. I made me some raspberry rolls, and (despite me not actually enjoying baked fruit desserts) these turned out really nice, and somehow seemed nicer than a turnover, but that might just be something I'm telling myself because I want to believe it. These kept well too, sitting on the counter for 2 days, and tasting yummy up to the last day. 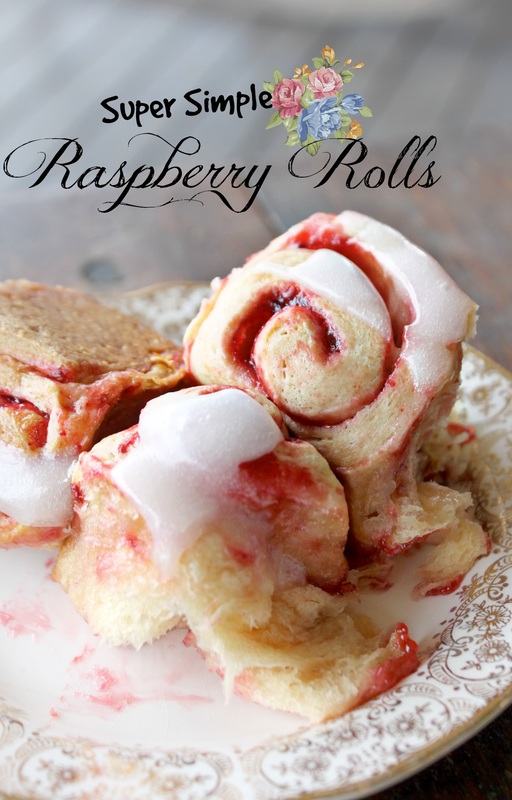 Raspberry Rolls Ingredients:
Method:
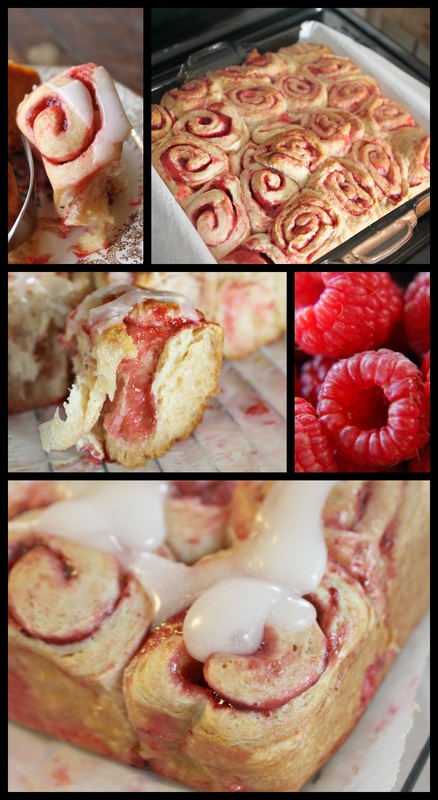 I realize this is NOT a real recipe, only an idea for something you can do with something already made for you. I fully intend on making these again, only I will try with a homemade dough and a pure raspberry jam. I'll let you know how that real recipe goes. Pinky swear. So, that's all for today.
I've been more on and off with posting because we've have an irritating Apple bug that causes desktop Macs to not be able to connect to the internet via WiFi. So, all my photos are on the desktop, and even if I worked on a draft on the laptop I would't have any photos to use because I can't access them because the iCloud won't work properly...blah blah, blah. Anyway, my brilliant husband got a long Cat-5 cable (ethernet), and hooked our computer up to our router so that I have internet again! However, the cable (though it is long) isn't quite long enough and I have to drag the computer desk away from the wall and on a wacky angle to get the cord to reach! I'm o.k. with this though! Apple really should fix this bug, but in the meanwhile we have figured a way around it! So, apologies for being absent, but I'm still here! :) Happy Wednesday! |
Hi, I'm Amy-Lyn! 
I am the lady behind this here blog! I live in the sticks with my animals, my super handsome husband, and my
3 amazing kids! Here you'll find things from recipes (gluten-free, paleo, and strait up junk food!), DIY ideas, thoughts on raising a son with autism, and whatever else pops into my brain! : ) Read more about me by clicking here! Want to Stay Connected?
Find What
|
 RSS Feed


