|
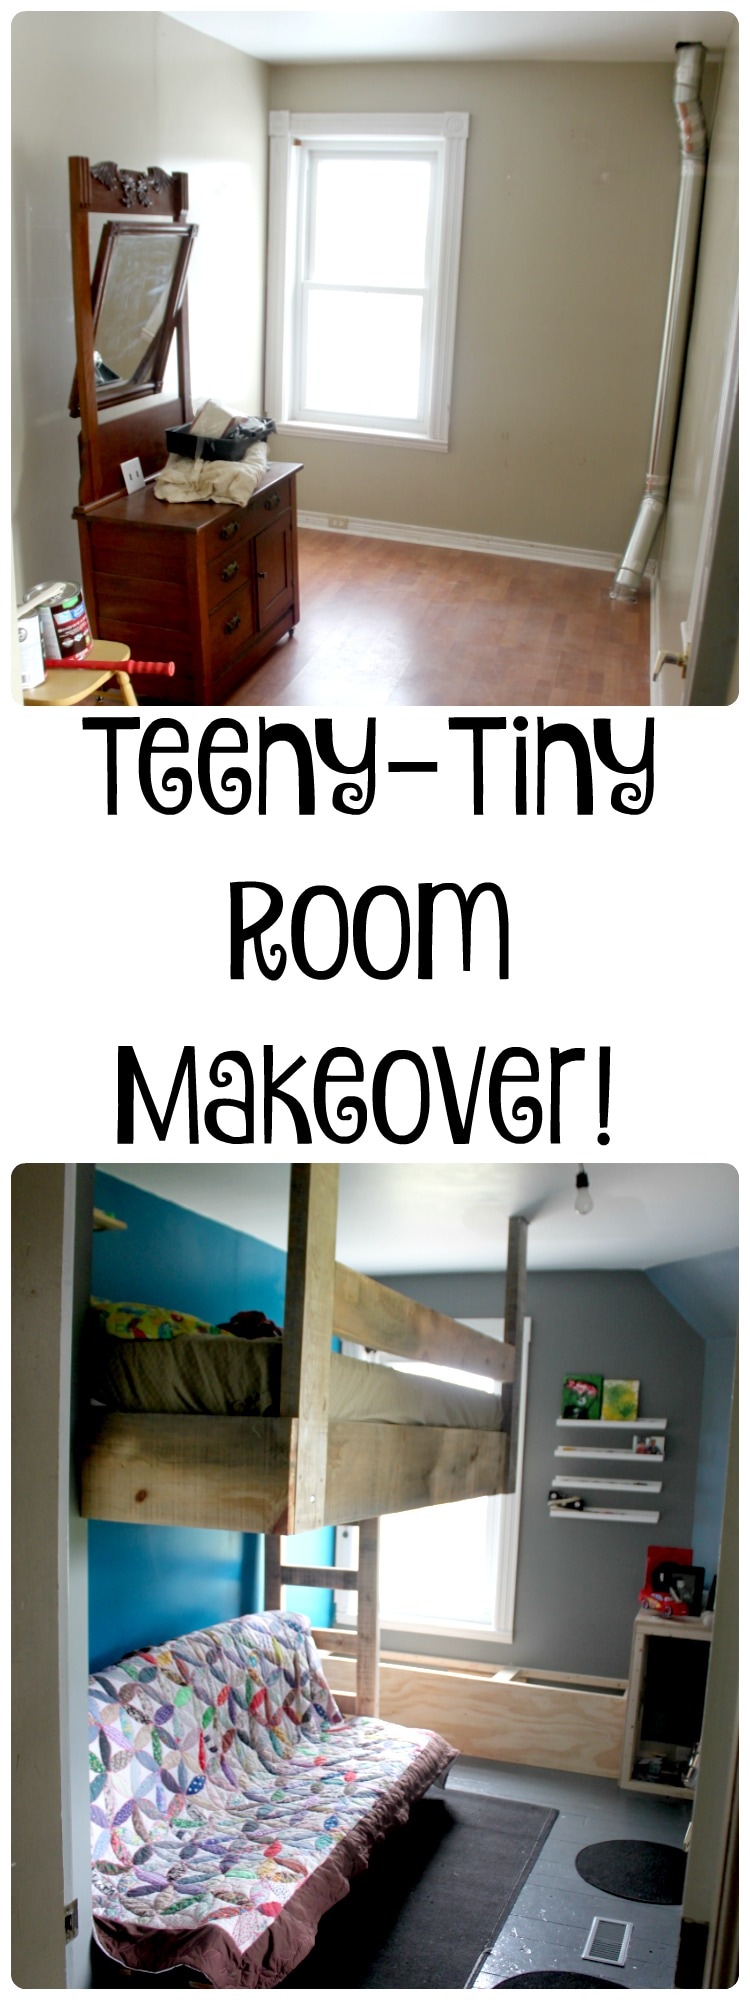
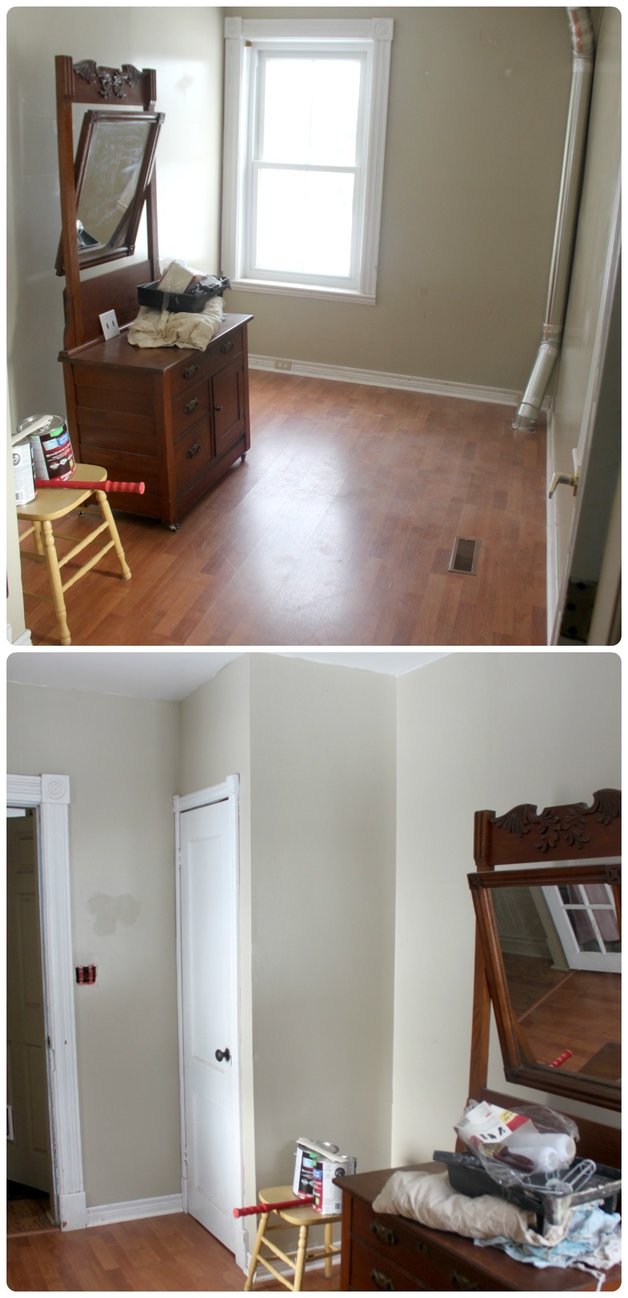
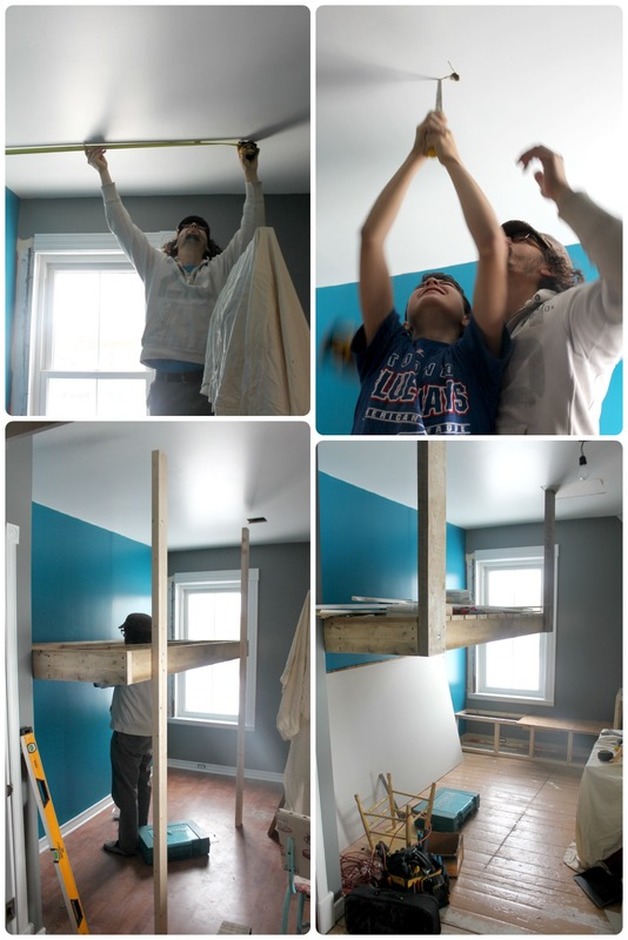
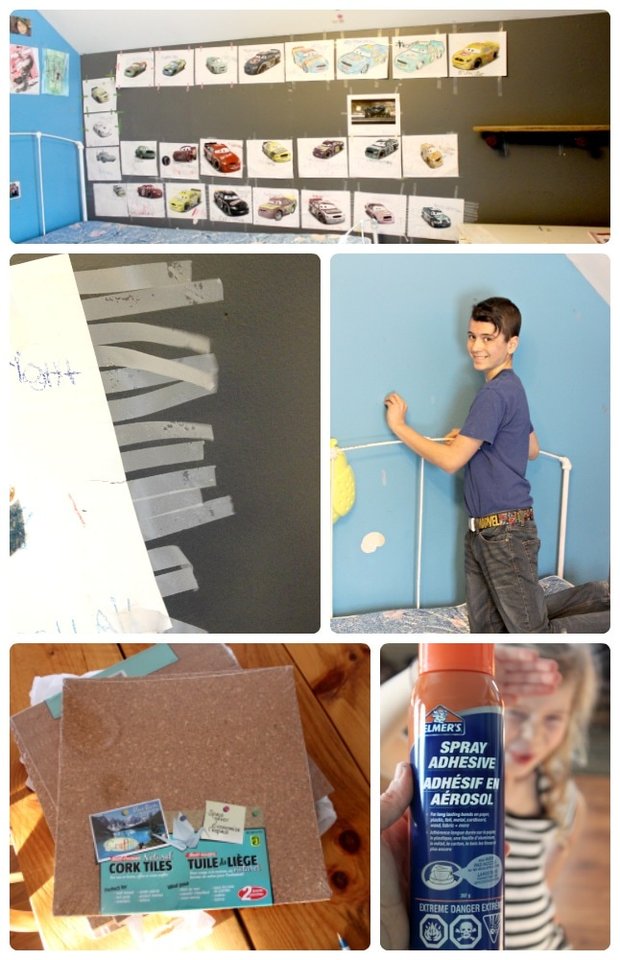
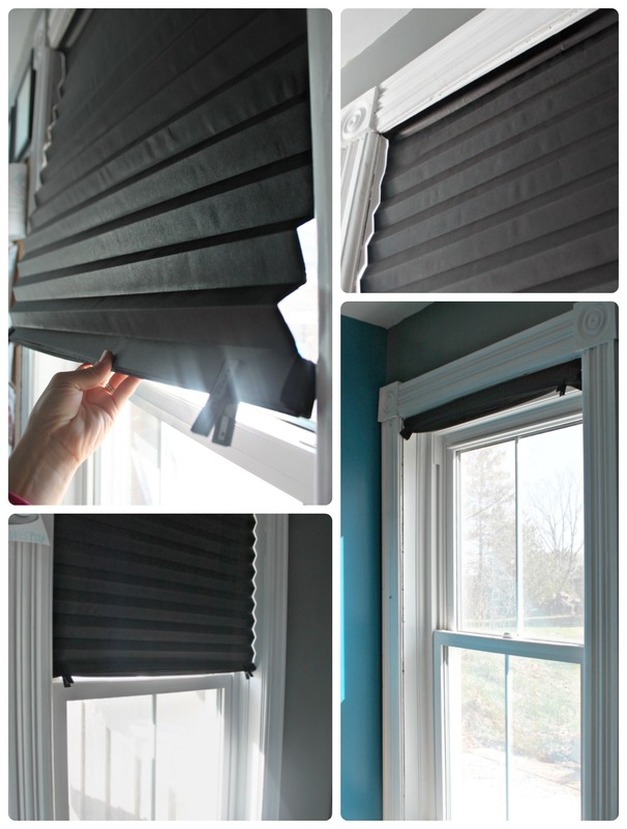
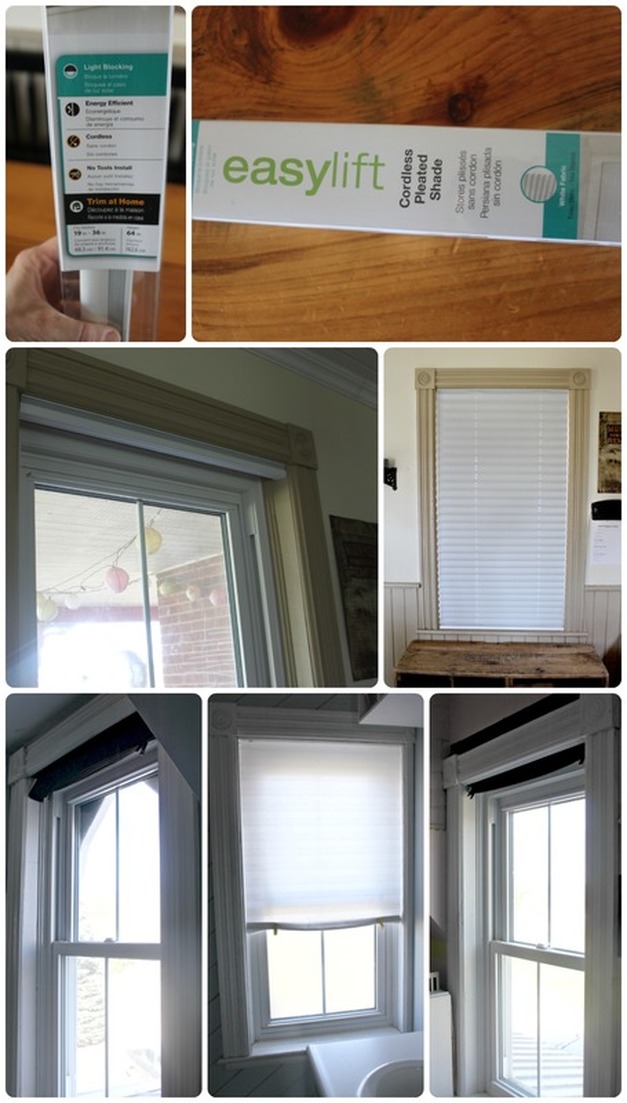
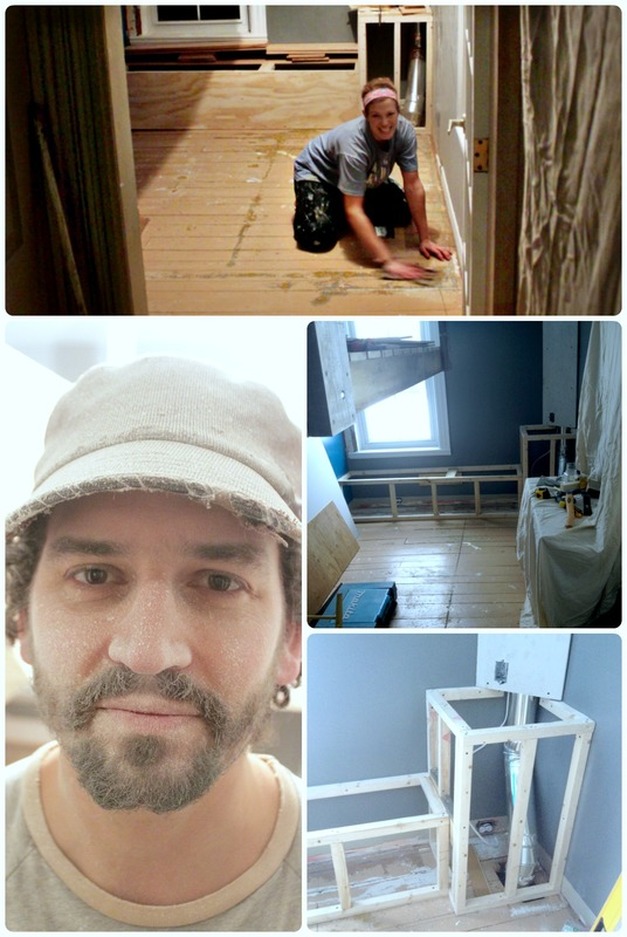
This post contains affiliate links. Although I was sponsored for the publication of this post, all opinions and thoughts are my own! See the Advertising Affiliate Disclaimer for more details! Hey there! Thanks for checking in! I am so excited to share with you today the transformation of our guest room into our son’s new room! I’ll share some of the obstacles that we needed to sort out to get the room together, and I’m also so happy to be sharing a product that I LOOOOOVE! It’s something I was introduced to years ago by a friend, and I’ve sort of been hooked ever since! It’s a very, very affordable, clean looking, complementary to every and any décor solution for window fashion! It’s a fabulous product called Redi Shade! Seriously, I’m using Redi Shade in 6 rooms in our house (we only have 8 rooms total in our house), and am planning to add them to the 2 final rooms in our house soon!! I’ll be sharing some photos below! Now, there were two MAJOR problems we faced as we went to work on Caleb’s new room. One, the room we were working in is a meager 7 ½ feet by 12 ½ feet! Oi vey! The other problem (which was compounded by the first problem) was how enormous our son was growing everyday! In the time it took us to actually complete this project (about 3 weeks-actually, it’s “technically” not even finished. Just being real!), Caleb grew an additional 4 inches! I mean, what the frick?!? Another more minor problem was that we didn’t just want to plunk a bed into Caleb’s new room, and then if he had guests, or if we had foster kids (which we’ve finally been fully approved for! Yipee!), his room would be useless! He’s way too big for a single bed (trust me, he was in a single bed, and his ever growing {now} 5’7 frame was edging closer and closer to the ends of his bed {which in Canada, measures to about 6 feet}!). So…what should we do? Well, something gosh-darned crazy happened........my husband starting digging around on Pinterest (yes, MY husband on Pinterest! He's not ordinarily a Pinterest lover), and he came upon “loft beds”, and immediately knew that was what we needed to do. Not only would it give us the room to make Caleb a bigger bed, it wouldn’t take up extra floor space to do so! And, we’ve had a futon in our room since we moved into this house 5 ½ years ago, and I was desperate to get it out! It was just taking up space in our room, but getting rid of it wasn’t an option because every time we had visitors sleeping over, we needed that futon! But, bringing Caleb’s bed up off the floor gave us that extra floor space to bring the futon downstairs to Caleb’s room, tucked up in it’s couch form, creating a fun space for Caleb and anyone else to hang out in! So…bad news…I have no real “plans” to show you for the bed, because we were winging it! We started with a mattress we just happened to have (I think my father-in-law gave it to us), and it was a strange size (47" x 83"- considered a “super-single” for a waterbed insert mattress size), and so we went from there. Adam (my husband) started by creating a frame made up of 4- 83” 2x4’s, and 2- 48” 2x4’s. This made up a basic frame, and we anchored this into the wall at the height (minus the mattress) we thought would be good for Caleb to sit up in bed. We also had some 2" x 4"’s helping to hold up the frame as we worked at getting it fastened to the floor joists in the ceiling. My husband fastened 2”x 6” boards to the outer corners of the bed to floor joists in the ceiling (we cut holes in the ceiling, then re-dry walled them after) above by using 2 carriage bolts at the bottom and 2 at the top (if you want more pictures or more details of this, shoot me an e-mail, and I’ll make my hubby get back to you!). After the boards were fastened from the bed to the ceiling, we took away the support 2" x 4"'s we had on the outer corners of the bed (see the bottom 2 pictures below). We then installed 20 pieces of 1"x 4”x 48” deck board across the top of of the frame, creating a “deck” of sorts that the mattress would sit on. We did all of this after I’d cleared the room out and painted, btw. I wanted to get the painting out of the way, and decided I would rather do the full job up front, and have a few touch-ups to do after the job was done, rather then try to paint the whole room oh-so-carefully around a new bed, bench, etc., later on. Anywhooooo…. Once we had the bed well under way, I started thinking about what things would make this tiny room feel like it had more space. So, we decided to build a bench under the window, and a small “table” in the corner (this was also a necessity as we’d recently had a new furnace put in, and we had new pipes fitted throughout the house…...one of which ran right up the corner of Caleb’s room! So, we needed to frame that in, and make that slightly irritating corner more useful)! So, full disclosure, this a real blog, and I am a real human with a real (working, busy) husband, and stuff doesn’t always get finished….and, well, I’m posting this “room reno” blog, and the bench and small table aren’t finished! But, I’m not comfortable enough with my skills to want to mount hinges and doors and finish those 2 items myself, and I was tired of waiting for them to get finished so I could publish this post, so I thought I’d send this out into the WWW as a for-real-life reno!!! Not quite done! Be honest, you’ve got a few nearly-done things happening in your house right now. Right? Maybe? Anyway, moving on! The bench was a real space saver as it houses all of Caleb’s cars and toys. And the small table will eventually hold his books…but for now they’re just in the bench with his toys (you can see the making of the bench in the photo of the bed getting installed. It's in the bottom right hand photo)! Another thing I decided his new room needed was a cork (bulletin) board. His old room had slowly turned into a room completely plastered with colourings he’d done! Not only that, but every time he put up a new picture, he’d use 400,000 pieces of tape to do it! So, I thought a cork board would help keep his drawings tidy, and would also help him not use up so much freakin’ tape, and I hoped would encourage him to hone in on which pictures he really, truly wanted to see all the time stuck up in his room. I started by using the plywood from his old single bed. The bed itself was garbage, but that piece of plywood still had some life left to give. Because I was using cork tiles from Dollarama that came in 12"x 12" pieces, I cut the plywood down to fit the tiles. Basically, it was easier for me to cut the plywood then to have to trim the cork tiles! I pre-drilled some holes where I needed the screws to go, then mounted it directly on the wall, using E-Z Anchor screws. I then used the cork tiles from Dollarama, and spray adhesive, and for some pieces, Weld Bond, and worked on sticking all the tiles to the plywood board. Some corners were creeping up, so I used teeny-tiny nails to set them back down. Once the tiles were dried and secured, I created a “frame” for the cork board by using random, mis-matched pieces of trim I dug out from our barn. Much to my husbands’ chagrin, I didn’t do perfect angles and make a “real” frame. Instead, I simply cut 2 pieces long enough for each side, then cut 2 more pieces to fit across the top and bottom – minus the inch or so trim I’d cut for the side pieces. If that makes sense? The board was 3' x 5', so I cut 2 -3' pieces for the sides, and then 2 - (approx.) 4' pieces for the top ad bottom. The end result is terrific, and Caleb was really pleased with it and had a good time picking out which pictures would make it to the board! 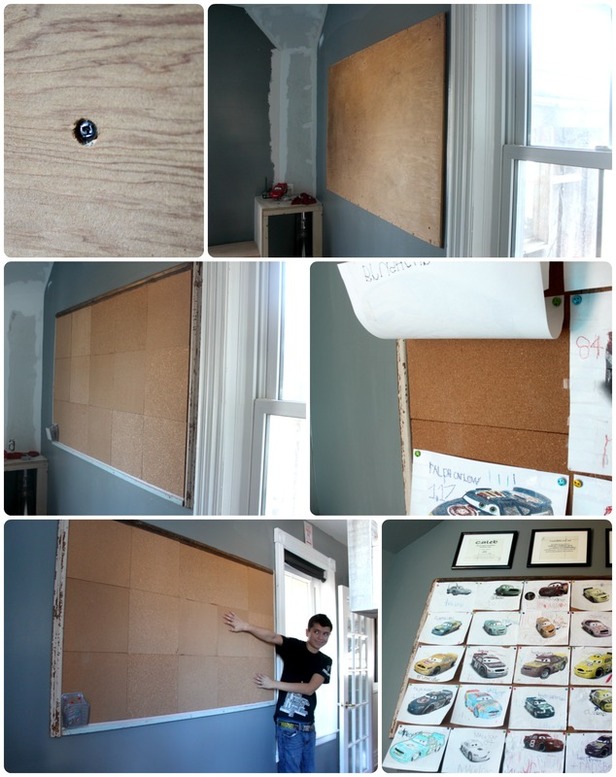 Cork board all ready! Cork board all ready! Can I just get back to the Redi Shade now? For me, finding blinds or curtains is painful! They can be expensive, you usually need to know the exact size (for blinds), and then it all requires screws and anchors, and way more hassle than I’m ever interested in! Another issue for me and finding blinds or curtains for our current house is that fact that it’s technically a 1 ½ storey, and a lot of the ceilings upstairs are sloped, or the windows are (beautiful) and “framed in” by the ceiling, making finding any room for a curtain rod nearly impossible. When we first moved in we daftly stuck nails and screws into our beautiful, original (100 year old) wood window trimming in an attempt at hanging up blinds and curtains. Makes me wanna cry. Well, we had friends who had these blinds, Redi Shades, and my reaction was kinda “huh?... They’re just sticky blinds?... There’s no strings?... And they cost what? That’s not very much!?”. So, I went out and easily found them at my local Home Depot, and at Lowes, and as soon as I could, I bought a shade for our bathroom (one that lets light in), and a shade for Caleb’s room (a room darkening one so he wouldn’t wake up with the sun!), and I was hooked! Those 2 blinds we put in over 5 years ago are still holding strong! The only “mishap” we’ve had was that the cat got all fired about catching a bug that flew behind Caleb’s blinds, and she made a few rips in it while attempting to catch said bug! I literally just used a small piece of tape and fixed them! As far as simplicity in installation, cost effectiveness, clean looking, and letting every bit of day-light in when open goes, these blinds are the winner, head and shoulders above all the rest! I’m not just saying that! My husband who works a rotating shifts (meaning he works days and nights), loves the room darkening blinds in our room. They block out all the bright day light so he can sleep during the day in preparation for his night shifts. I recently tried a different type of shade from Redi Shade called the Easy Lift shade, and it’s amazing!!! The original shades you need to put up (like an accordion) and clasp together at the top with the clips they provide, but these Easy Lift blinds have a small string inside that allow you to gently pull down to close, or easily glide up to open without the use of clips. The Easy Lift blinds are still very safe though (and by “safe” I’m referring to the dangers often associated with the cords and strings that hang down from regular blinds), but just offer a little more ease in use than the regular, Original Redi Shade. So, in case you hadn’t gotten the gist, I am a wee bit obsessed with these blinds! Just look at the pictures though - nice, tidy blinds, so much light when I want it (because there's no curtains blocking any of it), no curtains for anyone to grab at and pull down (the number of times I've had to try to re-mount curtain rods because of the kids pulling them down! Sheesh!), easy to install (no tools needed except a knife!), and affordable. I mean, c'mon, what more do you want from a window covering!?! I don’t even want to mention the floor, but I will, briefly. We were just going to leave the laminate tongue in groove fake wood flooring, but then when my husband was working at something in the room I heard a “craaaack”, and went into see what had happened…he’d pulled up the floor and was ripping up the subfloor, which was particle board, and it was making a horrible cracking sounds as it came up! Anyway, I was shocked, but happy to see the nice, original pine board floors underneath, and decided it looked much nicer having the boards run the short way (you can see the laminate flooring ran the long way through the room, but the pine runs the short way, giving the room a wider, less long and narrow feel in my opinion). I spent a few days sanding the floor as it had been thoroughly mudded to be even in preparation for the subfloor and laminate floor. So, I sanded it down, and put 3 coats of a high-gloss, alykd enamel paint onto the floor. It was a standard grey colour, I literally bought the cheapest, construction grade paint. I didn’t really care exactly what colour it came out to be because I knew we’d have a carpet laid down, and also, I’m cheap. There, I said it. 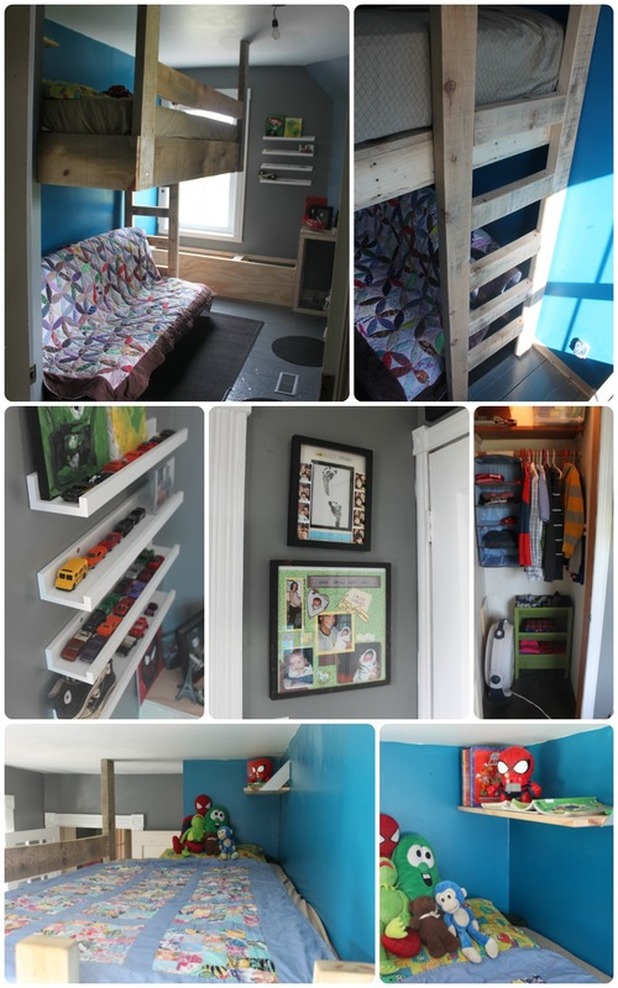 So, the finishing touches included putting up some small Ikea shelves for some of Caleb’s cars, putting up some of his pictures and paintings, installing a small shelf up in his bed for his books and alarm clock, and touching up some of the paint that got scuffed during the installation of the bed. We also needed to make his closet functional because of the fact we decided his tiny room couldn’t handle a dresser! (see middle right hand photo above) So, we hung a simple storage organizer from Ikea, and installed some shelves, and I stuck in a strange piece of furniture I’d purchased years ago. The shelves hold his extra toys in a bin (we rotate them), as well as some “off-season” clothing. The hanging organizer holds his pants and shirts. The picture of this looks pretty empty (laundry day!), but that thing holds all of his 9 pants, and 14 t-shirts. His jammies, socks and underwear are in that bizarre piece, and his sweaters and button-up shirts are hanging up. We can even fit his fan in there (white noise for sleeping!) Because his room is right next to the laundry room, I didn’t give him a laundry basket, he simply walks his dirty laundry directly to the laundry basket in the laundry room each night! Overall, I am so pleased with how the room turned out! Yes, we’re not actually finished, but we’re finished enough, and Caleb moved in, and he loves it! I stand by my "real life" post and sharing this with you before it's actually finished, and not being sorry about it either! :)
If you have any questions about anything, don’t be afraid to e-mail and ask me! I will happily respond with any help I can offer! Don't forget to check out Redi Shade! I'm sure you'll love them as much as I do! Thanks for stopping by!!! xoxo
6 Comments
Louisa
5/10/2017 07:23:50 am
I have honestly never even heard of a "loft bed" before! It makes so much sense though so that you don't have the big, clunky "legs" of a regular bunk bed taking up floor space! I showed this post to my husband who was going to build bunk beds for our sons room, and he has totally changed his mind about bunks, and is going to build a loft bed instead! Our son has a teeny-tiny room too!
Reply
Amy-Lyn
5/12/2017 10:11:34 am
Hi Louisa! I'm so glad to introduce you to loft beds! :) And I hope yours turn out great! There are so many variations of them (besides bolting them into the floor joists above), so make sure to Google it! And, yes, be sure to check out Redi Shade! They are window fashion game changers!
Reply
Sandy
5/10/2017 09:39:24 am
That room looks so cozy and fun! We have a bunch of the redi shades and love them, they work especially well in our playroom that has a huge bay window which would cost a fortune to get proper window coverings
Reply
Amy-Lyn
5/12/2017 10:13:18 am
Thanks Sandy!
Reply
7/4/2023 06:32:39 am
The sort of grass you develop has a ton to do with how much support it requires. There are grasses that don't develop tall and along these lines require insignificant cutting.
Reply
7/4/2023 07:19:25 am
As the years progressed numero development and modern firms have been legitimately engaging it out to shield themselves against hundreds and thoands of individual and classactivity suits.
Reply
Leave a Reply. |
Hi, I'm Amy-Lyn! I am the lady behind this here blog! I live in the sticks with my animals, my super handsome husband, and my
3 amazing kids! Here you'll find things from recipes (gluten-free, paleo, and strait up junk food!), DIY ideas, thoughts on raising a son with autism, and whatever else pops into my brain! : ) Read more about me by clicking here! Want to Stay Connected?
Find What
|

 RSS Feed
