|
I'm not 100% sure if this "qualifies" as a life hack, but I find it super helpful, so I wanted to share it! When I was a child, my Dad built a slatted bottom box that sat over the heating vent in our "shoe room". So, when we would come in on a winter day, we would toss our mitts, hats, scarves and sometimes our boot liners into this "hot box", and when the heat would turn on, our stuff would get nice and dry! What a smarty pants!  My version I use today is a simple milk crate sitting over the heating vent near our shoe shelf at the front door. Sure, it's unattractive, but function wins in this fight! To keep life simple and a little less cluttered, my kids only have one hat, one scarf, and one pair of mitts each, so, throwing their stuff in the box means that when they go out again their stuff is dry (and sometimes nice and warm!) for them to use, and they don't need a second set for "just in case the others are wet".
I hope someone finds this little tip from my childhood helpful! I think the worst hit from my holiday neglect was my baking cupboard....I actually didn't really neglect it, I completely abused it! I was baking a lot, and every time I would bake, I would leave the cupboard a little worse than I found it....the end result? A disaster! 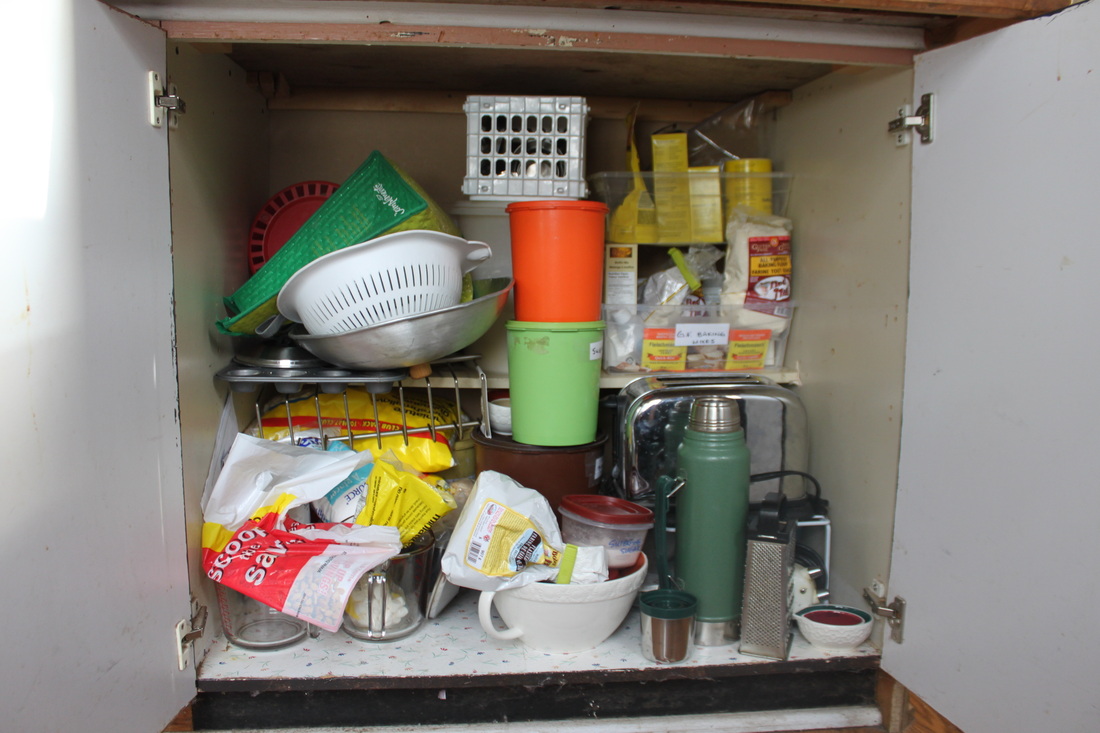 The cupboard in all it's glory! So, clearly it was a need-to-do job after life settled down from the holidays! 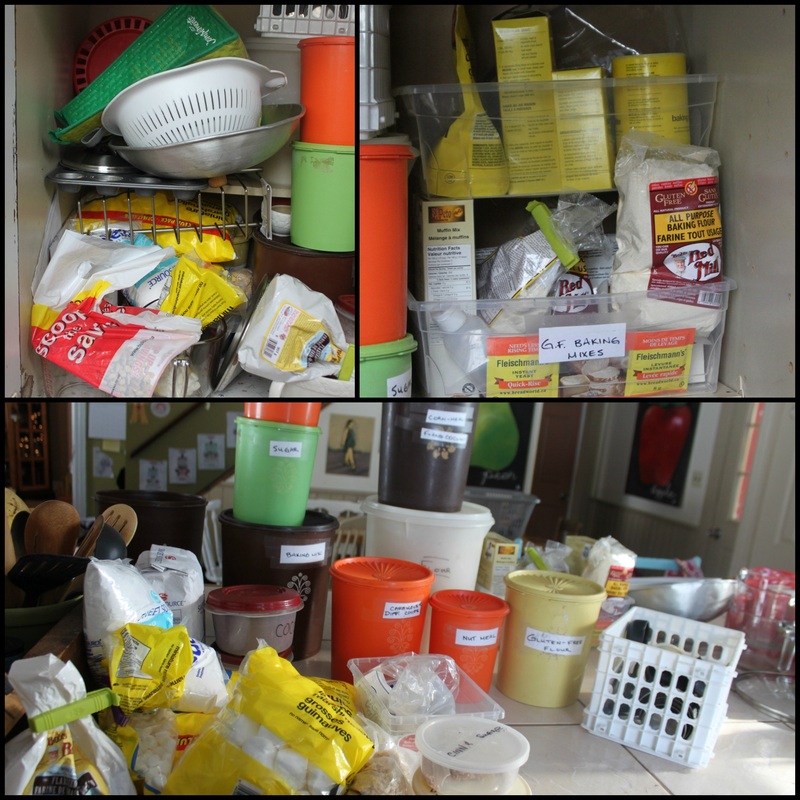 (top 2 pictures) Each section was crammed with stuff, and I couldn't believe how much space it took on the counter (bottom picture) when I pulled it all out! As usual, I began by pulling everything out to see what I had, what was hiding, what needed to be thrown away, etc. This time though, I did spend some money on the project because I knew I would need some baskets to help keep everything in it's place. 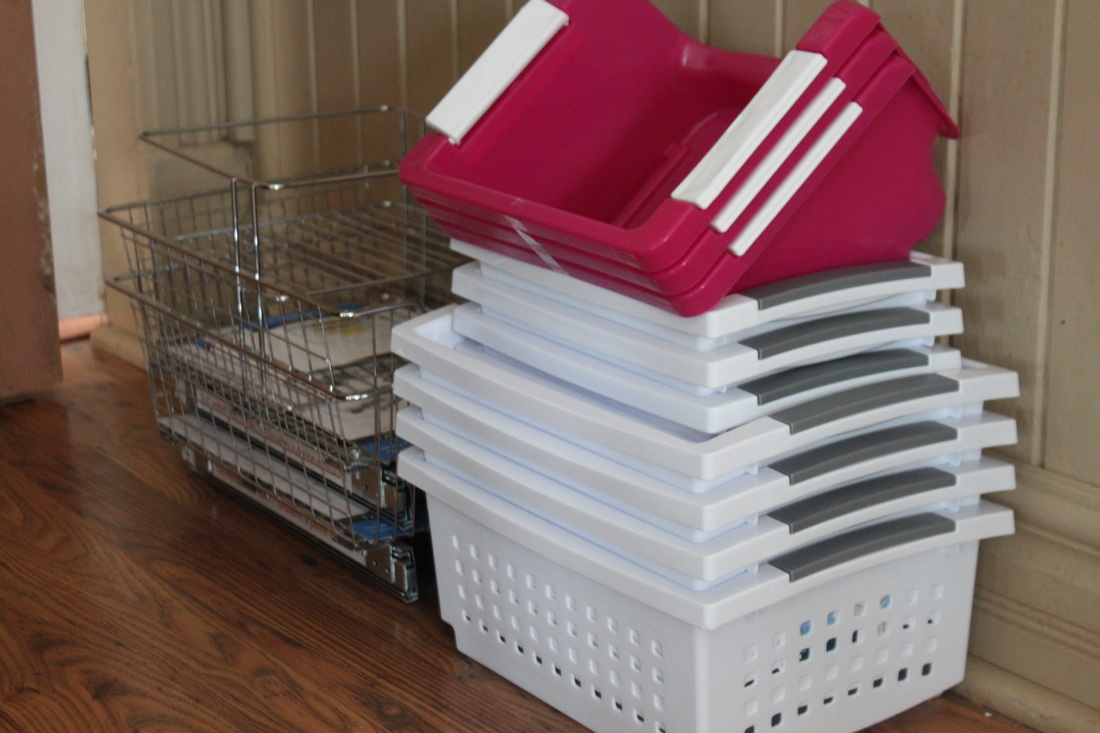 I bought more than I figured I would need because I didn't want to not have what would fit and work for the space. Plus I knew I could find uses for whatever remained, or just return it. Because this is a bottom cupboard, and very deep, I purchased 2 "drawers" to use. They required a little cordless drill work, but they were really very simple to install. Then I re-stocked/re-assigned some of my old school Tupperware, and started to see where they would fit. 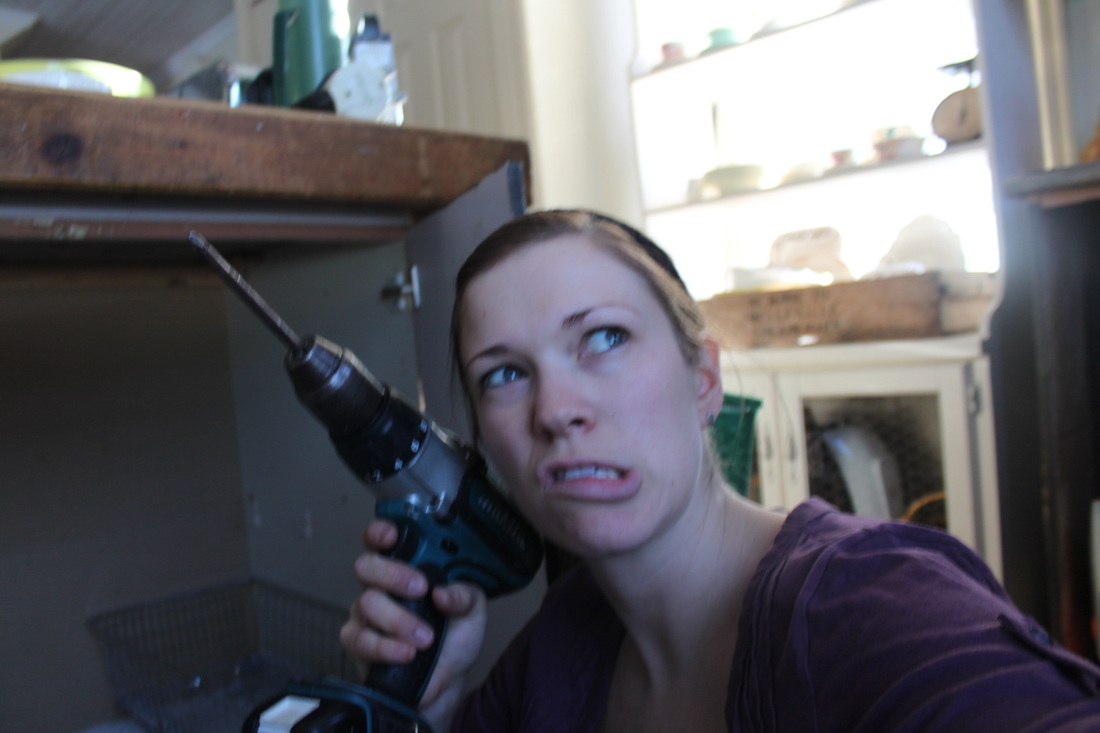 Using the drill selfie. :) Some things were in there by default, and needed new homes, like the lids for my pots (my pots and pans used to be in this cupboard before I did the hanging pot rack, and the lids never left!). They are happy on top of the fridge, though you have to be at least my height to reach them. I also moved a (beautiful, from my sister) mixing bowl out to a new spot, and gave away a few other bowls I had because I no longer needed them. My toaster remains in the baking cupboard though because I don't want it on the counter, and there is literally no-where else to put it! 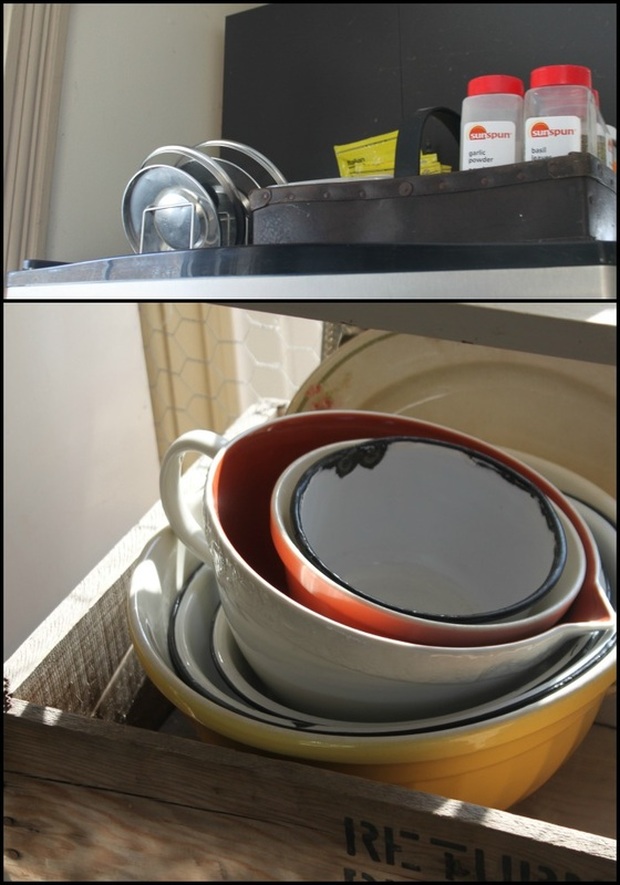 Re-Homed lids (top), and bowl (the cool one with the handle). Labelling things saves a lot of headache when it comes time to use the cupboard. I just wrote on regular paper, cut it out, and taped it on. I'm super happy with how it turned out, and am glad I tackled it instead of just throwing more and more things into it and shutting the door before everything fell out! :) 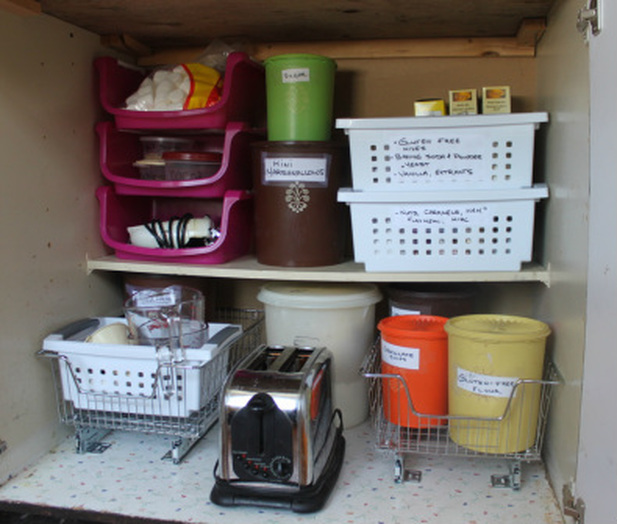 Ohh, lala! :) It took me about an hour to get everything how I wanted it, but I sure do like how I can find everything now. I keep opening the cupboard just to take a little peek at the organization....it's true, I'm that much of a tidy-ing geek.  When we moved into our new house two years ago, I knew the cupboard space could be an issue. I decided I wanted a hanging pot rack, but I couldn't find one that suited our house and style, and also our budget! Why are ugly, hum-drum hanging pot holders so darn expensive?!? 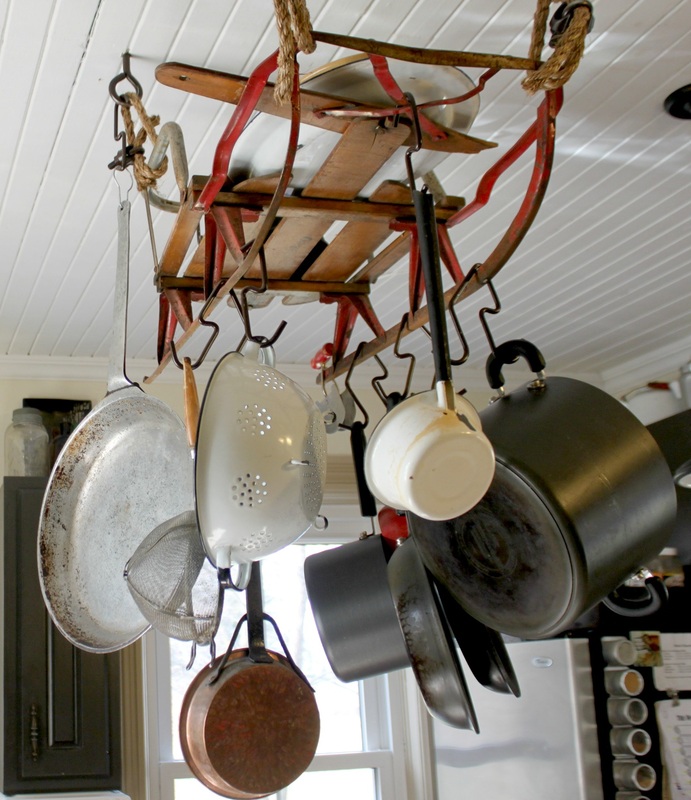 So, I kept an open mind, and finally this past summer I found the perfect hanging pot holder for us. An antique sled for $15! Woot woot! My husband was skeptical though....very skeptical.... 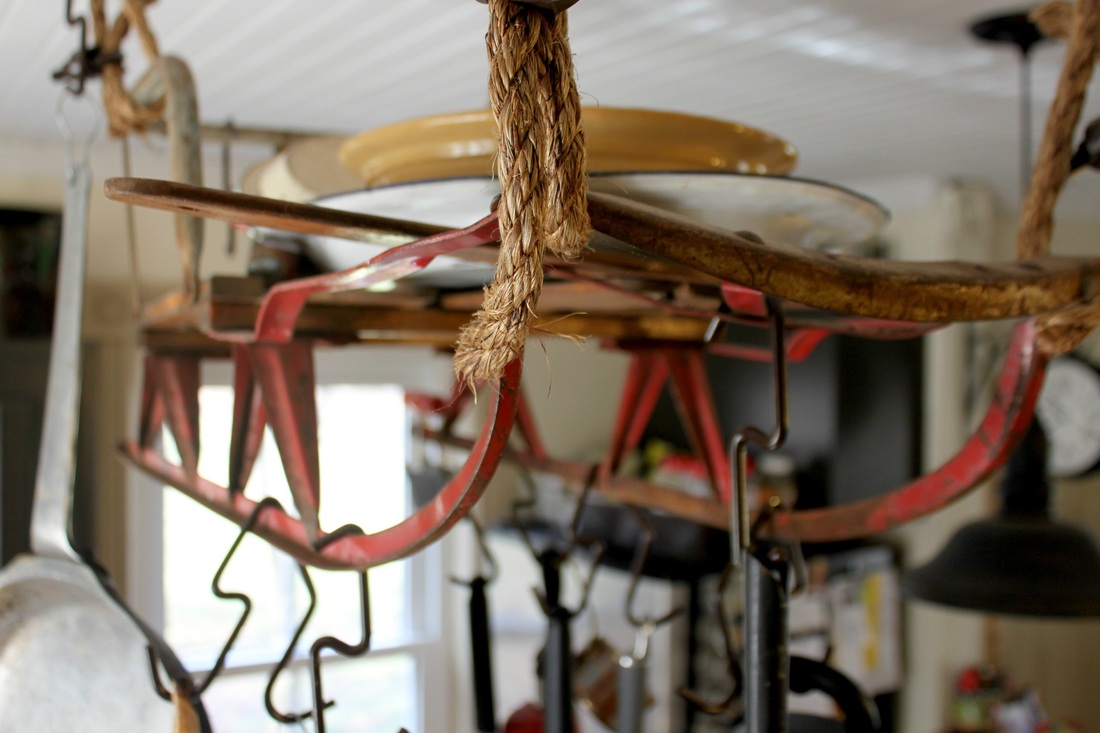 I bought the rope and hardware I would need (when I told the guys at the local Home Hardware what it was for they were skeptical too...geepers, some men haven't a spark of imagination!) I needed to spray paint the hardware because I didn't want it to be shiny silver.  The spray painted hardware and the rope holding the sled Then, when my Dad was visiting one weekend, we got to work! We had to drill a lot (a LOT) of holes into my ceiling because this old house does not have "regular", evenly spaced beams. So, we drilled to make sure we were putting the eyelets into beams (ya know, so the pot rack didn't come crashing down on our heads!) 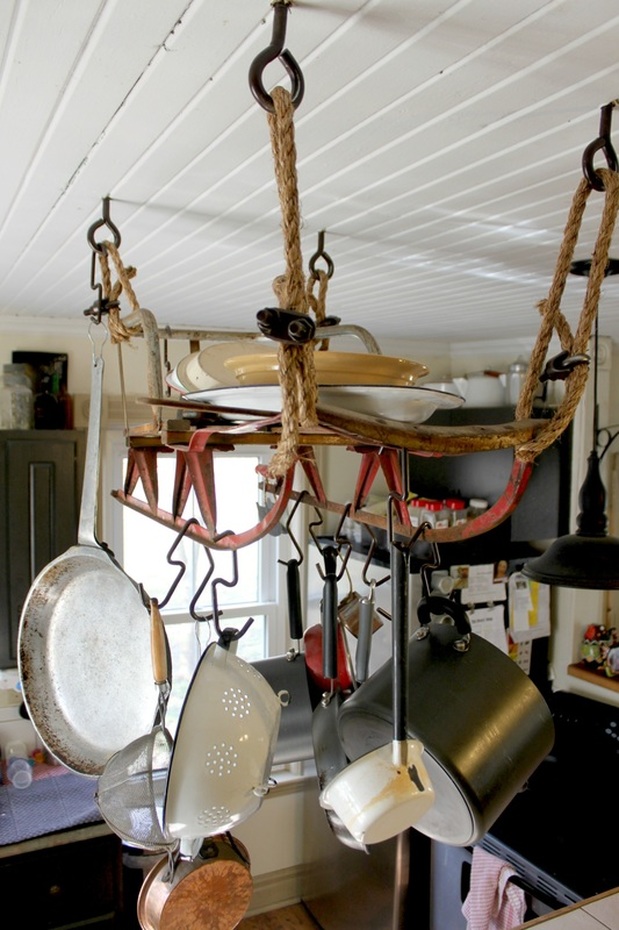 If you look along the grooves you'll see all the extra holes. You don't really notice them though when you're in the kitchen. I love the finished product! And, my husband even thought it was kind of awesome. I am so happy that I found this sled, and that I didn't just buy the first thing I saw from Bed, Bath & Beyond. It's original, it goes with our beautiful old house, and I love to re-use stuff!
Have you ever given something a totally different job than what it was intended for? Tell me about it! I am always interested in new & creative ideas! When our 2 girls finally got out of their cribs, I wanted to get bunk beds. But, the set I wanted cost $1000....so, no thanks! Yikes! 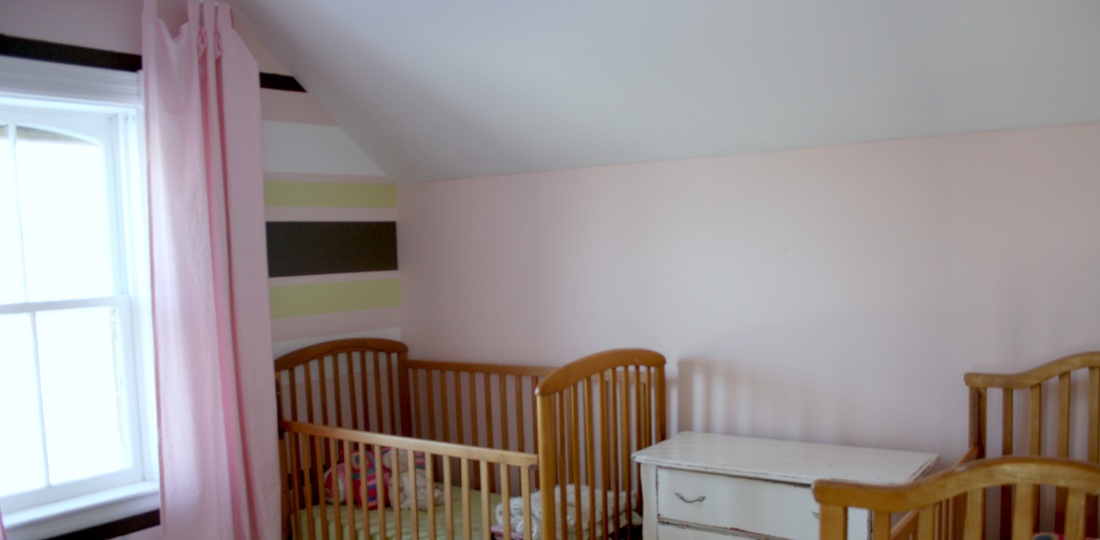 The girls' room with 2 cribs So, to tackle the issue at hand, I got creative and thrifty! My 2 fav. things! 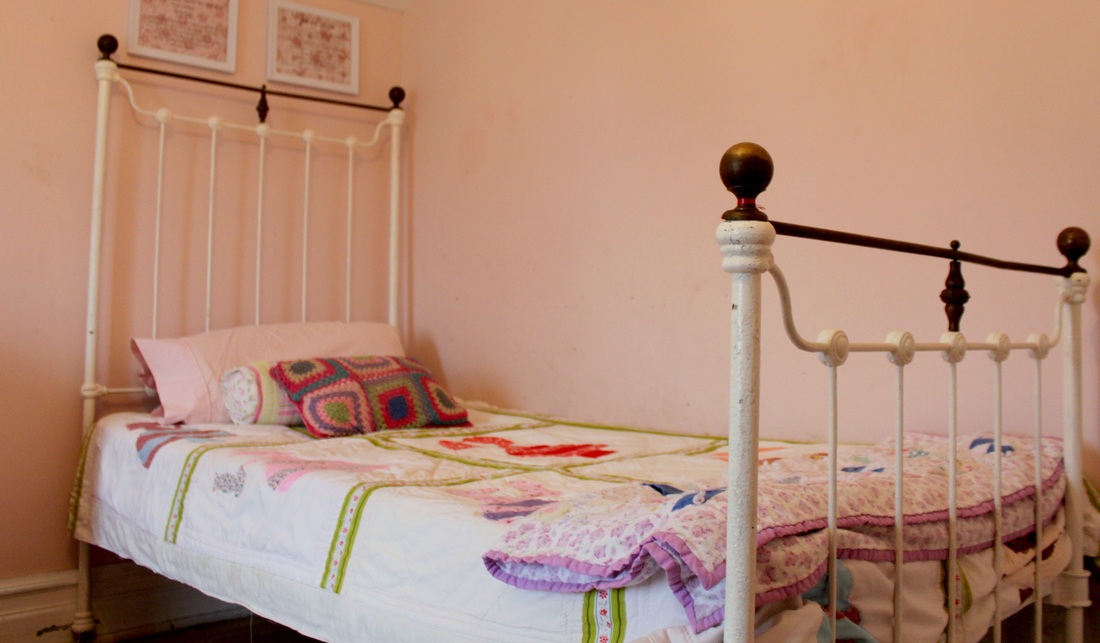 The brass and wrought iron bed we purchased. It's like a princess bed! For $75 we bought a brass and wrought iron antique "single" bed. So, to offset that cost, I found (through Kijiji) a metal bed frame (just the legs, and the frame to hold the mattress), a box spring, and 2 mattresses-all for free. We also needed to buy a sheet of plywood to go under the mattress on the antique bed (which cost about $18, with leftovers). But now, we needed a second headboard to match the one we bought. Enter: 1980's inspiration! Back in the day, faux finishes were all the rage. People painted fake brick, fake marble, and fake head boards (among other things). Done right, you could fool people, but done wrong, well, it just looked crappy (and usually hilarious)! 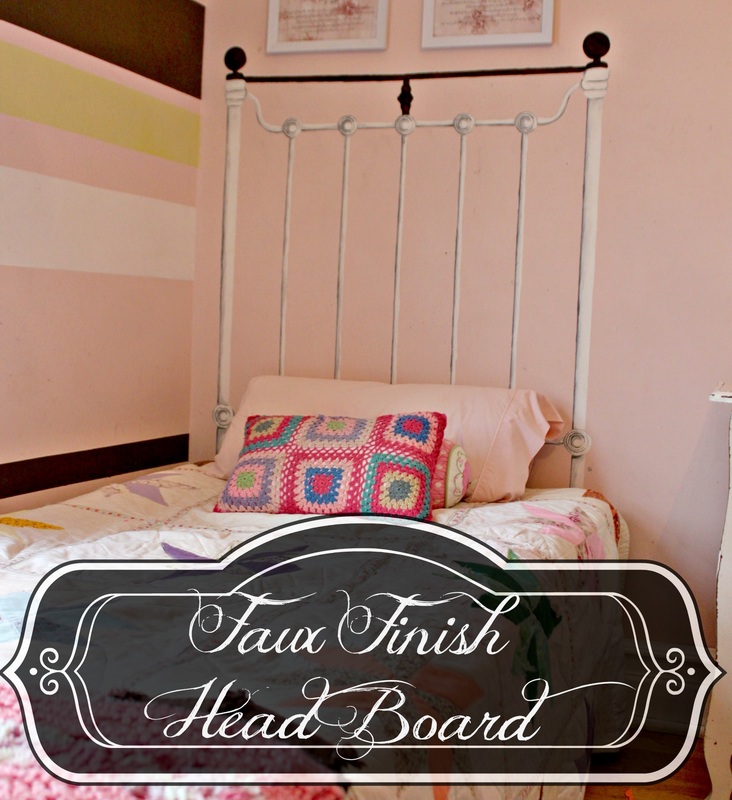 The "faux" headboard So, it was honestly pretty simple to do. I just held the real headboard up against the wall where I needed the "second" bed. Then, I traced it! I then used a small sugar dish to trace and do the circles properly. If you want to do a headboard, but aren't doing a matcher, and therefore don't have something to trace, my advice would be to keep it simple. This headboard is actually very simple. You could use a yard stick to trace the strait bars, a small circular object to get the circle parts right, and create a few simple stencils to do the wavy parts so that they are balanced. 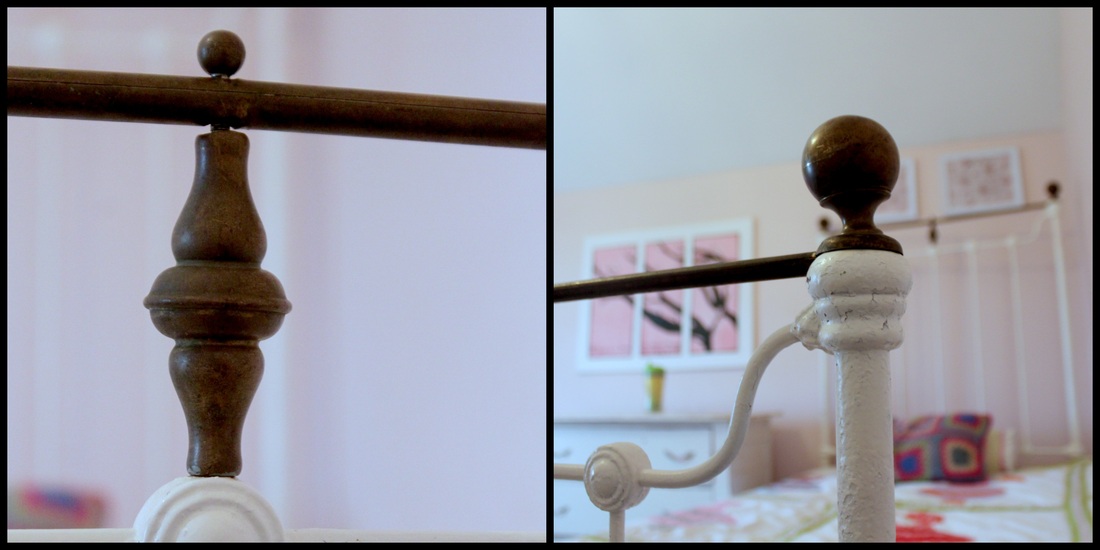 The details on the real bed that I needed to re-create. Starting with white, I filled it in, and then with 2 shades of grey I added dimension. I decided not to add a "shadow" because the real bed would have a different shadow at different times of the day, but the fake bed would have a perma-shadow in one direction. Illusion wrecker! To simplify the intricate designs along the bed, I used a cereal box and an exacto knife to cut out stencils (draw your design on the cardboard, then place onto a cutting board and use the exacto knife to cut it out). I just put the stencil in place, dabbed on some paint, and moved to the next spot. 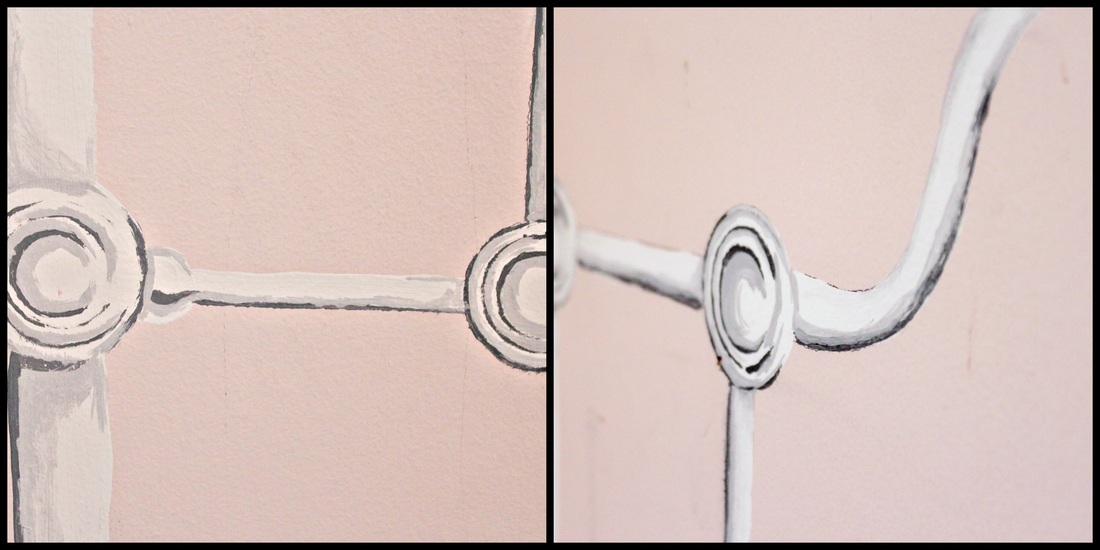 The details I simplified by making a stencil People (almost everyone who has come over since) has walked past the room, then done a double take and can't believe the one bed is just painted on the wall. The only thing missing is the footboard, but we're o.k. with that because it's a really small room.  The completed room! For $93 (antique bed, plus plywood), a bit of Kijiji hunting, and a few hours of painting, our girls have beautiful, matching beds for their room!
I have a duelling personality. One side of me loves old things to the point of clutter, the other side of me wants a place for everything, and everything in it's place. So, I starting repurposing the things I had acquired so that I could have the best of both worlds! 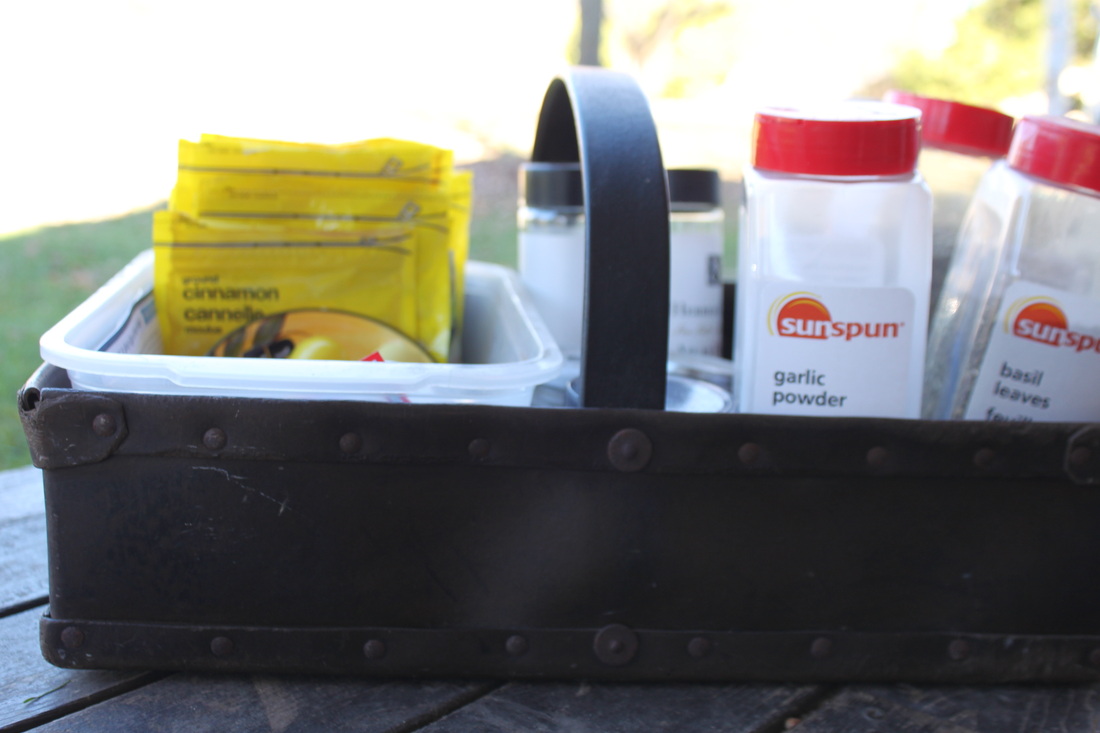 This beautiful, WWII era homemade leather "basket" serves as a spice rack, of sorts. It also was used at my son's summer birthday party to hold drinks. 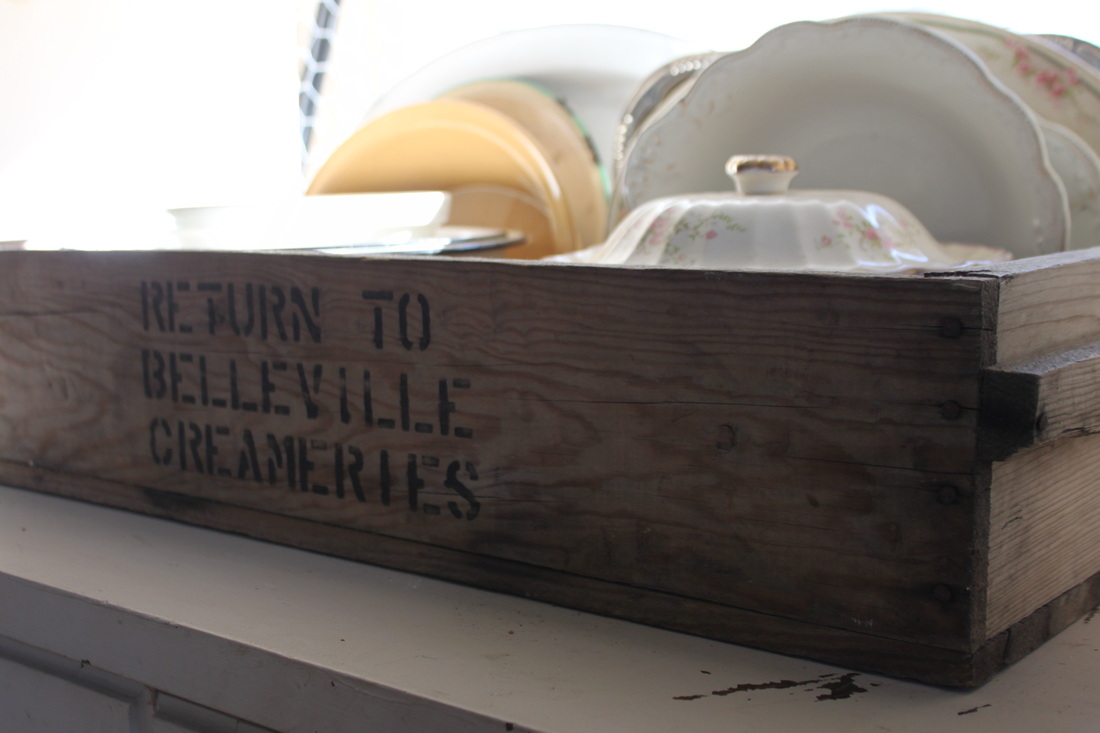 My Belleville Creameries box helps keep my mixing bowls, serving dishes, and platters all tidy and accessible. 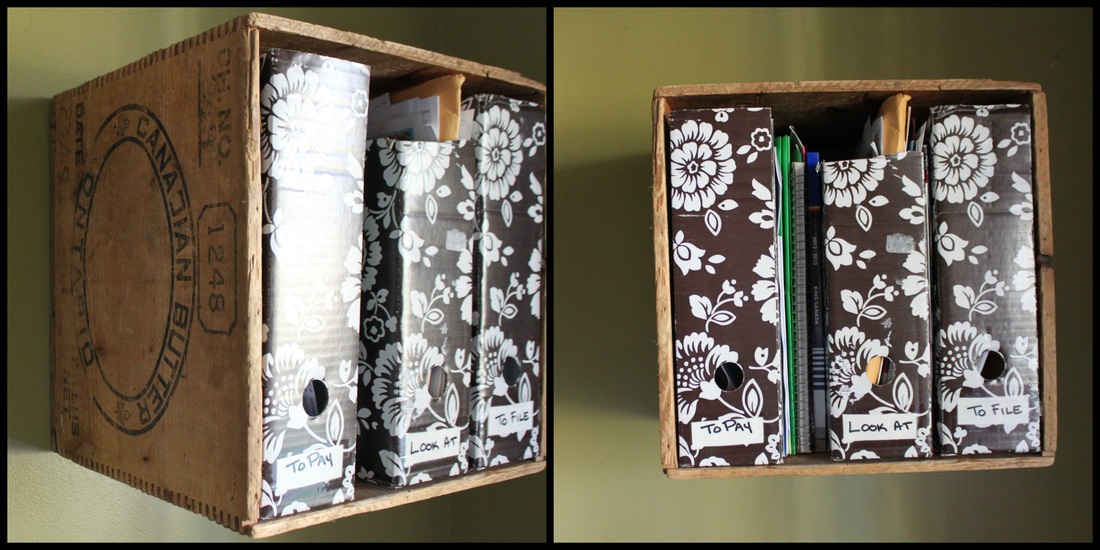 I've had this Canadian Butter box for a while, and it has had many, many jobs. It was a "night stand" sitting on the floor when I had a low bed. Then it served at many parties as a bags of chips holder. It was used very temporarily to hold our cardboard and paper that we would take out to burn (a very undignified job for such a lovely box). Finally, I was trying to get our computer nook in order, and I anchored and screwed it to the wall as a shelf. 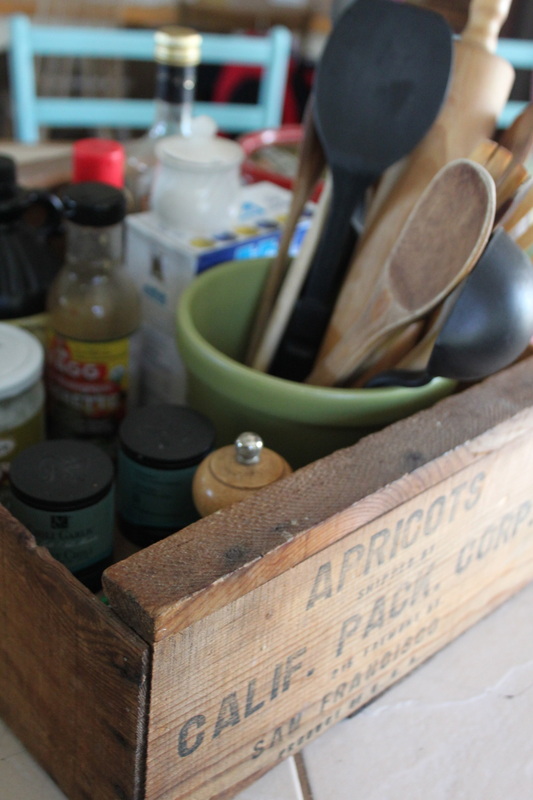 This box sits next to my stove and holds my cooking utensils as well as oil, vinegar, salt and pepper. 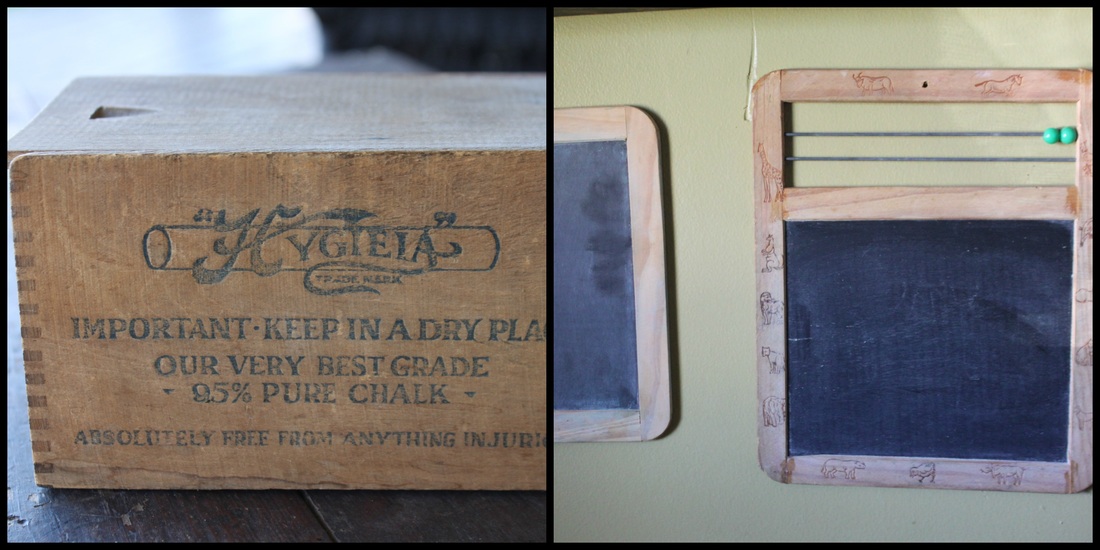 This box literally has not been re-purposed at all, and holds the chalk for our little chalk boards! 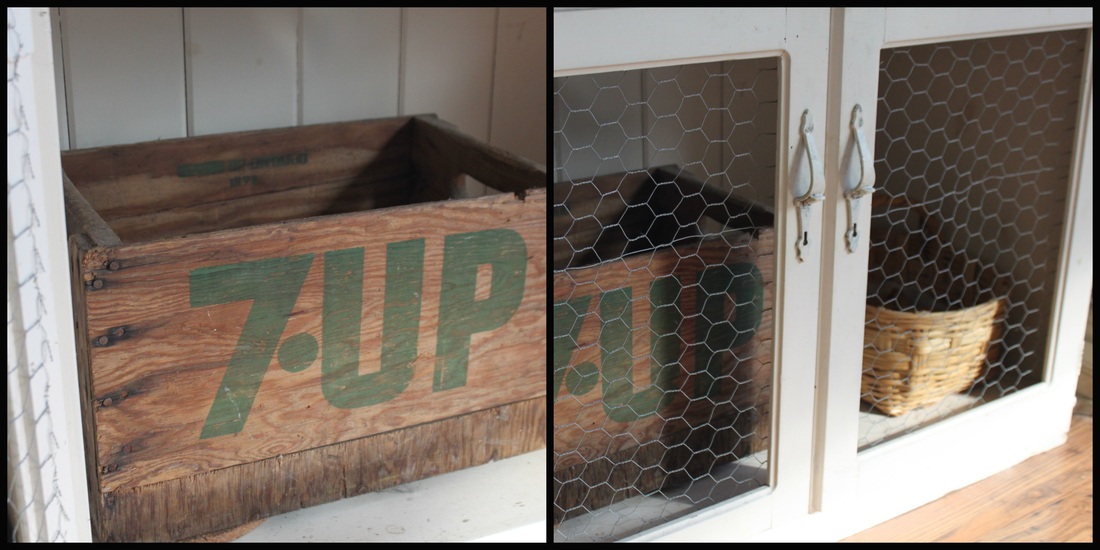 I got this box a long time ago to hold toys for my son in his room, but it has since become the potato holder in the kitchen. 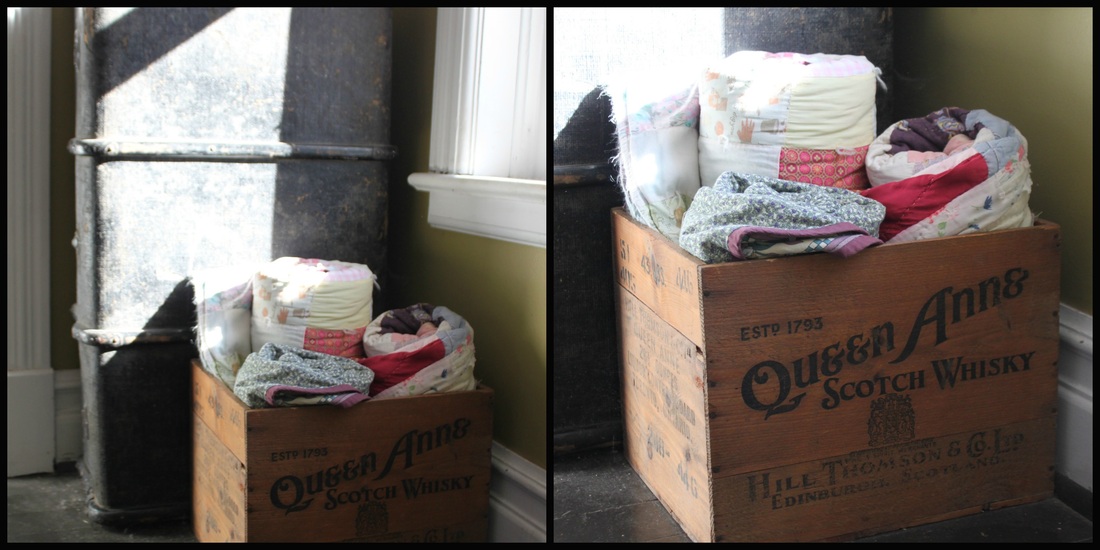 An old whiskey box holds extra quilts in the hall incase guests need an extra blanket in the night, then they don't need to go rooting through my linen closet! 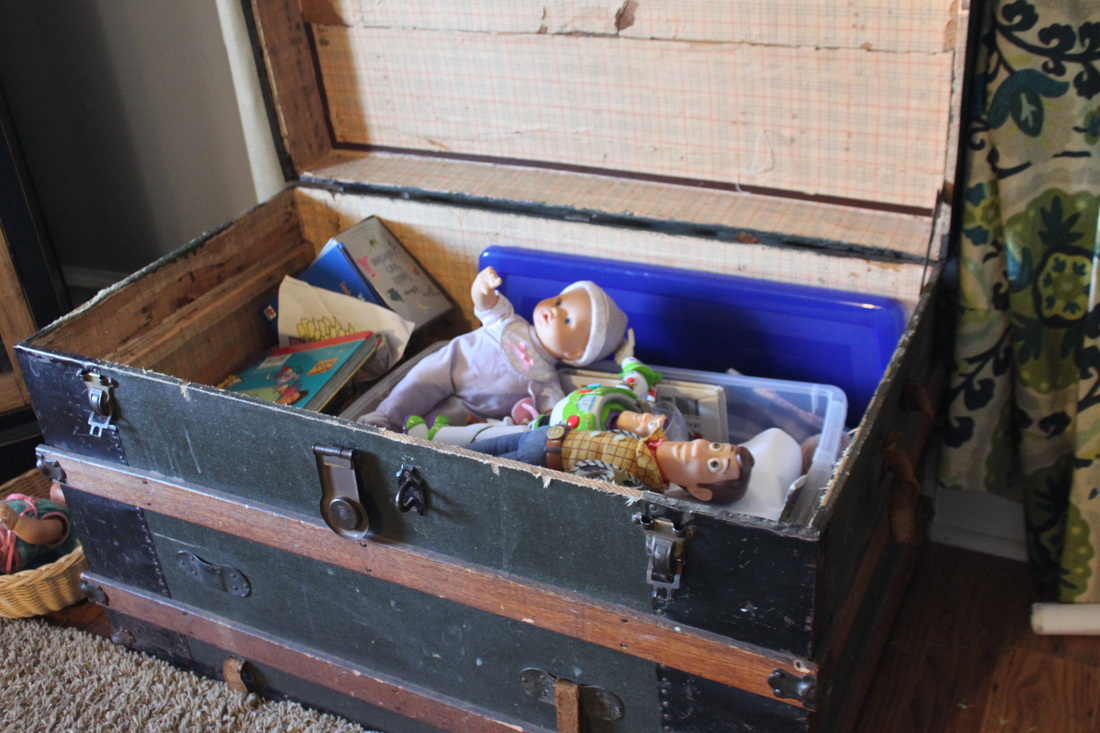 An old steamer trunk holds my kids toys. At night, the toys get tossed in there, and my living room looks like an adult, relaxing place instead of an isle from Toys R Us! 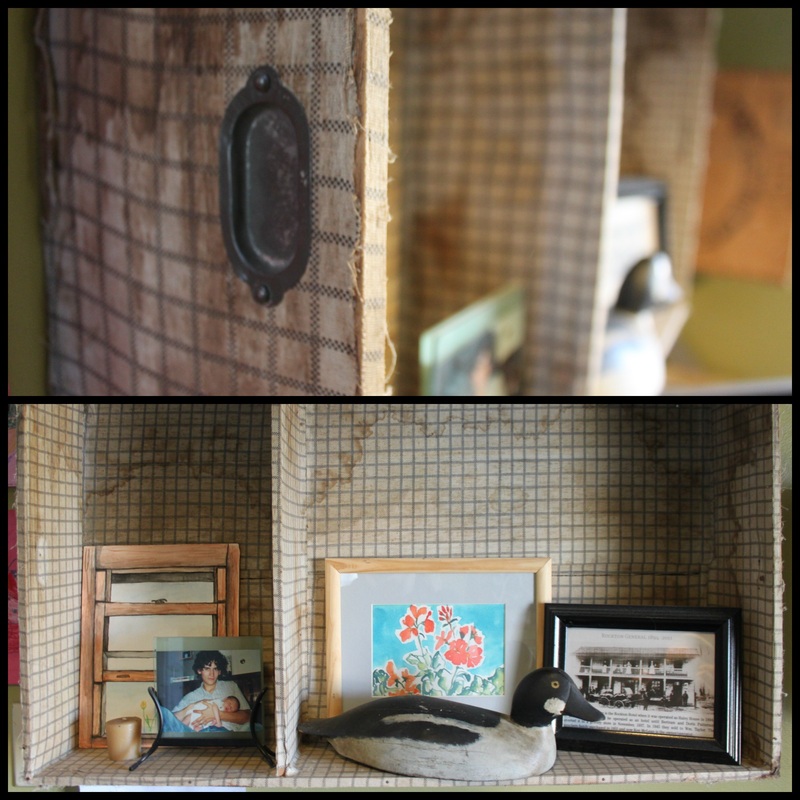 Speaking of steamer trunks, my kids also have one on the front porch to hold outside toys, but the lift out part of it (that most old trunks you'll find have missing), needed a job. So, it got added to our computer nook as a shelf. 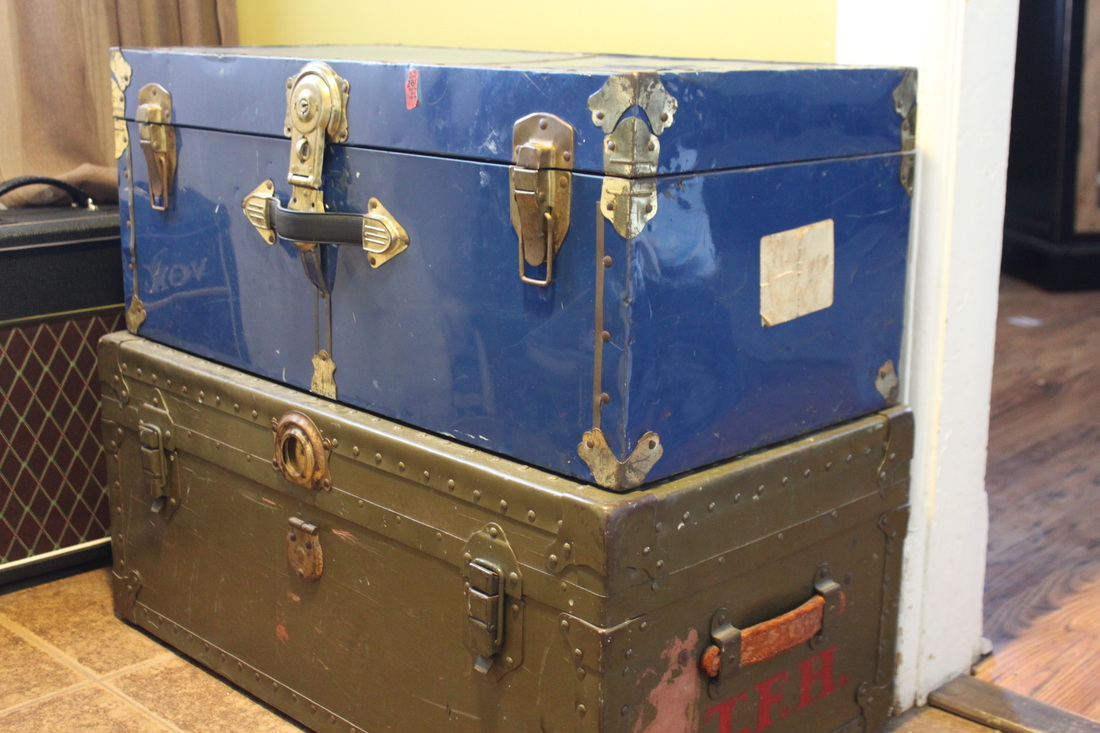 More steamer trunks….o.k, I have a problem….but let's not dwell on that right now. These stacked trunks are also in our computer space, the bottom one is actually a little empty, but the top one has our computer paper, and some other office-y things like binders and files. 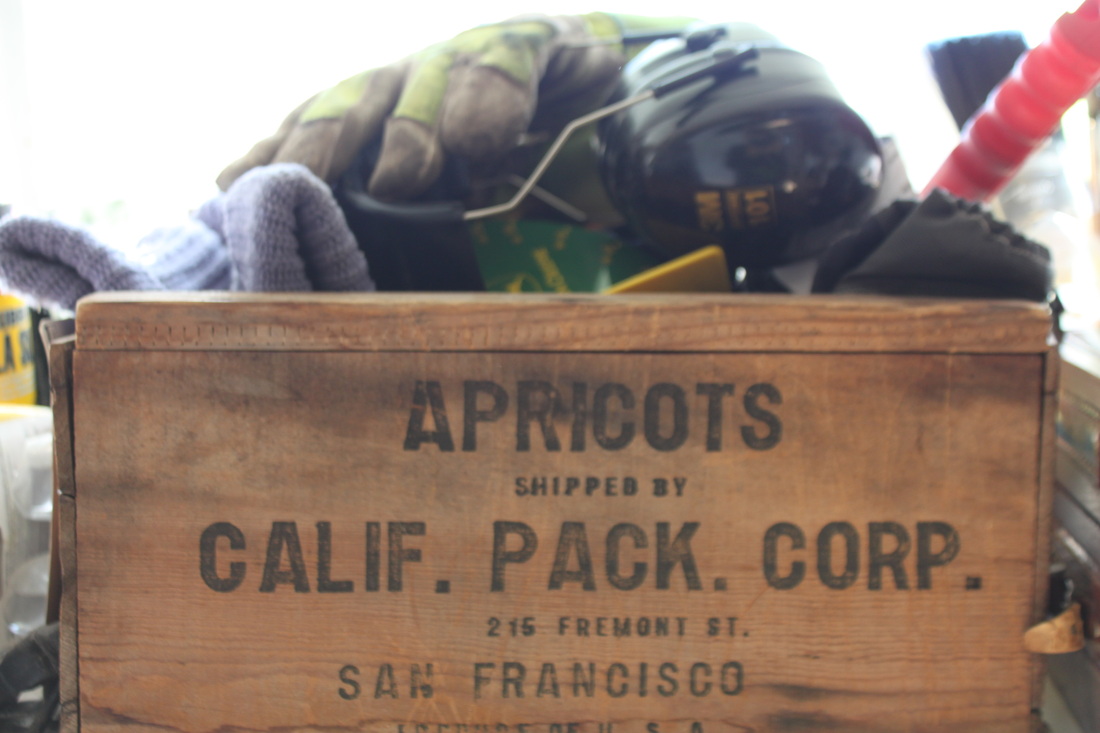 Just so you don't get it in your head that I am perfectly tidy, I am also sharing this photo from my fairly messy back room. This lovely box holds, as you can see, anything that lands in it! In here you'll find things ranging from dog treats, to a thermometer, mitts and a hat, lost nails and screws, and sidewalk chalk. So, (I want to say "in conclusion" as though I am completing an essay) you can love something, but also put it to good use. These beautiful bits of history are a part of our house, a part of us and who we are, and they help keep things tidy! I call that a win/win....um, win!
I have a love for beautiful old things. I love history, really, and antique things that remind me of the past are the only way to "capture" history in my home. 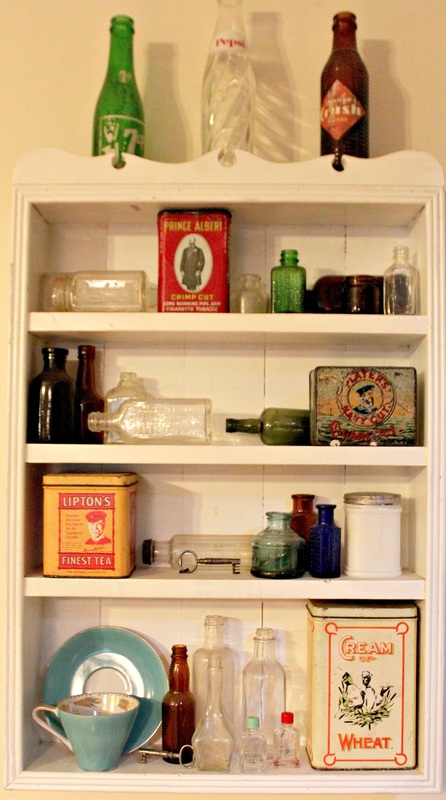 The whole vignette The downside to loving old things....? Finding places for those old things! My solution? Vignettes! A vignette refers to many things and subjects, but in this case, it means a collection of things put together for display (more or less)! 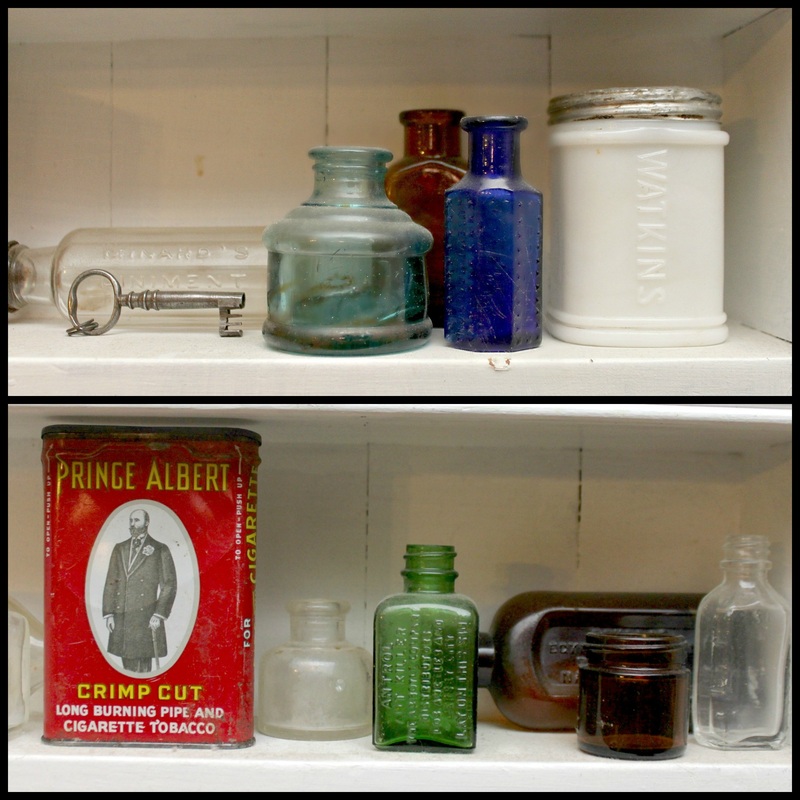 These bottles are a little dusty....but still pretty. Look at that old Watkins jar! So, when I realized I had so many lovely little things, and no place for them all to be seen, I painted a little shelf thingy I had, and worked on arranging my things. The key to a good lookin' vignette is to have levels, mix mediums, and create balance. 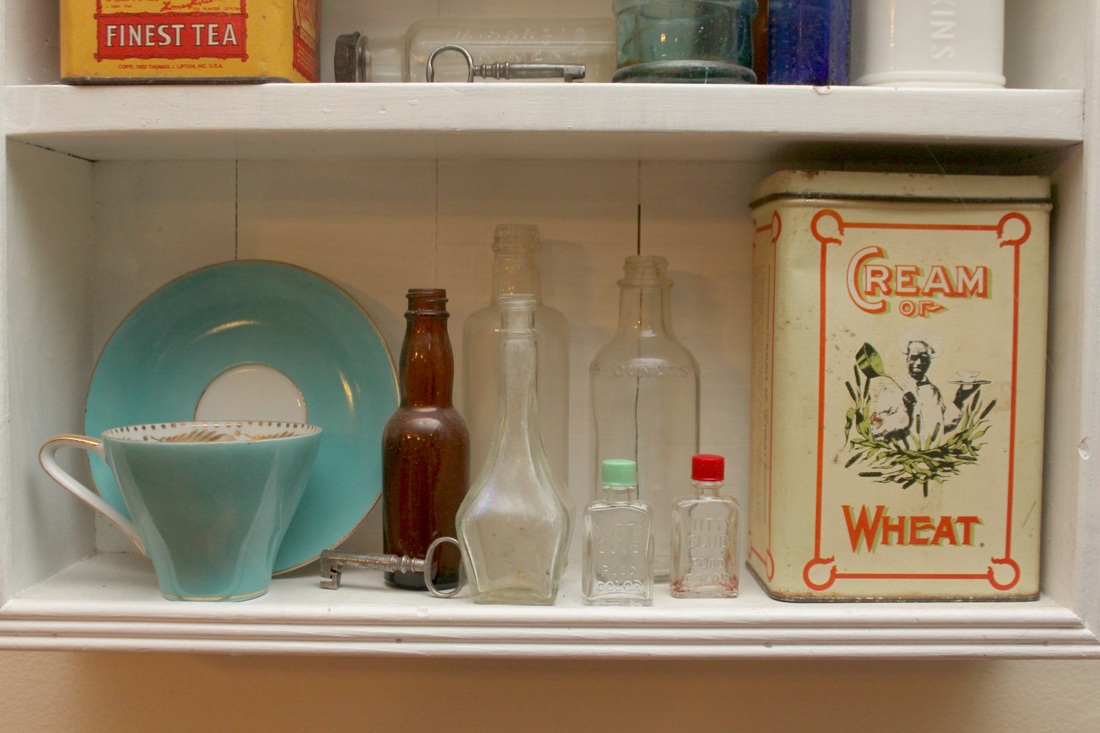 Those tiny bottles on the bottom with the green and red lids are glass food colouring bottles. I saw something on Pinterest that made me go, "Whaaaaaaat?" It was the idea of re-growing romaine lettuce, and green onions from the "throw away" part of the veggies. Basically, the stump of the romaine, and the bottom, white parts of the onion get "planted" in water, and are supposed to re-grow. It seemed simple, but I didn't quite believe it. You put the veggie ends into water, in a sunny place (like a window sill), and give them clean water every few days, and let them grow. 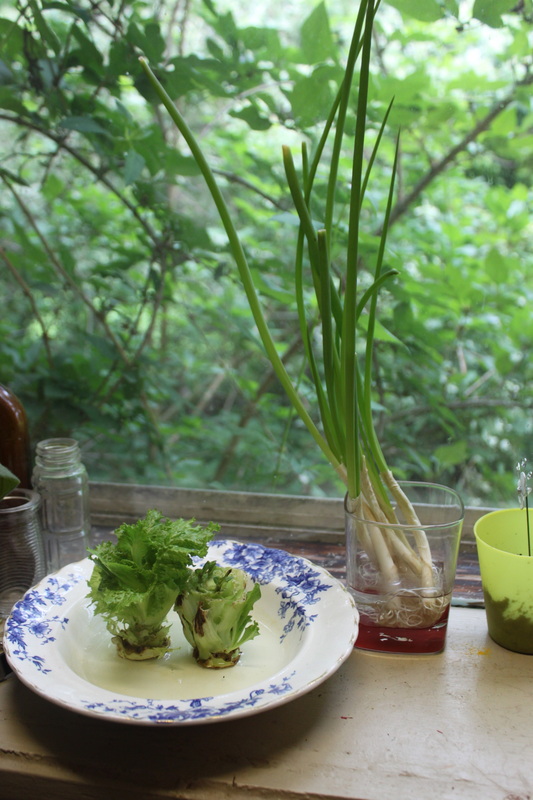 You can see that I put the romaine in a shallow bowl, and the onions I put into a cup that would help hold them up. These pictures were taken after 5 days. Look at those onions! I was so impressed! AND-after using them that night in our meal, I re-"planted" them in water, and grew them AGAIN! Then....yes, one more time!!! So, out of one purchase of green onions for maybe a dollar, I got fresh green onions 3 weeks in a row! I'm a fairly cheap, Dutch gal, so that warmed my heart! 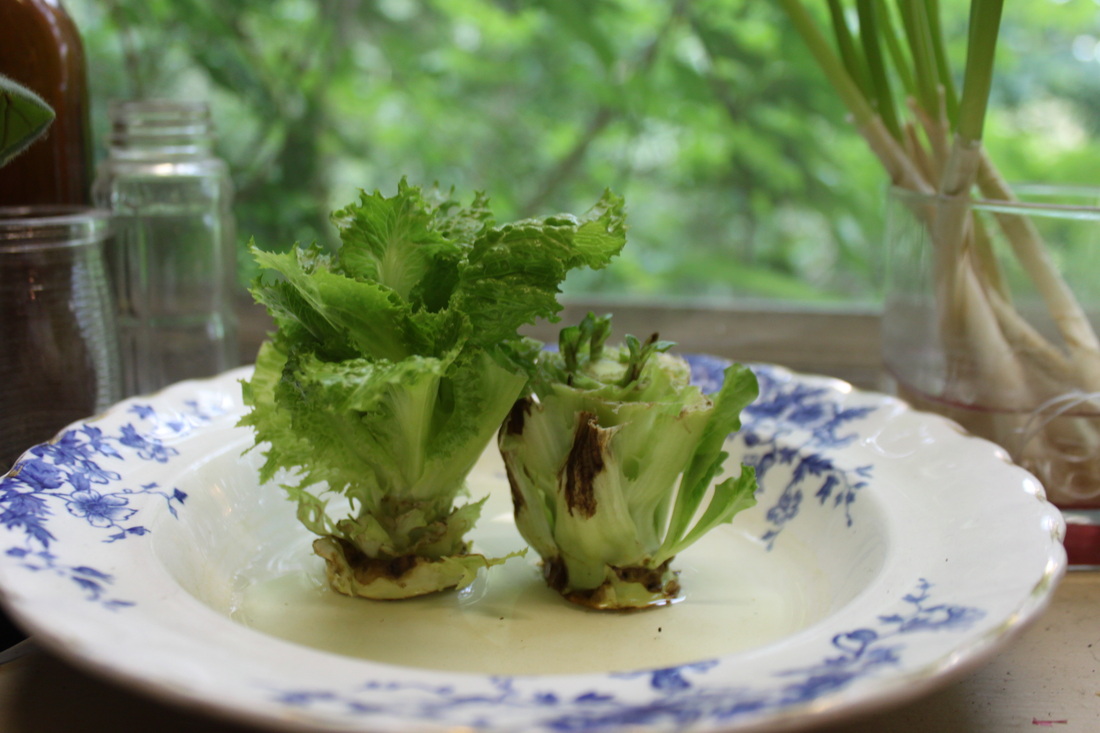 The romaine grew too, but sooooo slowly. It took another 5-6 days to get enough out of this romaine for me to eat as a side salad. It was good though, and I was proud that I had grown it in my window out of "garbage".
Amy-Lyn So, while planning my daughters 3rd birthday (a tea party), I knew I would have to rectify the problem where I didn't own a cookie stand (one of those pretty, multi-layered thingies). Well, I looked around for one, but was never terribly impressed with either the cost or how it looked. Then I saw one on Anthropologie.....for around $80. Yikes. No thanks. 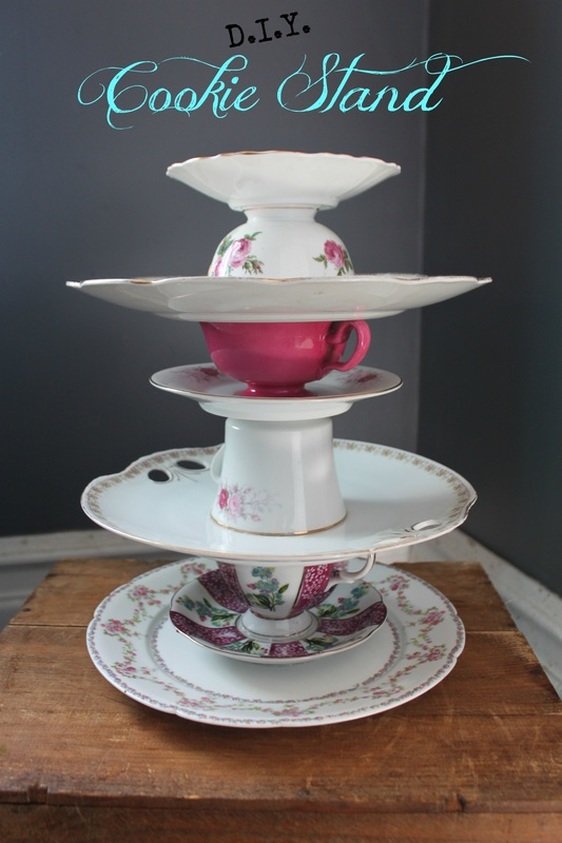 Well, when you find something you love, but it costs too much, what do you do? You go to your local thrift store, and get 'er done your own way! I looked around our "Hidden Treasures" store in my small town for dishes that would fit with the pink and white theme. In total, $3 was spent on the dishes. Then I headed over to our Home Hardware for some glue. Elmer's makes a "Fix-All Cement" (pictured below) that is good for hot and cold weather, as well as water resistant. 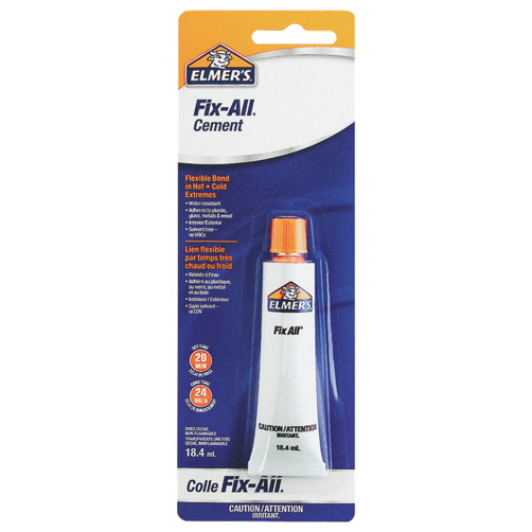 I went home with my dishes (one of which I broke while going home.....good thing I bought that glue....) and my glue, and started working on my cookie tray. I just kept stacking and re-stacking the dishes until I had something I thought was perfect. Then, I carefully glued them together, and put it somewhere safe to dry. So, for under $10 and not that much effort later, I had my own, Anthropologie inspired, cookie stand! I have used it a lot since making it, and so I am glad I have it! It's also a great conversation piece, so that's a bonus! :)
|
Hi, I'm Amy-Lyn! 
I am the lady behind this here blog! I live in the sticks with my animals, my super handsome husband, and my
3 amazing kids! Here you'll find things from recipes (gluten-free, paleo, and strait up junk food!), DIY ideas, thoughts on raising a son with autism, and whatever else pops into my brain! : ) Read more about me by clicking here! Want to Stay Connected?
Find What
|
 RSS Feed


