|
Good monday morning to you! Today I bring to you a treat that has saved me many a time while eating clean! Being honest, as a woman, there is a certain time every month where if I don't eat some chocolatey sweetness at least once in the day I could just have an adult melt-down! Just joking...well, half-joking. Anyway, years ago a friend gave me a recipe for chocolate banana avocado pudding, but at some point I lost the recipe and was just winging it. There was always something that wasn't my favourite about it though. After it had been in the fridge for a day, it started to taste a smidge like super-ripe banana, which is not what I want to taste while eating chocolate pudding! So, I've been winging and tweaking, and have a pudding that not only tastes great right when you make it, but tastes even better after it's been in the fridge! 
5 Ingredient Avocado Chocolate Pudding (no bananas!) Ingredients:
Method:
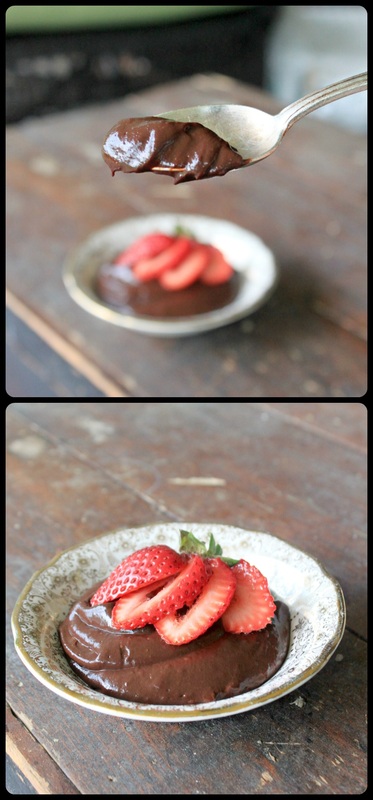
So, that's it! It's super easy, super yummy, and therefore you should make some! :)
7 Comments
This week feels like a blur...I finally finished that chicken coop I started a few weeks back. Yes, it did take me that long! It was a huge project that involved endless hole digging for posts for the fence, and we have a lot (A LOT!) of rocks around here, so it was a big task! Then there was the "deep litter" floor that needed to be dug out, walls to be put up, a window and door to hang, chicken wire to staple...what else? I dunno. Oh, my horse finally came home this week too...and he promptly ran away and took off down our road! Yikes! We got him back, but it's been a little stressful convincing him that he is indeed here alone with no other horses! Last night, before going out to vote, we played a true hillbilly game called, "catch them darned chickens to put 'em into the new coop". O.k, its not a real game, but it was sure hillbilly! Caleb's chore before and after school is to feed the hens, but he hadn't mastered the "here chick chick chick" call, and so they won't come when called, so we couldn't just pied piper them to the barn. We literally ran around like loonie-toons chasing the chickens every which way (and slipping and sliding in the wet grass because it was raining!). We only got 7 out of 8 hens...? Either way, I won 4-3. Hooray for hillbilly me. I actually don't like when blogs blab on about nothing before a recipe....but apparently I needed to get that out. I just sat down and it started coming...so, sorry! You're just lucky I didn't blab on about the actual Earl Grey! The cookies today are from the one and only Martha Stewart, and are really simple with just few ingredients to get them together. And they really are the most perfect tea cookie with their lovely Earl Grey taste. I love Earl Grey (thanks to my friend Gracie!), and drink at least 2 cups a day. At least. 
Earl Grey Tea Cookies -The dough needs chilling time- Ingredients:
Method:
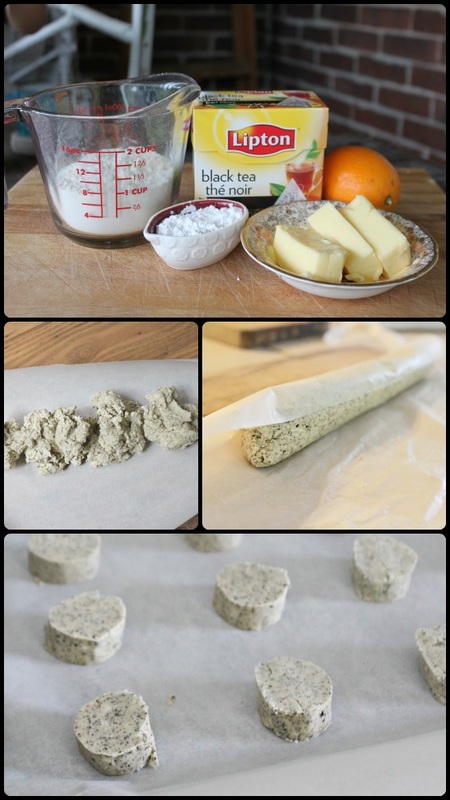
The ingredients pictured were for a half-batch
I feel ashamed, but I completely forgot to take some pretty pictures of these dear little cookies before packing them up and taking them to a tea party! :( I plan to make them again soon though, and shall update the photos then!
Another thing, you could try to make these cookies with other tea flavours, I think. If you're into herbal/fruit teas, that could be interesting. Or a chocolate mint tea would be good too. Anyway, I'm off today with a bunch more things to do! So, happy Friday, and have a good weekend! xo 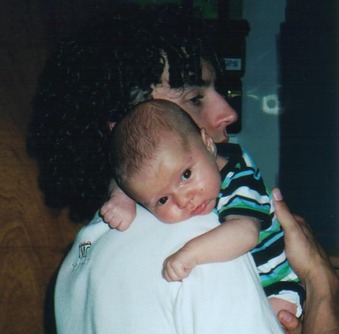
Little Caleb with his Dad
When your first child is born, something changes. The change is not that you suddenly become a parent, I believe the change and becoming a parent happens after that initial birthday, in all the moments that follow. It's taking what is about to come at you, and not only doing your best, but allowing it to change you for the best. 1o years ago I gave my husband Adam a Fathers Day card preceding the birth of our first child, Caleb. We expected a lot f changes when we became parents, a life we knew would be different. I know we were worried about being enough for a new tiny person, being whatever we needed to be to be able to raise a decent human being up in this world. But, as Caleb got older, and it became evident that something wasn't quite right, the "simple" roles of parenthood we thought we had were really beginning to change. Imagine someone had given you a painting, and told you "this is what parenthood will look like", so you look at it, you study it, you imagine it even when you're not looking at it. Then one day, that person comes back and says, "I actually need that painting back. Parenthood will look different for you, but I'm not quite sure how different, so I'm not painting you a new picture....you'll just have to see how it goes". When my husband and I first realized our son had autism, there were different reactions. As Moms, I think we tend to blame ourselves for everything regarding our children. Obviously it's because we're perfect and nothing could ever possibly fail while under our watchful eye, and if it does fail it's our fault (really, our need to blame ourselves must stem from us assuming we have the control over everything, right?). My husbands reaction was two-fold. One was a manly need to fix the problem, but the second reaction was the hardest. He saw that painting, all the things he hoped for, being carried away, with nothing left to look at in it's place. He mourned the things a "regular" father and son could do, that he likely wouldn't be doing with our son. It wasn't an all at once reaction, but one that would come in waves as we watched our son struggle with hurdles other kids were leaping over. In the years since Caleb was born, and we found out he had autism, things have been good, bad, and ugly. My husband has not been a perfect Dad, not by any stretch, but what he has been is a willing student to our son. And I think that does make an amazing father. Pam Brown, an Australian artist and poet said, "Dads are most ordinary men turned by love into heroes, adventurers, story-tellers, & singers of songs." I think having a special needs child makes a Dad feel even more ordinary because things that seem like they are par for the course in raising a child, especially a son, are difficult, or impossible to achieve. The everyday things in raising a child with autism can be so challenging, and a lot of days you're left wondering if any of it matters at all? But, in the last 10 years what I have seen is my husband loving our son, our sweet, amazing, but often terribly difficult son. I've seen him fight and advocate for him, try to include him, even when it seems like our son has no idea what is going on. He's passed down knowledge to him, perhaps not the knowledge he anticipated handing down, but for our Caleb, it is important. He will sit with him and "research" (Google!) the things that Caleb is interested in so that they are learning it together (turns out a tomato is a vegetable, which Caleb is NOT pleased about!). He will act like a complete goon because Caleb thinks its funny to see a grown man dancing like an idiot (o.k, I think everyone actually finds that amusing). Adam has worked so hard, has cried many times, fought many times, laughed many times, been angry and confused many times. But at the end of it all, he's still pushing on, believing and hoping the best for our son, and trying to find the best in himself while on the journey. 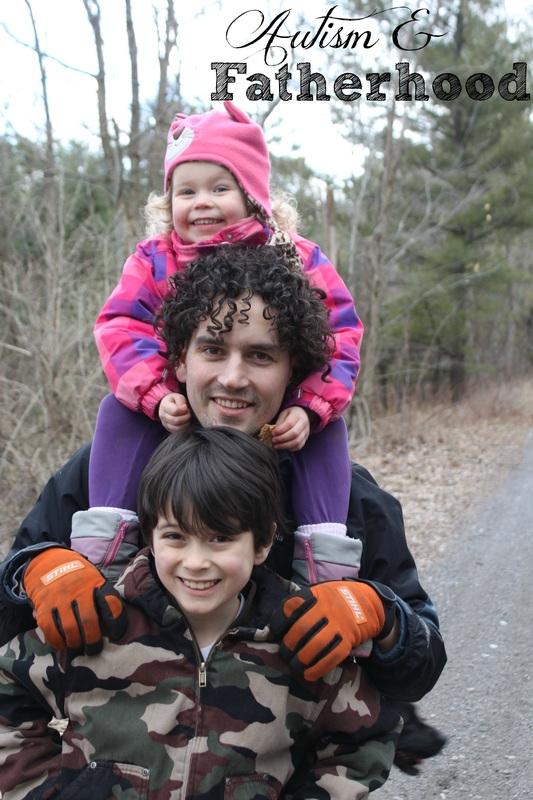
Who doesn't want a delightful little gluten free, dairy free, sugar free and nut free tart with a perfect crust, a delicious caramel filling, and a touch of chocolate on top? Who, tell me who? No one, that's who!  Mini Caramel & Chocolate Coconut Tarts Ingredients: For the Caramel:
For the crust:
For the chocolate:
Method: Caramel:
Crust:
Chocolate:
 When I ate one of these after leaving it out at room temperature for a while, the caramel filling was just getting softer, and it was so, soooooo tasty.
Anywho, that's all Wednesday people! I hope these tarts make it onto your to-bake list! If they do, please tell me how they turn out! Am I the only one who can go through life without consciously letting things impact me? I am being serious....Sometimes I feel so disconnected and cold because I know a season has gone by, and I just let it come and go without stopping to see it or feel it. Maybe some of the things I forget though are things I didn't realize I should be remembering, if that makes sense? I went away this weekend, and had an experience that made me stop and say, "what am I tucking away in my memory, what am I learning right now, who am I in this present moment before this present is my past?". All of these questions and thoughts came to me because I went to an alumni reunion at the Circle Square Ranch in Brantford. Back in 1996 and 1997 I started going with one of my sisters to the Ranch; I wasn't on staff, but I would go and help out. Then, in 1999 I started my first year as a staff member. I worked there in the summers and off seasons until 2006, at which point my husband, our young son Caleb and I went to a Circle Square in Kirkland Lake, then the following summer we moved to Bancroft. At this reunion, even though I didn't see all the people I had hoped to, I did see a lot of people who have been a big part of my life-I just didn't realize it until I saw them again. Seeing how much time has passed, and how old I am now compared to then could have made me depressed, but it really just made me feel happy about my life. In my current role as a stay-at-home Mom, life revolves around my home. Fixing ouchies, jumping on the trampoline, reading stories, saying prayers, making meals & lunches, doing laundry, tidying, cleaning, getting projects done, it is an amazing job, but also one that can make you forget you ever did anything else before it! So, taking a trip to a place where I spent almost ⅓ of my life really hit me. I honestly had to stop myself from crying a few times. Not because I was sad at all, but because I was feeling so overwhelmed with looking back. I felt so very humbled knowing how many kids had come through the camp, had come to know Jesus, seeing current staff members that had been campers "back in my day", and feeling so much purpose from the role I got to play in all of it. I had a few opportunities to talk to staff from my years at the ranch, but also to talk to some of my old (horseback) riding students, who had become staff later on, and the stories they remembered about me as their teacher were overwhelming (and a little scary!). But as we drove away from Brantford, I said to my husband, "I don't want to live life thinking nothing....I want to remember right now, I want to cherish right now". There is a fine balance between looking back, and looking forward. I need to be able to see ahead, to make plans, to prepare, to have dreams about what is to come. But, I also need to stop, and see where I am right now, and take a "mental picture", and tuck it away in my heart. Then I also need to be able to see where I've come from, what has shaped me and impacted me, and see how who I was then, and who I knew, and what I did (or didn't do), shaped me for today. Those years at the ranch seemed long (and hot and dusty!). I don't remember ever thinking, "oh man, I just need to get out of here!", but I also don't remember making any connections, purposely tucking lessons or people or experiences away in my heart. I want to do that now; I got a glimpse into my past this weekend, and it held a lot of treasures. I just wish I had seen a lot of these treasures then. Treasures aren't always things that are good at that time, but they are lessons, life shapers, character builders. So today, wherever you are, whatever kind of life you currently have, take stock of your treasures. Learn lessons well, cherish the people who are in your life right now. Sometimes things are so hard, but just know there are seasons, and it will pass. What will you learn from it? Looking back can give you a view of the road you've travelled, and humble you. Taking stock of today can help you smile more, perhaps cry more, maybe give a few more hugs, say a few more honest things. Know that this day will someday be your past and your legacy, that is being left behind you. Then look ahead, knowing things will be different, a new part of your life be be in motion, the people, places and things behind you have shaped you, and prepared you for the road you are about to travel. 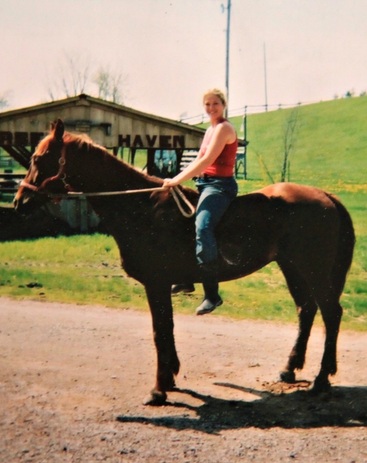
A younger me at Circle Square Ranch, Fall 2002
All I can say about this chicken is yummmm!!! For realz, even my pickiest little Abby liked it. Well, first she ate it and said, "this is yucky", and I said, "that hurts my feelings, try again". So she said, "Ummm....this is different?", and I said, "thats fair. Now, try a few more bites before you decide how you really feel about the taste". So she tried a few more bites, then said, "this is different....but very yum". So, there you have it. A fairly-picky 5 year old critics opinion on this dish, and she has eaten it without any complaints since. So, you should try it. :) 
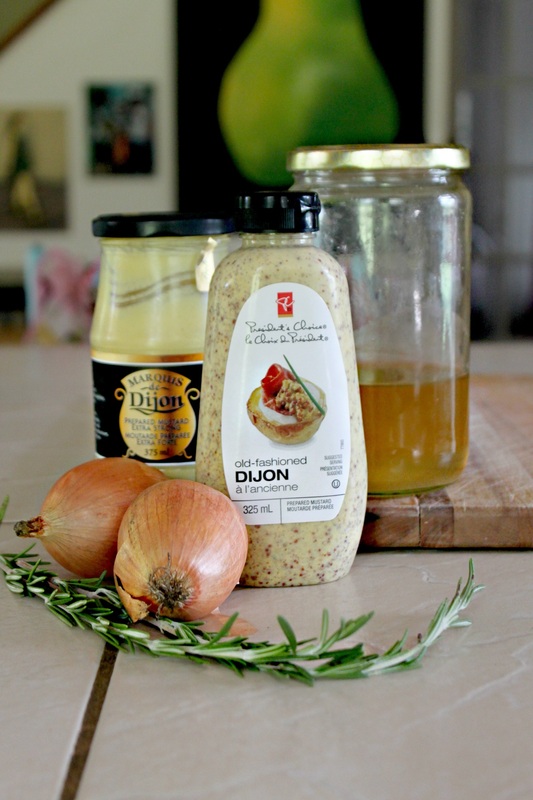
Honey Mustard & Rosemary Chicken Ingredients:
Method:
This chicken is simple enough for a weekday family meal, but seriously tasty enough for guests. So, give it a try, and let me know what you think! Or, let me know one of your favourite and easy ways to prepare chicken!
Making treats is easy (mostly). But if you start taking away some of the most current allergens like dairy, wheat, sugar, or nuts, you're kind of left wondering if baking for those people is possible at all! Let me tell you, it is! 
Paleo Vanilla Cupcakes (nut free too!) with Chocolate Frosting Ingredients:
Method:
Paleo Chocolate Frosting Ingredients:
Method:
* If you serve these in a very hot room, or outside in the heat, the icing will become soft. So, try to keep these cool as long as you can. 
Yummmmmy.....
My youngest and I shared 3 cupcakes because I just genuinely couldn't believe they came together so nicely, and they tasted so darned good!! Oh man, and the icing! We sure ate our fair share of icing!
That being said...no matter how "healthy" something may be, a treat is still a treat! Don't go thinking you can eat 3 of these without a second thought! Besides, if you're trying to be healthy, the practice of eating 3 cupcakes at once is not that great....you may need counselling....I may need counselling...let's move on! :) Well, we're off on a road trip today! I'm excited about this weekend, and will hopefully share about it next week! Peace out Friday lovers! Oh my gosh that was cheesy. xo I like to read different blogs from parents who have children with autism, and I also like to read up on current research, and on "what's happening" in autism. On the Autism Speaks website, they recently had Amy Hess, mother to Henry (who has autism) and the site coordinator for the Autism Speaks ATN Center of Excellence at Nationwide Children’s Hospital in Columbus, Ohio, answer the question: "How can we help our son find his passion?". Here is her answer, along with some thoughts from child psychologists Barbara Mackinaw-Koons and Caroline Murphy, with the Autism Speaks Autism Treatment Network at Nationwide Children’s Hospital and Ohio State University. How Can We Help Our Son Find His Passion? "Our son, Henry has autism and is limited in his use of language. We’ve learned to think outside the box in my approach to finding his talents and interests. After his diagnosis of autism, we attempted traditional activities like soccer, T-ball and swim lessons. Each proved frustrating for our child and disappointing for us as parents. While we watched our friends and their children continue down the typical path, we came to realize that ours would be a different one. One less travelled. Yes, there was some sadness in not following the typical path. But I also welcomed the opportunity to explore different options. I think the most important step was paying attention to Henry’s interests. He loved water, snow and drawing. So we began to focus in these areas. We regularly go to the beach, where Henry loves to swim. He’s also become a very accomplished kayaker. That’s him in the picture below. In the winter, he loves to ski and with our encouragement he’s become active in his school ski club. Thought it took us 7 years to get him to feel independent on the big hills, he now skis faster than we had ever imagined. We are even more proud of his evolving work as an artist. I often call Henry my serial artist. He draws constantly, and my house is full of all types of paper with faces, characters, models and sketches. While sometimes, I’m tempted to sweep away the clutter, I realize that it is part of Henry’s creative process. To encourage his passion, we take Henry to art stores so he can pick out markers, paper and other art supplies that meet his needs. With his limited language, it can be difficult to identify the best art media for him. So taking him to art supply stores and exposing him to the options has been important. The next step was for us to begin visiting venues that showcase art. With exposure and experience, Henry has been able to give us clues to his likes and dislikes. We recently recognized the need for assistance from an art professional. Henry now works with his art mentor, Tracy Settle, each week. She introduces new concepts and techniques to help him develop his talent. Henry recently entered a piece of artwork he titled, “There’s No Place Like Home,” in the Ohio VSA Art Expressions tour. He won third place in the youth category and went on to win the People’s Choice award! His art piece was purchased on opening day. (photo below) Henry feels confident that he has a future in the field of art, and so do we. His interpretations of musical productions from the Golden Age of Film invite his viewers to see the films from a new perspective. In his work, Henry highlights aspects of these films that go unnoticed by the untrained eye. His artwork is reminiscent of the techniques used by artists when creating the sets and characters for the films. Henry is very passionate about his artwork! We often find him hard at work, surrounded by sketches, drawings, and three-dimensional renderings of props from famous movies". 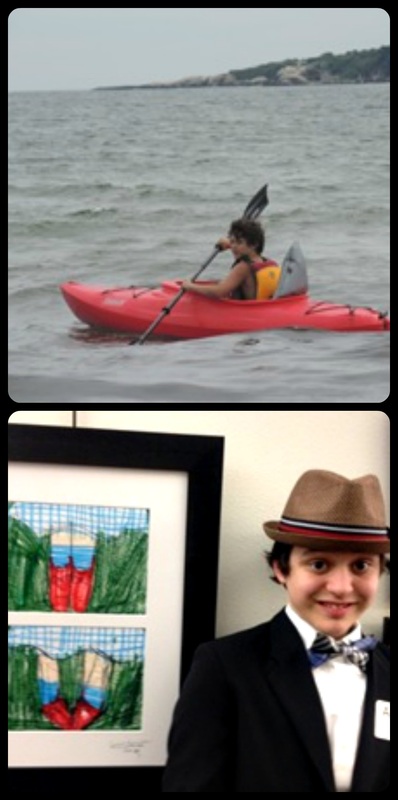
Henry kayaking, and with his art
Drs. Mackinaw-Koons and Murphy: "Amy’s story illustrates several important strategies for helping individuals with autism find their “niche” or develop strengths no one realized they had. As psychologists, we talk with parents about being creative and persistent, as well as increasing their own tolerance for failed attempts and roadblocks. Many parents feel they’re entering unchartered waters when a child can’t succeed in the traditional activities they envisioned for their child. Amy’s point about “thinking outside the box” highlights this so well. Great talents go beyond those of star quarterbacks, valedictorians and head cheerleaders. With individuals who have autism, it often helps to encourage the person to follow personal inclinations, passions – even restricted interests. In this way, the individual can start to build a skill set. Does your loved one have an amazing strength in rote memorization? Try a drama club! Memorizing lines from the script could be a great fit. Does your child have a great love of animals? Consider volunteering with your child at a local pet shelter. In the process, you are helping your child develop important caretaking skills. The concept of “signature strengths” is a good way to think about this approach. For Henry’s parents, carefully observing his personality and natural tendencies provided a good menu of opportunities. His parents identified strengths and began to add activities and opportunities that enriched the budding abilities they observed. Most likely, you aren’t going to discover that your child suddenly possesses an amazing new skill or talent. Anyone who has a special talent will tell you that he or she didn’t arrive there by chance or without effort. Persistence and patience are important. Behavioral difficulties and anxieties may well arise around trying new things, and we encourage you to provide “gentle nudging” with lots of support and cheering for willingness to try. Openness to opportunities, courage to try new and different things, and celebration of small successes are all so very important! Parents and other caregivers must be willing to accept initial failures or even embarrassment if at first their loved one doesn’t fit the mold. Continue to advocate for your child – whatever his or her age – and encourage the development of the talent you have seen. Just like any individual who shows a special gift or talent, the road to success is achieved through consistent trial and error and repeated opportunities for practice. Remember, we always get better at what we practice. You could ask Henry … but we hear he’s busy finishing another amazing drawing!" 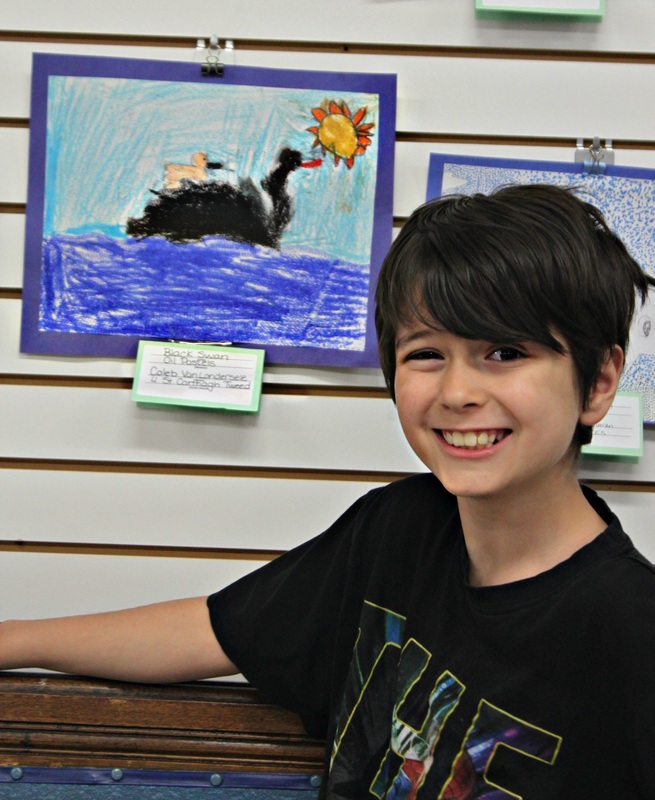
My Caleb with his art "Black Swan" at an elementary school art show in Tweed
I appreciate their thoughts on this subject, and, even though I may realize a lot of the points made, or have said them myself, I like to read/hear about it again. The one line "parents and other caregivers must be willing to accept initial failures or even embarrassment if at first their loved one doesn’t fit the mold" really hit home for me, because although we love Caleb, and think he is amazing, we often find ourselves angry and embarrassed with him in circumstances where we need him to "fit". That's not him though, that's us. Immature, selfish adults who want to pretend we're perfect.
As parents of special needs, or regular needs children, we need to honestly evaluate why our kids are doing what they're doing. Sometimes a child can have a hidden talent that only comes out from us parents signing them up, and letting them try it. But sometimes a child is driven all over the place, doing all of their "activities" that the child only continues to do because the parents insists they do it. I wouldn't encourage a child to adopt the habit of quitting things they don't like, but let them finish what they started (whether they wanted to do this activity, or you wanted them to), then listen to what your child has to say about that particular activity and why they may or may not wish to continue. If your child lacks the verbal skills to tell you their thoughts about the activity, watch them. Do they seem stressed before or after they go? Are they enjoying themselves while at the activity, or do they seem overwhelmed, anxious, and not-involved/included? Finding a child's passion is so important. Helping a child find a career is one thing, and sometimes the career path and passion path cross, but finding a passion can be such a fulfilling endeavour. Having a passion can give someone something to look forward to in their spare time. Or if they're blessed enough to have their passion and jobs be one in the same, it can make the everyday so satisfying. It's not about just 'finding an interest', it's about seeing who is inside, and being able to express that. It may not look the way we thought it would, or hoped it would, or fit the mild, but that's passion. One needs to get creative when they have hens that are great layers! I love having eggs at hand whenever I need them for a recipe, or to give away as a super random, hillbilly-style gift to bring to someone, but at some point you just need something 'different' (well, different, but still using eggs!)! This is made with sweet potato, but can easily be made with regular potato, and there is no milk products in here either, so you can add cheese or milk or cream if you wanna.  Bacon & Sweet Potato Egg Bake
 The last time I made this, I actually did half the pan with the recipe (and ingredients) above, and the other half with regular potatoes and cheese in the layers. The kids and my husband thought it was super tasty with the addition of cheese, and using regular potatoes.
So, make it how you would like, and enjoy it! We live on the outskirts of a town that meets all our basic needs: a pharmacy, grocery store, hardware store, a health/bulk food store, library and post office, some 2nd hands stores, and even a fantastic bakery. For the most part, we can get what we need in our little town. But groceries, oh man, buying all of your groceries in a small town is bad (the only time it won't be as bad is when there are 2 stores, because then they at least try to have competitive prices)! I'll stop in when I need to pick something up quickly, but otherwise, we have our grocery day when we're in Belleville, a city about 30-40 minutes away. On Sunday's after church, we head on over to noFrills with our menu and our list, and get 'er done. Wow, that slightly off-track intro was all to say...when you're "in town", it can be really easy to stop in someplace for fast-food. Fast-food is obviously super unhealthy (even the 'healthy' choices aren't really that great), but worse than that, it can be a ridiculous expense! If a family of 5 (with kids old enough to want a meal) went to a drive-through only once a week, by the end of the month they would have spent $80-$100 dollars!!! Maybe to some people that doesn't seem like a lot of money, but seriously, that's just ridiculous. I know of people who "can't afford" do anything or go anywhere in the summer as a family, but they eat out (which is way more expensive) and drive-through once or twice a week. If they saved that drive-through money every month starting in September, by July they would have $900-$1000 (or close to $2000 if they ate out twice a week, or more if they ate out more often) to use for some summer. Oh my, I am just off on a tangent, rambling away about stuff. This post is meant to be about planning, about packing a lunch, about choosing the healthier option, and about saving some money! The real trick to doing this is to plan to do it! I know, brilliant. For real though, we leave for church on Sunday morning at 8am-ready with our groceries bags and baskets, our menu and list, and our lunches. Do I wake up at the crack of dawn to have the lunches ready? Gosh no. I make them the night before, and stick 'em in the fridge. Sometimes I'll add a last thing or two in the morning that I know wouldn't be great in the fridge, but otherwise, I try to get the whole thing packed at once. The thing about packing a "lunch" or a snack, is that with kids and adults, having a good variety to choose from/nibble at makes not eating the drive-through food a bit more manageable. If you only pack carrot sticks, all you'll think about is french fries! So, do yourself a favour and "variety pack", as I call it. 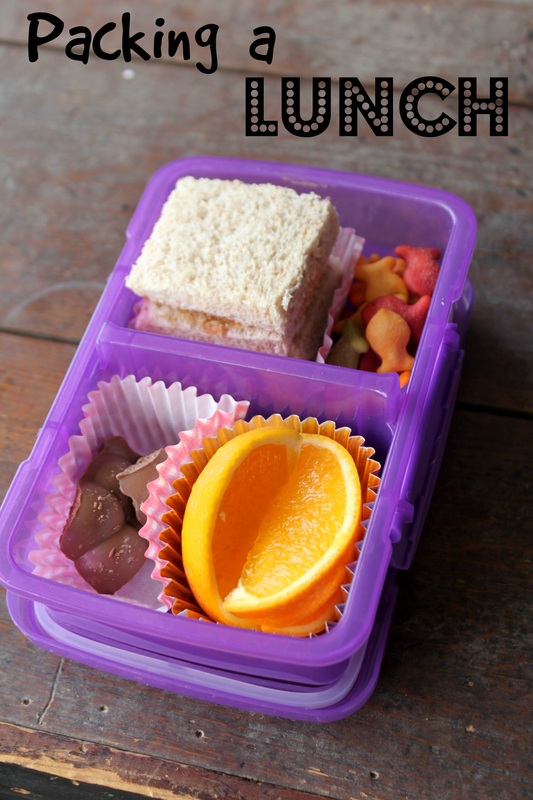 This little lunch for my youngest had half an orange, some Goldfish crackers, a half-sandwhich, and a few pieces of Cadbury Bubbly Bar. I only have this one sad photo from one of our most recent town trips. I make the lunch based on what we have (remember, we are going on grocery day!). Sometimes it's leftovers, sometimes it's lots of fruits and veggies, it's just whatever! I use wax paper or paper muffin cups to divide things. If something is wet (like that orange), I will use the special aluminum lined muffin cups. Yes, I know they are expensive, but I literally re-sue them for these lunches (they just wipe clean), so it's not too bad. I bought this container from Dollarama, and we each have our own. You could also buy (or maybe you have) some silicon baking cups. I used to have some....I'm not sure where they are anymore....anywho.... You could also buy a fancy-schmancy lunch box meant for these types of lunches. Here are some cool boxes, and some great lunch ideas. 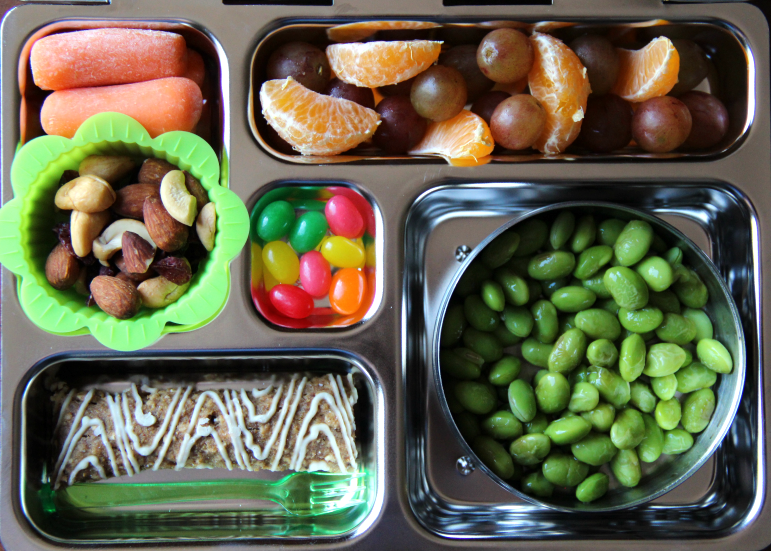 I know, right! This lunch from Family Fresh Meals is hard-core! That lunch box is called a PlanetBox, and I do sort of want one. Anyway, you can see this Mom packed a good variety in this little power-house lunch. I honestly think for kids, these lunches are so ideal. There is never some enormous sandwich that needs eating, or an entire apple that should be finished. Some kids (like my 5 year old mousey eater) just literally cannot do an entire sandwich. These lunches, with their little bits of this and that, make it easy to eat it up all.  This Mom at My Mommy Style packs some good looking lunches too. She just uses plasticware she already has, and some silicon muffin cups to divide and conquer. 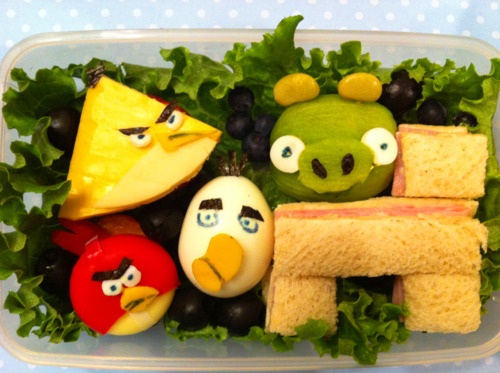 Packing these lunches might be new-ish in our country, but this type of lunch has been around for a long time in Japan. The word "Bento" to us may just be a name brand, but a "bento" is a traditional lunch in Japan, usually with rice, meat, and a vegetable. They even do a "character bento" which is an amazing character based lunch. Seriously, amazing! Check these ones out at Lunchbox Awesome! Seriously, just click there to see some cra-cra character lunches!
Anyway, Bento Boxes (and all the available accessories) are pretty cool, and if you have a kid who comes home from school with a half-eaten sandwich, a half eaten this, a half eaten that....guess what? They may benefit from a bento style lunch. It'll save you food you throw away, that's for sure! And, like us, if you have to travel "into town" often (I know a lot of people around me do because we all live away from the nearest city to us), pack a bento lunch, and save some money (....and calories, and saturated fat, and...). Now, as a closing statement, we DO drive-through sometimes! I don't want anyone thinking we never do! Sometimes we're in town longer (waaaaay longer) than we had hoped and it ends up being a 2 meals in town kind of day. I won't lie, I actually like McDonalds fries a lot, so I'm never too upset if I have to eat them! :) Sometimes we plan on packing one meal, and eating the other one out. It's a treat, and because we don't do it every week, the kids feel like it's special. The End. |
Hi, I'm Amy-Lyn! 
I am the lady behind this here blog! I live in the sticks with my animals, my super handsome husband, and my
3 amazing kids! Here you'll find things from recipes (gluten-free, paleo, and strait up junk food!), DIY ideas, thoughts on raising a son with autism, and whatever else pops into my brain! : ) Read more about me by clicking here! Want to Stay Connected?
Find What
|
 RSS Feed


