|
A few weeks back 'twas my birthday and we had a little shin-dig for it! I had a friends daughter making me a cake (she's 10 years old and asked if she could make my cake for me! Such a sweet girl!) So, even though I had a cake coming, I still love baking and trying new things, so I knew I would be making some extra treats for the par-tah (like these s'more clusters!) and I suddenly had the urge to make lemon squares! I literally had no clue how they were made, so I Googled "easiest lemon bar recipe", and got a result from Rock Recipes for Super Easy Lemon Bars, and they weren't joking around! These amazingly delightful squares are so gosh-darned simple to make, and only require 5 ingredients! Ok, 6 including the icing sugar to dust on top, but still, 6 ingredients is pretty good! I hope you'll make these squares, and check out Rock Recipes (the author is a fellow Canadian!). It is a blog is full of amazing recipes!  Lemon Squares From Rock Recipes Ingredients: For the shortbread base:
For the layer of lemony goodness:
Method: Shortbread base
....while that is baking..... Lemon layer:
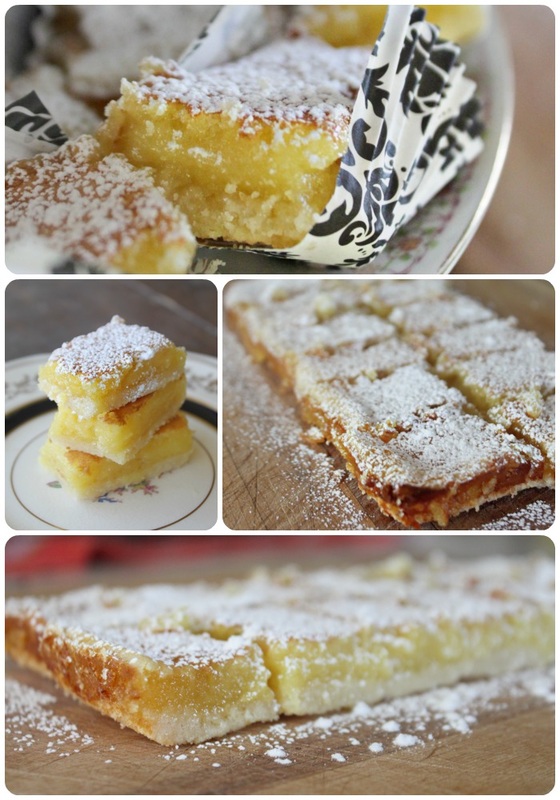 So easy, right? And seriously, unreal delicious! I brought the few remaining squares I had to an art show I was doing the day after my party, and one lady said that the squares were better then the (slightly expensive) ones she bought from a lovely bakery downtown. I told her, "I just Googled 'easiest lemon bar recipe', and this recipe came up!" She could hardly believe it! Ok, randomly, my fingers crack A LOT! All the time, no matter the season! I think it's because I wash my dishes in crazy hot water (kills more germs, and they dry really fast!).....but, all that to say....it makes typing really freakin' hard! :( Boo hoo for me! Seriously, I'm having to type with only the middle finger of my right hand, and the pointer and middle finger on my left hand. My number of words per minute typing is at an all time low!!! Woe is me! Ok, I'm done whining..... I hope everyone had a great week, and has some plans for the weekend! My husbands plans are to be on his weekend of night shifts, and for us to tiptoe around the house so as to not wake him! Whomp whomp! Our usual Saturday thing is to go to the dump (we gotta bring our own, no pick up for us in the sticks!), and go to the library. It's supposed to be ok weather tomorrow too, so we'll probably go for a little nature walk. Going for walks around our place in the fall is so nice. So very nice. Alright, I'm signing off! xo
0 Comments
It's Thanksgiving weekend here in Canada! I love Thanksgiving! It welcomes in the wonderful fall weather our country offers us (I seriously love the fall weather here in this part of Ontario!), we get to enjoy The Rockton World's Fair, it gathers together family & friends, and we get to eat lots of amazing and delicious foods! Way back in the summertime, my sister and I stopped at a store called "Almost Perfect" (or Almost Frozen as my Mom once called it!). It is a store that sells frozen, refrigerated and grocery foods, some name brands some brands of their own, & super low prices. I"m not getting paid for this rant, I just love the place! Anywho, when we were there in the summer they had bags of caramel bits for sale for a crazy good price! So, my sister and I both snatched some up with ideas in mind. Somehow though, I never got around to using mine! Oh, I've gone through (at least!) 5 KG of chocolate chips, but I just kept forgetting/not knowing when to use these caramel bits. Until it was the fall....then all I was thinking about was apples and caramel...then fate...cake mixes were on sale for 0.97, and I saw for the first time ever, a Spiced Cake Mix! Seriously, I haven't see them until now! But my brain went "yes!", and I knew what was happening.... 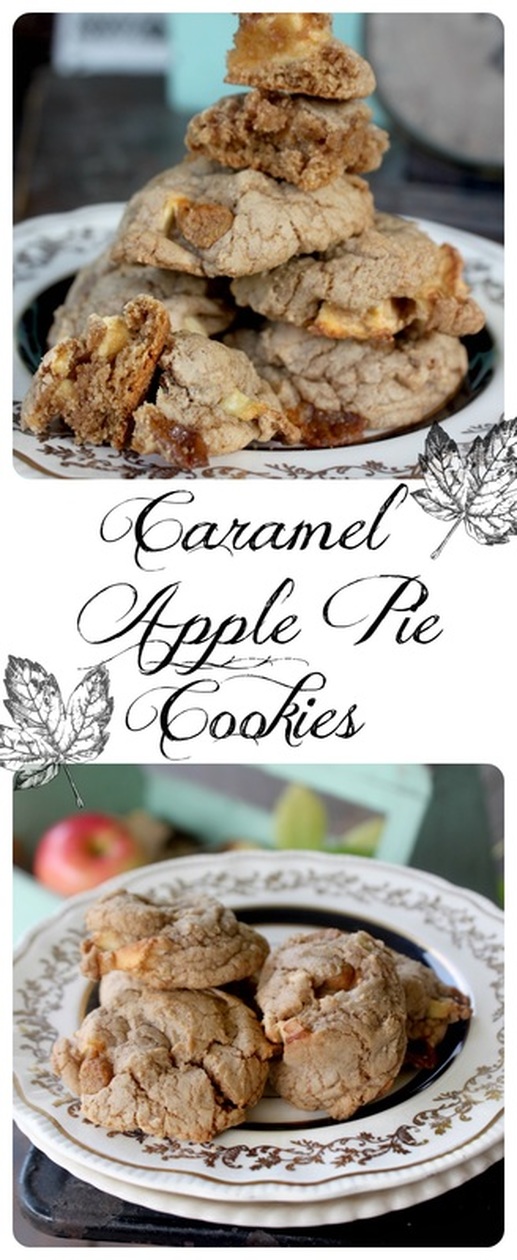 Caramel Apple Pie Cookies Ingredients:
Method:
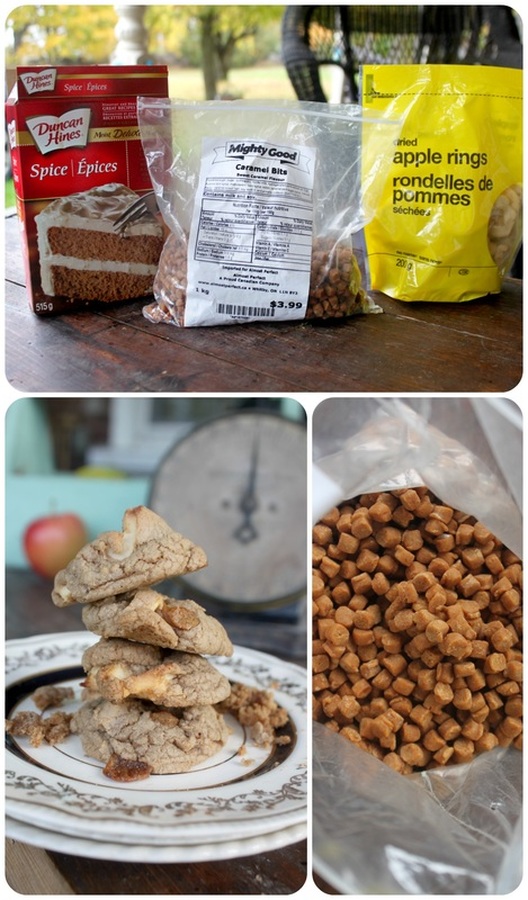 Let's talk dollars and cents here for a moment.....I love to bake, I love to bake the "real" way (without a cake mix!), but let's break this down:
Total for (approx.) 24 cookies $ 3.53 (give or take, plus electricity for running the oven) All that and you're completely finished in 20-30 minutes (depending on how many cookie sheets you use at once, etc.) But for realz......this is unbeatable. Well, if they were actually magically good for you, that would be unbeatable....but let's not talk about that right now.... : ) 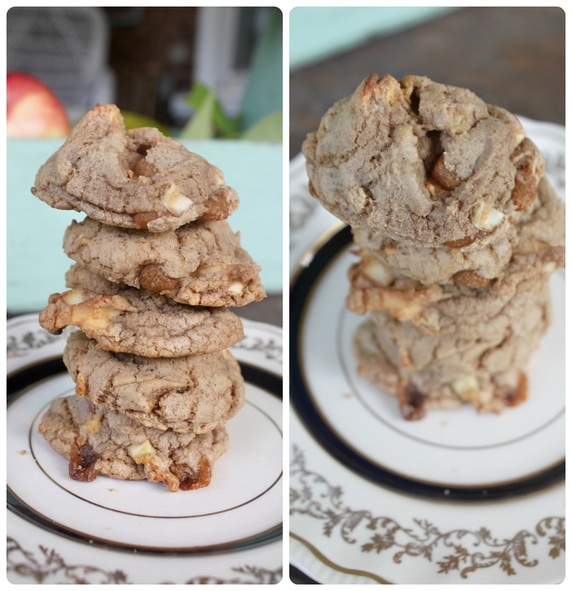 See why I love fall here?!? It's beautiful! 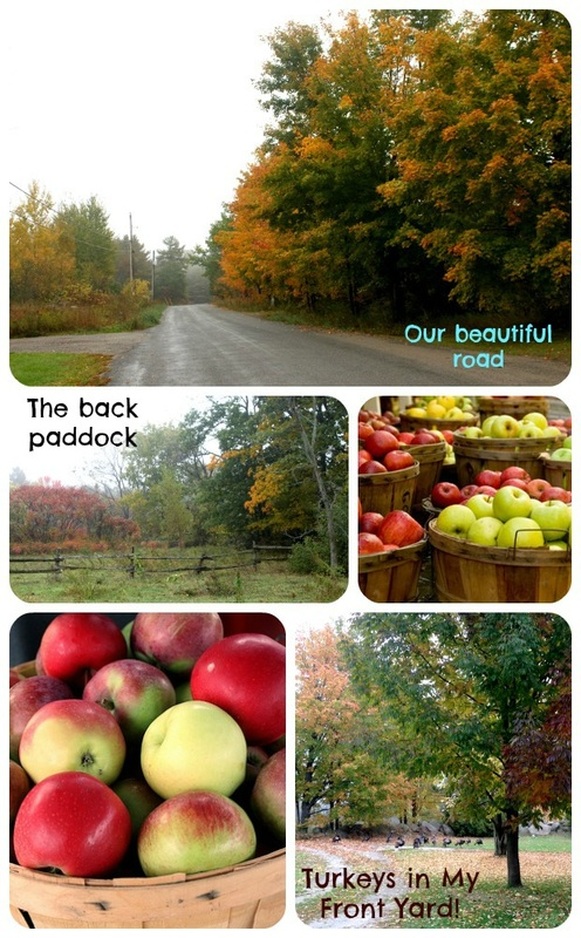 Alrighty, well, I hope all my fellow Canadians have a wonderful Thanksgiving, I hope you get to make some cookies, see some friends or family, or both, eat some wonderful food, and get to a fall fair if there is one near you! And remember to be thankful! xo I've come to the ripe old age of 32 today! I'm not feeling sad or anything, getting older can be exciting (just spend time with a a child from the age of 3-7 and you'll learn that getting older is extremely exciting!) :) We're having a birthday party tonight too, which is something to look forward to! It's a semi-surprise party....I said something like this to my husband, "Adam, I want to throw myself a birthday party this year". Him, "why?". Me, "well, I'm always throwing parties for the kids, and I want to throw one for myself. Plus it's a good excuse to get all our friends together". Him, "Oh....ok". Then, because I hadn't said much about it (I was planning it in my mind, and had invited a few people), he started to try to secretly plan it for me. So sweet. Anyway, having me only partly know what is going on is just making me feel a little antsy. I like to plan, I like to prepare, but I'm learning to let go....sort of. My husband came home from work yesterday to my three tiered cookie stand loaded with desserts. "Uh, did you make these today?", he asked..... Yes, the answer was yes. I had baked for a good part of the day for my party, just in case. I figure whatever is leftover can be sent home with guests as party favours! Anywho, let's get to today's treat! It's soooooooo simple to make! It's sooooooo tasty. It's soooooooo some other third thing. If you don't already know this, (one of ) my favourite things is s'mores. Real, campfire s'mores are my most fav, but any combo of marshmallows, chocolate, and graham crackers just floats my boat. So for my birthday, I'm sharing a s'more recipe that is among my favourites! 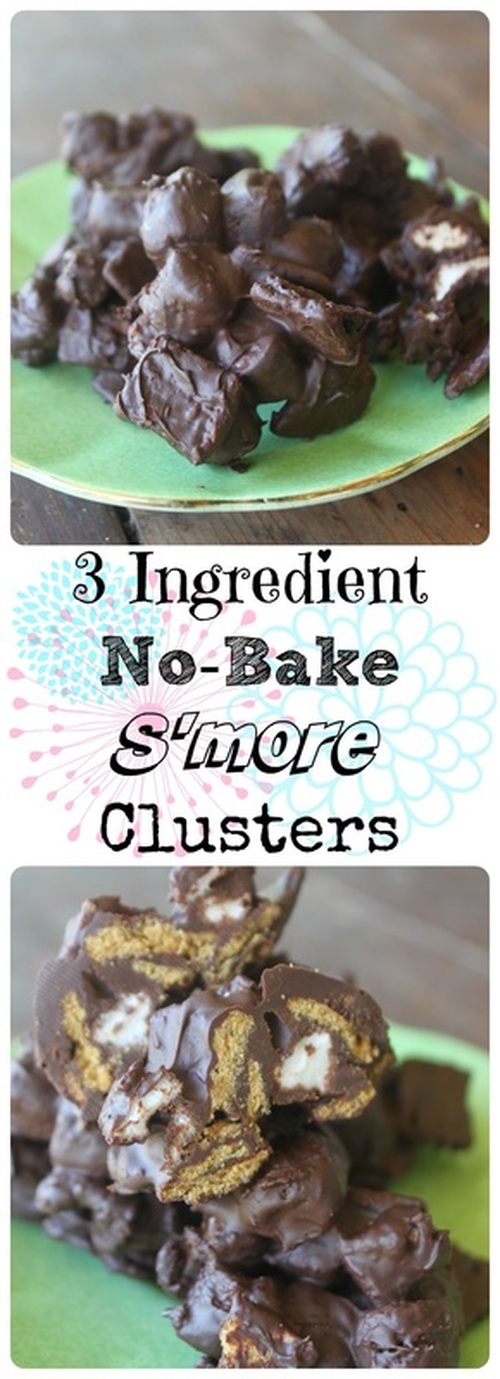 S'More Clusters Ingredients:
Method:
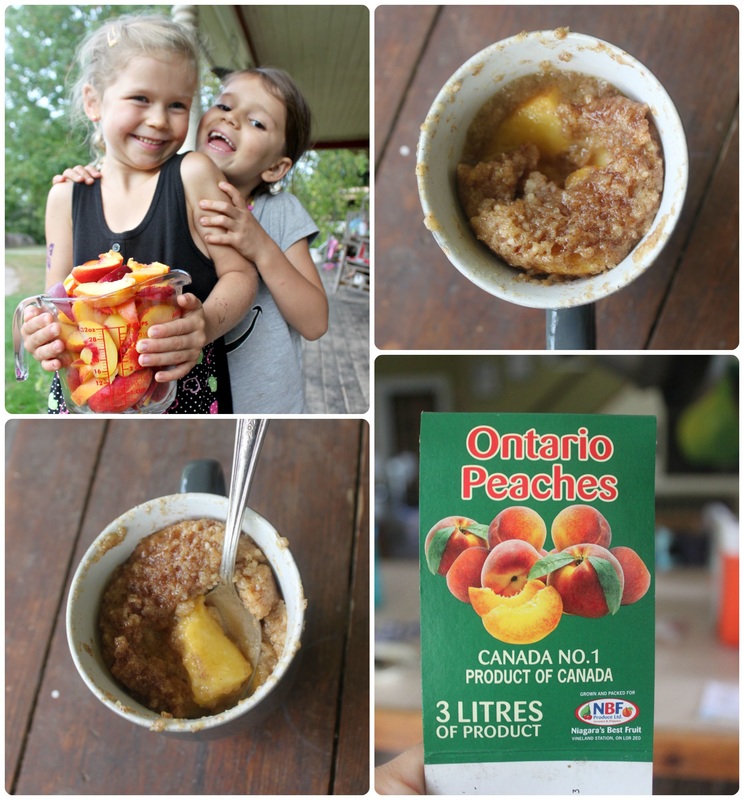
Seriously......just melt, dump & stir, scoop and cool. That's the recap of the method! It couldn't be easier! Well, you could skip the scooping and cooling part and just eat it warm out of the bowl, but that's a serious stomachache waiting to happen, so I wouldn't do that (unless you have friends with you who will share the "burden"!) :) 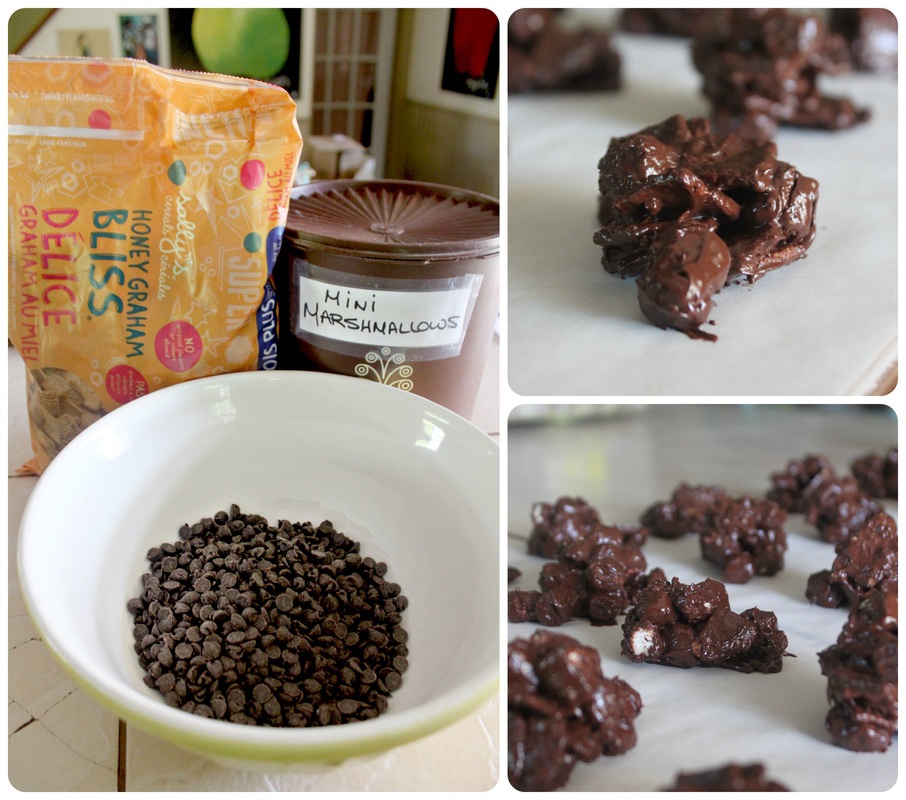 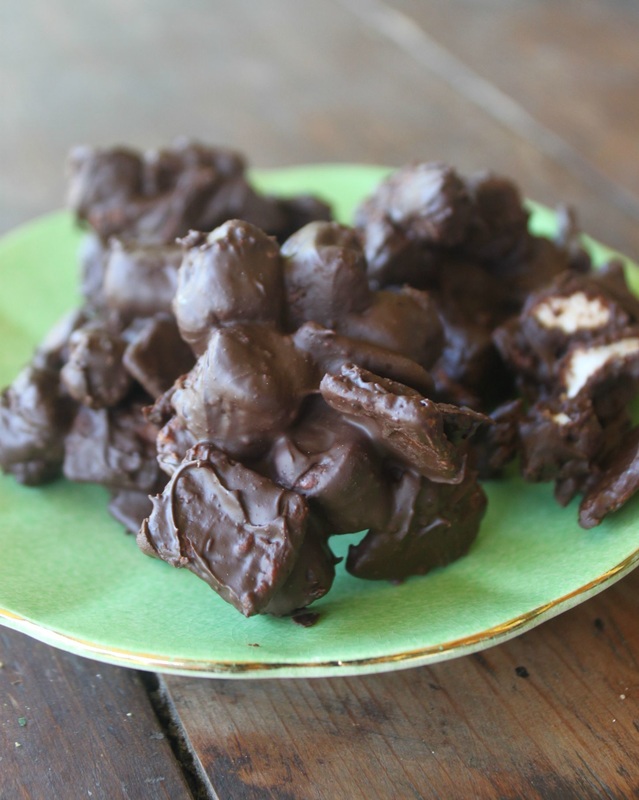 So, today in a spirit of deep gratitude, I want to share some things from this past year of my life that have made me realize a little more about myself, about what I am capable of, and about how blessed I am. I think it's good to re-cap and see how things have changed, to see what you've accomplished, and to feel fulfilled, but also to see where you want to push harder and grow more. First, I was in a show this past year with the Belleville Theatre Guild. I didn't intend to be in the show, I was just going to help with choreography, but (long story short) I ended up in the cast and am really proud of the work we did. Of course I am biased about it because I was in it, but we really worked so hard, and it was a beautiful show. Being in the show helped me semi-conquer a deep fear of failure. I (for as long as I can remember) have avoided doing many things because I was afraid I would be terrible at it. But I was suddenly in this show, singing in a role just outside of my vocal range (I am usually an alto), and felt so worried that I couldn't do it. Or if I managed I would crap out half-way through the run of the show. But I decided to "Rachel Berry" it. Rachel Berry is from the show "Glee" and as I watched this show and how confident Rachel was, I somehow built up a mental confidence and talked myself into being fully able to do this role I had been given. And I did it! I got the vocals, my voice didn't crap out during the run, I wasn't so nervous during performances that my voice was a wreck, and I did it! I honestly feel like that gave me a new confidence, a belief in myself that maybe some things are not out of my reach, and that I don't always need to be afraid of failing! I know I will still fail any many things in my life, but I feel more willing to try now that I've done this show. Also, speaking of the show, it pushed me to accomplish a goal I have had for years, and years, and years!!! Doing the splits!!! I have honestly been trying for so long and have wanted to be able to do the splits since I was a kid, but couldn't quite get there. Then, I'm in this show and the director (who I was sharing choreography with because there was 10 dance numbers in this show!) says, "and then you'll do the splits". I was like, "what? Huh?....I can't really do the splits....", and she said, "well, then do the jazz splits" (a cheater split, really), and I thought, "this is it". This is a chance to really try to get my splits! And I was crazy determined to do it! I did stretches for my splits every day, for at least 15-20 minutes. I even bought a video from some physiotherapist (with a crazy annoying voice!) with new stretches to help me...and that's what did it. The stretches with the annoying voice guy pushed me (and my muscles) just that little bit further, and I got it! I got my splits!!! It took years, then literally 5 months of really focused stretching, but I got them! Woo hoo! :)  Me in "The Drowsy Chaperone" this past Spring. The picture of me doing the splits is the only one I have from the show, and it's a screen-grab from a video, so it's not the best picture. The other beautiful photos are from Greg Pinchin Photography. This year I also (through my new confidence) managed to fly to Europe and back without having a panic attack or barfing, or crying, or any of my usual flying reactions! I honestly got on the plane, talking to myself "you can do this. You can fight nerves, you did it for the run of the show, you can fly in a plane"....and I did! I actually (gasp) kind of enjoyed it! And, while we're on Europe, I got to go to Europe! I've actually been before, but this was really different. I got to go as an adult & with my husband. We visited family (I love knowing more about heritage and history), visited some beautiful places, ate some amazing food, and really enjoyed the trip! I feel so blessed to have been able to go!  A shot of us in the airport on the way to Europe and on the way home. Also an in-plane shot of Iceland as we flew over it! Lastly, I feel like this year has helped me grow as a visual artist. I feel like I've put more time in practicing my painting, and I am feeling more confident about it. It probably looks the same as ever, but I sense a change in what I can do, in how I do it. Painting (although I always enjoyed it) was also often a struggle. I felt like I couldn't put down what I was imagining. But this past few months I've been feeling more calm in it, if that makes sense. I think being in Europe helped somehow. I got to see close up some of my favourite artists work, I got to see how from close up, a lot of their paintings were just colours, but not a whole picture. You step back and suddenly there is an amazing impressionist painting. I can get stuck looking too closely at my paintings, and have learned to step back and see the whole picture. 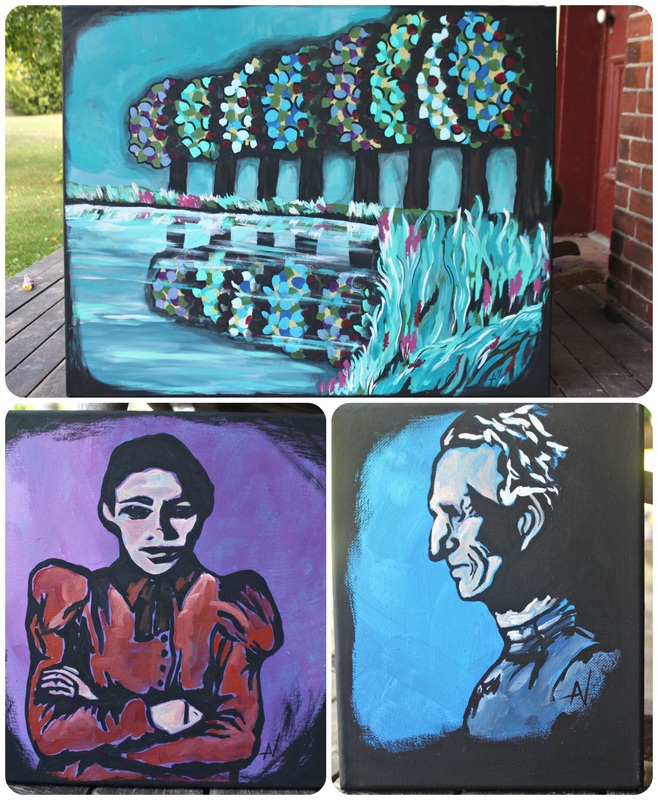 3 of my newest paintings That's it! (haha, that's it!) That was a short story for goodness sake! At least it was a short story with pictures! :) If you read along, thank-you! If not, no worries! This blog is a place where I share recipes, DIY ideas, thoughts on raising kids and thoughts on autism. But, it's also a place where I share my heart. It doesn't matter so much to me if people read it, it matters to me that I just got it out. I want to be able to look back at this post and remember this year (I've got a pretty rotten memory!), and to remember on low days how blessed I am! To anyone else who shares this birthday (Will Smith, Barbara Walters, Tyler Mills {this last guy isn't famous, he's a friend from my childhood}), happy birthday to you too!!! xoxoxo Apparently today is the last day of summer....geepers. I 100% thought it was on Monday, so when all is said and done, I feel as though I've gained a few extra days of summer! The last few weeks we've been eating (and enjoying) a lot of peaches! Ontario leads Canada in both peach and nectarine production with 82% of the national production (found this factoid here), so I mean, we're serious about peaches here in Ontario! I knew I would be eating them as-is, but also that I would be making some cobblers/crumbles too. I made a paleo peach crumble (or crisp, whatever you chose to call it!)) last peach season, and it's good. But one vegging out night watching episodes of "House", I wanted a warm peach creation, but not a crumble. I wanted a "cobbler", which is a batter or biscuit topping baked on the fruit. I have a thing for mug cakes (here's a few!), so I knew it could be done! I wanted this thing more peachy than cake-y though, so you can feel free to use less peach if you want. But peach amount aside, I think we can all agree that a mug cake is a perfect Wednesday treat. It's quick, it's simple, there's only enough for one which means 2 good things: you can't share it, and you can't overindulge either! 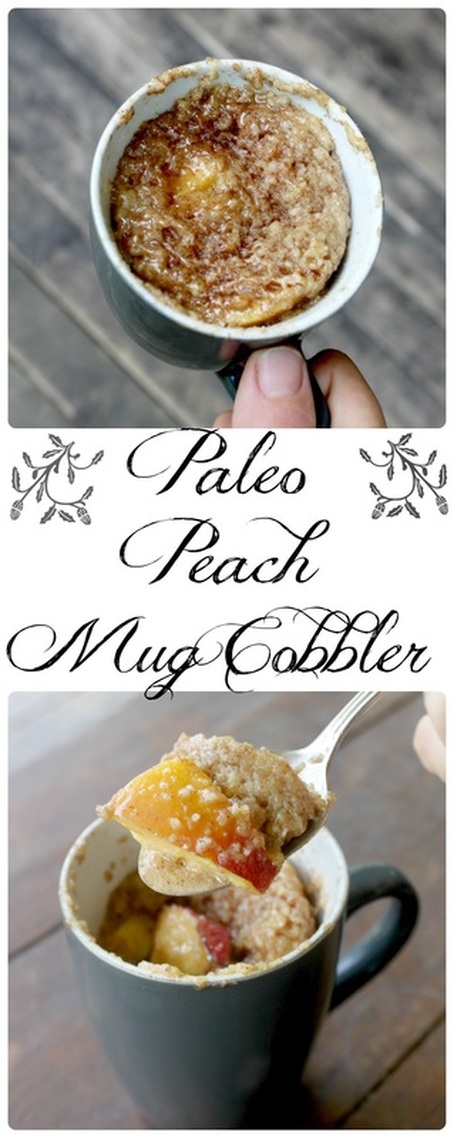 Paleo Peach Mug Cobbler Ingredients:
Method:
 Wednesday....oh Wednesday....I start loosing steam by Wednesday.... We were visiting some friends last night, and we got home late-ish, and I hadn't had a chance to prepare lunches in the evening like I usually would. So I got up at a ridiculous hour (before the sun!) to get a good lunch packed for my hubby then for the kids. I know 9pm will roll around tonight and I'll fall asleep on the couch (watching "House"), but, I do quite end up enjoying my quiet mornings. I prefer the usual ones that begin at 6:00-6:30, not 5am like today, but still, it's nice. I'll probably need me some mug cake tonight though, that's for sure! You can do it! Get through Wednesday! Good golly, this week flew by! Anyway, time flying aside, this recipe was inspired from our time in Paris this summer. We only spent a few days there between being in Belgium and The Netherlands, but the food there was inspiring! Shops filled with beautiful chocolates, macarons, meringues, cheese, breads, pastries.....oh goodness.... Before leaving this past summer, I came across a recipe for S'mores Macarons on a blog called Liv For Cake. Somehow her down-to-earth-ness made the idea of making macrons a little easier! I was always pretty intimidated by macarons! They seemed so fussy and delicate and I'm like a big ogre sometimes when it comes to working in my kitchen (I broke a dish while drying it with a towel the other day!), and I felt like I just couldn't do macarons! Well, having this tiny possibility in my mind of being able to make them was a great way to enter Paris, France. I got to see macarons being made in a few shops, and actually seeing the process added to the smidge of confidence I had gained from Olivia (at Liv For Cake). I now felt that, ogre or not, I was going to try my hand at macarons! So, a macaron is not a macaroon. A macaron is a meringue (egg-white) based treat. It's actually (in it's truest form) gluten-free because it's made with almond meal. Then colour and flavour is added and ganache, buttercream or jam is sandwiched between 2 cookies. A macaroon is something else....I think. Ok, truth is, it's hard to find out the exact origins or reasons behind the 2 words and what they mean. Though, to keep it simple, 'round here, a macaroon is still an egg-white based dessert (just not meringue-d), it's just mixed with shredded coconut then baked. Cassey at Blogilates (get it? It's like Pilates and blog...? Anywho) has this little photo comparison for you to go "ohhhh, yes, I see now....." 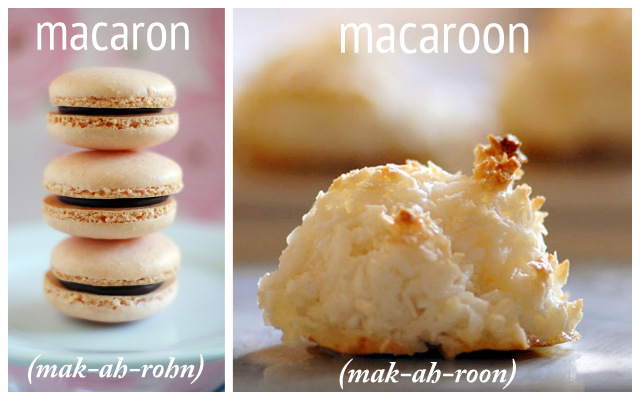 She's also got a healthy alternative to the snack, if ya wanna see it, look here. It's like a mash-up up a macaron and a macaroon, and it looks puuurdy tasty. :) Also, I have a (not healthy) no-bake macaroon here....it's chocolate and peanut butter too, actually.....  Look at those beautiful macarons! So, when I got down to it; to actually making macarons, I turned to Google! I didn't need to re-invent the wheel, and I knew someone else would have thought of what I was thinking: peanut butter and chocolate! For realz though......I never saw a single peanut butter and chocolate macaron in France....I think this flavour combo used in such a lovely French dessert is possibly an insult to the dessert....but only in France! On this side of the pond we like to mix it up! I found at Sally's Baking Addiction a recipe for Chocolate Peanut Butter Macarons, and got to work!  Chocolate & Peanut Butter Macarons Adapted recipe from Sally's Baking Addiction. Go to her recipe for the weight measurements for the cookies. Ingredients: Macaron Cookies
Peanut Butter Filling
Directions: Cookies:
Filling:
Voilà!!! That's French for "look at what I did!" (a very loose translation, to be sure) :) 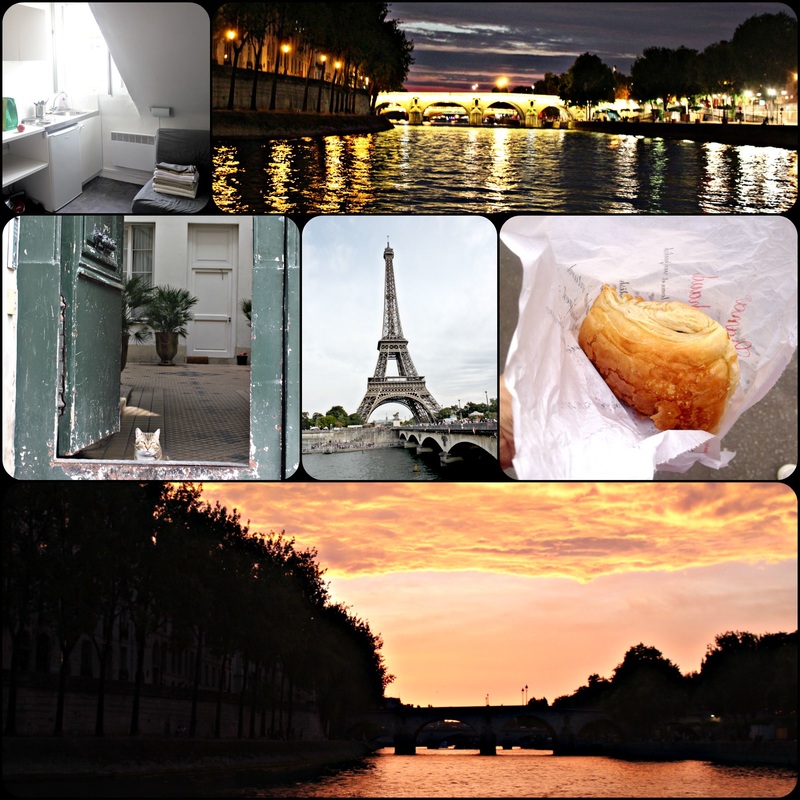 Top left is the little flat we stayed in while in Paris. Top right is the river Seine (reminds me of Van Gogh's "Starry Night") The middle row shows a cat that was sitting in an open door, the Eiffel Tower, and a super fresh, warm, chocolate filled croissant (yum!!!) The bottom is a sunset shot along the river Seine There are so many tips and tricks that people have for making the most amazing macaron! Me? My only real tip is to not be discouraged if they don't turn out perfect the first time you make them!!! There can be many things that effect your results. Baking sheet type, oven temperature, humidity on the day you make them, almond flour being not fine enough, yadda yadda, yadda there is a list a mile long with why a macaron might work or not-but just do your best! Follow directions, look at a bunch of different recipes, see what other are saying, and go for it! You can see in my photos that mine are not perfect looking, but they tasted amazing (x1000), had a nice crisp outside, a soft chocolatey inside, and I wasn't trying to win any macaron contest, so who cares if they would be approved by the French themselves!?! Not me! :) Just enjoy the process, and see what you can do! Oh, and if you have kids, they'll eat them (pretty much) no matter what! 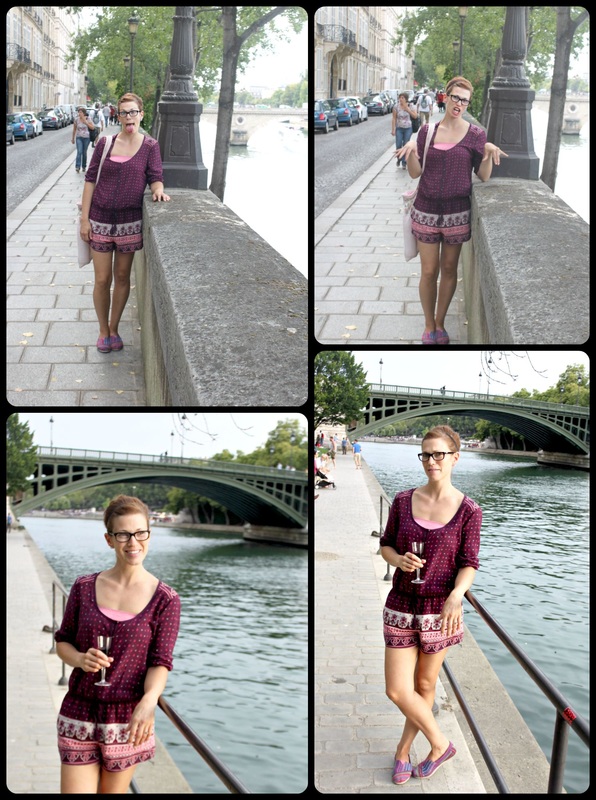 Let's take a break to talk about some of the photos my husband took of me while we were in France.....the "nicest" one above (bottom left) is so cheesy, and was preceded by the photo on the bottom right where Adam was saying something like, "can't you just make a normal face and smile?", and that's what he got. I am a child.Oh, and the top 2 photos need no explanation. 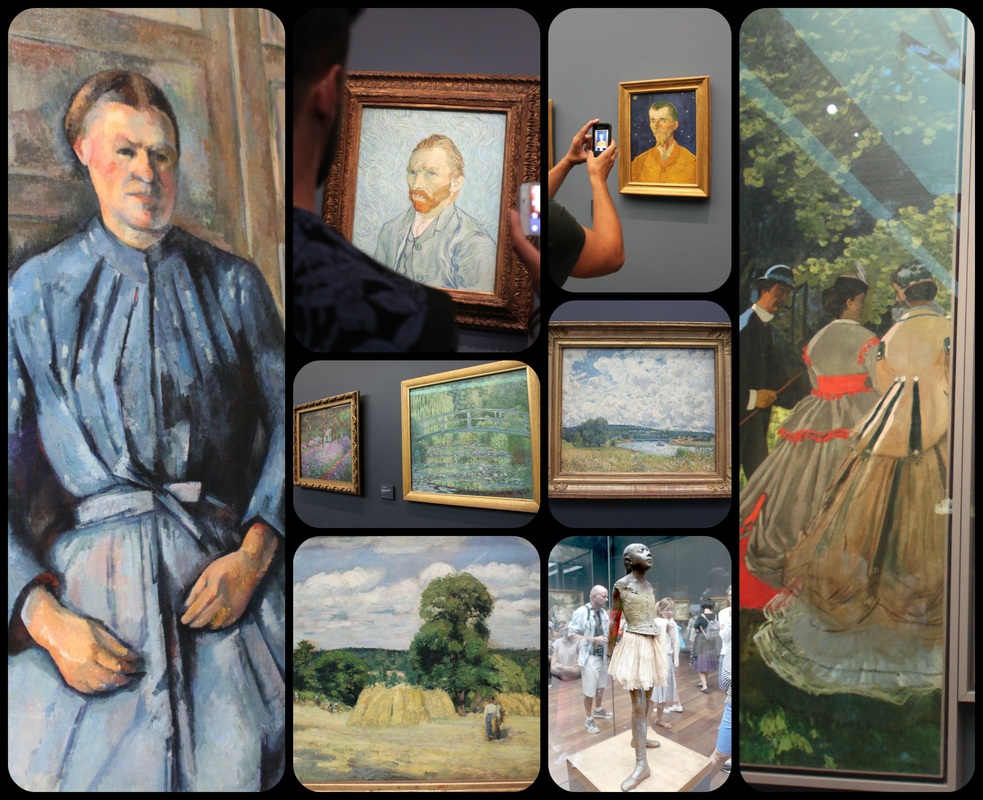 The photos above (which I feel I am probably not allowed to post?) are from the Museum d'Orsay. It was strange experience because you were allowed to take photos (that is not normal in a museum), but it also made people a little rude. Someone we talked to described it as a "blockbuster" museum because people were more concerned about being able to say they were there (so many people doing selfies in front of Van Gogh paintings!), and didn't really seem to want to stop and look, and appreciate the amazing art. Anyway, we still enjoyed it, and I got to see work from some of my favourite artists and influencers Paul Cezanne, Vincent Van Gogh, Claude Monet and Edgar Degas.
Then we left the museum and I got more macarons. :) I hope everyone has a good weekend! We've got no big plans...the hubby is working a weekend of night shifts which means we awake people need to stay outside, or stay inside quietly! I am planning on baking this weekend (big surprise here, yes?), and just having some quality time with my kids! Happy weekend time! Well, it's felt like a long week, and a long week calls for a sweet treat! I should really post something fresh, seasonal, Ontarian (something with peaces, of course!)....but I won't. There are no rules here, I have no blog boss! :) In April 2014 I posted a recipe for Mini Meringue Nests; they are tasty, have simple ingredients, and make an impressive and light dessert 'bowl' for fruit, pudding, whipped cream, yadda yadda. Fast forward to now, and I'm eating mostly paleo (about 80-90% of the time), and I only give myself 1 (or 2) treat days a week. So, when we had friends coming over on a non-treat day, I wasn't about to not make a super-fantastic, summer dessert! Gosh no! Luckily the friends we had over love sweets, so they are good guinea pigs (thanks Val!) :) I made my crazy delicious Honey Mustard & Rosemary Chicken (in a pan on the bbq), roasted potatoes, obviously also on the bbq, and a green, leafy salad...maybe a coleslaw too...? Can't remember, doesn't matter! What does matter is dessert (really, the most important part of any meal!). I took my regular, non-paleo mini meringue nests, and gave them a simple switch over to create such a treat; such a lovely, delicate, slightly sticky, oh-so-good treat. Yummy! :) 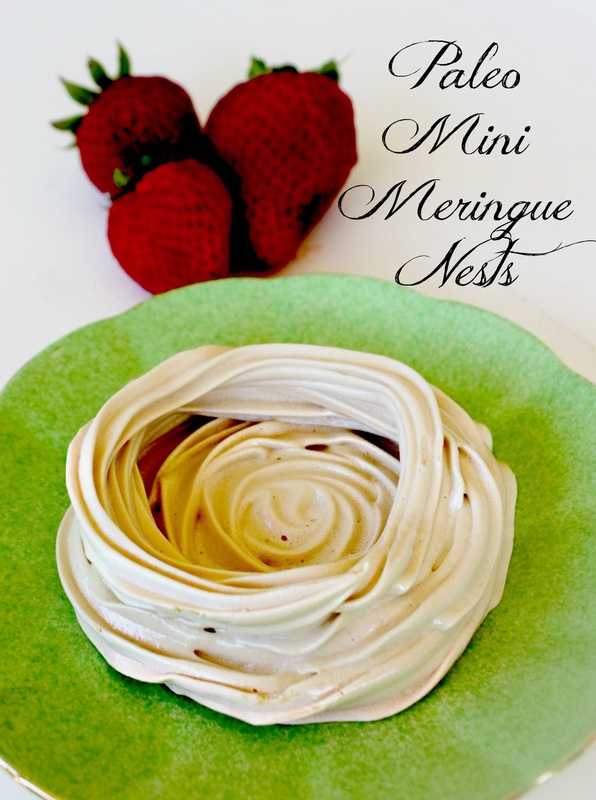 Paleo Mini Meringue Nests Ingredients:
Method:
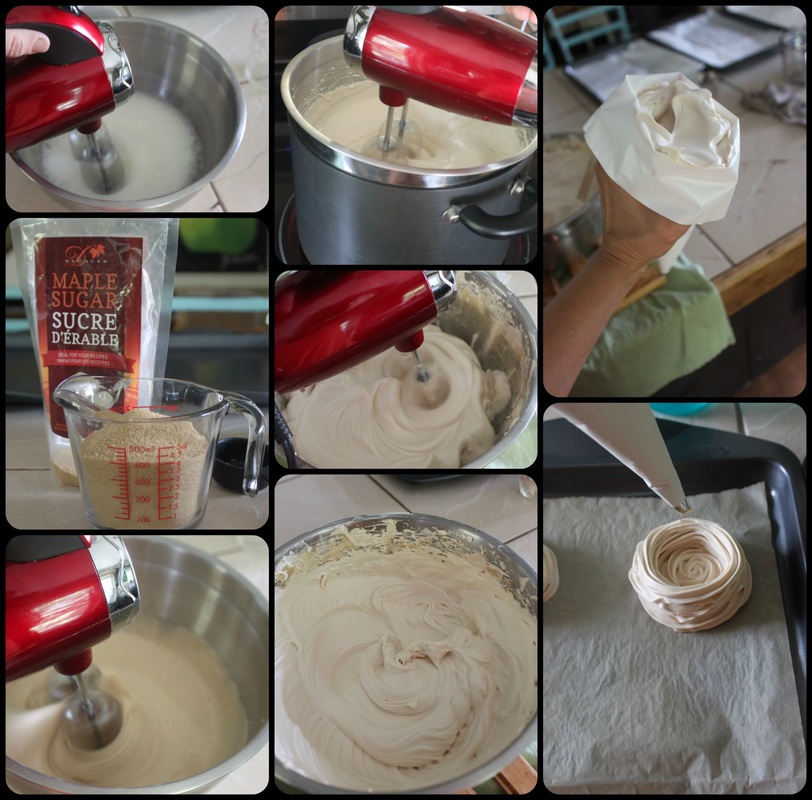 Here is the process! Whip the egg whites, add the sugar, whip it up more, put over simmering water until sugar is dissolved, remove from heat and whip until stiff! Fill a piping bag, and make your nests!  The paleo pudding I served with the nests So, full disclaimer....if you use maple sugar, your tastes buds will be singing a hallelujah chorus!!! :) It is such a maple-y marvel! The coconut sugar lends a darker, more molasses-y taste; just as yummy, just a different kind of yummy. I also found that (no matter how many batches I tried), these didn't stay as dry as regular meringue. I think it's the sugar difference. I tried switching between the two sugars and the starches, but after about 5 minutes out of the oven the meringues nests got a little sticky. lets be honest, that is not a big deal at all, but I wanted to put that out there so if anyone else had this problem you would know I had it too! My solution was to keep the meringue nests in the oven until it was nearly serving time, then I turned the oven back on to it's lowest temperature, and let the nests re-dry slightly. I turned the oven back-off after it had reached temperature, and left them in the oven for dessert, and we just grabbed the nests out of the oven as we wanted them. We filled the nests with this paleo chocolate pudding, fruit, and whipped cream. It. Was. Good. x 1000. 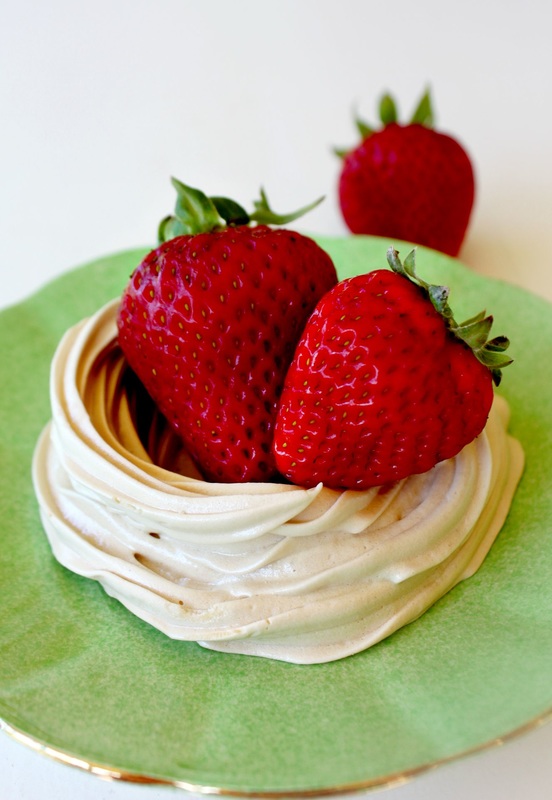 I cannot believe that school starts next Tuesday.....I feel (honestly) sad about it; the kids and I have had a great summer (.....maybe because 15 days of the summer I was away from them in Europe, giving me ample time to miss all the sweet things they do, and forget all the irritating things they do! Therefore resetting my child-patience gauge!) :) Haha, whomp, whomp!
The kids are really excited about school starting, and I am looking forward to some time alone in the house getting paintings and different projects ready for an Art Show I am doing at the end of September for Belleville's Culture Days (I'll be downtown on Saturday, September the 26th next to the Library!). I'm signing off now. I meant to post this in the morning, and it's now 7:54 p.m....so, I missed the mark by a smidge.....still, it's summer yet, and I am enjoying the lazy version of life! I was literally sitting on the couch with the kids, watching a pre-bedtime movie, and one of them said, "is today the weekend?", and I said, "nope, not yet, it's only Friday", and that reminded me that it was Friday, and that I had this post (mostly) ready to go! Golly. Well, hopefully next week I'll share some recipes with peaches in them! Have a good Labour Day weekend fellow Canadians! xoxo Hey, so I guess I missed Monday and Tuesday this week??? Seriously, I thought today was Tuesday, I thought Tuesday was Wednesday, I think my brain is all scrambled up from summer! My (strange) kids are counting down the days for school to start. Seriously, who's kids are these? I wasn't ever happy to start school except for when I was home-schooled! I am a natural-born loner, and I'm happy to admit it! "14 days, 14 days" my girls were cheering this morning! I kept my mouth shut and let them be excited; who am I to project my fear/hatred of school onto my hilariously excited children? Anyway, them reminding me of the impending school year got my mind working on things to pre-bake and put into the freezer to pack into lunches. These brownies are on the list. My kids are not paleo eaters, well, not completely. Caleb is gluten-free, and I'd say 70% of the girls food is gluten-free (by default because of Caleb being gluten-free and me being paleo), but I've been thinking about trying a little harder to clean up the kids' food a bit more this coming school year. Oh, I will still be feeding them McDonalds once in a while, and treats will always be in the house, but I want to try to get all our percentages closer together as far as what we eat. We'll see how it goes...it might be a complete failure, but I will at least try! So, these brownies are on the list (uh, I already said that...), and I've got some almond butter banana muffins to make, granola bars, and some sort of healthy/paleo cookies. Probably my double chocolate avocado cookies. Moving on, here's the brownies!  Ingredients:
Method:
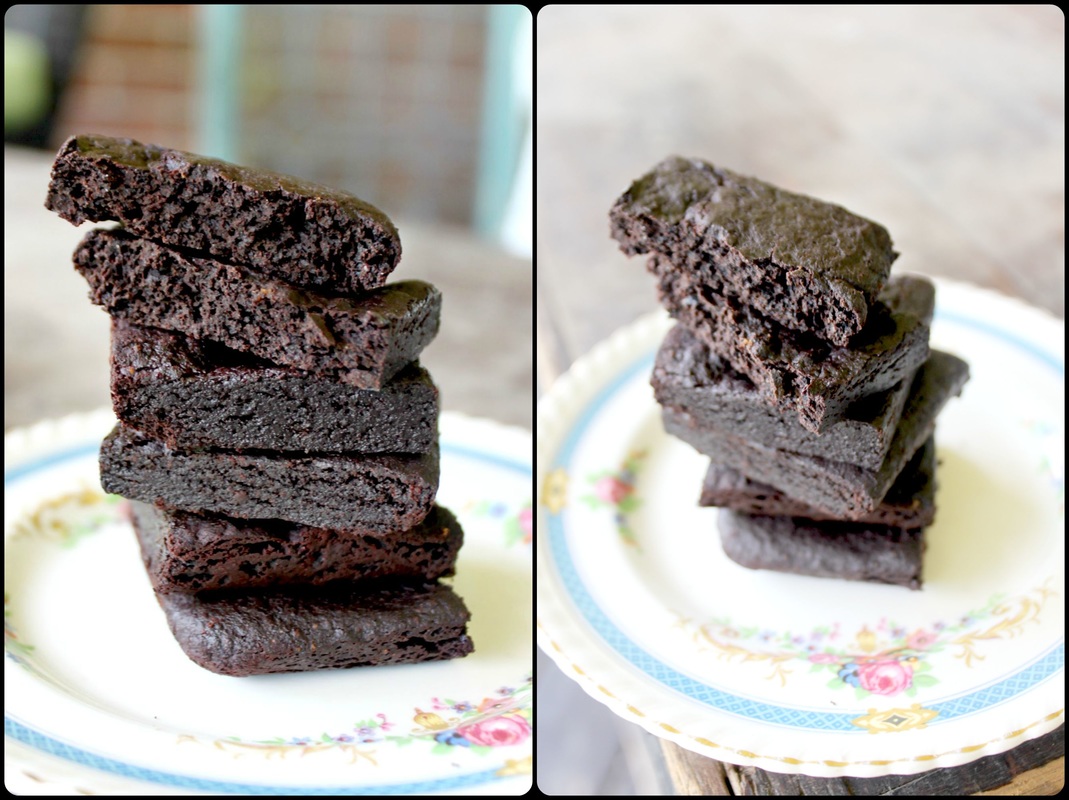 The first time I made these it was an experiment (as expected!), but I was hilariously surprised by how they turned out! We were having friends over, and I had a small strawberry cake for the kids and the non-paleo adults, and I made this for myself, really (I was willing to share if it tasted good)! I cut them, and took a bite, and said out loud, "wow! These turned out really well!". My husband laughed and said, "I thought you weren't suppose to make dessert for guests that you hadn't tried before?". Yes, that is, or was, a rule at some point, but I rarely make dessert except for guests because I don't want to find myself eating all of what I've made by myself! I often make desserts for the first time for guests, sometimes it's a success, and sometimes it's a complete failure!
Anywho, that first time I made them I (super-duper) enjoyed it topped with coconut whipped cream and berries. Yummm-o. I've since made and enjoyed them plain, with almond butter sandwiched between two, and also with sliced banana on top. These brownies are dense, moist, and so very good! Happy Wednesday everyone!! Hello, hello, hello! It's Friday! Ok, well, in the summertime, Friday means little, unfortunately. Especially when my husband is on a weekend of night shifts. :( Still, for the sake of those who feel elation by their Fridays, then happy Friday to you! Today I am going to share with you the recipe for the chocolate cake I used for Caleb's birthday, as well as show you how I made his cake. When making gluten-free recipes, usually using a regular recipe and adapting it doesn't always work out. In fact, it's often a complete flop! But here's the thing: If you have a great gluten free flour blend, then add a little extra "glue" (like xanthan gum, guar gum-if your blend doesn't already have it), you can tweak at it, and make it into something delicious! That is the case with this cake. The original recipe is from the back of a Hershey's Cocoa Can. It's really an old recipe, but it seemed tried and true. With a few personal tweaks like using sour milk instead of regular, and coffee instead of water, then of course, using gluten-free flour, this cake turned out moist, super tasty, and was really easy to make! 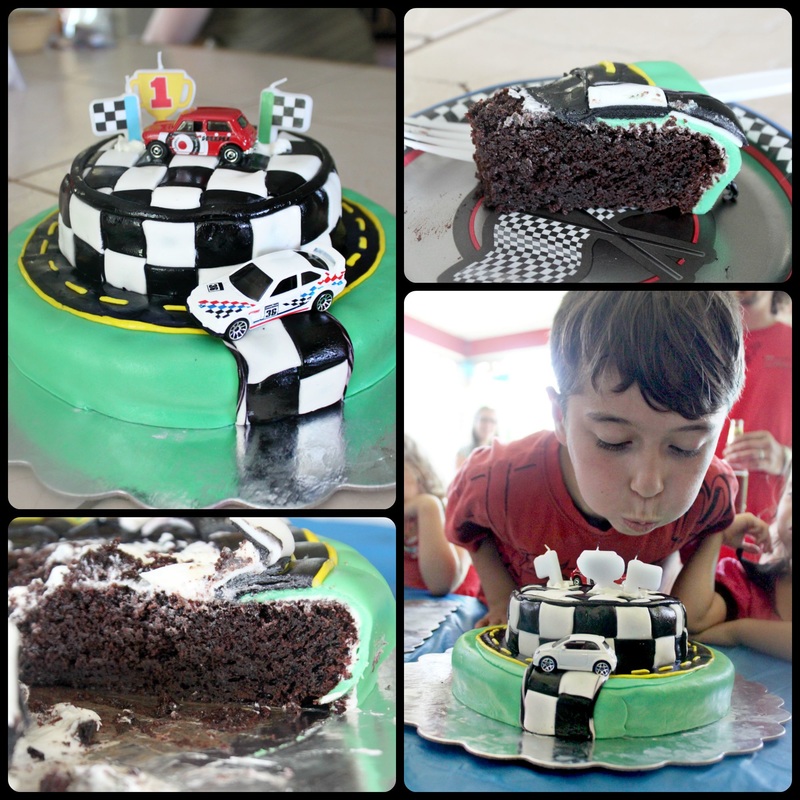 Gluten-Free Chocolate Cake *As with many baking recipes, this turns out better if the milk & eggs have come to room temperature * I'm sorry I don't (can't) offer a "PRINT" button, but you can click on and download the document if you'd like! :)
Ingredients:
Method:
Making a Checkered Cake 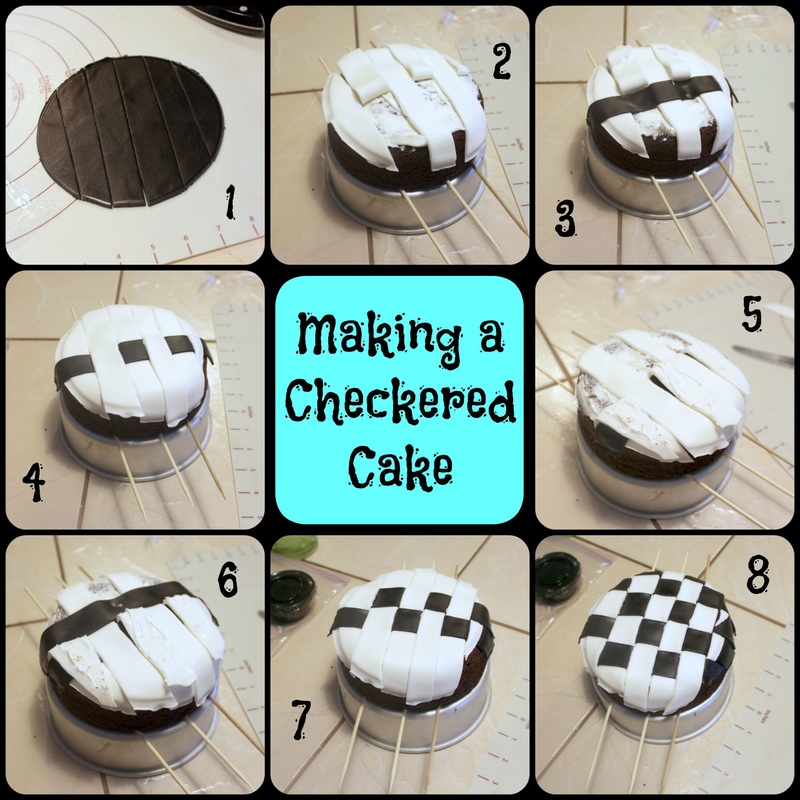 So, in looking for ways to make a checkered cake, the only suggestions on the www were to cover the cake in white, then cut out black squares and stick 'em on. Seriously. Who wants to do that, and who could make their squares perfect, and stick them on perfect? Not me, that's for sure! I decided instead to make the checkers like I would a lattice top for a pie. It worked out really well, and was not too difficult. I started by putting skewers onto the cake pan, and setting the cake onto it. I used the skewers as a "just in case" for lifting the cake off later. I didn't really need them, as it turned out, but I wanted to explain why they were there in the photos. :) I used a vegetable shortening fondant (instead of marshmallow fondant) this time because marshmallow fondant can dry out faster and I knew I'd be fussing with the fondant for a while and needed it to stay soft and workable. Also (if you follow the recipe in that link), make some of the fondant with 1/4 cocoa and 3/4 icing sugar as a base for making black fondant). As a general rule, keep your shortening handy and keep rubbing it onto your hands as you work to help keep the fondant from drying out. Start by applying a layer of buttercream to the top of the cake as "glue" for the fondant.
This is not a difficult method, but you do need to be a little focused to make sure you're paying attention and actually pulling back every-other strip, and alternating strips properly. 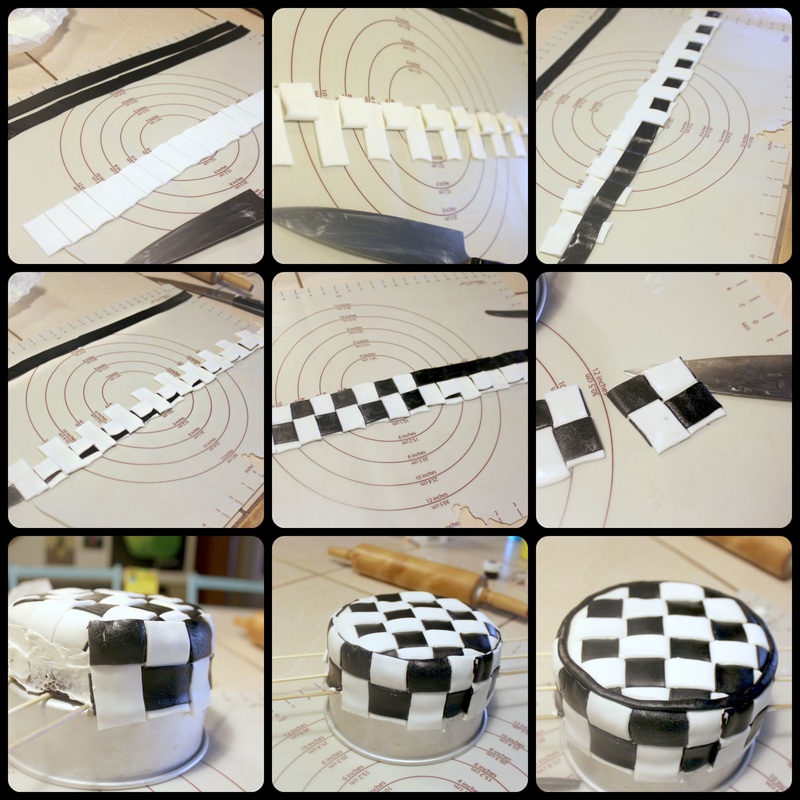 Making the side checker uses the same process of folding every other piece back (photo 2), laying down the black, then folding the pieces back up (photo 3), and repeating with the opposite pieces (photo 4 and 5). Once you've got that finished, apply some buttercream to the sides of the cake for "glue". Cut the long checkered piece you've made into sections of about 4 (moving the whole, long strip of checkered fondant was too fussy), and attach to the side of the cake, pressing each section into the buttercream to make sure it's well attached (photos 6 and 7). The final photo shows a little trim I added (by rolling out some black fondant) Wrap this top portion of the cake in plastic wrap as you work on the bottom of the cake, you don't want it drying out! 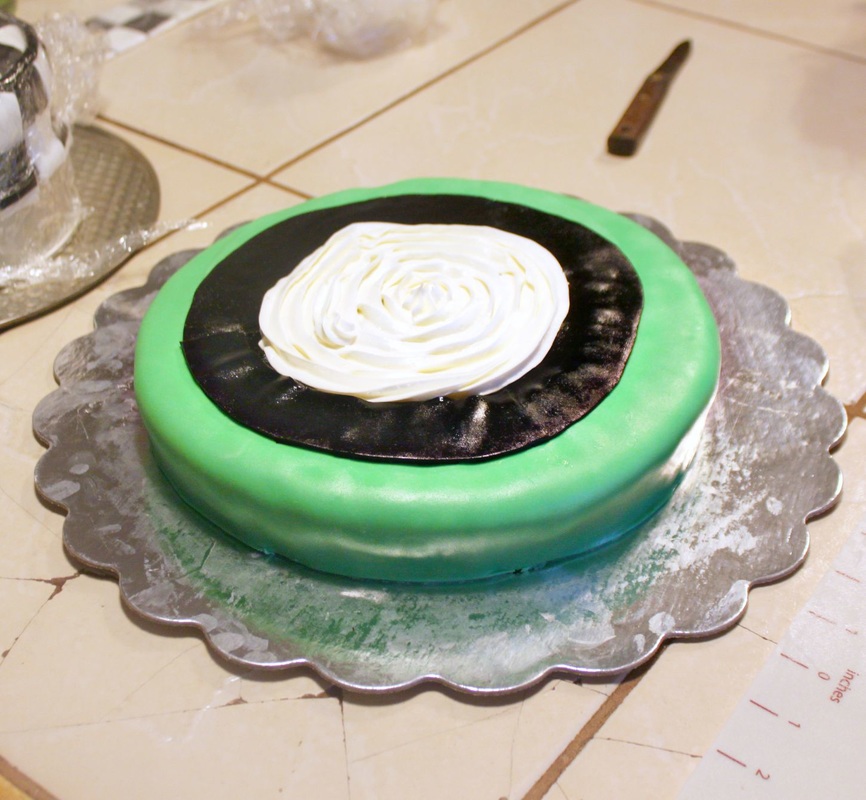 The bottom of the cake was just covered in buttercream for "glue", and then green "grass" fondant, and a little black fondant "track". Then I added a little more buttercream to the spot where the top layer would be sitting.
Now to put the 2 cakes together I left the plastic wrap on top of the top-layer cake, I then put my hand onto the top of the cake, and carefully flipped it over (onto my hand), and set it down onto the base. Oh, uh, remove the skewers (if you were using them) before you place the top of the cake onto the bottom. After this I added some details like using the leftover checker I had from the sides and added them, and also adding a little yellow dotted line on the "road", and I also added some more trim with rolled out fondant. Then I added Caleb's favourite (and throughly cleaned) cars and candles to it. Oh, and don't forget to wipe off your serving plate/tray/whatever. See the photo above and all those greasy little smudges I made? I'll share next week how I made the other car for Caleb's party! Sometimes it's so difficult to come up with an "ending" for a post! How about "the end"? Perfect! The End :) Oh, and have a great weekend! We're back! It's been 16 days of being away, but we've made it back safe and sound! We landed in Amsterdam on August 2nd, then travelled to Haaltert, Belgium where we spent a week visiting Adam's family, and also visiting Brussels, and many of the cities around the western side of the country. After that, we headed south where we spent 2 days in paris, France. Oh boy, that's a story! I'll get to it eventually, but not right now! After those 2 days, we travelled north, stopping again in Belgium, in a place called "Londerzele". Look familiar? It's where my husband and his family (the Van Londersele's) are named after. "Van" in a lot of European names means "of", or "from", so our last name is "from Londerzele". Anywho, we continued on our journey, going to the place where my Dad was born and spent the first 7 years of his life. A lovely place called Breda, in The Netherlands. We spent the day there visiting my family, then headed more north/west toward Rotterdam (for 1 night and day), then Haarlem (for one night and day), and finally ending in Amsterdam for 3 nights and 3 days! I took a lot of photos....a LOT! I plan to share many of the photos in the next few weeks (or months), as I share recipes from the places I visited. I also ate a lot of different foods! I had chocolate everywhere I went (big surprise there, right?). I had kaas (cheese), croquettes (a small breadcrumbed fried food roll containing, usually as a main ingredient, mashed potatoes), saucijzenbroodje (sausage rolls) & stroopwaffle (thin waffles with a syrup filling) in The Netherlands. Crepes, baguettes and croissants in France, and frieten (fries-NOT french fries), waterzooi (a fish or chicken stew), crevette grise (little, tiny shrimps), and, of course, waffles in Belgium! Belgium is famous for mussels too, but I couldn't go there, I'm not into mussels. I did try some nice Belgian beers though (they sure do like their beer!), which I don't generally enjoy, but I did find a few that I quite liked. Anyway, back to waffles!!! The recipe today is for a simple gluten-free waffle, which, incidentally, more closely resembles a real Belgian waffle in taste and texture than our very Canadian or American version. Over on this side of the pond, our waffles are very light, fluffy, and barely coloured (not browned too much). Oh, and we drown our waffles in syrup! In Europe, waffles aren't even really a breakfast food at all. They are served in restaurants, but mostly by street vendors and small shops. Also, in Belgium.....get ready for this....there are no "Belgian Waffles". That made me laugh! There are two main types of waffles, the Brussels waffle, and the Liege waffle. The really, really, really simplified way to distinguish the 2 waffles is that Liege waffles are made with a thicker batter that is similar to bread dough, and they have uneven edges. Pearl sugar is mixed in with the dough, which caramelizes when the waffle is cooked. Ya, I know....drool! The Brussels waffles are made with a yeast-leavened batter, which makes them lighter and crispier. They are rectangular with defined edges, and they also have deeper pockets or holes. So, my waffles are North American is shape and size today, but they are more Belgian in texture. It's the love child of the two countries. Whomp whomp. I plan on getting my apron on and experimenting with my waffles to share with you both types of Belgian waffles very soon! But, for today, I share these. Alstublieft! ("here you go", or "if you please" in Dutch and Flemish....which, incidentally, is the same language) :) 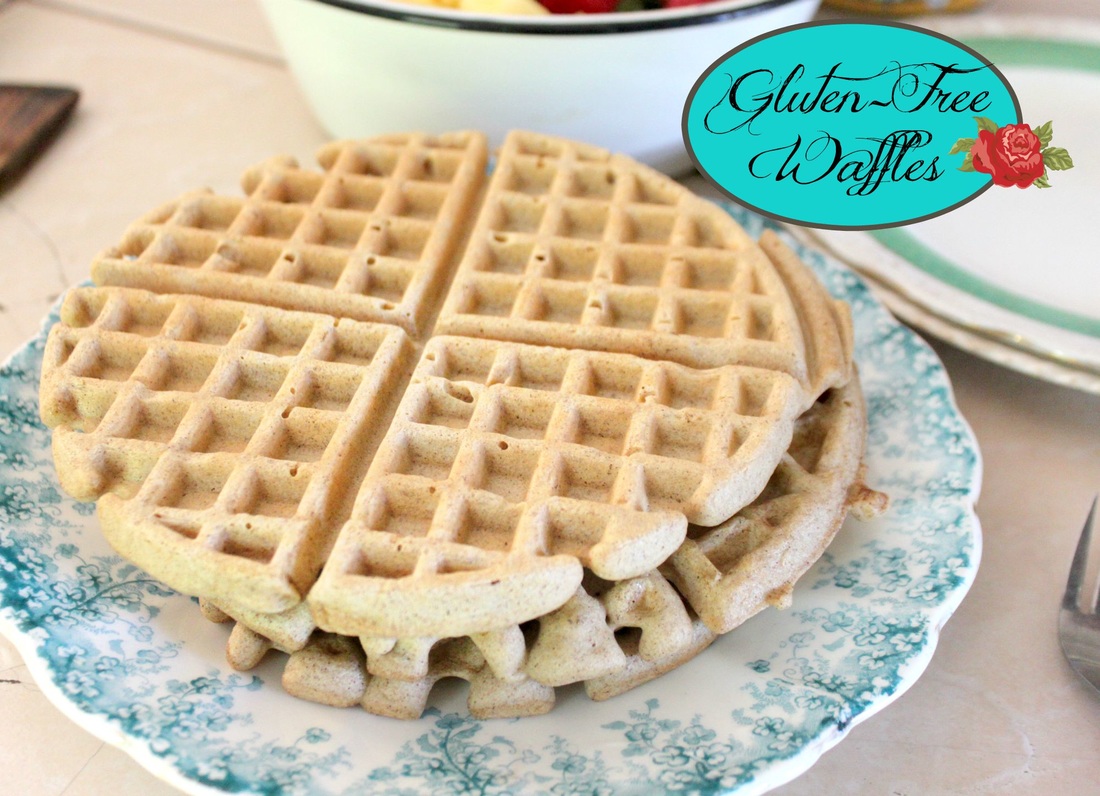 Gluten-Free Waffles Ingredients:
Method:
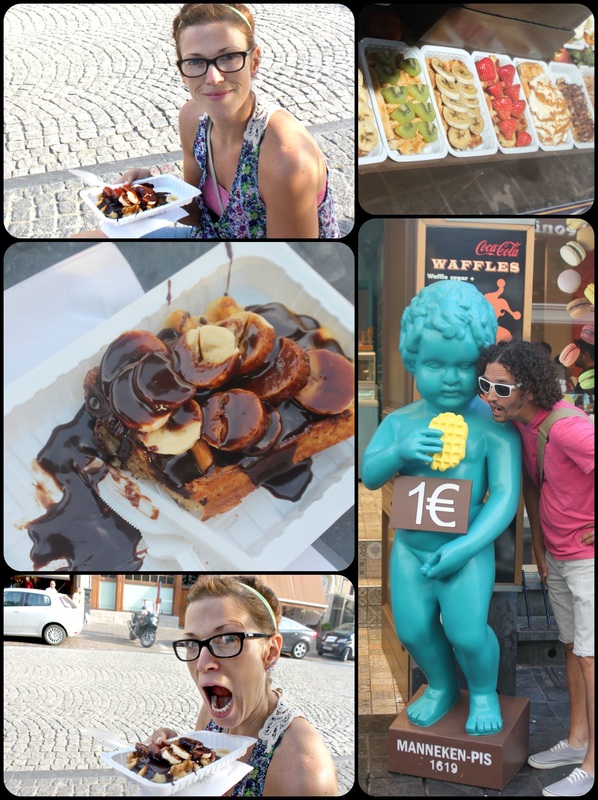 Eating a waffle in Ypres, Belgium. I chose a Liege waffle with banana and chocolate. Yummm-o! :) And you can see a window display of some of the waffle toppings available. Oh, and that's Adam with "Manneken Pis" (translation: "little man pee"), a famous statue in Brussels. The real statue is actually only about 2ft tall. And it isn't teal. 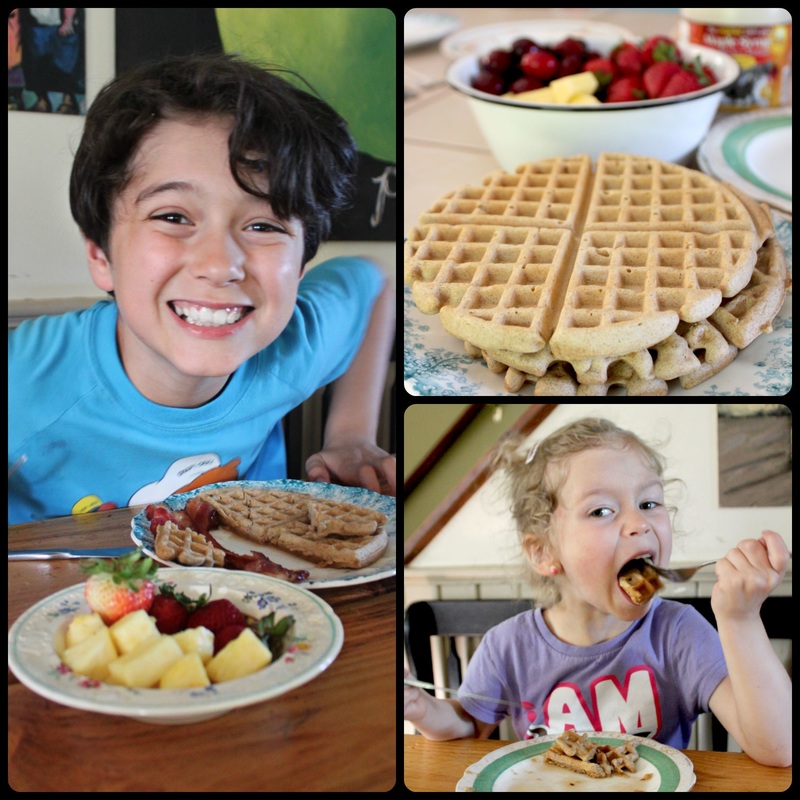 Caleb and Keziah eating their waffles. We generally eat ours as dinner with syrup, bacon and fruit.
I'm glad to be back! Travelling was really fun, meeting family in Europe was wonderful, walking between 10-20 kilometers a day was something I actually enjoyed! But being back to real life is my favourite. I love our house, and the farm. I like every day, there is beauty in it, though it's easier to see the beauty when you've been away for a time. Until next time, tot ziens ("so long")! Today is (nearly, almost) the day! We fly out tomorrow, but today we drive out to Brantford where the kids will be staying while we're away on our trip. I am really excited...and super nervous! My experiences on airplanes haven't been the best...nothing 'bad' has ever happened, but I just get all in knots thinking about it, and then taking off...I'm usually ok once we're really on our way, but the take-off and landings do me no good. Or thinking about how freakin' high in the air I am!!! My first flight ever was with a "buddy pass" (my cousin worked with the airline, and he'd get deals). Basically though, all the first class passengers boarded, then the regular class, then the stand-by passengers.....then me! Luckily the seat available was First Class, so I was cozy, had lots of room, and was treated super-duper well (they must have seen on my 16 year old face that I was terrified!)! That particular flight taking me to England had me making a few lay-overs (which meant more take-offs and landings!), and riding in some small (and wildly bumpy!) planes! I almost missed one flight in Georgia, but started chatting with a very pleasant old man, who randomly asked what flight I was waiting for, and I showed him my ticket, and he informed me I was at the wrong gate! And the airport in Georgia is big and sprawling! I literally had to sprint to my actual gate so I didn't miss my flight! I flew to Cuba with Adam for our honeymoon, and that was alright. I was 7 months pregnant, and had to turn my air vent right on my face and breath very deeply to keep from feeling sick, but it went alright. On a flight to South Africa (a 16 hour adventure!), I ate the meal they provided about an hour before landing...and it didn't have time to settle in my tummy before the shaky landing began....I barfed everywhere....I know, so classy. I could feel it coming though and warned the people sitting next to me...I'm not sure it did much to make them feel better, but I think it's better than just being surprised by someone vomiting on you? No? I shouldn't intro food with being sick....I'm an idiot. Ok, well, I am hoping this flight will be better because I feel like I have better mind control. Haha, that sounds whacky! What I mean is, over the last few months or so I've been learning how to keep myself from getting too nervous. I needed to learn to be in control for the musical I was in; I needed to know that what I could do in rehearsals I could do for a real performance without being so nervous I was pitchy or wobbly on my dance feet! I channeled some sort of inner Rachel Berry (from Glee!) and just took control over my mind. It might sound crazy, but learning to take control of your thoughts and emotions is powerful, and I am glad I know I am capable of it because I plan on exercising that 'muscle'! Alright, let's move onto my last post until I get back! I was thinking I could post once or twice while I was away, but we're not bringing the laptop, and working on posts from my phone sounds like torture! So, once upon a time I posted about homemade chocolate pudding, but I'm here today to share the paleo version. This pudding was is yummy, I mean, for realz delicious! As far as paleo treats go (and remember, this is a treat, not an everyday pudding! Try this one if you want a slightly more healthy paleo pudding!), this is in my top 5, Two thumbs up! 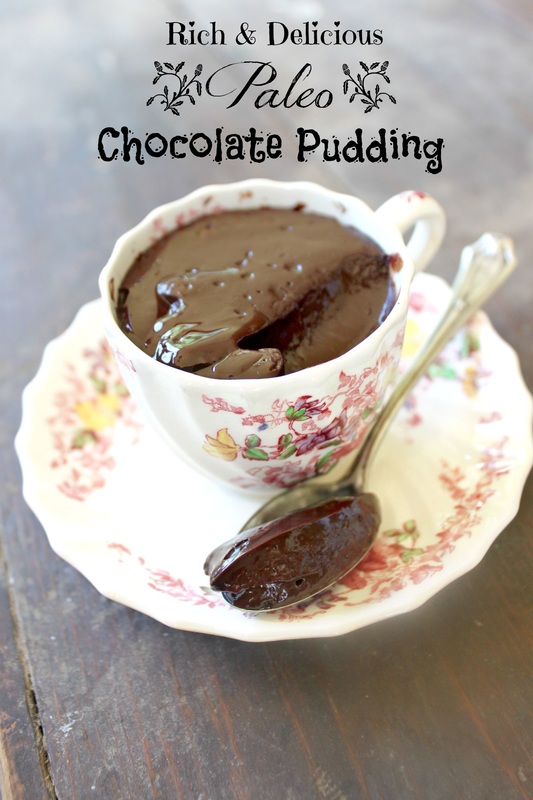 Paleo Chocolate Pudding Ingredients:
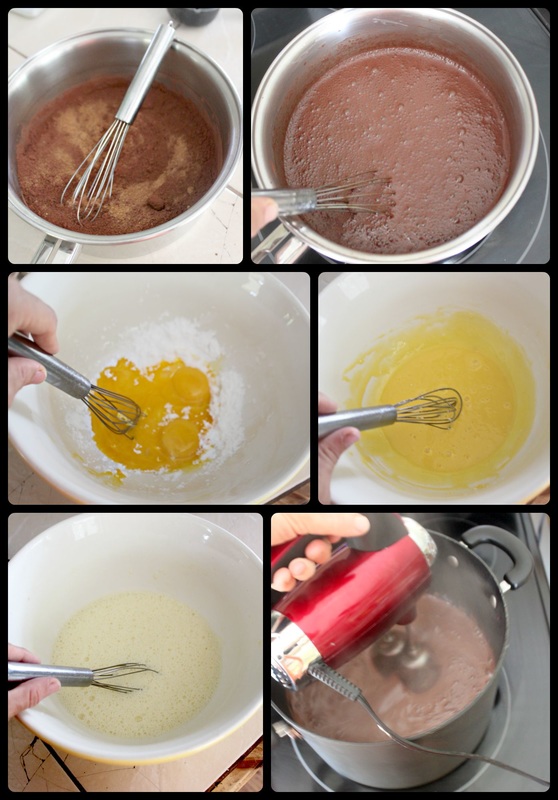
Method:
  I need to sign off! I am packed up and ready to go, but I need to get the last minute things together, load the van, and give the low-down to the person house/horse/dog sitting for us while we're away! Good-bye for now everyone! xoxoxo |
Hi, I'm Amy-Lyn! 
I am the lady behind this here blog! I live in the sticks with my animals, my super handsome husband, and my
3 amazing kids! Here you'll find things from recipes (gluten-free, paleo, and strait up junk food!), DIY ideas, thoughts on raising a son with autism, and whatever else pops into my brain! : ) Read more about me by clicking here! Want to Stay Connected?
Find What
|
||
 RSS Feed


