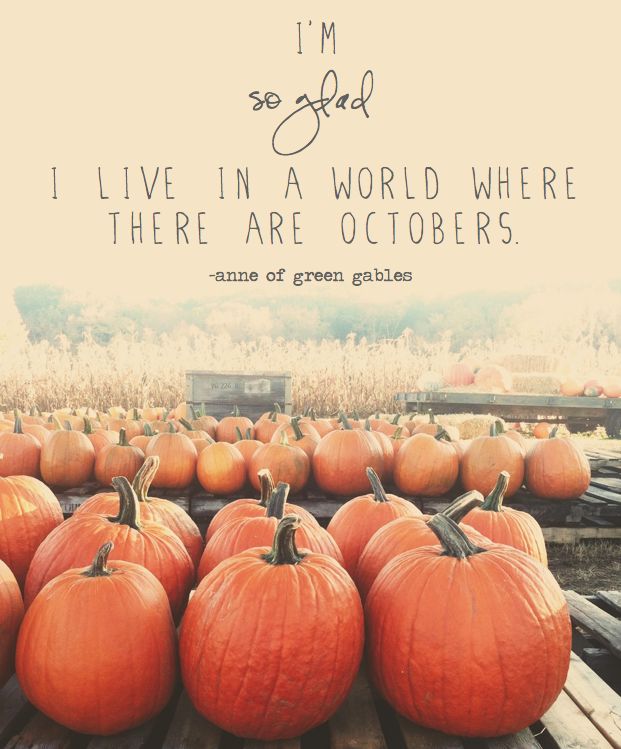
 As per my usual, I decided to experiment with a dessert for guests that were coming over. I know, it's against the "rules" of inviting people over (you're not supposed to try something new for guests), but I felt the urge to make a pie, and to make it paleo-fied because it wasn't a treat day. Besides, the people we had coming over weren't super-duper dessert freaks, so there was a chance they wouldn't even have any! So, worst case scenario, I took the time to make it, and then had to eat it all to myself, or I took the time to make it, and it bombed, but my friends don't care because they didn't want dessert anyway! So, this pie really combines a few other things I've made before, but I've only just introduced each thing to the other for the first time here. They became kindred spirits, and I think you will appreciate their friendship to one another. There is a quote from Anne of green Gables about October (see it up there?), perhaps that's why I felt Anne-ish & kindred spirited about this pie. :) 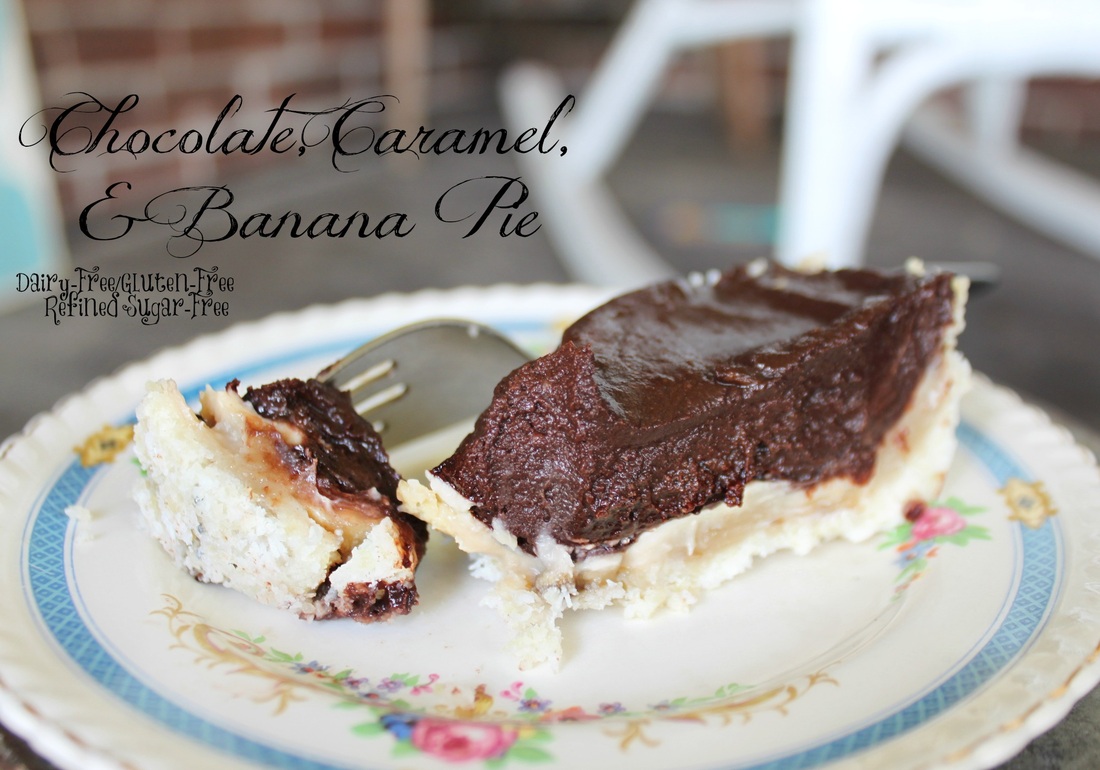 Chocolate, Caramel & Banana Pie Ingredients:
For the Crust:
For the Caramel:
For the chocolate:
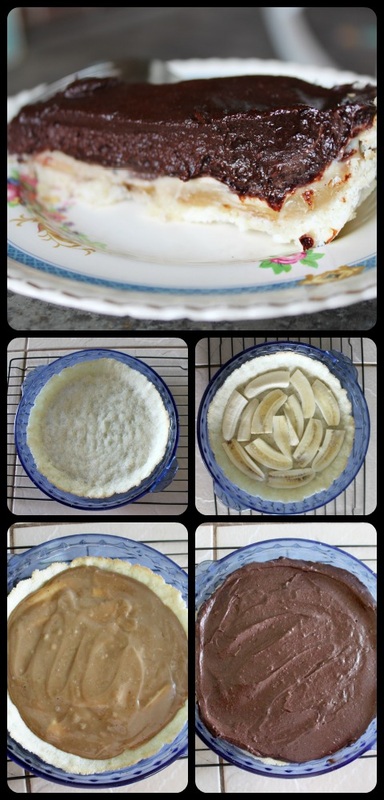
Method: For the crust:
For the Caramel:
For the Chocolate:
Put it all together!:
 My super skeptical son, who almost automatically dislikes something he knows that I have made gluten free (even though I have far more successes than failures!!), devoured his piece, then asked for seconds. Then asked for some for breakfast the next day. If you're looking to bring a pie to any Thanksgiving festivities this weekend, why not a paleo friendly pie! I know it's not "festive" (with pumpkins, apples, or the like), but it will make you thankful! And if you have gluten-free, or dairy-free or refined sugar free people in your family, they will be happy too! 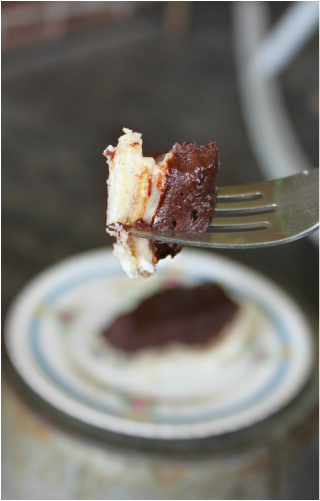 Happy Thanksgiving weekend my Canadian friends!!! :)
xoxo
2 Comments
Something strange has been happening in my kitchen lately.....it all began a few months ago when a hinge on our oven door broke. It should be fixed, but I just sort of shrugged, and figured out a way to keep it from falling off completely (though it did a few times, and let me tell you, that sure messes with baking times!). Anywho, then my beautiful vintage stand mixer was in the middle of mixing when suddenly shhrrruncchhhweeellcchhh.....the engine seized (that strange word is the official sound of a vintage stand mixers engine seizing, btw). So, I was down to only using my hand mixer to recipes, which in some cases proved to be a great arm workout as my hand mixer is also vintage, and weighs at least 8 pounds! Then, in the middle of whipping up some avocado cookies, SNAP, one of the attachments snapped off. Oh well, I thought, I can use a hand mixer with only one mixing attachment... A few weeks back I was going to make some treats for a fundraiser I had volunteered to bring some desserts to, and I turned my oven on, only to watch as the bottom element of the stove caught fire, and burnt its way down the entire element, until only a crunchy, burnt, useless element remained. "No worries!" said I, "Our BBQ has a thermostat, I can bake in there!" It's true, I can bake in my bbq....though it can take twice as long because I only really have 1 rack to use. But, I wasn't worried, I would press on! Then, yesterday during a macaroon experiment in which I was attempting to really mix the ingredients together well in a blender, the bottom ring (the threaded part that holds the blender glass to the base of the blender), broke in half, and everything in the blender came flying out as the glass top came crashing to the floor! ....I think the Lord may be trying to tell me something. It's either A: to make more microwave cakes & leave the oven alone, to B: win the lottery and buy a new oven, C: Stop buying vintage appliances, D: Be a little more gentle when screwing the bottom on a blender on, E: to send a truly heartfelt thank-you card to my father-in-law who bought us our bbq a few years ago, or F:....to stop trying to bake altogether. I really can't imagine the lesson would be that last one, but I can't be sure. All that to say, I made my own birthday cake a few weeks ago on our bbq! My husband shook his head in disbelief....though I'm still not sure if it's because I made a cake on the bbq, or because I made myself a birthday cake? No matter, it worked out really well, and I got a paleo(fied) birthday cake! It wasn't a treat day, after all, and I didn't see why I should have a treat day just because it was my birthday! I thought it more fitting that I would celebrate my birthday eating what had gotten me to the new, healthier place I was in! So, here it is, many stages, a little step-intensive, but overall a simple and tasty cake! 
Paleo Chocolate & Chocolate Chunk Layer Cake *I only have one small round cake pan, so I made the chocolate cake first, then while it was baking I prepared the chocolate chip cake layer. When the chocolate layer was done baking, I washed and dried the cake pan and used it again. If you have 2 cake pans-all the power to ya!* Chocolate Cake Layer: Ingredients:
Method:
Chocolate Chip Cake: Ingredients:
Buttercream Frosting: Ingredients:
Method:
Cake Assembly:
Look at those lovely cakes!
Pictured above is the spray I use for cake pans. And dusting the pan (with cocoa for a chocolate cake, or flour/starch for white cakes) really helps to ensure the came will come out of the pan when you're finished baking it. 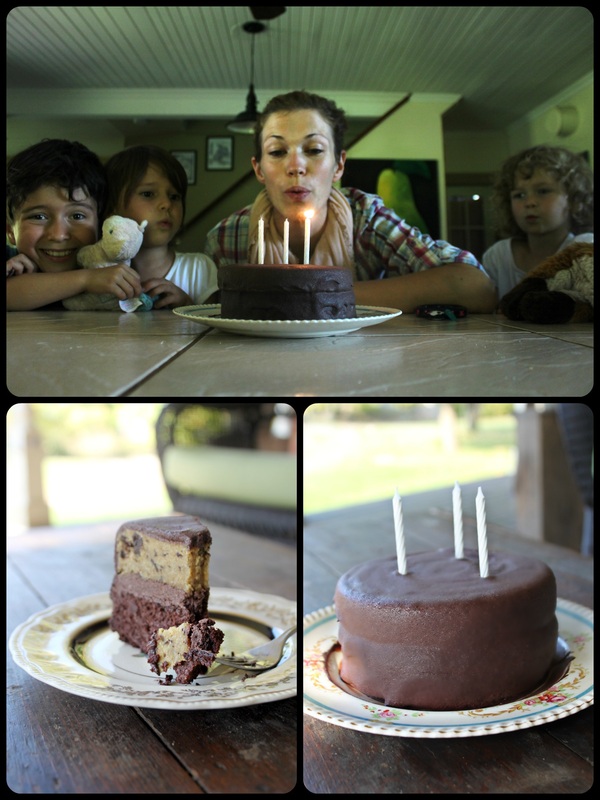
The kids and I having cake for dinner on my birthday! :) Seriously, we had it for dinner. We did have some veggies later on, if that makes you less concerned.
And so, there you have it! My tale of kitchen woes, and how I refuse to be woe-d by such things! :) Seriously, stubbing my toe makes me angry, but my kitchen falling apart around me? Naw, I'll just figure something else out!
I've made this cake, some cookies, muffins, mini muffins, and even a pie on my bbq! It's like having an old fashioned summer kitchen! That's how I will look at it, at least! Once the snow flies I may feel differently though...whomp whomp. And I'm doing fine without a stand mixer, and a hand mixer with only one mixy-thing on it is still easier than trying to whisk everything by hand! I can't make smoothies until I get a new blender, but my Mom gave me a Yonanas for my birthday, so I will just use my frozen fruit for that instead! The glass if half-full for me folks, looking on the bright side is something I want to spread around! Later peoples, and happy Wednesday! Pass on some positive attitudes! :) Hello there folks. How goes your rainy fall? Yesterday I stepped out of the van in our church parking lot, and stepped into a puddle. And it was still raining, so I got even more wet as I walked into the church. So, I had sopping wet ballet flats on my feet for all of church, and then for running all our errands after-namely doing the grocery shopping. And ya'll know how cold grocery stores can be/are! So, by the time I was done my feet and I were froooooozen! I'm just whining a bit. I'm over it now. So, ribs, eh? Well, I think every family has their method of making ribs. I've had some amazing ribs, and I've had some serious doozies too. The thing with ribs is that you can never think at 4pm, "I think I'll make ribs for dinner". You can't do it, they will be tough and awful! Well, unless we're talking about the pre-packaged, fully cooked, just warm-them-in-your-oven type of ribs. That's different, I'm not talking about that. These are slow cooked, melt-in-your-mouth ribs, with a fantastic and simple to make sauce. You can finish them on the bbq if it's a nice day and you feel like it, or it can all be done in the oven. You could also slow cook them in a slow cooker and finish them off in the oven or bbq! It's up to you! So, next time ribs are on sale, grab a rack and try my version. Then tell me how they turned out! 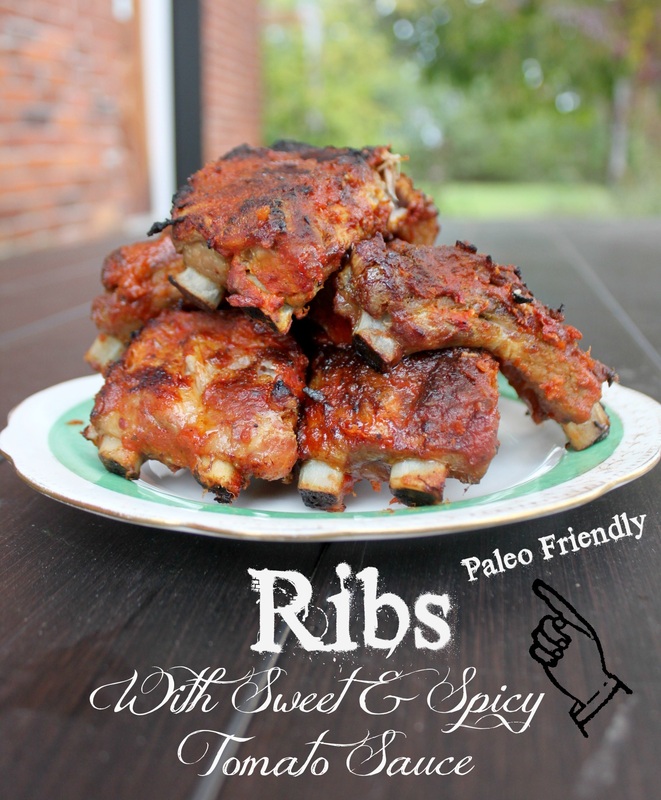 Ribs with Sweet & Spicy Tomato Sauce Ingredients:
For the dry rub:
For the Sauce:
Method:
*** You could also do the slow cooking in a slow cooker on low for 4 hours or so, then finish the ribs off in the oven or bbq to brown up*** 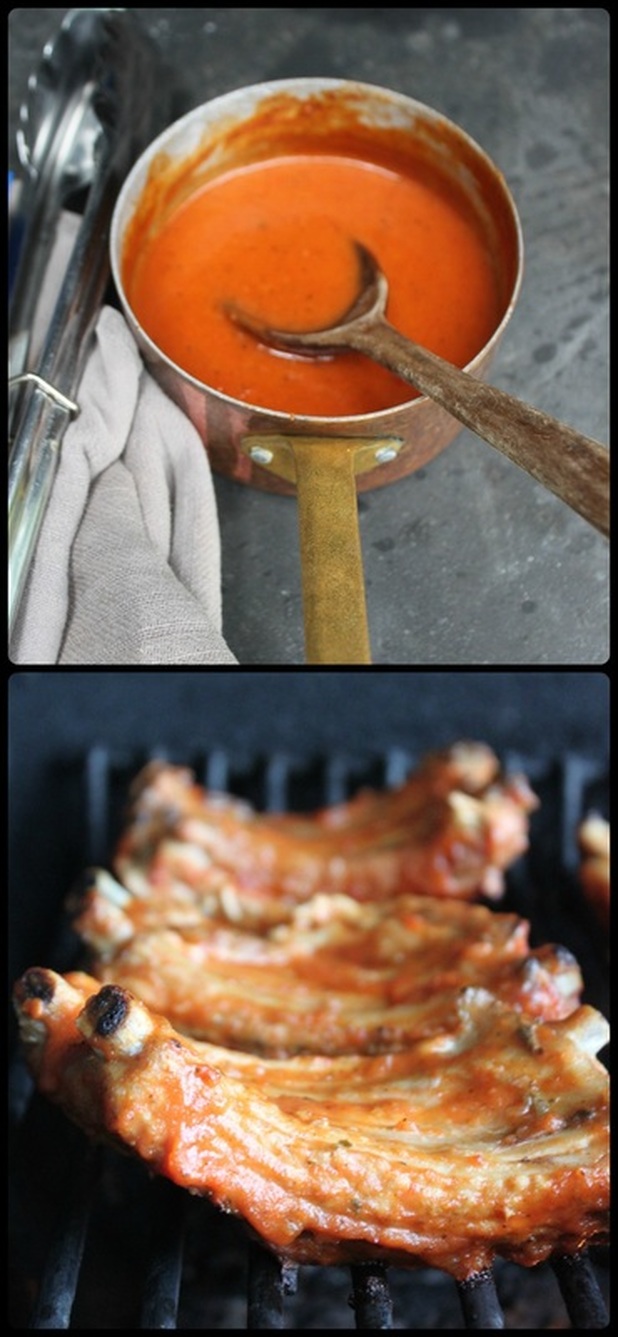 The warmed and ready sauce, and the meaty side of the ribs getting sizzled. So, that's the end of the rib story! I hope you enjoyed it! It seems long, but the basic instructions are simple. Rub the ribs. Slow cook the ribs. Sauce the ribs. Sizzle the ribs. Have a great Monday! So, here in Tweed they always have a lot of food on 50% off at the wee grocery store. It's for many reasons, usually because we're a super small town, and they can't sell everything they need to before the expiration date, so, on clearance it goes-and I swoop in and buy it! Go Dutch! Anywho, recently they had a few dented cans of sweetened condensed milk for $1.50! Whaaaa? Yes, I know that a dented can can (haha, can can) release chemicals into the food, and poison you, but it's sweetened condensed milk, it wasn't doing you any favours to begin with!!! Sheesh! With that, I ask you what I should make with said sweetened condensed milk for my treat day this weekend!?! I have 3 different squares that have been on my (super un-healthy) Food Board on Pinterest, and I neeeeeds to try me one of them! Some of my treat days I have nothing in mind and am happy noshing on a Cadbury Bubbly Bar, but other treat days I look forward to immensely, and this is one of those times! The SCM is calling to me! :) 2 of these recipes are totally new to me, and involve some of my favourite ingredients-chocolate, marshmallows, and maple! The third bar is one I've made before, and surprisingly has fruit (jam) in it, but man oh man, it's goooood. And I am long overdue in making a another batch! So, I'll let you see each one, then you need to help me decide which one to make this weekend!!! Don't forget to click on the green highlighted words to send yourself through Internet Land to get to the other blogs to see the recipes! Maple Chocolate Walnut Bars 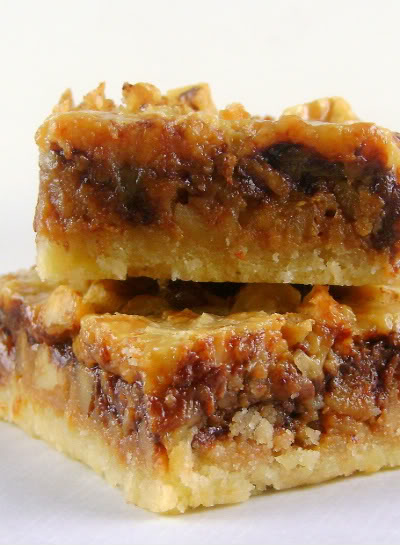
Mary at One Perfect Bite has created these Maple Chocolate Walnut Bars, and they look soooo good, don't they? Yumm-o! They also have a fall feel to them somehow, and make me want to test drive them as a possible treat to bring to any upcoming Thanksgiving get-togethers. You bake the crust, sprinkle some chocolate chips on it, then beat the sweetened condensed milk with an egg and some maple flavouring (or real maple!), add in the nuts, spread it over your base, and bake it! Easy peasy! Rosie's Raspberry Bars 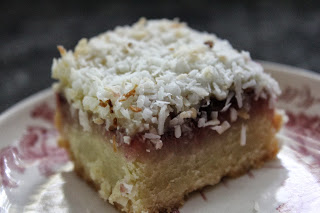
Here are the bars I have made before, and let me tell you, no one, and I mean NO ONE has ever not liked these Raspberry Bars! I'm not kidding! Sharon (my beautiful sister) has the recipe for these crazy delicious squares over at her blog, The Good Kind of Crazy. A fantastic shortbread base is baked, then has raspberry jam spread over it, then the sweetened condensed milk poured over that, then coconut pressed into the milk and baked until perfect! Perfect! Marshmallow Chocolate Chip Shortbread Magic Bars 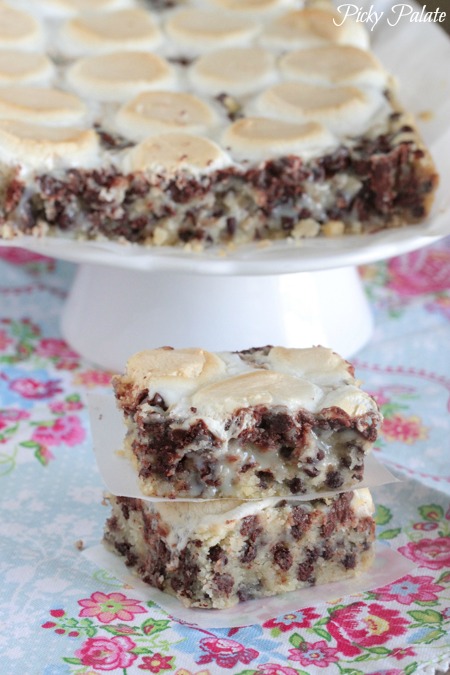
Yes, I know the name of these is a little laboured, but whaaaaaaa???? How delicious does this look! Drool..... The lady behind The Picky Palate has created a bar that only someone as coo-coo as me for marshmallows and chocolate could have invented! These bars have a chocolate chip shortbread base that is baked, then sweetened condensed milk poured over it, then chocolate chips and marshmallows all baked to campfire perfecting to top if off! Yowza! Thumbs up! So, whad'ya think I should do?
I am a youngest child, and classically cannot make decisions easily, so I ask you for your help! P.S. anyone who reads this who lives in Belleville or Tweed will get a sampling of whichever one I decide to make!!! Incentive to help me! :) Alright, well, that's all for today! I hope you help me decide which bars to make, and I also hope you check out the other blogs and perhaps decide to make yourself some squares too! Happy Weekend! I know, this post title sounds like a Miss Marple mystery, but it is an actual issue. Parents of kids with autism murdering their children (and often committing suicide themselves), and saying that, "it would be better this way".....it makes me feel sick. The sad and scary part in all of this is that our society tends to victimize the parent who committed (or attempted to commit) the heinous act, not the innocent child who is the actual victim. I understand feeling stress caring for a person with special needs, I understand being so frustrated and hopeless. I understand that everyday brings a new challenge. But murder?!? In a lot of the news stories, the bottom line is, "families who have kids with autism need better support!". So, what they are saying is that with better support, innocent children won't be murdered? "Give me support or the child dies!!!"-That's what they are saying. Sounds foolish when you say it plainly, doesn't it? Are more resources needed? They sure are! But are a lack of resources permission to take your own child's life? I shouldn't have to answer that for you. People say foolish things to me like, "oh, it must be such a struggle raising a kid with autism..." (with a sigh and pity in their eyes). They do this because they hear news stories that make parents who decide to do unthinkable things seem rational, because it is sooooo hard raising a kid with autism. It is hard! But so is raising "typical" kids! Are the issues different? Yes. But are the issues different between each of my kids anyway? Yes! I'm stuck between explaining how my life is different, but not that different. I can't make light of the things parents go through when raising a child with special needs. But I also can't say that raising them is so much worse than usual, and that ending that persons' life is understandable. The media supports the idea (hopefully not on purpose) that blaming an autistic child for his/her own murder is o.k. If you read a news story about a dog owner who killed his dog because it was difficult to take care of, wouldn't 100 different organizations be after that dog owner!?! Wouldn't the media push for loving homes to adopt these "difficult" pets? Wouldn't your heart bleed for that poor innocent dog.....? We're messed up. Autism is a spectrum, and that means there are highs, lows, and in-betweens. We need to feel the same about all the individuals in every spot on that spectrum, and at any age. 
Does my wonderful young man have any less reason to live than you do, just because he can be "difficult"?
In the news right now is a woman, Kelli Stapleton, who tried to murder her own 14 year old daughter with autism, and commit suicide at the same time.
She locked herself and and her daughter in a van with 2 charcoal grills turned on, and waited for the carbon monoxide to kill them both. This woman was a blog writer (of The Status Woe), advocating for her daughter, and documenting the struggles they went through. Just hours before she attempted to kill herself and her daughter, she wrote a post that, to me, seemed a little psychotic. If lack of funding and resources is this Mom's excuse than this quote from her last blog post will seem baffling, "We obtained the single opening for the Michigan children’s waiver for the whole state! So Issy has funds for staff at home. Her very own human for nearly all of her waking hours! Can. You. Imagine?! I found a staffing agency that has been following Issy’s story, wants to help her, and is thrilled to take the training". This seems like a victory, like a reason to feel hopeful, and not to take your life and the life of your own daughter. She goes on to tell of the problems they had with a school they were trying to send their daughter to, and how they struggle with their daughter and her violent outbursts. She talks about the "crazy" ideas her daughters' therapists give her like converting their garage so their daughter could live in it; independent, but watched over. Or perhaps to put her into foster care. These options were "crazy" to this mother! But murder/suicide? Oh, sure, that sounds good. There are countless (seriously, too many) stories of caregivers of people with autism who decide to take the life of a person who, in many cases, has no voice to fight for themselves. Anyway, I feel like I'm not making a point, and just rambling/venting more than anything.... All I want to say is that no-one deserves to have their life taken away from them-especially by their parent! Comments on the website for Autism Speaks, an advocacy agency, compared the mother to Hitler, who wanted to purge society of disability. Others said she should be tried on hate crimes charges for targeting someone with autism. “If you had autism, how’d you like your mother to decide that you shouldn’t live anymore?” one commenter wrote. It's a good point. If that Mother had a face to face conversation with her daughter, do you think her daughter would have agreed to her plan? Again....I'm not sure what I'm getting at. My heart breaks thinking about the children who have been killed because they were "too difficult" to care for. I am broken at the way media portrays these children as the cause for their own murders, and for their care givers being shown as victims of their own children. Don't buy the stories. If someone is being hurt, the person hurting them is NOT the victim, no matter what their story may be. If you meet someone who is raising/caring for someone with autism, don't go to, "ohhhh.....it must be so difficult", but don't do the "well, my kid does that too!" either. See each individual with autism as individuals! There are good and bad days, high and low functioning people, joys and sorrows. But, above all, each person with autism is a person, who has the right to live, just as you and I do. As many of you may know, I don't usually buy or like chicken breasts. It is healthier, but gosh, it's far too expensive, and usually turns out dry. Looking at those 2 major features of chicken breast, I say why the heck would anyone buy it?!? Anyway, we decided to go with a grocery company this year, and we basically order all our food (mostly meats!), and it gets delivered to us all at once, and we use it over (about) 10 months. Anyway, all that to say we did buy chicken breasts in among the meat we choose, so I've been finding ways to use it that I think are delicious! And what says "healthy chicken" like coating and frying it! I am joking. This crispy chicken is a bit healthier though, and my whole fam loves it. It does not end up dry (it's virtually impossible!), and even the leftovers are tasty. 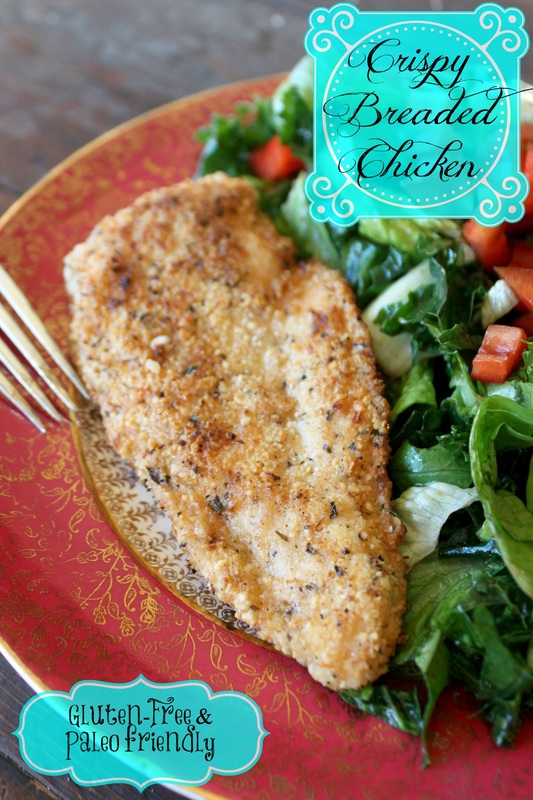
Crispy Breaded Chicken Ingredients:
Method:
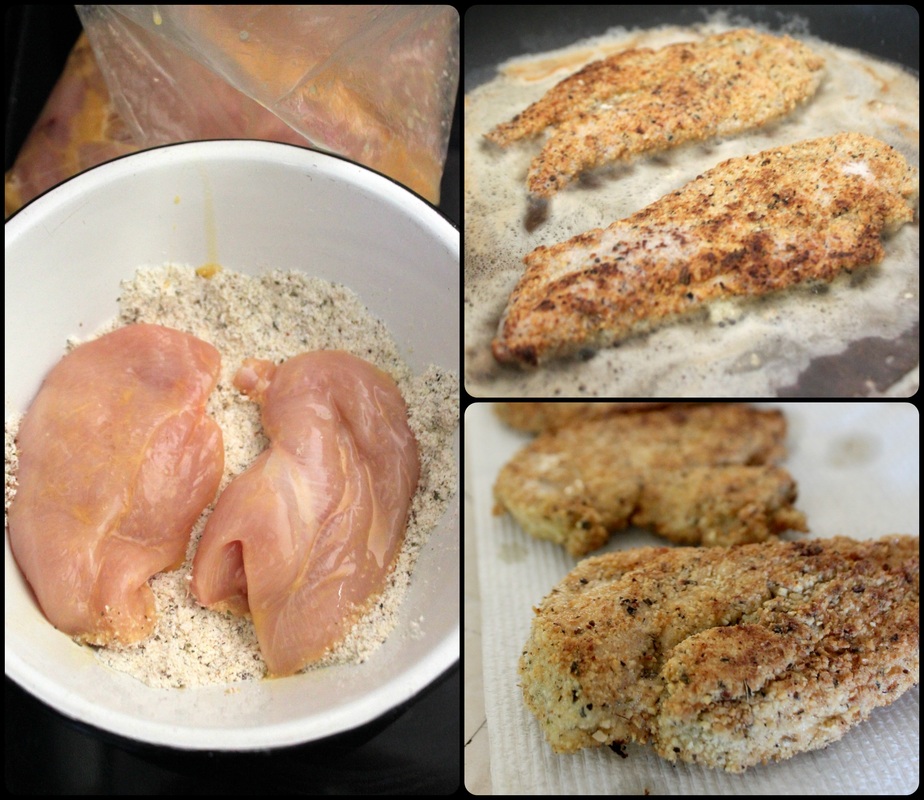
Coating, frying and ready to go!
I send leftovers in a wrap (as a chicken caesar) for my husbands lunch the day after eating these and he always enjoys it. I, usually because I am lazy, will just grab a piece of this out of the fridge cold and eat it strait up the next day. I have also chopped it up into a salad of sorts with chopped celery, cucumber, peppers, tomatoes, and some oil and vinegar. Yummy! 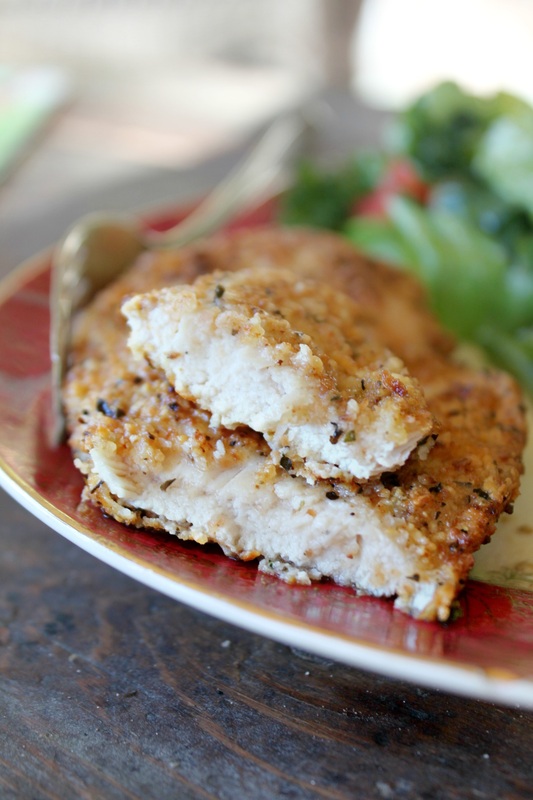
And that, as they say, is all she wrote! I hope this Wednesday has you feeling good and not feeling like, "uuhhhhh.....it's only Wednesday!?!?!". Thumbs down to that. Go for a nice walk today, or make yourself some hot chocolate, or read a book for a few minutes. Do something to make this Wednesday a good one!
See ya later! |
Hi, I'm Amy-Lyn! 
I am the lady behind this here blog! I live in the sticks with my animals, my super handsome husband, and my
3 amazing kids! Here you'll find things from recipes (gluten-free, paleo, and strait up junk food!), DIY ideas, thoughts on raising a son with autism, and whatever else pops into my brain! : ) Read more about me by clicking here! Want to Stay Connected?
Find What
|
 RSS Feed


