|
Another pile of recipes? Uh huh! With valentines day approaching, I wanted to share some lovely treats with you! This roundup of goodies are all gluten-free, and all the recipes I choose to share have 5 or less ingredients, and most are no-bake, so, we're talking super awesome, quick and easy! The collection features some kid friendly treats (though I would love them too!), as well as some "grown-up" treats (though my kids like them too) : ) Basically....everyone will like them!!! Enjoy! Rice Krispie Treat Hearts How darling are these? Find them at Intimate Weddings 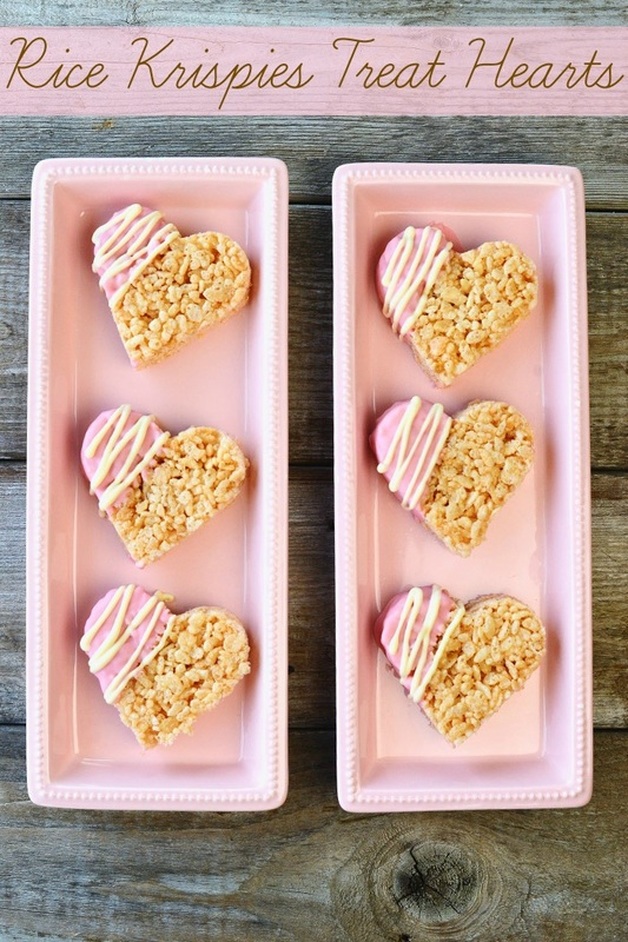 Heart Macaroons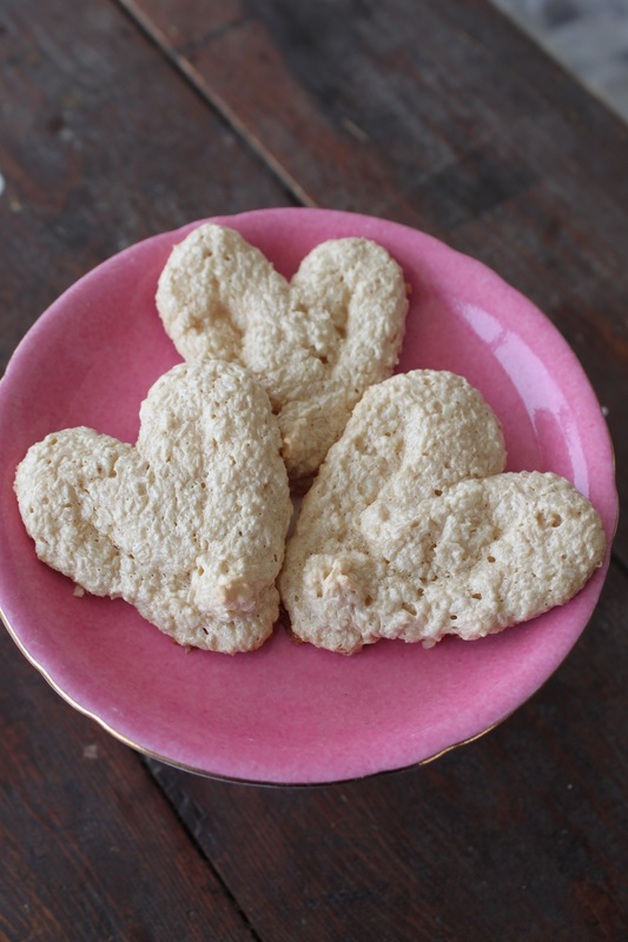 Rice Krispie TreatsThese treats come in 2 varieties: regular with a white chocolate top, and a mars bar, coco pop (or chocolate rice krispie) version! Yum! Find these treats at Mandy Mortimer 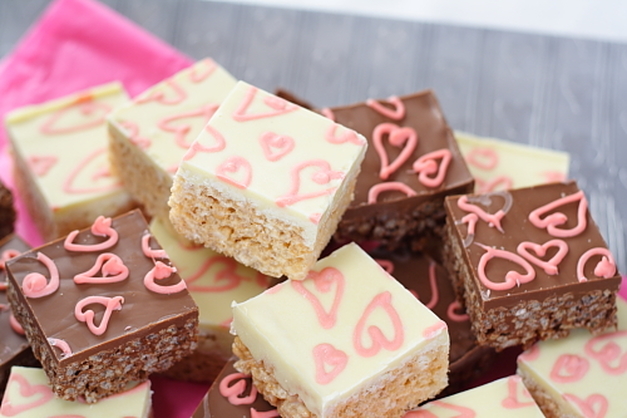 Skittles marshmallow PopsI mean. what?!?! Pulverized Skittles coat these mallows for a crazy amazing treat! Dine & Dish will show you how it's done! 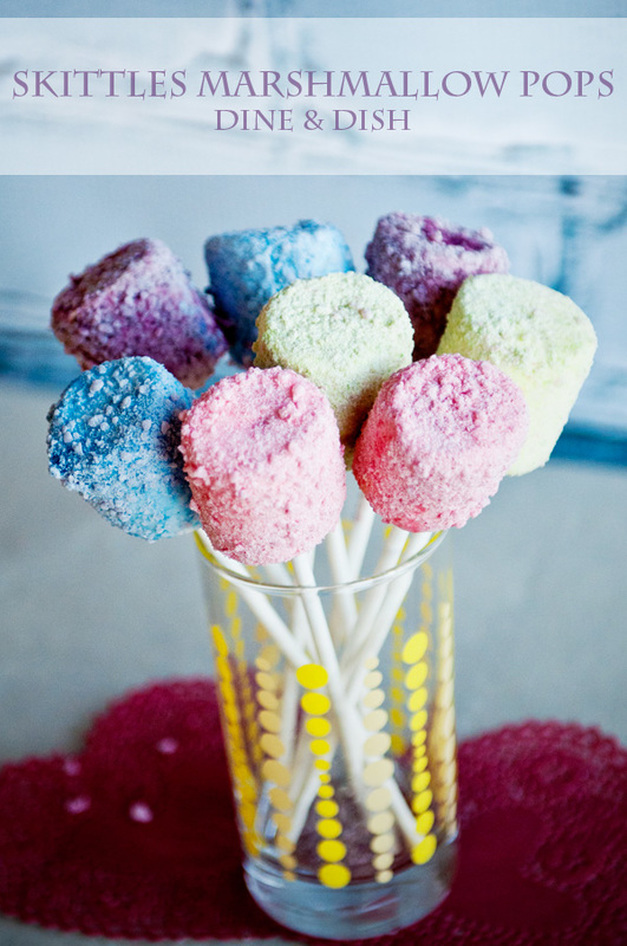 Dark Chocolate Truffles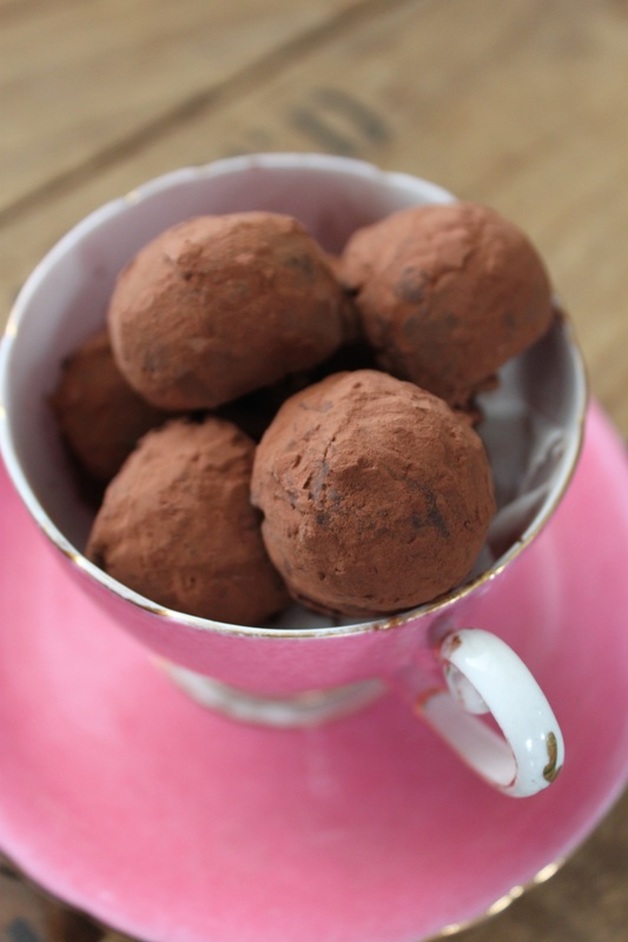 Flourless Chocolate CakeIt only takes 3 ingredients to get this rich and fudgy cake ready! It's primal too! You'll find the recipe at Gimme Some Oven 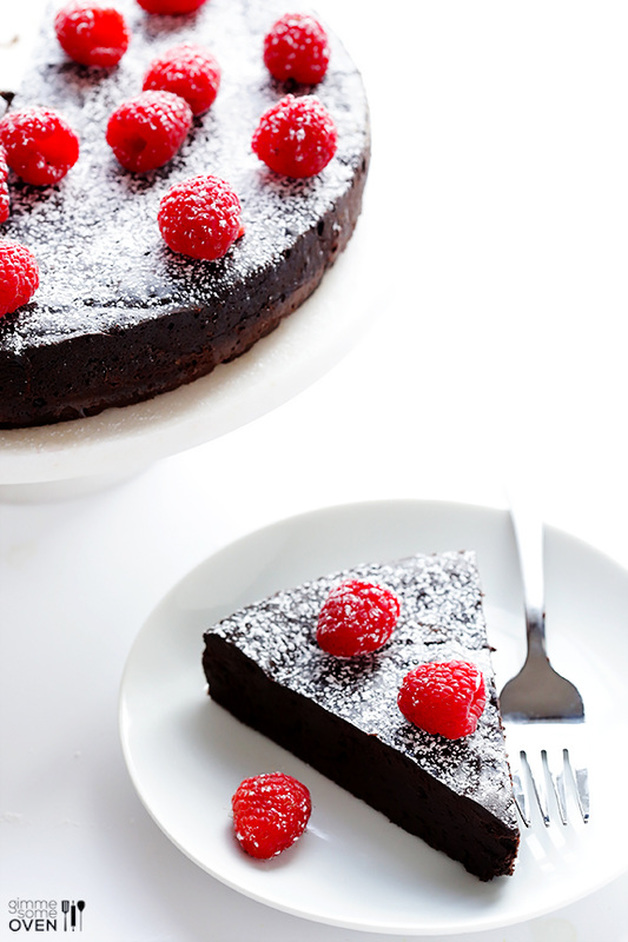 That's all I have for you today!!! I am not really a "I need a gift!" for valentines kind of gal, but I will take any excuse for a box of chocolates! So, I've told my husband many times that I am the dream wife for valentines day; get me the most cliche gift, a box of chocolates, and I am really happy! Well, as long as I don't have to share with anyone, that is! : ) Happy weekend to you all, happy valentines (or gal-entines day to the single ladies), and I hope you come back to see me here again soon!
0 Comments
S'mores in February? Is that even a question?!? If you love s'more the way I love s'mores, then any occasion is a s'more occasion! : ) Needing a campfire for a s'more is for amateurs....haha, I take s'moring (the art of making s'mores) very seriously!! I made up that verb "s'moring", but I like it! Wow, anywhoooo......with Valentine's Day approaching, people start thinking about special treats they can make for special people in their lives. I'm not just talking about people in a romantic relationship, either. I'm talking about people who want to show love to anyone they love (or appreciate)! I'm talking about neighbours, co-workers, parents, children, friends--anyone you think could use a sweet little treat to say "you are valued, and I love (or appreciate) you!". Years ago, when we lived in Bancroft, we were invited to a New Years Eve party by a good friend who, at the time, ran a catering business with a friend of hers. That night, they made the most ridiculously yummy and simple dessert--they took store-bought two-bite brownies, smooshed half of a large marshmallow on top of each, stuck 'em under the broiler for a quick melt and roasted top, then drizzled dulce de leche over them. I mean, c'mon! Doesn't that sound amazing! I couldn't get over how yummy they tasted, and how simple they were to whip up! I've been making variations of this dessert now for years, always starting with a store-bought two-bite brownie, and a half marshmallow, then drizzling with melted peanut butter, cookie butter, Nutella, butterscotch, or a dollop of raspberry jam It's easy to make this gluten-free too, as you can now find gluten-free two-bite brownies and graham crackers in most grocery stores. The version I am sharing with you today is a favourite version though. A lovely two-bite brownie, topped with a perfectly roasted mallow, then a piece of graham cracker shoved into it?!? Oh yeah..... 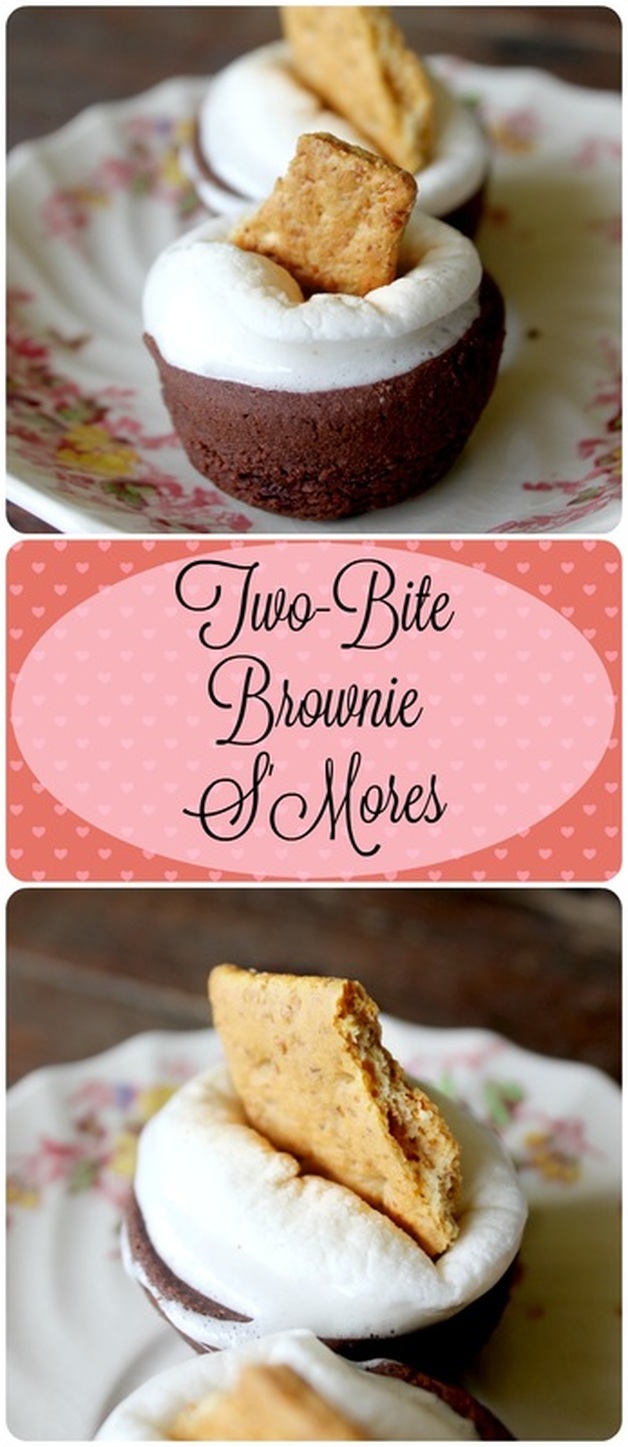 Two-Bite Brownie S'mores Ingredients:
Method:
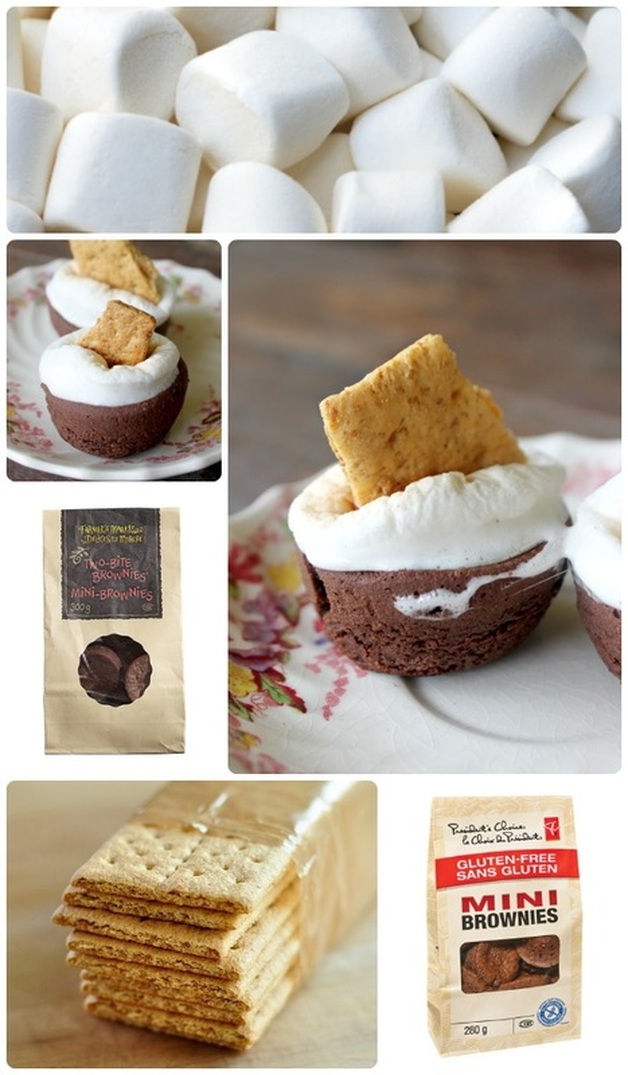 These little treats are the ultimate in lazy-lady desserts!!! Right?!? Bonus (for me) is that I most often get the bag of two-bite brownies for 50% off! Don't know why, but there always seems to be a few bags marked down, so I like to grab one, and put it into a zippered plastic bag and toss it into the freezer until I want to use them. If you do this, just be sure to pull them out of the freezer and let them thaw before you start. **Side note.....because I think gluten-free graham crackers taste like cardboard dipped in sawdust (ok, not exactly, but they are basically the nastiest gluten-free food item ever! P.S., the brand I tried was Kinnikinnick. I'm not trying to bash them, but I want to spare anyone the grief of wasting their money on those graham crackers), I will sometimes cut a gluten-free cookie in half (my sons' favourite are the chocolate vanilla cream kind from Glutino), and I'll shove that into the brownie and mallow. Still really yummy and pretty, but of course that wouldn't make it a s'more anymore though! But hey, if you have found a brand of gluten-free graham crackers that don't taste awful, go with those! And if you want to share your finding with me, please do! Pretty, pretty please! So......I've been trying to wake up early again, like I used to in the "old days" : ) These "old days" are really just a year ago or so, but I sure had gotten used to sleeping until I needed to get my kids up for school around 7:45....then my husband pointed something out to me. He said I always seemed a little less frustrated with my day when I woke up early and got my blog post published. What happens when I wake up with my kids is that I sit down to publish my post after they get on the bus at 9am, and if my post isn't totally ready, I could be sitting at the computer until 10:00....10:30......11:00.......it can take hours and hours to get one single post ready!!! By the time I'd send my thoughts and recipes into the world wide web, I'd feel like my day was half gone--which it basically was!!! So, with time stolen from my day, I felt like everything else I was doing should have already been done, and I was behind in my list of to-do's. So, by evening, I would feel defeated, like I hadn't gotten as much done with my day as I wanted, like I had un-finished business with my day. Bleh. All because I was lazy and wanted to sleep in (.......I love sleep.....).
So, I've started doing something different. I realized that I used to get up early without a problem because I was bursting with ideas for blog posts! I used to publish a post every day! Geepers! I still have ideas, but that purpose that got me out of bed in the morning had faded a smidge....and I needs me a reason to get out of bed early! So, I stopped making my husbands lunch at night, and decided to leave it to the morning. To clarify for any feminists who are having a conniption, I enjoy packing my husbands lunch! I am the meal planner, the budget maker, the "make sure you eat your vegetables!" person in our house....I may also have a slight control issue, and all those things combined mean I want to (need to!) know what's going into my husbands lunch! Saving this job until the morning (and me wanting/needing to do it) means I need to wake up early....like, 5:30 early. This gives me time to make my love some lunch, (and some coffee!) before he heads out the door at 6am, and then I get 2 full hours to work away at my little passion of writing and blogging in my little (tiny!) corner of the internet! This also gives me time to have at least 2 cups of coffee before my kids get up which really seems to make them more lovely somehow..... :) This morning though, I got a better reward....I let our dog out for a wee, and stopped to look into the sky. At 6am at this time of year, the stars and the moon are still out. And I couldn't believe how brilliant and beautiful the sky was!!! I felt overwhelmed by how amazing it looked, and thought, "if I were still asleep, I would have missed this!". I felt so blessed, somehow. I live out in the sticks with no lights from any city to cloud the view of the moon and stars. I felt empowered that I had started my day before my town had even started it's day with the sun. I beat the sun to this day! That's an accomplishment!!! So, maybe you're really not into getting up early......that's ok! The point of my story wasn't to tell you that you should wake up early because I do! The point was really this....what is it that makes you put your head down on your pillow at night and think, "this day was good"? My (wonderful) husband saw that I was more miserable than I should be. He saw that I was getting a lot done in a day, but somehow still feeling crappy about my day when I went to bed in the evening. I hope you have a spouse, or mate, or best friend or sibling or somebody who knows you who can say, "Are you feeling you best? Maybe you should (fill-in-the-blank)? Or, I hope you can step back from yourself and say, "what used to make me feel like I'd accomplished something?". I don't know what that might be for you, but I encourage you to find that thing (uh....within reason....don't do anything illegal or that damages the people around you!). Life isn't about making yourself happy (eeek! I know, I know! How contrary to what we're always being told!!!), life is about purpose. But, get this, well placed purpose will leave you feeling happy. What a trick, eh! I was trying to make myself happy by sleeping in....which left me feeling miserable! But having purpose & waking up, packing a lunch, and sitting down to write before the sun has even thought about coming up? That makes me happy! Well, I've shared/rambled now for too long....and it's probable no one will even read this far....but that's ok! : ) I write for you out there, but I also write for me. This is an online diary of sorts. You get recipes, DIY ideas, parenting tips, or whatever, but you also get my inner thoughts, what my heart lets out when it's going to burst. If you have read this far, thank-you! I honestly appreciate everyone who stops by Bushel & A Peck. I don't know many of you at all, but I like to think we are connected by way of this site. So, if you want to, leave a comment. Let me know you stopped by! Share with me what gives you purpose! Oh, and don't forget to share with me a brand of g.f. graham crackers that aren't terrible too! :) xoxo So, I happened upon a photo of what looked like a delicious pie called a "chess pie". I looked at the recipe and thought it seemed interesting, so then I do what most people do and Googled "what is a chess pie"....or is it only homeschoolers who want to know everything about everything? N-E-Who..... The all knowing Wikipedia told me that chess pie originated in England (think of all the custard pies they make!), but is known as a Southern U.S. pie. The chess pie is a little different than a regular custard pie though in that it also includes cornmeal. Not sure why exactly, but that seems to be the ticket to make a chess pie a true chess pie! Vinegar seems to be a thing that isn't as standard, but it seemed interesting to have it in a pie, so I wanted mine to include it. And the filling of a true (cornmeal) chess pie is naturally gluten-free, which seemed like a good starting point to making the whole thing gluten-free! I have a lovely gluten-free pie crust that I make, and making the pie filling was simply a matter of taking a few recipes and smooshing them together so that it suited me! And I had seen regular chess pies, and chocolate chess pies, so of course I wanted a chocolate pie, duh. : ) 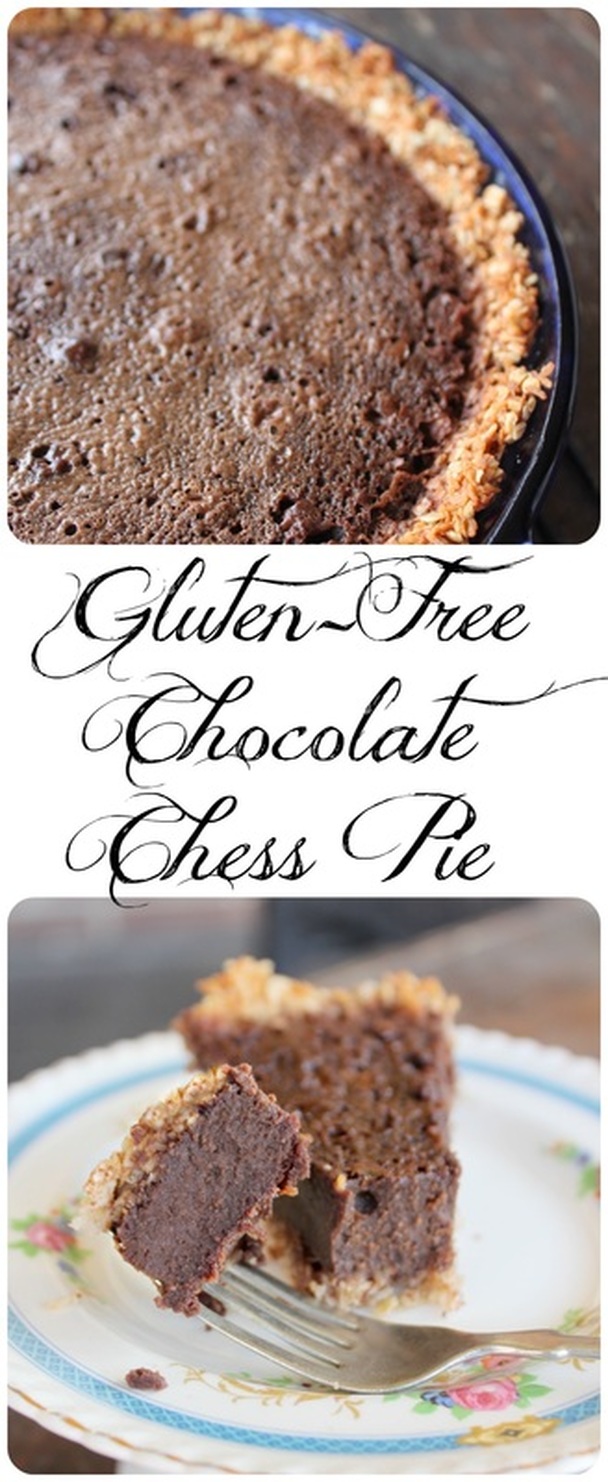 Gluten-Free Chocolate Chess Pie Ingredients: For the pie crust
For the pie filling:
Method:
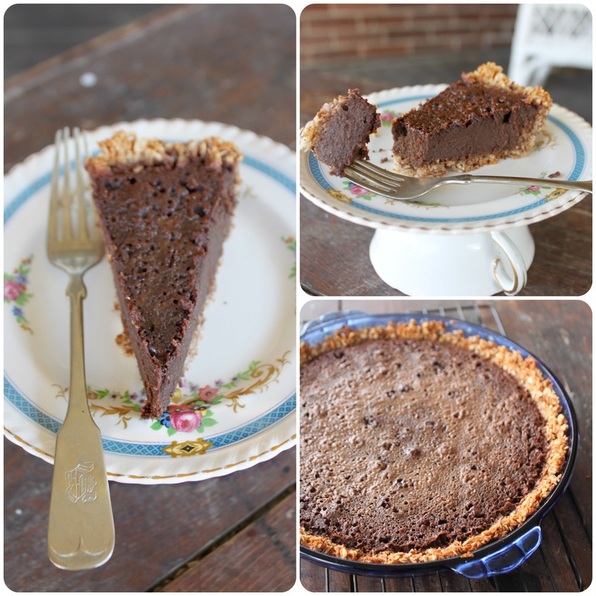 My gluten-free Caleb ate 2 pieces of pie for dessert, then at bedtime asked for another piece (I said no), and when he saw it at breakfast he asked for it again (...I said no again...)! So, it's safe to say he liked this pie! I made it for guests one evening and they all liked it too (none of them are gluten-free eaters regularly). So, it is a well-received gluten-free pie! The way this pie turns out is like a custard, but without so much jiggle. That doesn't make as much sense as I had hoped it would....but, I'm sticking with that description! You can see that it has a dense, moist, fudgy consistency, and the gluten-free crust has just a subtle taste to it that goes splendidly with the chocolate-y filling. You could also make this pie in a gluten-free pastry crust, or if you're not gluten-free you could make it in a regular pastry crust! Oh, and the name "chess pie" is still a mystery! There are a few ideas as to where this pie found it's name, but no-one seems to know for sure, so I shan't be able to help you there! I feel like it bothers me more than it would others that I can't find a reason for the name though...? Yes? I know there's got to be people out there like me who want to know the "why" behind meaningless things like the origin of a pie name!!! Ok, well, this weekend is the callbacks for The Music Man (The Belleville Theatre Guilds spring 2016 production), and I am looking forward to it! I'm not trying out for the show this year, I'm just the choreographer! Haha, "just"! It's hard work doing choreography! Anywho, I love callbacks because you get to see everyone together that you've narrowed down from multiple auditions and there's singing and dancing and script reading, and everyone is so nervous that it's just so exciting! Have a great weekend whoever you are, wherever you are, whatever you're doing (....I feel like I'm about to start singing a Backstreet Boys song.....yes? Anyone...?) K, g'bye! Hello hello!!! Today I've got a lovely and simple recipe for you! I first made it for my middle daughter's birthday, because her theme was "teal" (yes, just the colour teal!), and I wanted to have something besides just the cake for her and her friends. I was also aware of the fact that the cake I had made was not gluten-free, and therefore my Caleb couldn't have any. Mind you. he's 11 years old and "technically" wouldn't have been invited to the party if it weren't for the fact that he is the birthday girls' brother! But, he's 11 with autism, so, that does change things. And besides, I want to let him have a special treat at a birthday too! So, as per what often happens to me, I thought I had a brilliant idea.....only to Google it and realize someone else had already done it! I think that still counts as my idea though because I thought it up not knowing it had already been done! : ) ' Ok, well, at one of the grocery stores I go to, they had Duncan Hines flavour packs on clearance for $0.10! Woot woot! I love when things are on clearance! I grabbed a bunch, not having an exact plan for them, but knowing I would be using them (they are great to add to homemade buttercream icing, btw!) Anywhoooo, these tasty little bites of sweetness are delightful, pretty simple to make, and BONUS, last for quite a while in an airtight container! After my initial batch for the birthday I made a double batch (using the less pretty colour, but delicious flavour of caramel), and crushed some to put with buttercream into the middle layer of a chocolate cake I had made. Yummm-o x 10000! Anyway, I had too many and just had the extras in an airtight container for, oh, I dunno, a month, with the kids and I just having one here and there. They tasted just as nice at the end as they did in the beginning, so, that's just a little FYI. So, let's get on with it, shall we!?! 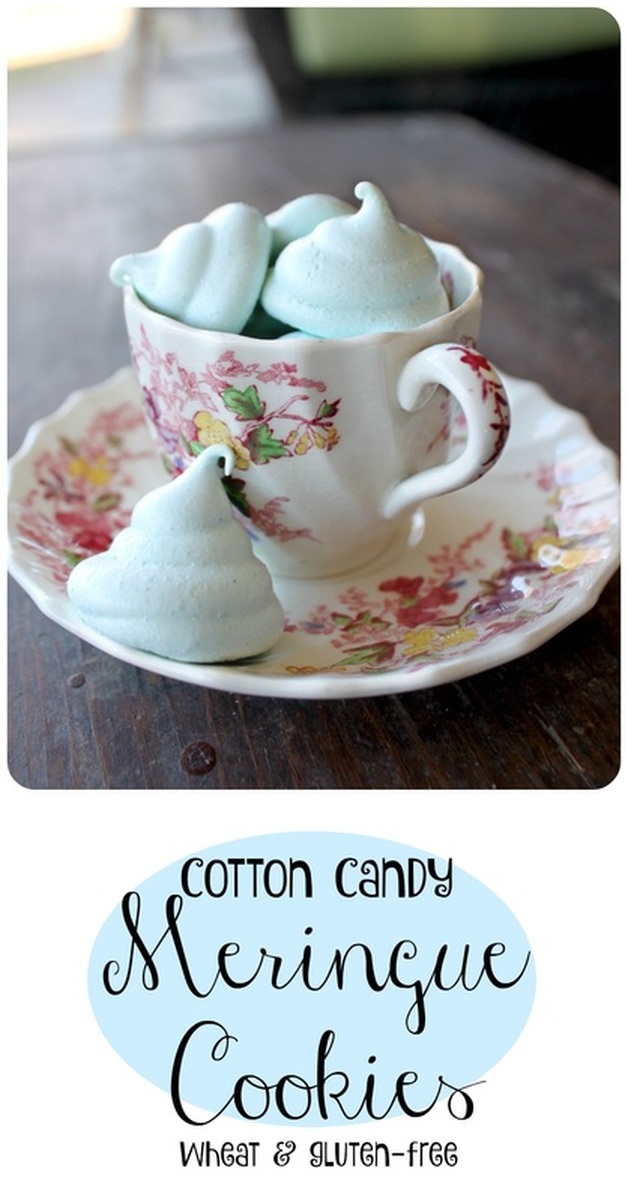 Meringue Cookies From Duncan Hines Ingredients:
Method:
 I loooves me some good clearance! 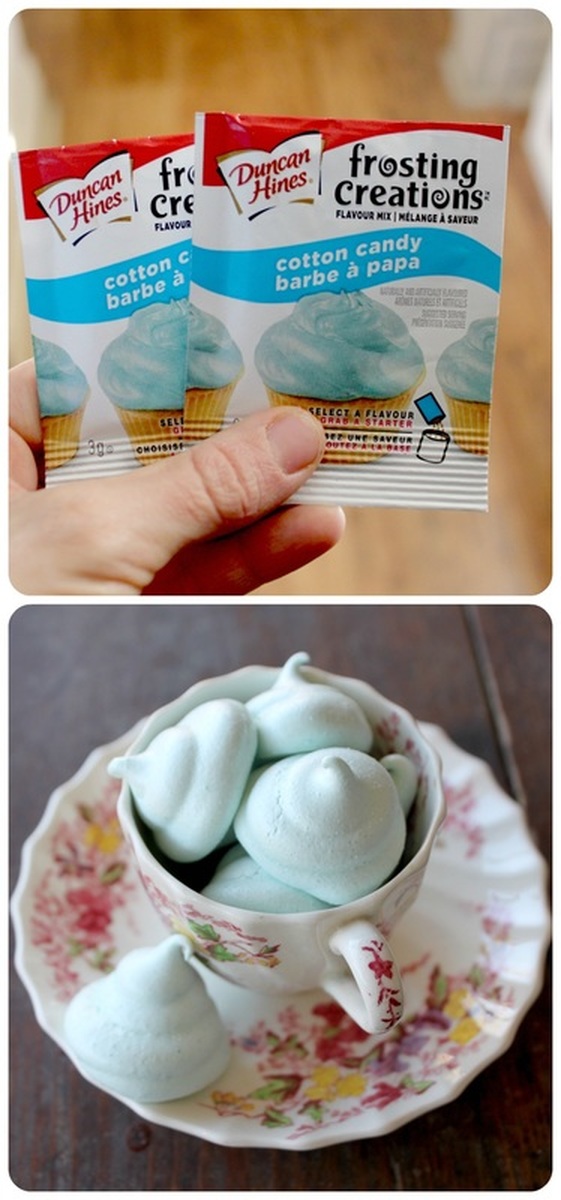 So, what do you think? Cute, right?! And although this recipe involves beating egg whites, slowly adding sugar, piping and a long bake time, everything is simple, right? Does that make sense? Maybe it's not simple and I'm delusional? Please do let me know if I am delusional and you think this recipe is the worst! Be nice about it though. : ) Wanna see Abby's enormous teal cake I made for this birthday?  It was a triple layer cake with a simple (though moderately time consuming) swirly/flowery buttercream frosting. Abby said it looked like a hat......and I was inclined to agree. : ) It was clearly not a thing worth sharing about in a post (poor hat cake), well, unless I was sharing about not-so-great piping skills! Seriously, I'm not that great at piping. But it was delicious, and that's important! Well, today we have another birthday party, only for our youngest! She couldn't decide on a theme (she literally changed her mind everyday!!!), so we finally landed on cupcakes as a theme! The common thread in all her birthday ideas was decorating food (it made sense since coming off Christmas where they were decorating gingerbread houses & gingerbread people, and gingerbread trees, yadda yadda). So, her friends are decorating their own cupcakes! I'll make one special one for her to have a candle on to blow out, but other than that, I haven't anything else to fuss over! I love making and decorating cakes, but I am also more than happy to not to! : ) So, I've got decorations to put up while the kids are at school, veggie tray to put together, cupcakes to pull out of the freezer, buttercream to make, and a ridiculous amount of candy to have ready for cupcake decorating! Seriously, I bought waaaay too much candy! Wait, is "way too much candy" even a real thing? Silly me. Happy weekend to all! I have been sorely lacking in anything Christmas oriented on the blog this season!!! Thumbs down! I have a pile of recipes I've been working on that are not geared towards the holidays at all, I've been busy with art shows & working on paintings, and have just been busy with regular life, so anything that could be even remotely helpful for this busy season just hasn't happened! So, I did have a different post ready for today, but yesterday as I was looking up my own recipes and baking my butt off, it occurred to me....why reinvent the wheel! Some of my favourite, go-to Christmas recipes I posted my first year blogging! So, today I am going to share with you the recipes from Bushel & A Peck that I've been making the last few days! A lot of the recipes from here are gluten-free, but can be easily made gluten-full if you have no dietary restrictions. 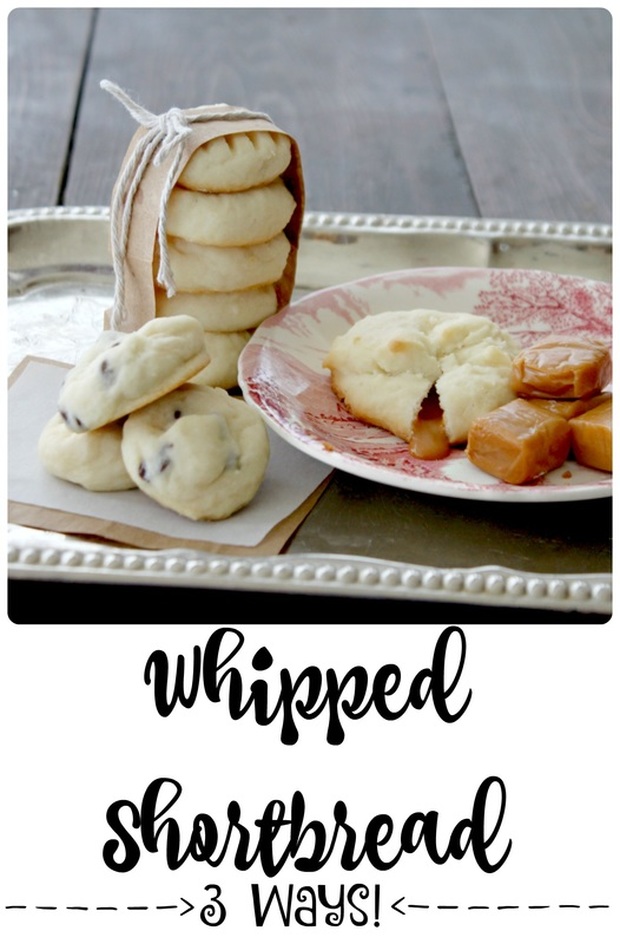 So, first up, a fantastically buttery whipped shortbread that only have 5 ingredients, and is very customizable! Add chocolate chips, caramel chips, butterscotch or white chocolate chips! How about an entire caramel, or whipping in some finely ground tea, like in my Earl Grey Whipped Shortbread! Yummmyx100000! Making and eating these plain is amazing too, so if you're looking for a strait-up easy, freezable, and crowd-pleasing cookie-this is the bees knees!  My buttery cut-out sugar cookies use basic ingredients, and turn out with a nice crisp outside, but with a soft, buttery inside. They can seem like a labour of love because you do need to chill these before cutting into shapes, and the cutting into shapes can seem overwhelming, but it's really simple work that makes a big impression! Iced cut-out sugar cookies are quintessentially Christmas, and I know I personally always look forward to them! This year I used a different icing for my cookies, and it worked wonderfully! My usual icing (pictured above) is tasty and simple, but I needed the icing to dry a little harder so that they could be easily stacked into airtight containers, and this icing did the trick! The recipe is from Sally's Baking Addiction, and you can find the recipe in the post with her cut-out cookies. Easy Icing:
Method:
Sally Says, "If it is much too thick, add 1/2 Tablespoon more water. If it is much too thin, add 2 more Tablespoons of confectioners' sugar. If you drizzle a little of the icing with the whisk, the ribbon of icing will hold for a few seconds before melting back into the icing. That is when you know it's the right consistency and is ready to use. If desired, add liquid or gel food coloring. You can pour some icing into different bowls if using multiple colors. If not decorating right away, cover the icing tightly and keep in the refrigerator for up to 2 days" 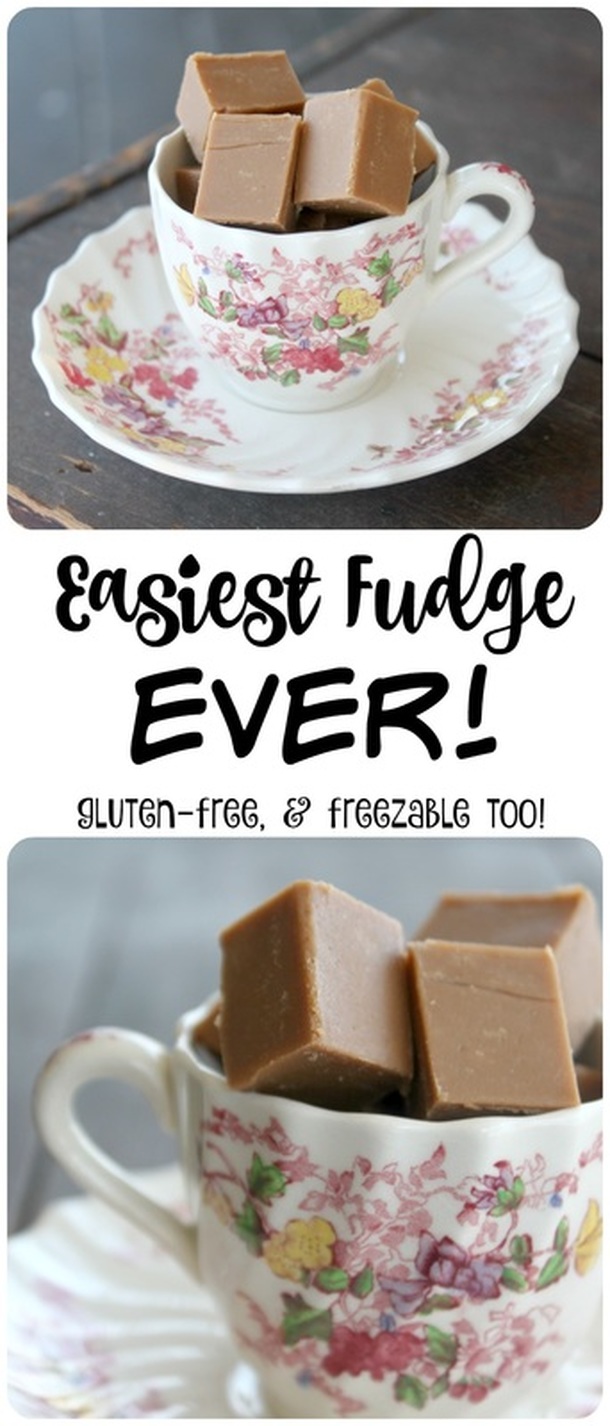 My fudge (The Easiest Fudge Ever!!!) is so simple, so quick to make, and freezes too, so, why not make a batch and stash it away in the freezer to have available to bring to a party, to serve to guests, or to add to a plate of Christmas treats you're giving away!.......or to snack on when you need a sugar fix! : )  Chocolate & peppermint are flavour favourites, yes? Ok, not to all people, but to those who like them together, these peppermint infused fudge-y brownies topped with crushed candy cane are a beautiful dessert to add to a plate or package of treats! Here's the recipe for Gluten-Free Candy Cane Brownies! 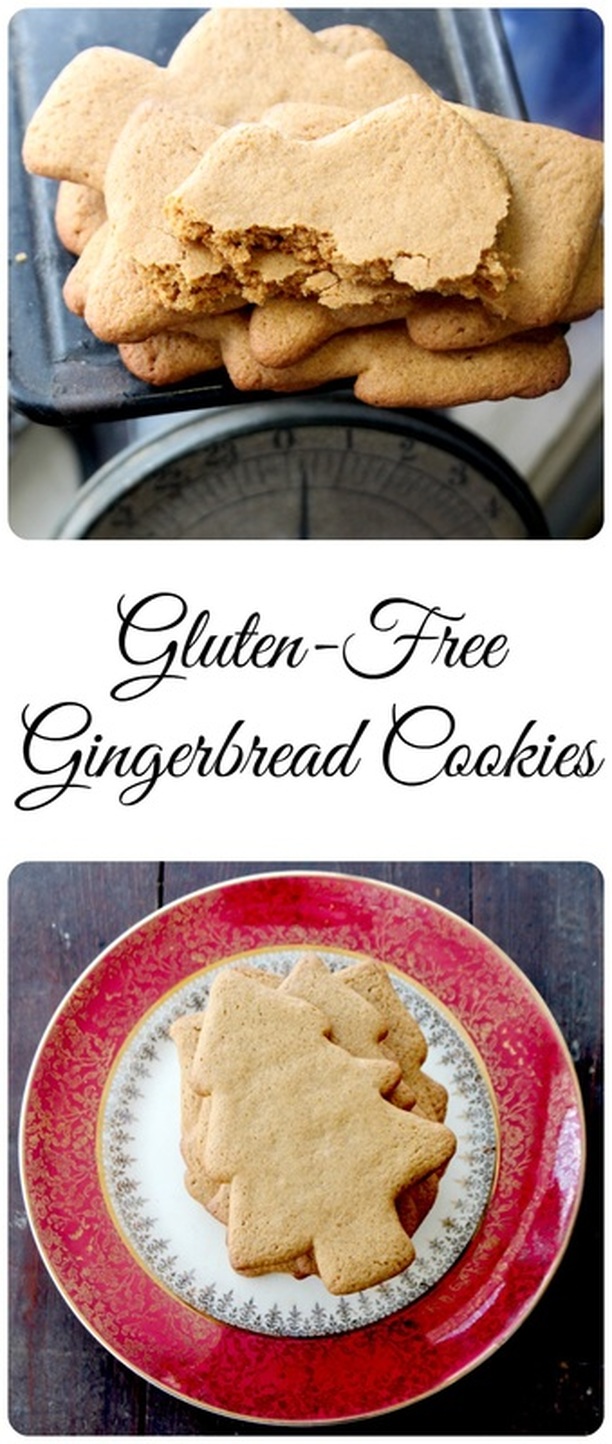 More gluten-free treats!?! Yes, sorry! Because my son can't eat wheat, I like to make sure I have a variety of sweets I can bring him so he can wonderful Christmas treats like everyone else! Also, can I say that brining a g.f. dessert to a function isn't a bad idea! There are so many people avoiding wheat & gluten, and why not make a few things that can be enjoyed by them! In my experience, it is always greatly appreciated! So, here are my Gluten-Free Gingerbread Cookies, they have a nice crisp outside, but a soft inside, and sturdy enough to decorate (my son's favourite part!) 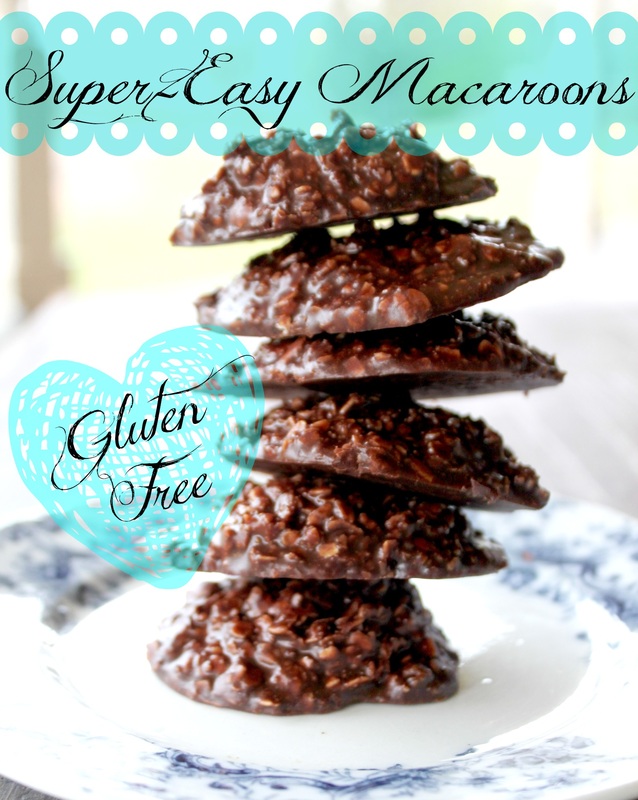 These simple, Peanut Butter Macaroons have been included in a few lists for Christmas cookies, including on the Roasted Roost (a list of 50 gluten-free Christmas cookies!!!), and on Only Taste Matters (with a list of 25 gluten-free Christmas Cookies!), and I shall add them here to my own list! I love that these require no baking (just a little stove-top time), use simple ingredients, & stay fresh in an airtight container for up to a week, so they can be made ahead of time (they can't be frozen though). Can we also for a minute just talk about that crazy stack of cookies pictured above!?! I'm not 100% sure how I managed to get them to stay like that, but I did! Haha! 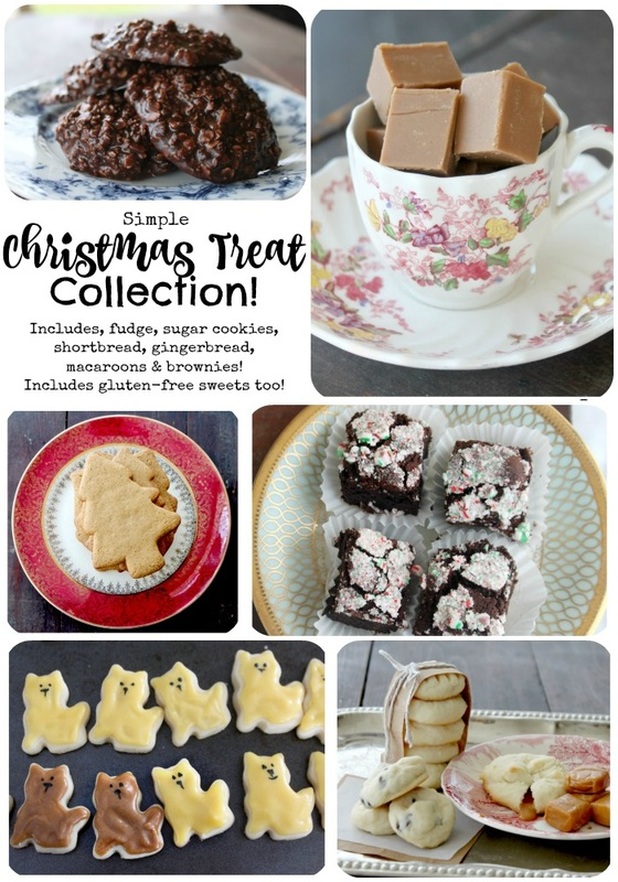 So, how's that for a list of Christmas treats! These are all tried and true recipes in my house, so I hope you'll find a few to make and add to your collection must-make holiday sweeties! I hope everyone has a good weekend! xo Hello! Ever seen the baked ham & cheese sandwiches before? I have been seeing them on the world-wide-web for a long, long time, but just never got around to making them! Well, now I've gone and made them, and there's no going back! So, hey, if you're going to a potluck and know the hosts, and know that you could use their oven once at the event....these make the best bring to a potluck food! All the recipes I found called for Worcestershire sauce, which I've never owned and wasn't about to purchase, as well as poppy seeds. I suppose I could have gotten those, but it didn't seem essential. Oh, and you're supposed to use "King's Hawaiian Rolls", which if you live outside of Canada, you should apparently be able to find. Here in Canada? No such thing as this King and his rolls from Hawaii! : ) Let's be real though, this crazy delicious hot baked sandwich recipe isn't exactly rocket science, and there is lots of leeway! For instance, you can use whatever thin sliced meat you'd like & whatever kind of cheese, though a strong, sharp, or spicy cheese is the best (in my opinion)! 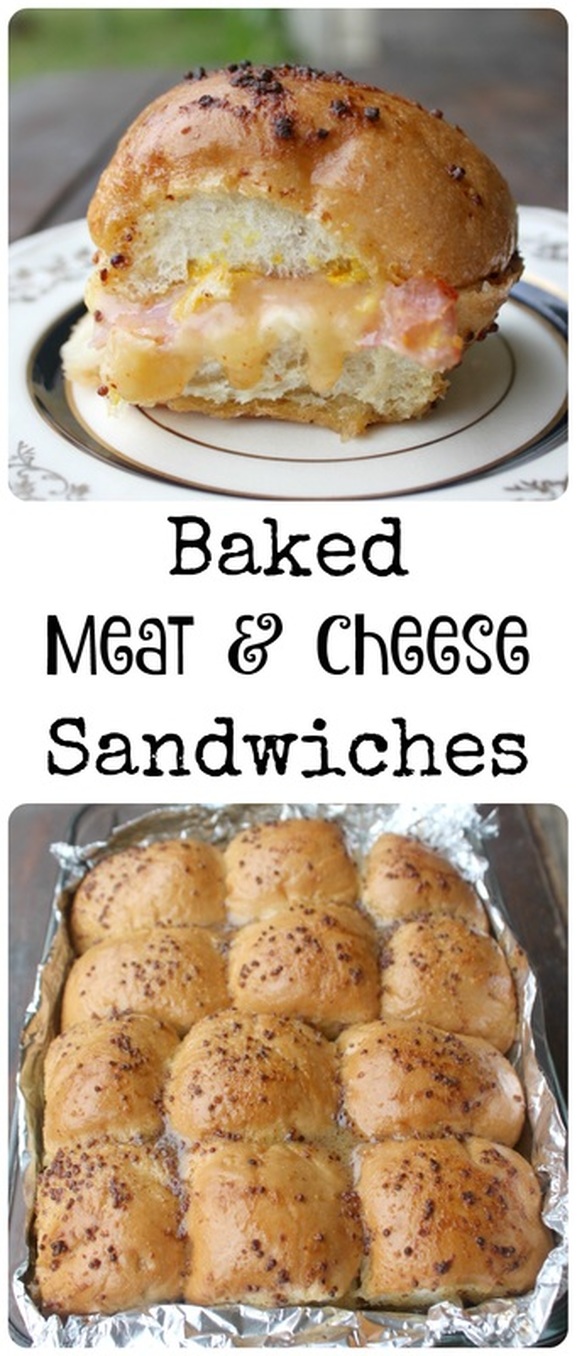 Baked Meat & Cheese Sandwiches Ingredients:
Method:
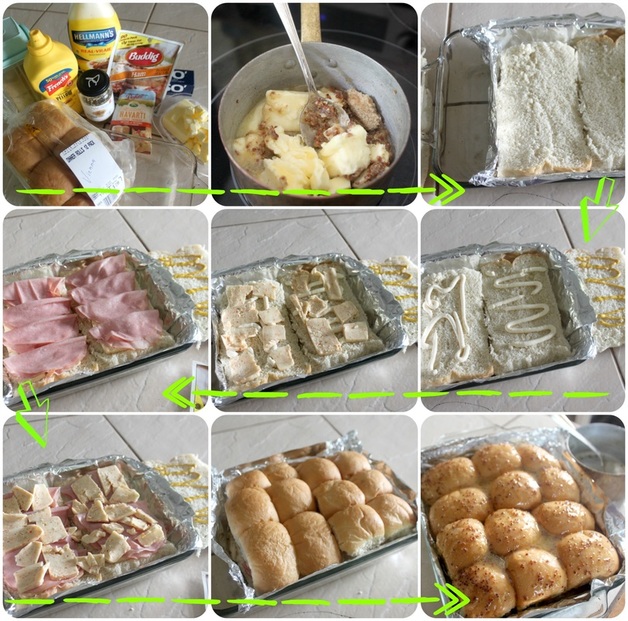 These sandwiches are really simple to put together, but the results are faaab-u-lous! Seriously, you end up with a warm & soft sandwich, but with perfect crunchy tops and edges, as well as the crazy delicious taste from the butter/mustard/sugar mixture......mmmmmmmm...... 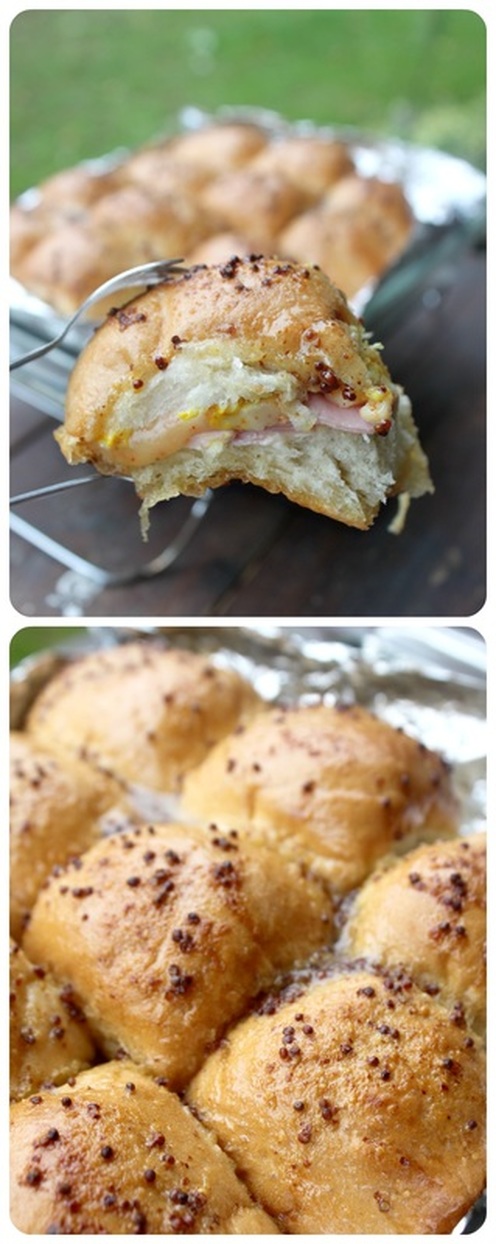 These fantastic sandwiches with a nice soup would be a perfectly delightful lunch with guests! Wouldn't you want to be invited to someones house with these?!? So, send this recipe to someone, and then super casual invite yourself over for a meal, then randomly mention how you soooo enjoy warm, baked sandwiches....and offer to bring the soup yourself : ) I'm signing off now, it's family movie night and we're watching the 1930's production of "Peter Pan" and putting a dent into the Halloween candy we got last weekend! Hazaa! Have a great weekend! xo A few weeks back 'twas my birthday and we had a little shin-dig for it! I had a friends daughter making me a cake (she's 10 years old and asked if she could make my cake for me! Such a sweet girl!) So, even though I had a cake coming, I still love baking and trying new things, so I knew I would be making some extra treats for the par-tah (like these s'more clusters!) and I suddenly had the urge to make lemon squares! I literally had no clue how they were made, so I Googled "easiest lemon bar recipe", and got a result from Rock Recipes for Super Easy Lemon Bars, and they weren't joking around! These amazingly delightful squares are so gosh-darned simple to make, and only require 5 ingredients! Ok, 6 including the icing sugar to dust on top, but still, 6 ingredients is pretty good! I hope you'll make these squares, and check out Rock Recipes (the author is a fellow Canadian!). It is a blog is full of amazing recipes!  Lemon Squares From Rock Recipes Ingredients: For the shortbread base:
For the layer of lemony goodness:
Method: Shortbread base
....while that is baking..... Lemon layer:
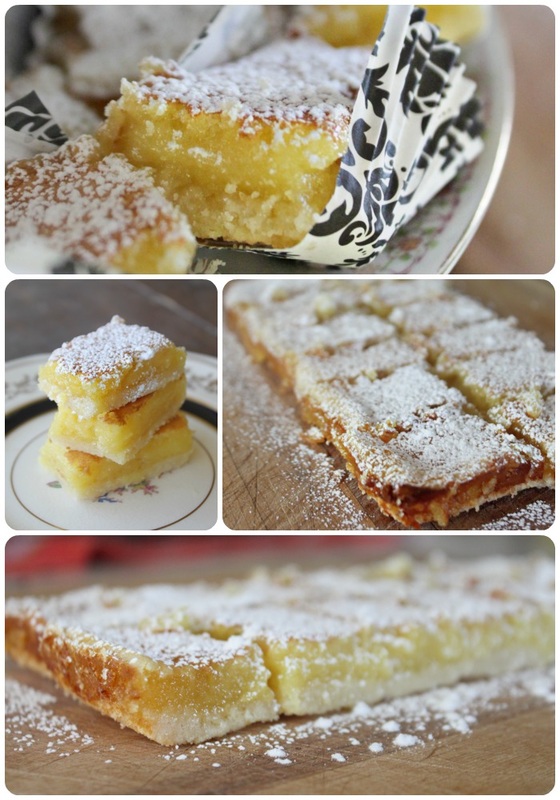 So easy, right? And seriously, unreal delicious! I brought the few remaining squares I had to an art show I was doing the day after my party, and one lady said that the squares were better then the (slightly expensive) ones she bought from a lovely bakery downtown. I told her, "I just Googled 'easiest lemon bar recipe', and this recipe came up!" She could hardly believe it! Ok, randomly, my fingers crack A LOT! All the time, no matter the season! I think it's because I wash my dishes in crazy hot water (kills more germs, and they dry really fast!).....but, all that to say....it makes typing really freakin' hard! :( Boo hoo for me! Seriously, I'm having to type with only the middle finger of my right hand, and the pointer and middle finger on my left hand. My number of words per minute typing is at an all time low!!! Woe is me! Ok, I'm done whining..... I hope everyone had a great week, and has some plans for the weekend! My husbands plans are to be on his weekend of night shifts, and for us to tiptoe around the house so as to not wake him! Whomp whomp! Our usual Saturday thing is to go to the dump (we gotta bring our own, no pick up for us in the sticks!), and go to the library. It's supposed to be ok weather tomorrow too, so we'll probably go for a little nature walk. Going for walks around our place in the fall is so nice. So very nice. Alright, I'm signing off! xo It's Thanksgiving weekend here in Canada! I love Thanksgiving! It welcomes in the wonderful fall weather our country offers us (I seriously love the fall weather here in this part of Ontario!), we get to enjoy The Rockton World's Fair, it gathers together family & friends, and we get to eat lots of amazing and delicious foods! Way back in the summertime, my sister and I stopped at a store called "Almost Perfect" (or Almost Frozen as my Mom once called it!). It is a store that sells frozen, refrigerated and grocery foods, some name brands some brands of their own, & super low prices. I"m not getting paid for this rant, I just love the place! Anywho, when we were there in the summer they had bags of caramel bits for sale for a crazy good price! So, my sister and I both snatched some up with ideas in mind. Somehow though, I never got around to using mine! Oh, I've gone through (at least!) 5 KG of chocolate chips, but I just kept forgetting/not knowing when to use these caramel bits. Until it was the fall....then all I was thinking about was apples and caramel...then fate...cake mixes were on sale for 0.97, and I saw for the first time ever, a Spiced Cake Mix! Seriously, I haven't see them until now! But my brain went "yes!", and I knew what was happening.... 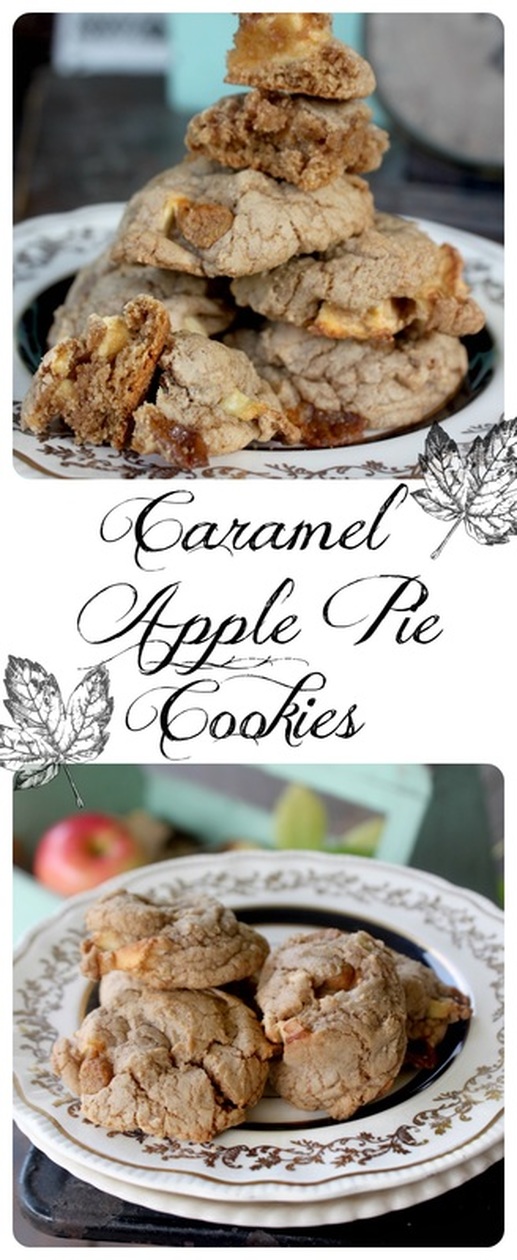 Caramel Apple Pie Cookies Ingredients:
Method:
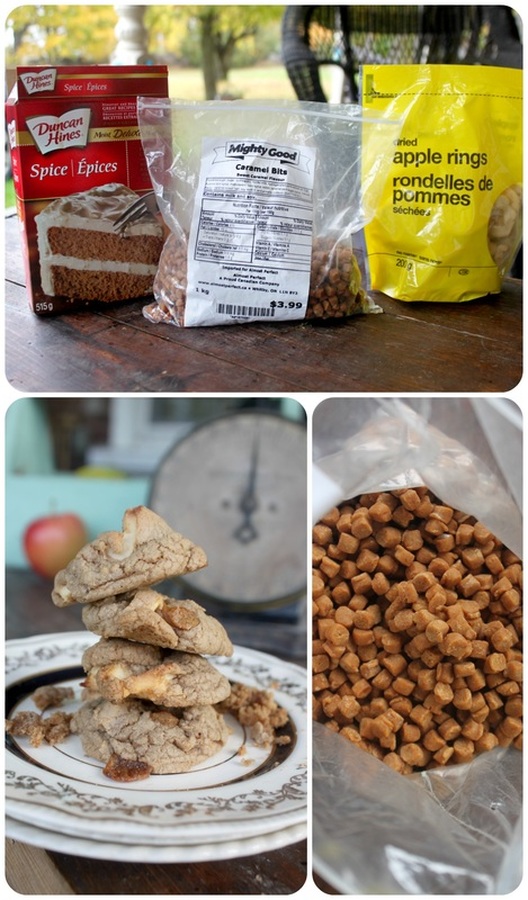 Let's talk dollars and cents here for a moment.....I love to bake, I love to bake the "real" way (without a cake mix!), but let's break this down:
Total for (approx.) 24 cookies $ 3.53 (give or take, plus electricity for running the oven) All that and you're completely finished in 20-30 minutes (depending on how many cookie sheets you use at once, etc.) But for realz......this is unbeatable. Well, if they were actually magically good for you, that would be unbeatable....but let's not talk about that right now.... : ) 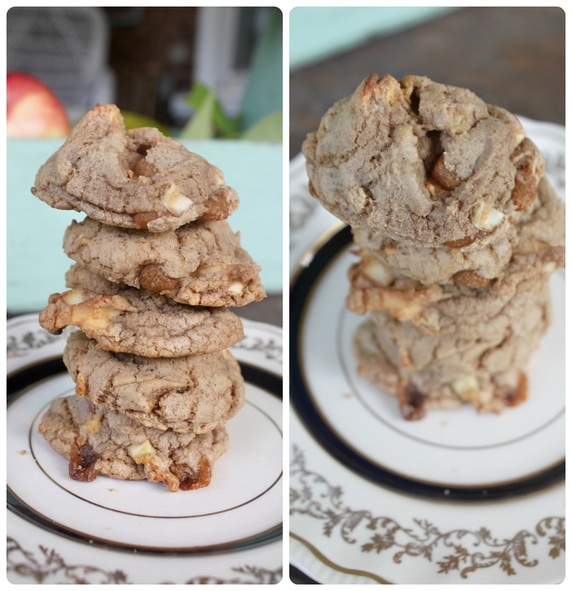 See why I love fall here?!? It's beautiful! 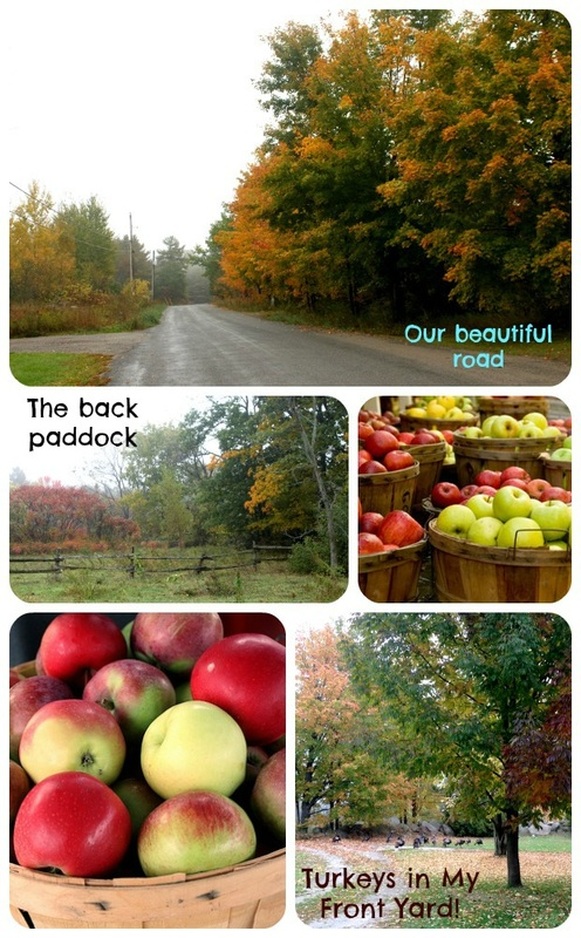 Alrighty, well, I hope all my fellow Canadians have a wonderful Thanksgiving, I hope you get to make some cookies, see some friends or family, or both, eat some wonderful food, and get to a fall fair if there is one near you! And remember to be thankful! xo Good golly, this week flew by! Anyway, time flying aside, this recipe was inspired from our time in Paris this summer. We only spent a few days there between being in Belgium and The Netherlands, but the food there was inspiring! Shops filled with beautiful chocolates, macarons, meringues, cheese, breads, pastries.....oh goodness.... Before leaving this past summer, I came across a recipe for S'mores Macarons on a blog called Liv For Cake. Somehow her down-to-earth-ness made the idea of making macrons a little easier! I was always pretty intimidated by macarons! They seemed so fussy and delicate and I'm like a big ogre sometimes when it comes to working in my kitchen (I broke a dish while drying it with a towel the other day!), and I felt like I just couldn't do macarons! Well, having this tiny possibility in my mind of being able to make them was a great way to enter Paris, France. I got to see macarons being made in a few shops, and actually seeing the process added to the smidge of confidence I had gained from Olivia (at Liv For Cake). I now felt that, ogre or not, I was going to try my hand at macarons! So, a macaron is not a macaroon. A macaron is a meringue (egg-white) based treat. It's actually (in it's truest form) gluten-free because it's made with almond meal. Then colour and flavour is added and ganache, buttercream or jam is sandwiched between 2 cookies. A macaroon is something else....I think. Ok, truth is, it's hard to find out the exact origins or reasons behind the 2 words and what they mean. Though, to keep it simple, 'round here, a macaroon is still an egg-white based dessert (just not meringue-d), it's just mixed with shredded coconut then baked. Cassey at Blogilates (get it? It's like Pilates and blog...? Anywho) has this little photo comparison for you to go "ohhhh, yes, I see now....." 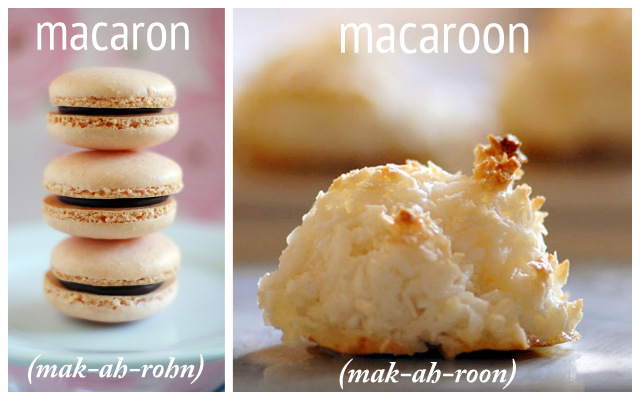 She's also got a healthy alternative to the snack, if ya wanna see it, look here. It's like a mash-up up a macaron and a macaroon, and it looks puuurdy tasty. :) Also, I have a (not healthy) no-bake macaroon here....it's chocolate and peanut butter too, actually.....  Look at those beautiful macarons! So, when I got down to it; to actually making macarons, I turned to Google! I didn't need to re-invent the wheel, and I knew someone else would have thought of what I was thinking: peanut butter and chocolate! For realz though......I never saw a single peanut butter and chocolate macaron in France....I think this flavour combo used in such a lovely French dessert is possibly an insult to the dessert....but only in France! On this side of the pond we like to mix it up! I found at Sally's Baking Addiction a recipe for Chocolate Peanut Butter Macarons, and got to work!  Chocolate & Peanut Butter Macarons Adapted recipe from Sally's Baking Addiction. Go to her recipe for the weight measurements for the cookies. Ingredients: Macaron Cookies
Peanut Butter Filling
Directions: Cookies:
Filling:
Voilà!!! That's French for "look at what I did!" (a very loose translation, to be sure) :) 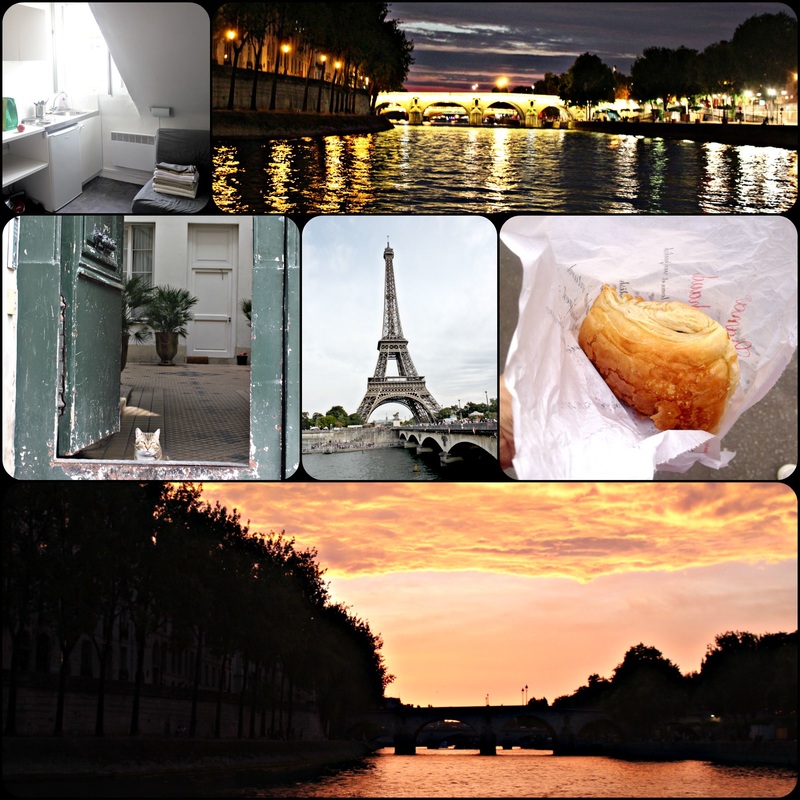 Top left is the little flat we stayed in while in Paris. Top right is the river Seine (reminds me of Van Gogh's "Starry Night") The middle row shows a cat that was sitting in an open door, the Eiffel Tower, and a super fresh, warm, chocolate filled croissant (yum!!!) The bottom is a sunset shot along the river Seine There are so many tips and tricks that people have for making the most amazing macaron! Me? My only real tip is to not be discouraged if they don't turn out perfect the first time you make them!!! There can be many things that effect your results. Baking sheet type, oven temperature, humidity on the day you make them, almond flour being not fine enough, yadda yadda, yadda there is a list a mile long with why a macaron might work or not-but just do your best! Follow directions, look at a bunch of different recipes, see what other are saying, and go for it! You can see in my photos that mine are not perfect looking, but they tasted amazing (x1000), had a nice crisp outside, a soft chocolatey inside, and I wasn't trying to win any macaron contest, so who cares if they would be approved by the French themselves!?! Not me! :) Just enjoy the process, and see what you can do! Oh, and if you have kids, they'll eat them (pretty much) no matter what!  Let's take a break to talk about some of the photos my husband took of me while we were in France.....the "nicest" one above (bottom left) is so cheesy, and was preceded by the photo on the bottom right where Adam was saying something like, "can't you just make a normal face and smile?", and that's what he got. I am a child.Oh, and the top 2 photos need no explanation.  The photos above (which I feel I am probably not allowed to post?) are from the Museum d'Orsay. It was strange experience because you were allowed to take photos (that is not normal in a museum), but it also made people a little rude. Someone we talked to described it as a "blockbuster" museum because people were more concerned about being able to say they were there (so many people doing selfies in front of Van Gogh paintings!), and didn't really seem to want to stop and look, and appreciate the amazing art. Anyway, we still enjoyed it, and I got to see work from some of my favourite artists and influencers Paul Cezanne, Vincent Van Gogh, Claude Monet and Edgar Degas.
Then we left the museum and I got more macarons. :) I hope everyone has a good weekend! We've got no big plans...the hubby is working a weekend of night shifts which means we awake people need to stay outside, or stay inside quietly! I am planning on baking this weekend (big surprise here, yes?), and just having some quality time with my kids! Happy weekend time! Well, it's felt like a long week, and a long week calls for a sweet treat! I should really post something fresh, seasonal, Ontarian (something with peaces, of course!)....but I won't. There are no rules here, I have no blog boss! :) In April 2014 I posted a recipe for Mini Meringue Nests; they are tasty, have simple ingredients, and make an impressive and light dessert 'bowl' for fruit, pudding, whipped cream, yadda yadda. Fast forward to now, and I'm eating mostly paleo (about 80-90% of the time), and I only give myself 1 (or 2) treat days a week. So, when we had friends coming over on a non-treat day, I wasn't about to not make a super-fantastic, summer dessert! Gosh no! Luckily the friends we had over love sweets, so they are good guinea pigs (thanks Val!) :) I made my crazy delicious Honey Mustard & Rosemary Chicken (in a pan on the bbq), roasted potatoes, obviously also on the bbq, and a green, leafy salad...maybe a coleslaw too...? Can't remember, doesn't matter! What does matter is dessert (really, the most important part of any meal!). I took my regular, non-paleo mini meringue nests, and gave them a simple switch over to create such a treat; such a lovely, delicate, slightly sticky, oh-so-good treat. Yummy! :) 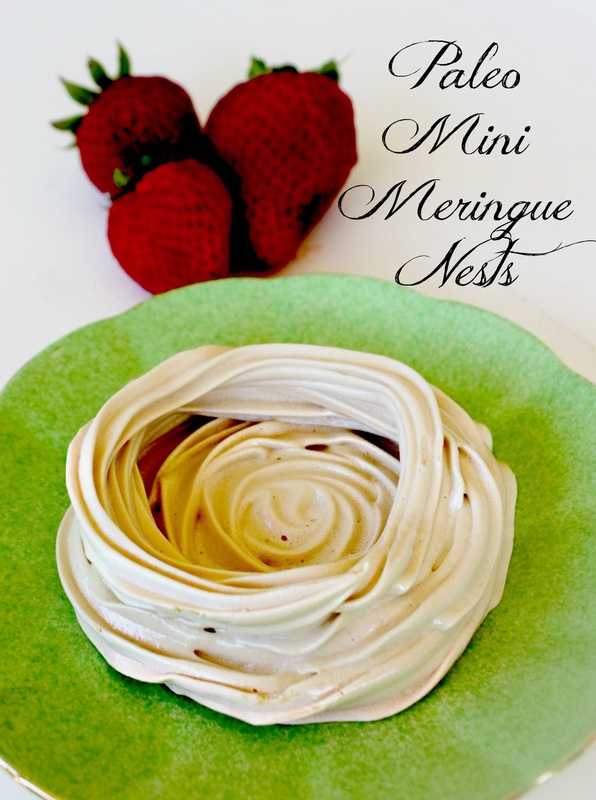 Paleo Mini Meringue Nests Ingredients:
Method:
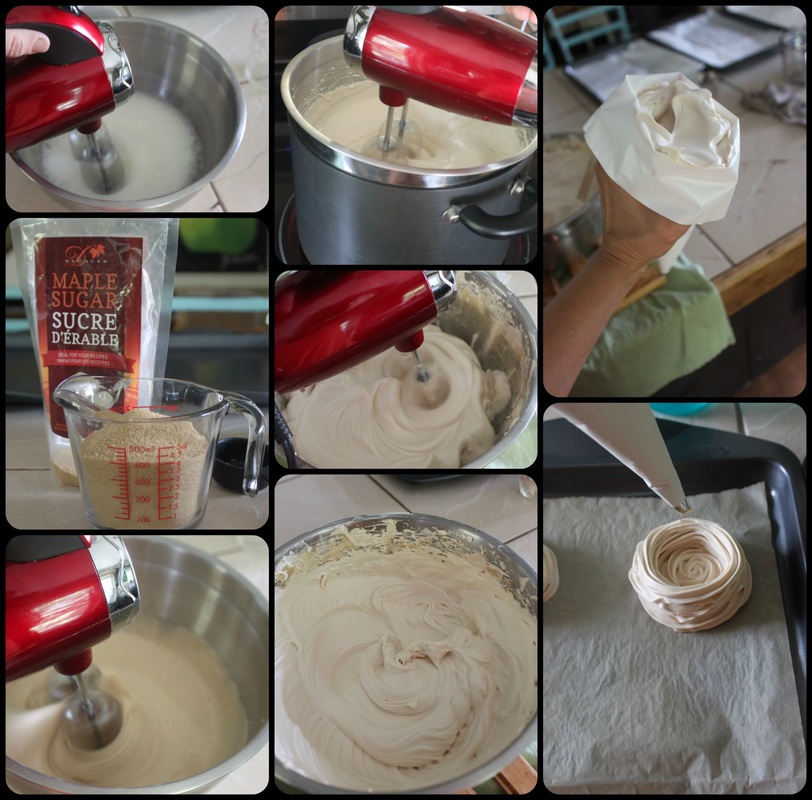 Here is the process! Whip the egg whites, add the sugar, whip it up more, put over simmering water until sugar is dissolved, remove from heat and whip until stiff! Fill a piping bag, and make your nests!  The paleo pudding I served with the nests So, full disclaimer....if you use maple sugar, your tastes buds will be singing a hallelujah chorus!!! :) It is such a maple-y marvel! The coconut sugar lends a darker, more molasses-y taste; just as yummy, just a different kind of yummy. I also found that (no matter how many batches I tried), these didn't stay as dry as regular meringue. I think it's the sugar difference. I tried switching between the two sugars and the starches, but after about 5 minutes out of the oven the meringues nests got a little sticky. lets be honest, that is not a big deal at all, but I wanted to put that out there so if anyone else had this problem you would know I had it too! My solution was to keep the meringue nests in the oven until it was nearly serving time, then I turned the oven back on to it's lowest temperature, and let the nests re-dry slightly. I turned the oven back-off after it had reached temperature, and left them in the oven for dessert, and we just grabbed the nests out of the oven as we wanted them. We filled the nests with this paleo chocolate pudding, fruit, and whipped cream. It. Was. Good. x 1000. 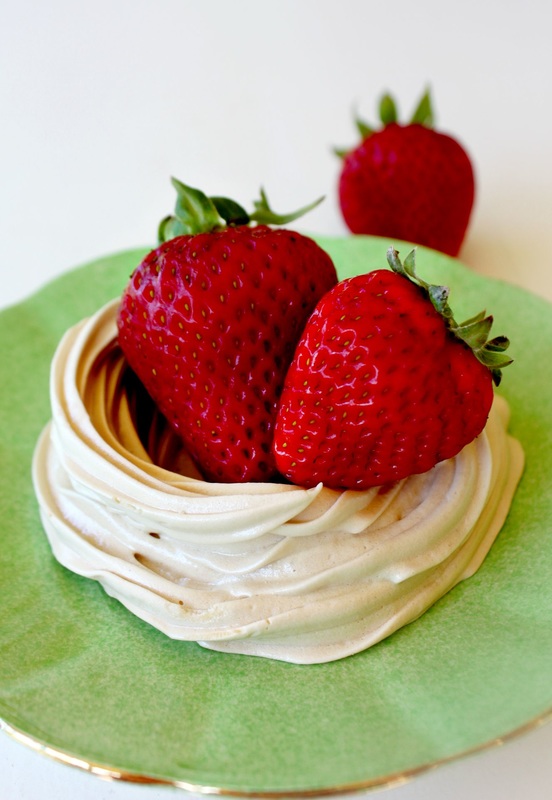 I cannot believe that school starts next Tuesday.....I feel (honestly) sad about it; the kids and I have had a great summer (.....maybe because 15 days of the summer I was away from them in Europe, giving me ample time to miss all the sweet things they do, and forget all the irritating things they do! Therefore resetting my child-patience gauge!) :) Haha, whomp, whomp!
The kids are really excited about school starting, and I am looking forward to some time alone in the house getting paintings and different projects ready for an Art Show I am doing at the end of September for Belleville's Culture Days (I'll be downtown on Saturday, September the 26th next to the Library!). I'm signing off now. I meant to post this in the morning, and it's now 7:54 p.m....so, I missed the mark by a smidge.....still, it's summer yet, and I am enjoying the lazy version of life! I was literally sitting on the couch with the kids, watching a pre-bedtime movie, and one of them said, "is today the weekend?", and I said, "nope, not yet, it's only Friday", and that reminded me that it was Friday, and that I had this post (mostly) ready to go! Golly. Well, hopefully next week I'll share some recipes with peaches in them! Have a good Labour Day weekend fellow Canadians! xoxo |
Hi, I'm Amy-Lyn! 
I am the lady behind this here blog! I live in the sticks with my animals, my super handsome husband, and my
3 amazing kids! Here you'll find things from recipes (gluten-free, paleo, and strait up junk food!), DIY ideas, thoughts on raising a son with autism, and whatever else pops into my brain! : ) Read more about me by clicking here! Want to Stay Connected?
Find What
|
 RSS Feed


