|
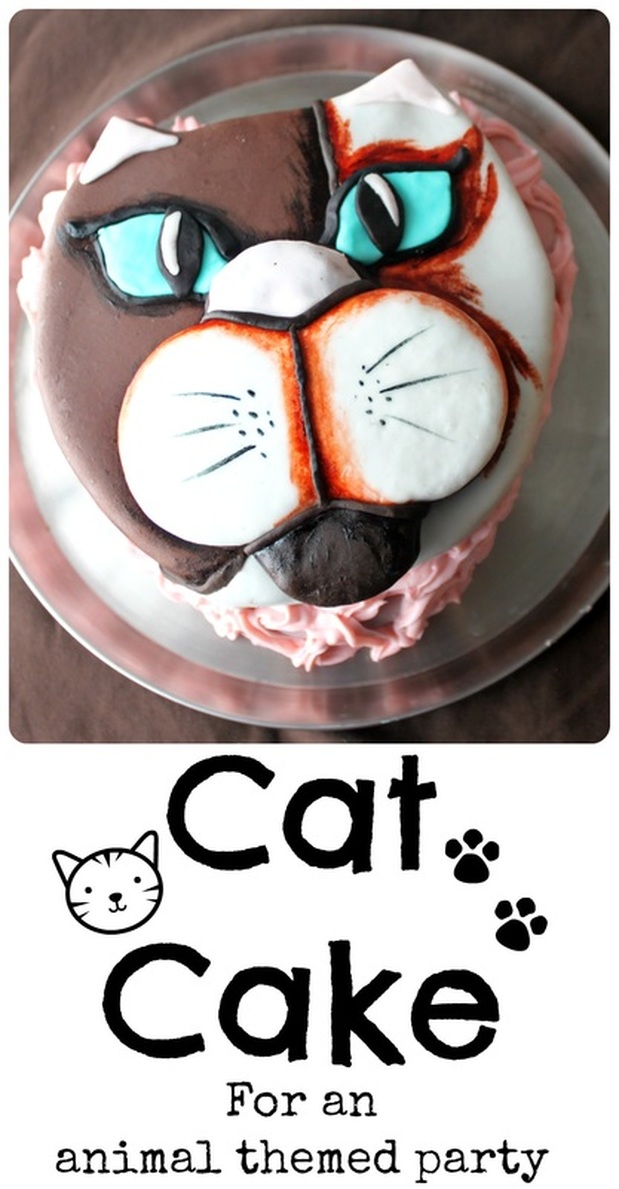
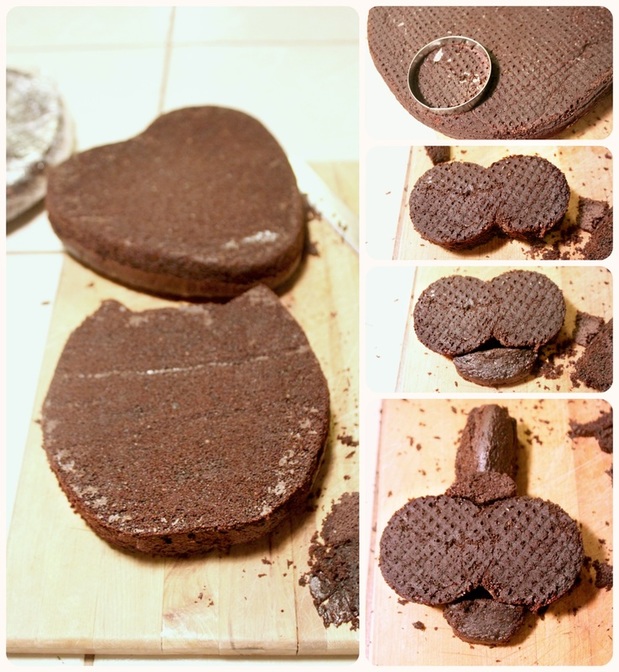
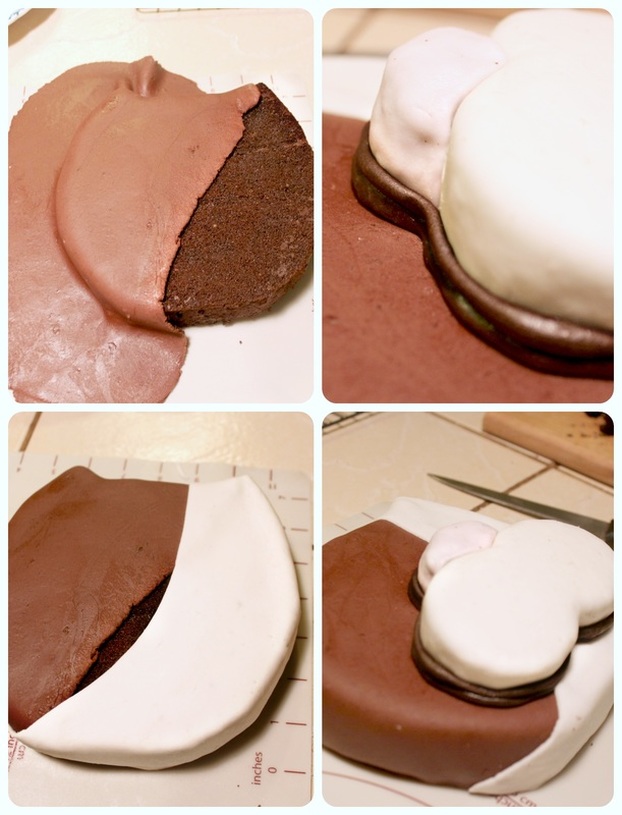
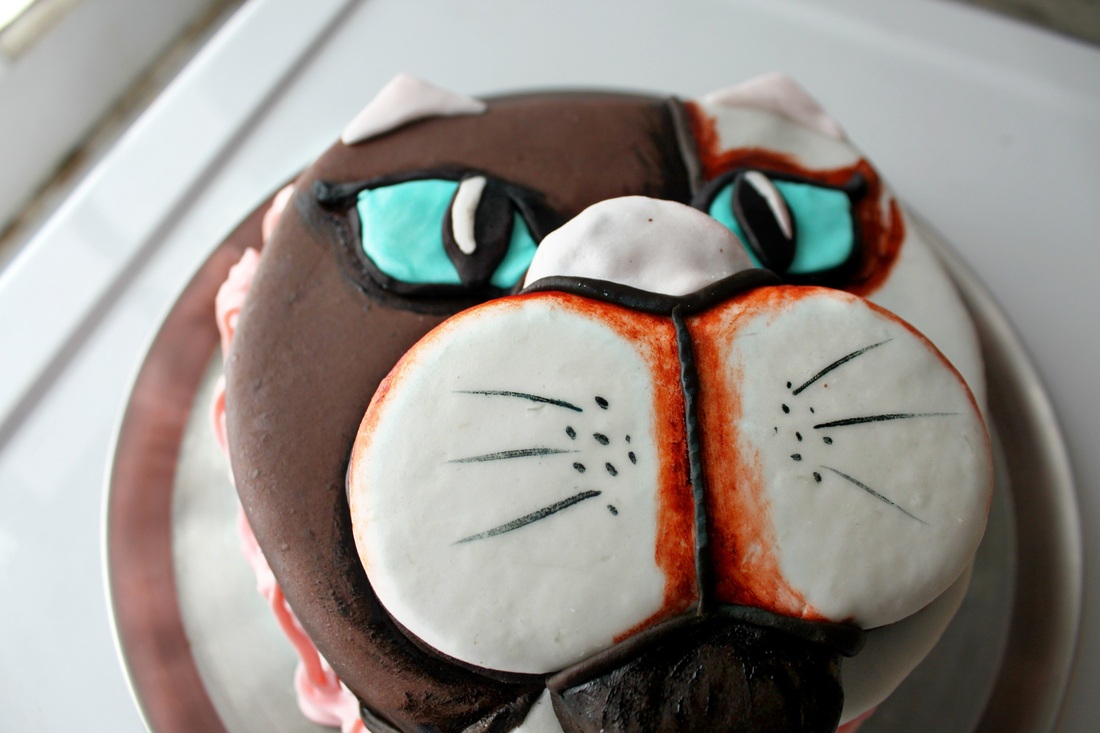
My daughter was having an animal themed birthday party. We encouraged the kids to dress like any animal, but my main focus for food, decorations, goody-bags, etc. was domestic animals like dogs, cats, and fish. I decided for her cake that I would make a cat because, of all the animals she loves, she really, really loves cats! I started with a chocolate cake from Martha Stewart (here-I doubled it), and baked one batch in 2 heart shaped cake pans, and the other batch in a large springform pan (to have as extra cake for the muzzle, and any other random thing I might think of!). I made these 6 days in advance, wrapped tightly in plastic wrap, and stuck them in the freezer. When I started working on it, I didn't even really let it thaw out much. I just carefully cut one of the hearts into a cat head by forming sharp ears, and rounding the bottom. If you don't have a heart shaped cake pan, just start with a regular round cake, and cut cake ears to add. To get a perfectly symmetrical muzzle, I used my circle cookie cutter, and overlapped them, just scoring the cake. Then I used a knife and carefully cut it out. For the bottom lip, I just used the piece I had cut off the bottom of the heart. Making the pieces for the muzzle, nose, & lip is mostly just a matter of seeing what cake scraps you have, and turning them into the new pieces you want. For my icing, I used a marshmallow fondant recipe that I have pinned on Pinterest, and have used many times. It's simple to make, and easy to use. I left some of the fondant white, made a few shades of brown, a little blue, a little pink, and a little black. I started by covering the cake in brown & white fondant, then covering the muzzle white fondant, then the nose in pink, & the bottom lip in black. I used a regular buttercream frosting to stick 'em together, and added some fondant "trim" to clean up the look of the seams. The eyes took some wiggling to make the exact same shape and size, but they turned out well. I added trim around them for definition, then added some more trim detail to the nose and muzzle. The bottom layer is simply the second heart (or a second round cake, if that's what you used), with a "melted fondant" (you take a store bought icing, micro wave it until it's pourable, then pour it over your cake, and let it harden). I turned it pink first with a little icing flavour packet. I carefully set the cat face on top of the fondant covered heart, then piped some coloured butter cream icing around it (I suck at piping icing....) The final stage in making this cake was to paint depth and detail using my Wilton Gel Colouring. I used a new, small paint brush to get the look I wanted. So, it took some time (as cake making/decorating can do), but I liked how it turned out, and my sweet daughter was so very pleased, which is the point! And this concludes my multi-day blogging about my daughters birthday! :)
Sarah
2/4/2014 10:54:14 pm
That cake is amazing!!!! great job!!
Amy-Lyn
2/5/2014 08:04:05 pm
Merci! Comments are closed.
|
Hi, I'm Amy-Lyn! I am the lady behind this here blog! I live in the sticks with my animals, my super handsome husband, and my
3 amazing kids! Here you'll find things from recipes (gluten-free, paleo, and strait up junk food!), DIY ideas, thoughts on raising a son with autism, and whatever else pops into my brain! : ) Read more about me by clicking here! Want to Stay Connected?
Find What
|
 RSS Feed
