|
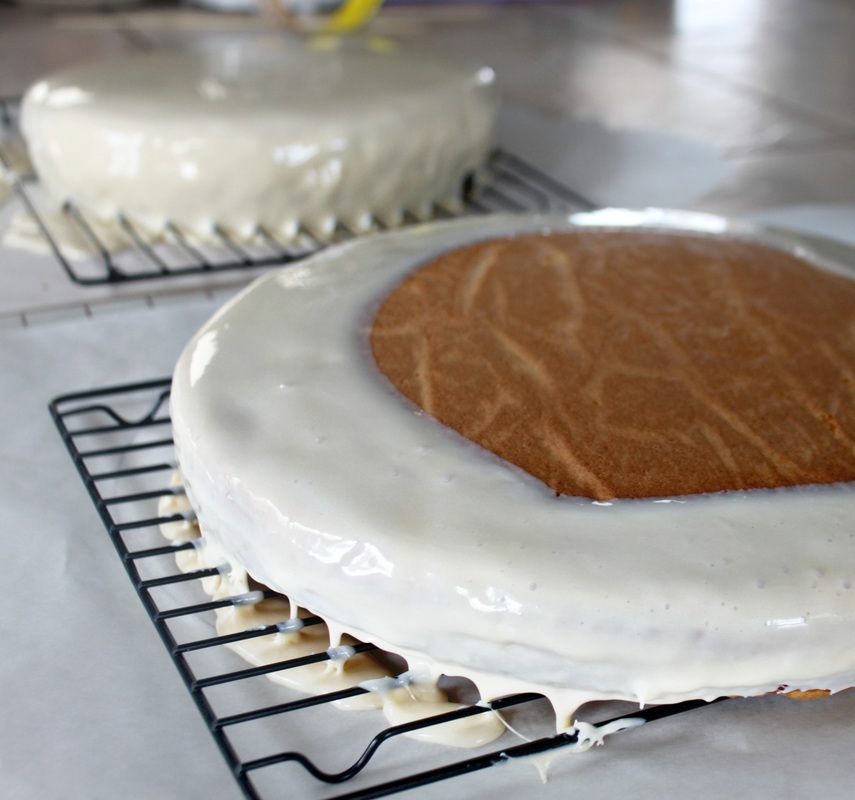
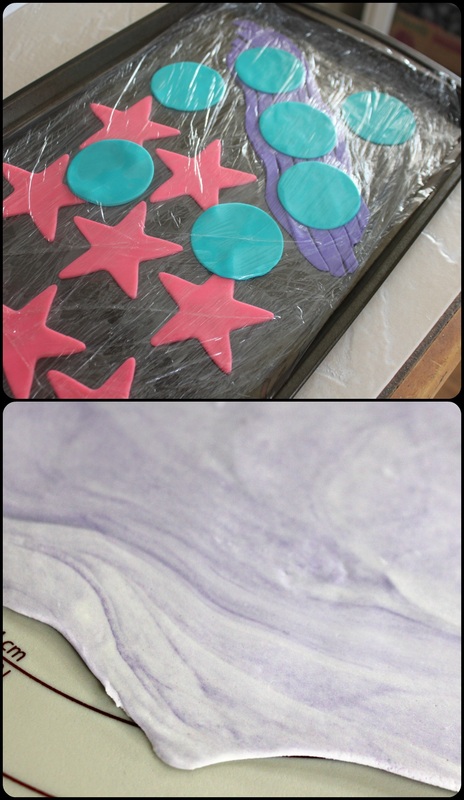
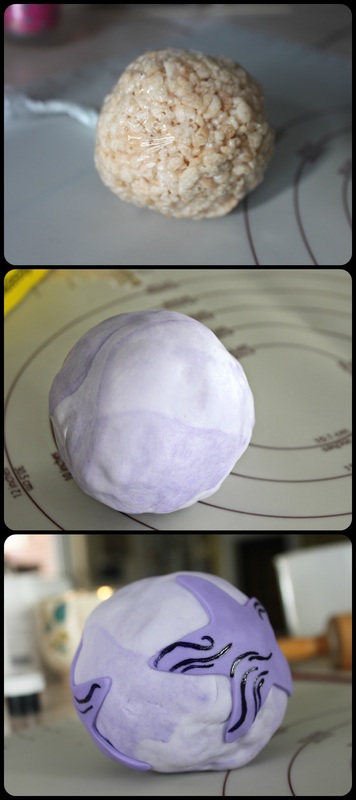
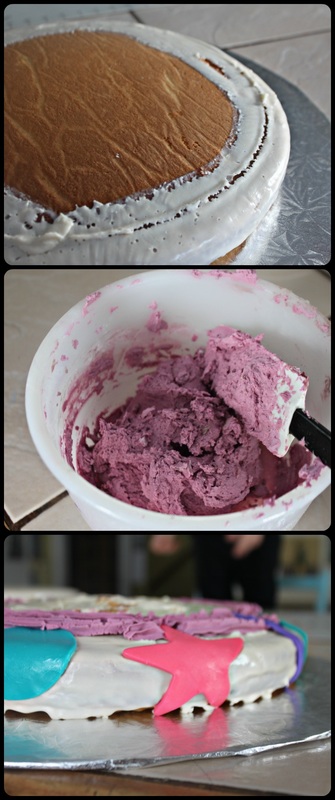
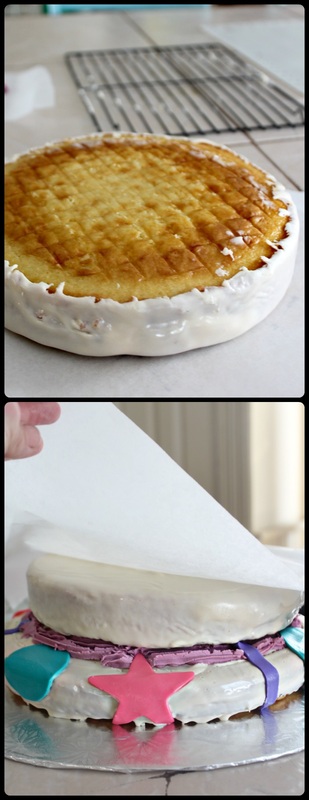
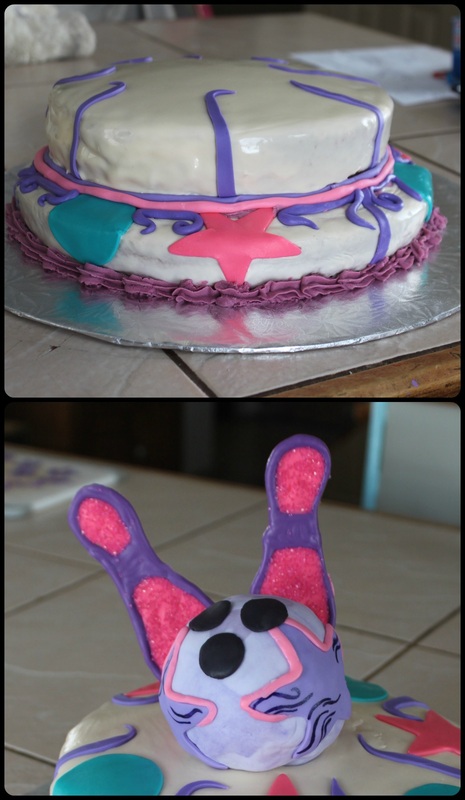
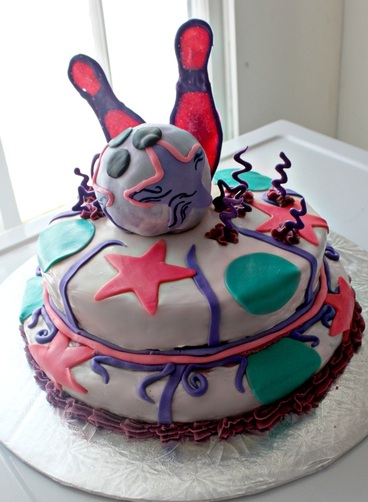
I got the chance recently to make a cake for a friends daughter. I was very excited, but also a little nervous about it turning out (making a cake for someone else is very different than making it for yourself or your own kids!). The cake was for an 11 year old girl who was having her party at a bowling alley. The request: vanilla cake, bowling theme, purple & green. Okey doke! I started with a simple vanilla cake recipe, and doubled it (I made 3 layers, but decided it would be too much cake, so I wrapped up one layer and put it into my freezer). After letting the cakes cool, I used the poured fondant menthol to coat the top layer, and I only covered a portion of the bottom layer because I knew I would be putting buttercream between the 2 layers. For the fondant for decorating, I used a simple Rolled Buttercream Fondant (it actually tastes good). I often use a marshmallow fondant, but that fondant can sometimes become dry, and I was making this cake for a party that was a few days away, and I wanted to be sure nothing cracked! I divided the fondant into 5 (the 5th section being tiny) groups, and made purple, pink, teal, purple marbled, and a tiny bit of black. The pink, and teal colours were rolled out, and (using cookie cutters) made into stars, circles, and the purple (using a knife) was cut into strips. I left a small portion of each colour un-rolled and wrapped in plastic wrap in case I needed it for extra details. I used a tiny glass bottle I have to make 3 little circles for the "holes" on the bowling ball. The bowling ball was made using a very small batch of Rice Krispie Squares, and rolling it into a ball (instead of pressing it into a pan). I wrapped the ball in plastic wrap, and put it into the fridge until it set, and I was ready for it. To wrap the bowling ball, I just decided where the bottom would be (for a possible seam), and I gently worked the purple marbled fondant around the ball, and smoothed it out as I went. I wasn't sure it was going to work, but I just plugged away at it, snipped a few pieces of excess as I went, and it came together (it was easier than I thought it would be). I added some fondant stars to it, just for fun, painted on the stars with a gel food colouring, and added the three black fondant "holes". Getting the cakes onto their tray was tricky, but I just made sure I was taking my time, and was oh so careful. Once I had the bottom on, I added some flavoured buttercream (using the cake pan from the top layer to give me an idea of how far out I needed to go), and the shapes I wanted on the bottom. I wanted to add the shapes to the bottom at this stage so that they would tuck in under the top layer. To put the top on, I placed a piece of parchment on top of the cake, and flipped it over to get it off the cooling rack where I had poured the fondant on. I then tucked in the icing that was hanging/dripping (it's how it looks because the icing was poured on while it sat on a cooling rack). Once I had it all tucked in, I gently placed the top layer on top of the bottom layer. To get the top to smooth out, I left the parchment on it and gently (using a rolling pin), rolled the top. Then I removed the parchment. To make the bowling pins I put a piece of parchment over a photo from the internet of bowling pins, and traced over it with melted purple moulding chocolates. Then I filled in the tracing with pink melted moulding chocolate. I added some pink sprinkles too. Photos of this same chocolate tracing technique are here, when I made a Princess Celestia for a cake topper. To make sure the bowling pins would stand up in top of the cake, I place a skewer on the photo before I began tracing with the melted chocolate. With the extra melted chocolate I drew squiggles, stars, and other random shapes that I thought I might be able to use as extra decorations for the cake (or that I could feed to my children who kept asking what they could eat from what I was making!). I also gently pushed a skewer into the bottom of the bowling ball to help secure it to the cake. To the top I added some stripes and shapes, and I also added some purple fondant, rolled and shaped to fill in the gap between the two layers. And I piped some buttercream around the bottom to clean it up. For a finishing touch I piped some buttercream onto the cake in random spots, and gently pushed some of the chocolate squiggles I had made.
The only mis-hap was that one of the bowling pin tops broke on it's journey from our house to the birthday girls' house! Oh my gosh! Luckily my friend is clever, and just melted the piece still on the cake, and re-attached the broken piece. Smarty pants. Well, I feel bad for how long this post is (especially after the doozie from yesterday!), but I wanted to try to break down the making of this cake as much as a could (in case anyone cared to know!)! I was told that the kids loved the cake, and the party went well, so I was very happy! Well, it's Friday people! I hope everyone has a great weekend!
4 Comments
Sarah
3/21/2014 12:13:23 am
Looks great and now i'm craving cake!!! I have a pampered chef lifter thing that I used to lift all my cakes and pizzas from place to place!! so handy!! do you have one?? if not next time i go to a party I'm getting you one!!!!
Reply
Amy-Lyn
3/26/2014 03:19:55 am
I did not know there was such a thing as that Pampered Chef lifting do-hicky! I hope you get invited to a Pampered Chef party soon! ;)
Reply
Gracie
3/23/2014 02:01:12 am
Looks great Amy-lyn!!
Reply
Amy-Lyn
3/26/2014 03:20:17 am
Merci!
Reply
Leave a Reply. |
Hi, I'm Amy-Lyn! I am the lady behind this here blog! I live in the sticks with my animals, my super handsome husband, and my
3 amazing kids! Here you'll find things from recipes (gluten-free, paleo, and strait up junk food!), DIY ideas, thoughts on raising a son with autism, and whatever else pops into my brain! : ) Read more about me by clicking here! Want to Stay Connected?
Find What
|
 RSS Feed
