|
I know organizing isn't something everyone likes to do. But here's the thing; I also know that a lot of people who don't 'like' to tidy, often say they wish they could/would. What's stopping them then? Usually, the fact that the mess seems overwhelming! Whether it's your fridge, the garage, a closet or just your junk drawer, the trick to trying to get organized is to just do it. I know, so cliche, but honestly, the longer the mess stares at you, the worse it'll feel. If you know you can't tackle it alone, then call a friend who you know enjoys organizing, and ask if they could come over to help. Before Christmas I was working on 6 new paintings, and some spots in my house really felt the lack of time I had! My deep freeze, the kid's toys, my baking cupboard, and my closet really felt the chaos the most. So today, and for 3 more Tuesdays, I will take you organizing with me in these different parts of my house. And hopefully you'll feel inspired to do whatever it was you've you been putting off in your house. And if you really don't care about being organized, then just ignore me! :) Anyway, for today, the deep freeze! 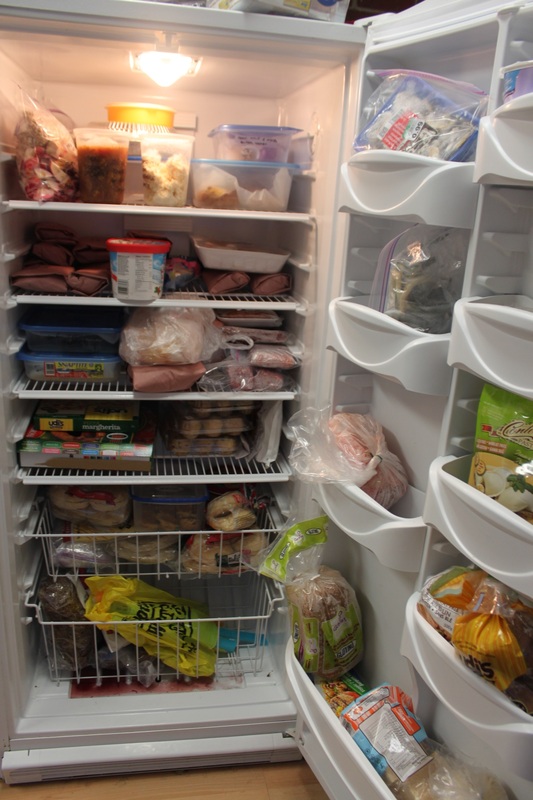 It was organized chaos....I could find most of what I needed...but there was stuff hiding in each section, and things I thought I had I couldn't seem to find. We (thank the Lord) have an upright deep freeze. Most people I know have the chest freezers, and I heard them all complain enough to know that when I ever got a deepfreeze, it would be an upright. It was staying fairly organized for a while, but then Christmas baking, random sales, getting our deer meat share from the fall hunt. It was a disaster! 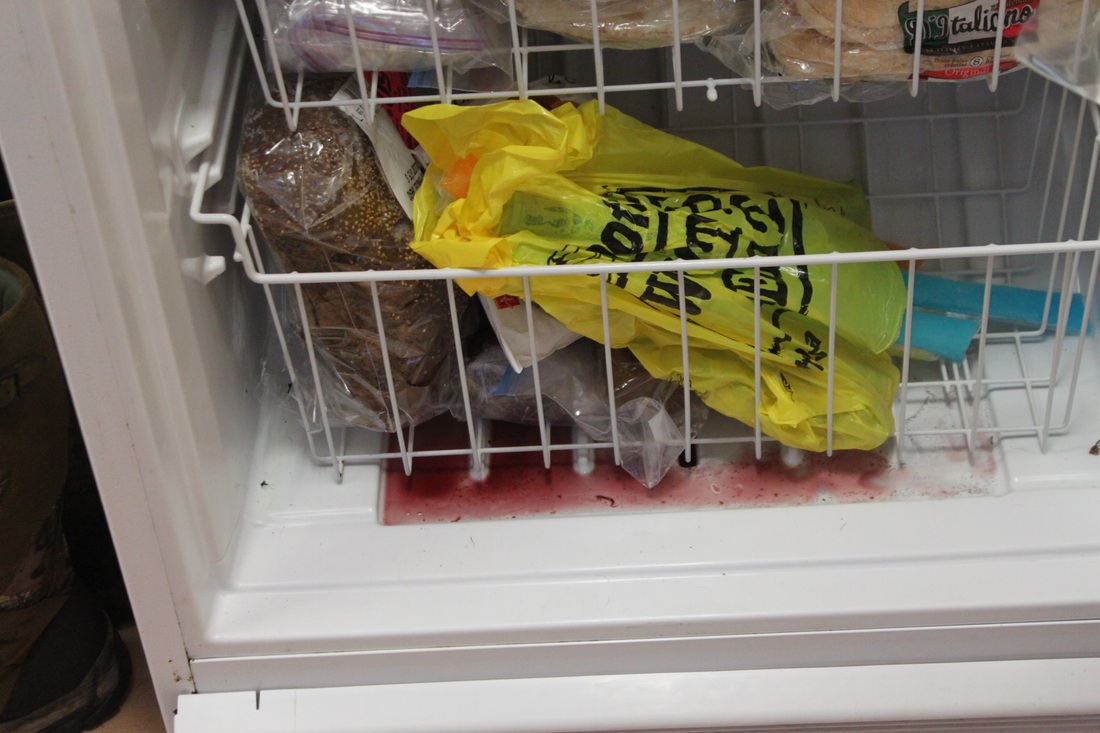 Nasty, sticky freezie mess, also a loaf of pumpernickel which I forgot was there.... To start in any organizing project, you need to get everything out and actually organize it! So, I just started pulling things out of the freezer, and setting them down in groups: meat, breads, gluten free, leftover/soup stocks, baked goods, and things that drip. And in this case, you need to work fast so your food doesn't thaw out! 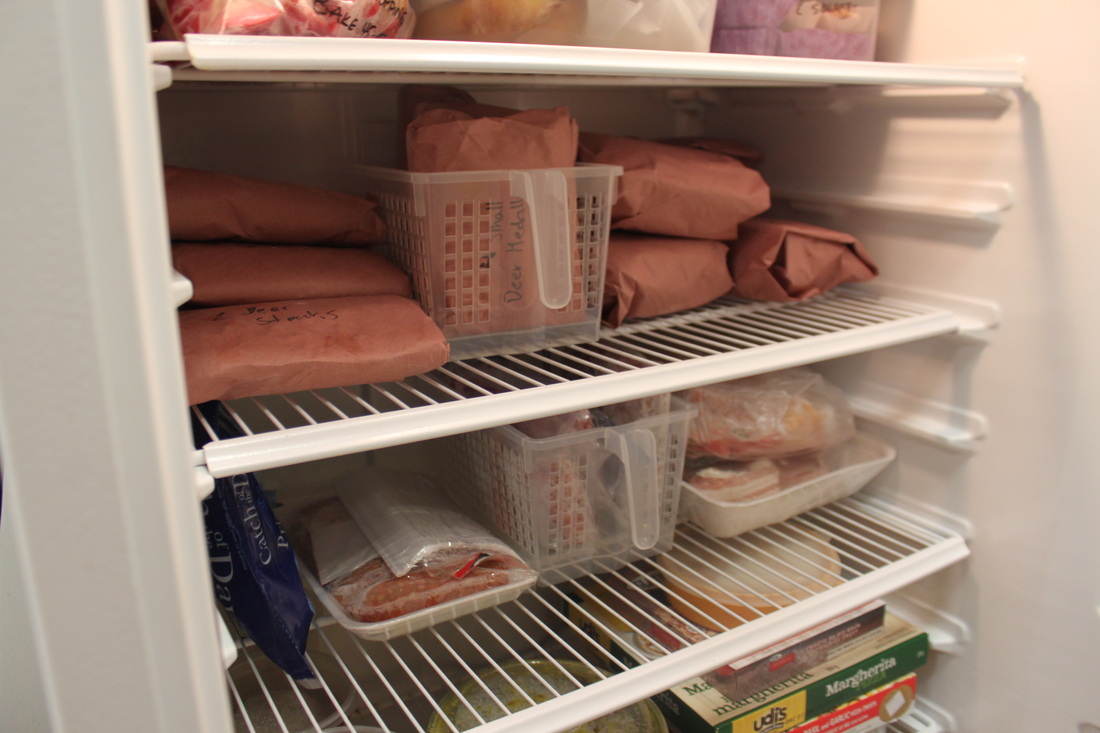 The breathable containers I used some breathable plastic containers to help get some things together. I find this useful because it keeps things separate and in specific groups. 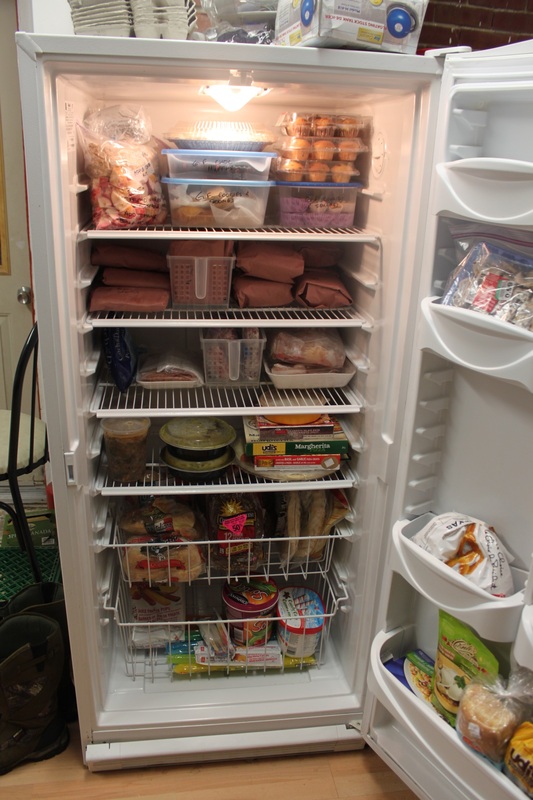 Looking good. Cleaning out the freezer reminded me we had that leftover indian curry from take-out, so we ate it the next night with rice. Easy meal. Forgot I had it. I grouped things together on shelves or in the door because then (for instance) if I grab a loaf of bread, I know what is still there and if we need more. One key is to make everything as visible as possible, and where it's not totally possible, things grouped together are easier to keep track of. If you're looking for meat, it'll be with the meat, not randomly stashed with the bread, etc. And, as for the "dripping" things I mentioned? In an upright freezer, put them in the bottom, that way if something happens (like not having Hydro), they won't melt and drip on everything. Put them near the front of a fridge/freezer for easy clean-up, and into a shallow container with no holes in it at the top of a chest freezer for easy access, and to just have a small thing to clean (instead of an entire, sticky chest freezer). It's all about containing potential messes! 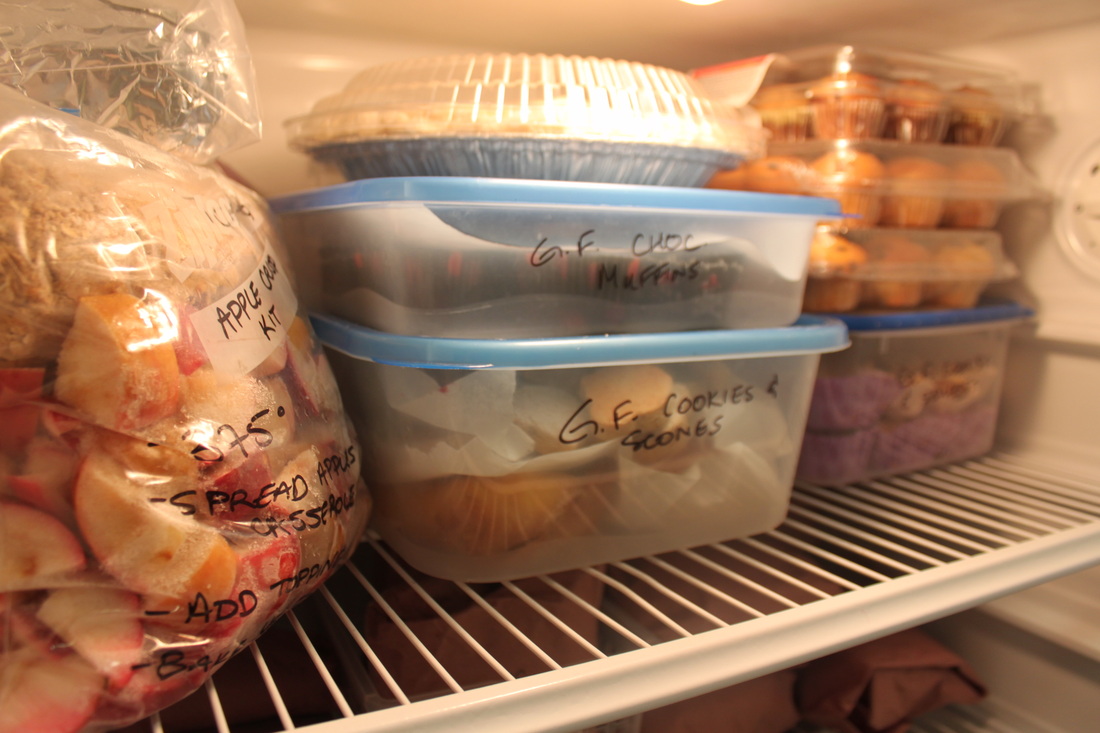 I also re-contained some baked goods (a huge container half full with this, another huge one half full with that, ya know). I made sure to re-write on things so I knew what I had still.  Some gluten free stuff in the door. So, whether it's a freezer above a fridge, a chest deep freeze, or an upright, it's important to do a tidy up every now and then to see if something got forgotten, do a mental inventory (or if you have a chest deep freeze, you could actually write out what was hiding in there like a real inventory, and tape it to the side of the freezer for easy referral), see if anything is so frost burnt it should't even be there at all, and give some sticky spots a wipe down.
This took me about 20 minutes, and it felt great to get done. Other jobs take longer, some shorter, but usually just starting with one thing helps to get the ball rolling!
4 Comments
Normally I would post a recipe on a Monday, but I wanted to do a last minute baked goods wrapping session instead! Everyone has their own ideas about how much to give, how to package it, so these are my personal feelings & ideas! I think less is more. Give the person a variety, but not so much they won't finish everything you gave them before it's not fresh and doesn't taste as good. You can sort of see in the photo that there isn't a lot of everything-just enough to share with family, or to enjoy with a coffee over a few days. I also don't like when a plate of dessert all tastes the same because it was all just put together. I know, picky, picky. But seriously, just separate the treats using cellophane bags (inexpensive from the bulk barn) or some plastic wrap. It also helps to give your gift some height, body and definition (sounds funny, but why not make a present look as good as possible?). 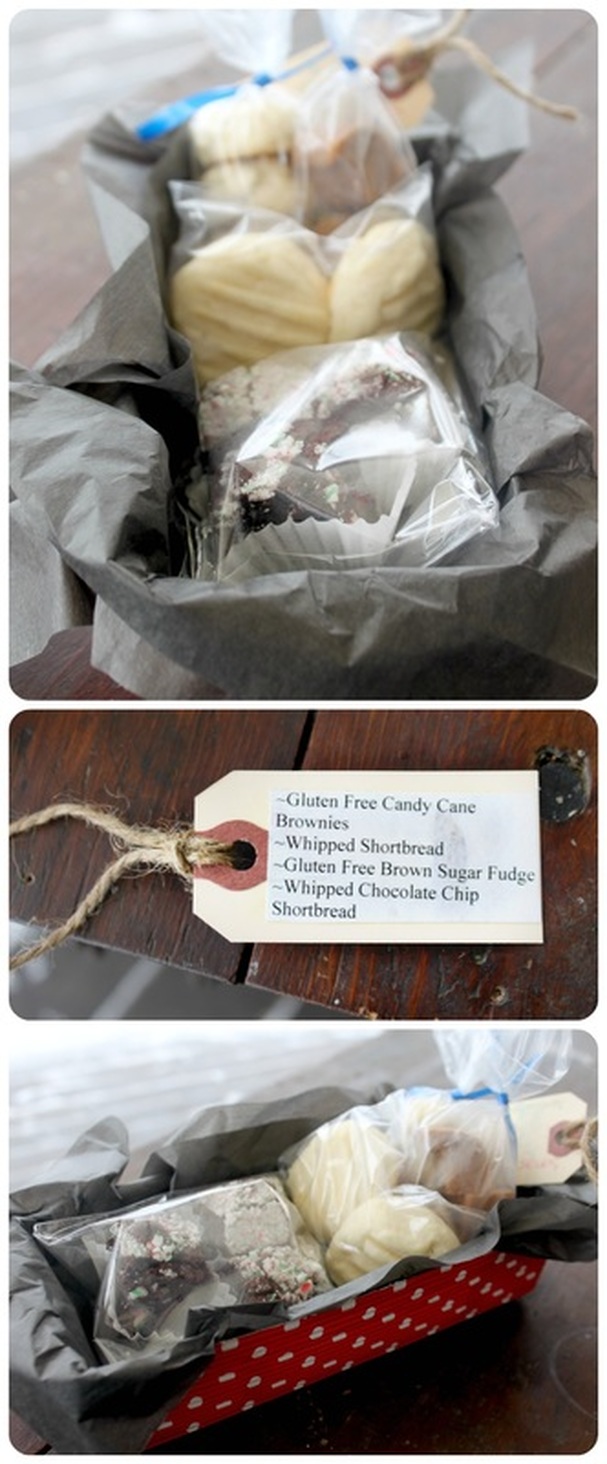 Include a tag if possible. It doesn't need to be fancy, but I always like to know what I'm getting instead of having to just take a bite and hope for the best....so, give your gift recipient a heads-up on what yumminess they are going to enjoy! The tag serves a double purpose too-you can write your greetings on the other side. Lastly, if at all possible, find something pretty, but practical, to put the treats in. I always find really neat-o stuff at Winners (like those pretty oven safe, paper ware loaf pans in the pictures). If you can't find anything to suit, just use a disposable plate, but try thinking of it as a stage instead of a flat plate. Using tissue paper, create a high, medium and low level (starting at the "back" of your plate) so that your desserts aren't just sitting flat and sad. Yes, desserts can be sad. :)
Then use a cellophane bag to put the whole thing in (if it's just on a plate) to make sure it all stays together. Then, just give your desserts away (the best part!), and spread some Christmas cheer! When we moved into our new house two years ago, I knew the cupboard space could be an issue. I decided I wanted a hanging pot rack, but I couldn't find one that suited our house and style, and also our budget! Why are ugly, hum-drum hanging pot holders so darn expensive?!? 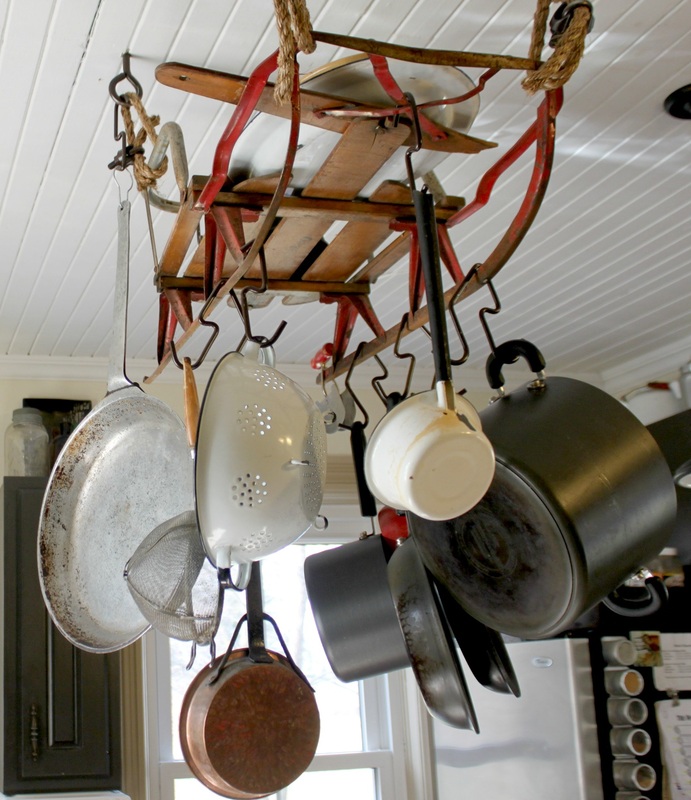 So, I kept an open mind, and finally this past summer I found the perfect hanging pot holder for us. An antique sled for $15! Woot woot! My husband was skeptical though....very skeptical.... 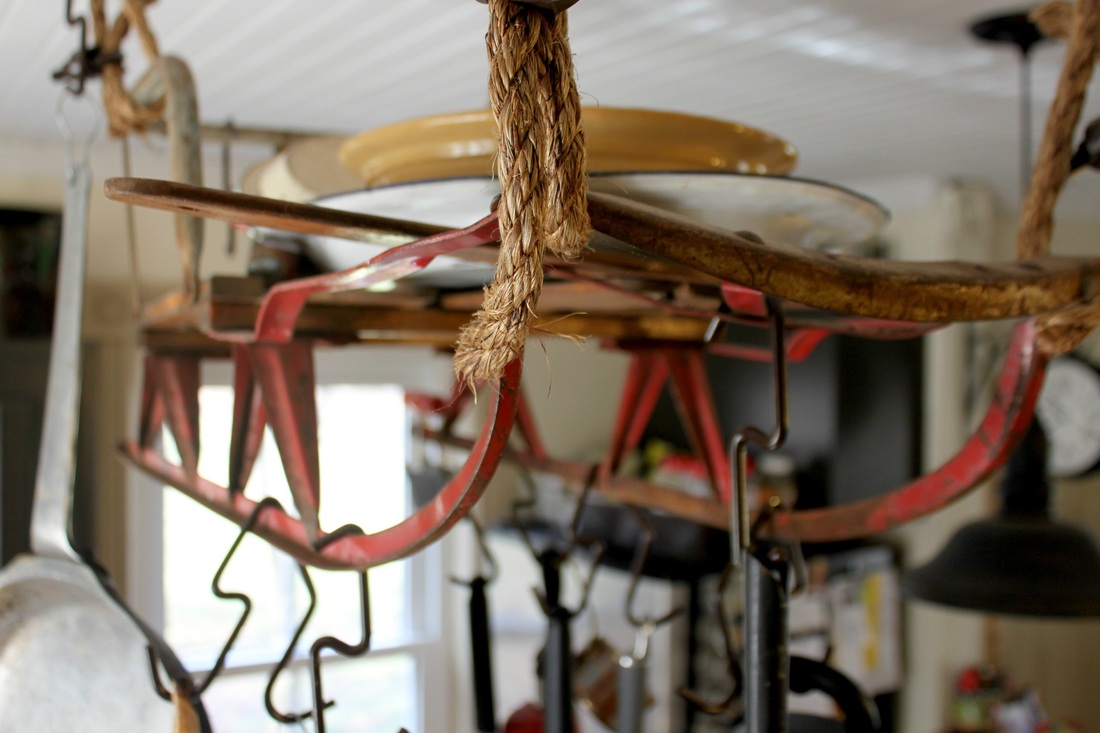 I bought the rope and hardware I would need (when I told the guys at the local Home Hardware what it was for they were skeptical too...geepers, some men haven't a spark of imagination!) I needed to spray paint the hardware because I didn't want it to be shiny silver.  The spray painted hardware and the rope holding the sled Then, when my Dad was visiting one weekend, we got to work! We had to drill a lot (a LOT) of holes into my ceiling because this old house does not have "regular", evenly spaced beams. So, we drilled to make sure we were putting the eyelets into beams (ya know, so the pot rack didn't come crashing down on our heads!) 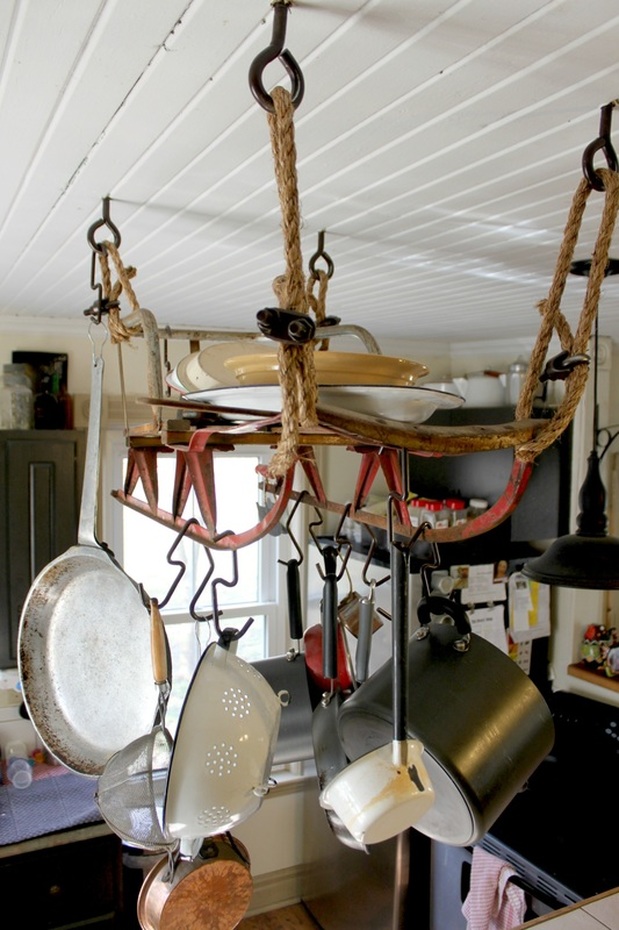 If you look along the grooves you'll see all the extra holes. You don't really notice them though when you're in the kitchen. I love the finished product! And, my husband even thought it was kind of awesome. I am so happy that I found this sled, and that I didn't just buy the first thing I saw from Bed, Bath & Beyond. It's original, it goes with our beautiful old house, and I love to re-use stuff!
Have you ever given something a totally different job than what it was intended for? Tell me about it! I am always interested in new & creative ideas! When our 2 girls finally got out of their cribs, I wanted to get bunk beds. But, the set I wanted cost $1000....so, no thanks! Yikes! 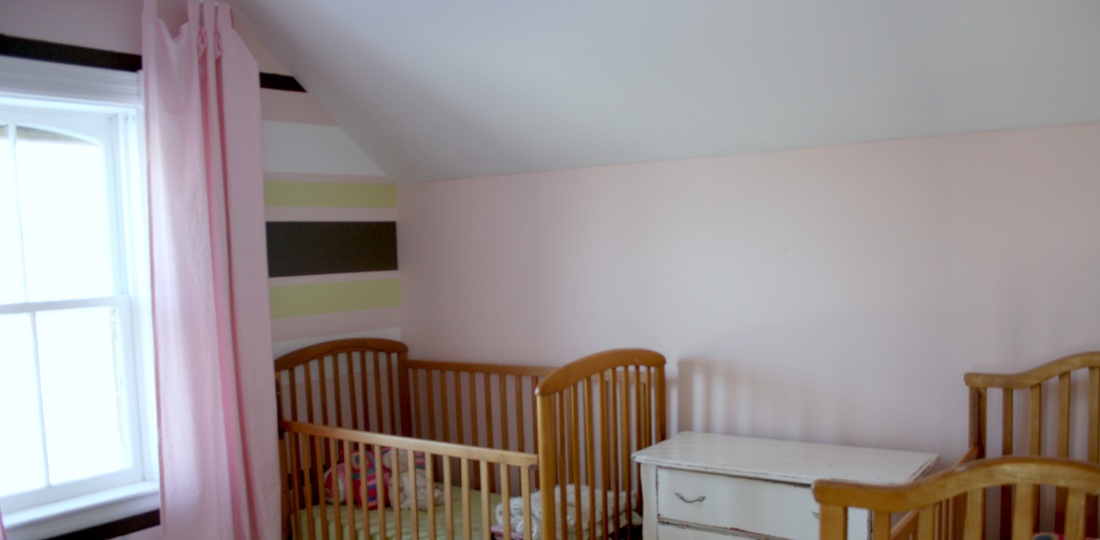 The girls' room with 2 cribs So, to tackle the issue at hand, I got creative and thrifty! My 2 fav. things! 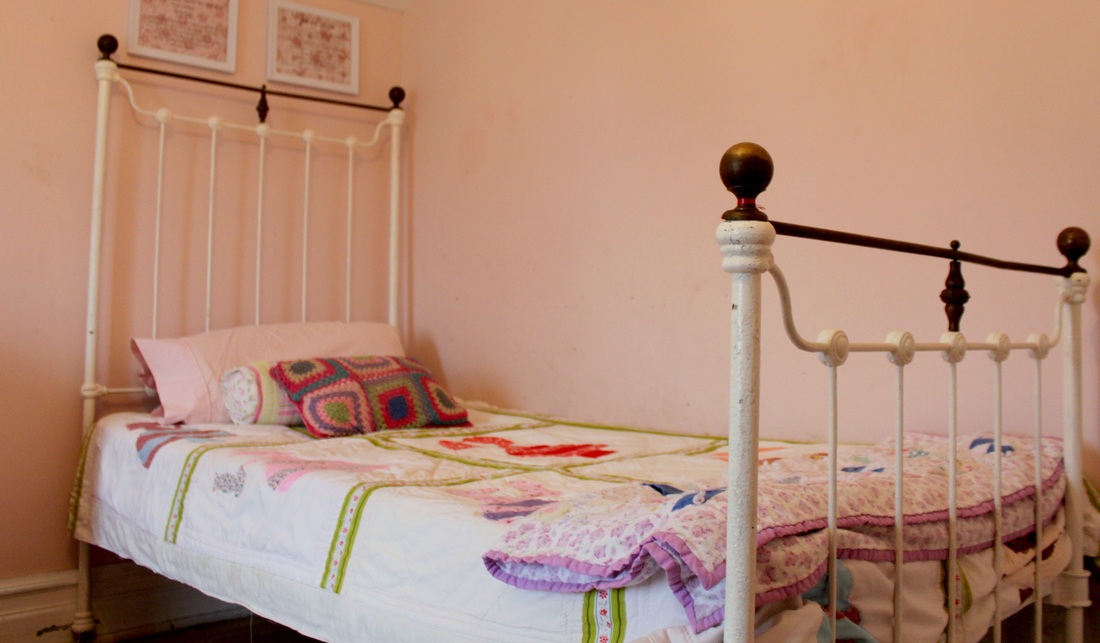 The brass and wrought iron bed we purchased. It's like a princess bed! For $75 we bought a brass and wrought iron antique "single" bed. So, to offset that cost, I found (through Kijiji) a metal bed frame (just the legs, and the frame to hold the mattress), a box spring, and 2 mattresses-all for free. We also needed to buy a sheet of plywood to go under the mattress on the antique bed (which cost about $18, with leftovers). But now, we needed a second headboard to match the one we bought. Enter: 1980's inspiration! Back in the day, faux finishes were all the rage. People painted fake brick, fake marble, and fake head boards (among other things). Done right, you could fool people, but done wrong, well, it just looked crappy (and usually hilarious)! 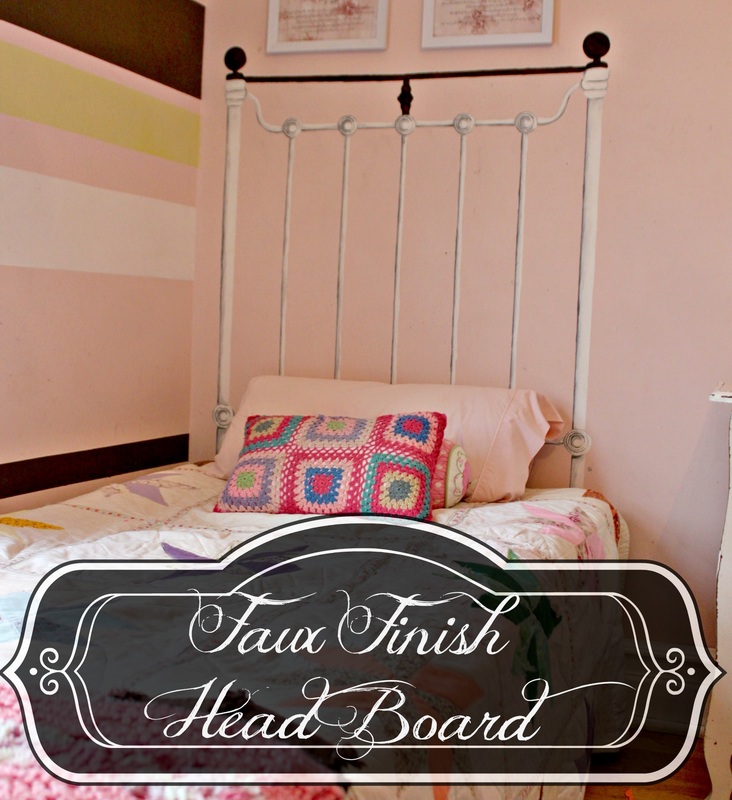 The "faux" headboard So, it was honestly pretty simple to do. I just held the real headboard up against the wall where I needed the "second" bed. Then, I traced it! I then used a small sugar dish to trace and do the circles properly. If you want to do a headboard, but aren't doing a matcher, and therefore don't have something to trace, my advice would be to keep it simple. This headboard is actually very simple. You could use a yard stick to trace the strait bars, a small circular object to get the circle parts right, and create a few simple stencils to do the wavy parts so that they are balanced. 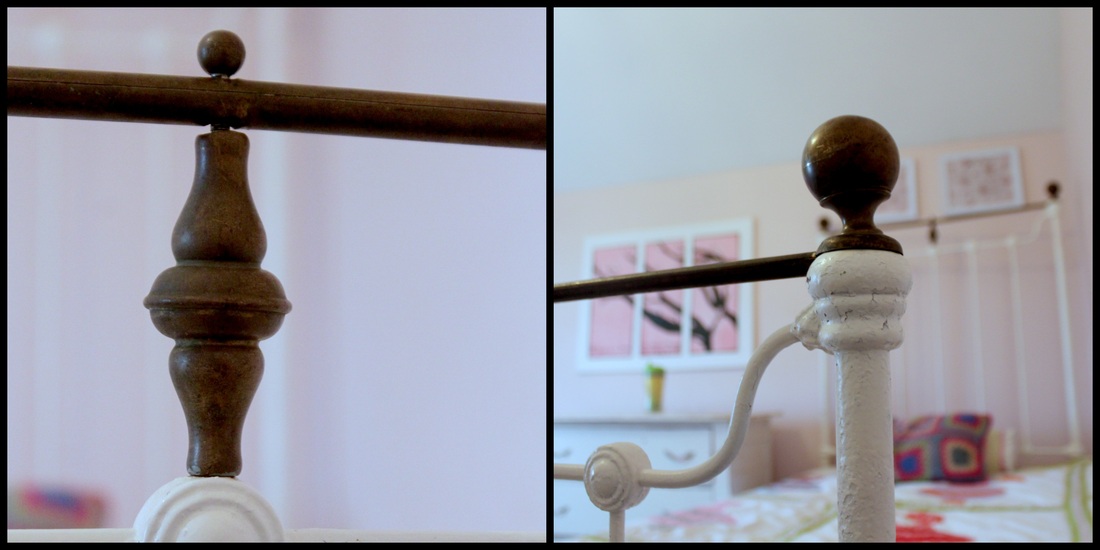 The details on the real bed that I needed to re-create. Starting with white, I filled it in, and then with 2 shades of grey I added dimension. I decided not to add a "shadow" because the real bed would have a different shadow at different times of the day, but the fake bed would have a perma-shadow in one direction. Illusion wrecker! To simplify the intricate designs along the bed, I used a cereal box and an exacto knife to cut out stencils (draw your design on the cardboard, then place onto a cutting board and use the exacto knife to cut it out). I just put the stencil in place, dabbed on some paint, and moved to the next spot. 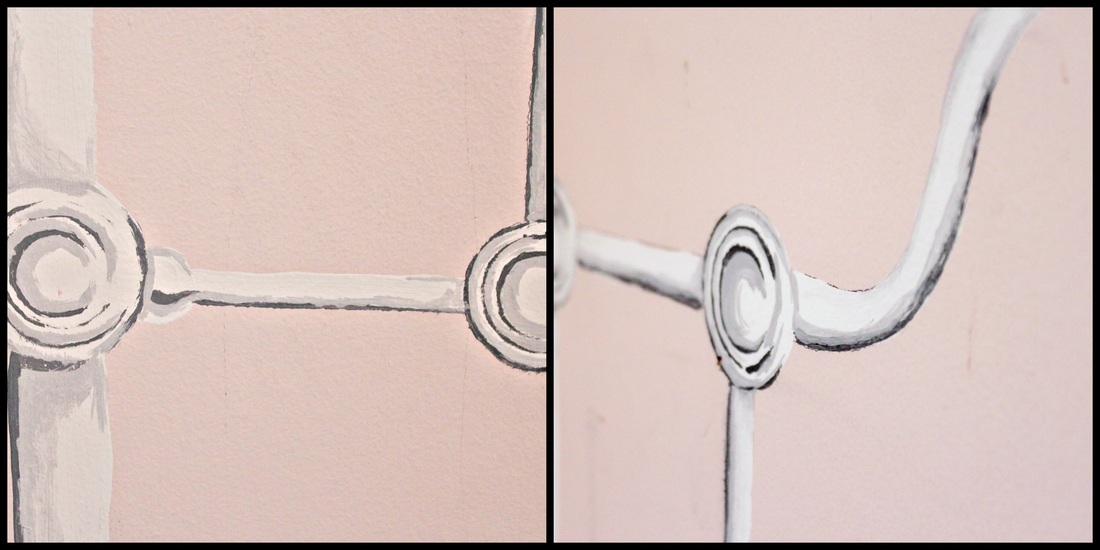 The details I simplified by making a stencil People (almost everyone who has come over since) has walked past the room, then done a double take and can't believe the one bed is just painted on the wall. The only thing missing is the footboard, but we're o.k. with that because it's a really small room.  The completed room! For $93 (antique bed, plus plywood), a bit of Kijiji hunting, and a few hours of painting, our girls have beautiful, matching beds for their room!
I have a duelling personality. One side of me loves old things to the point of clutter, the other side of me wants a place for everything, and everything in it's place. So, I starting repurposing the things I had acquired so that I could have the best of both worlds! 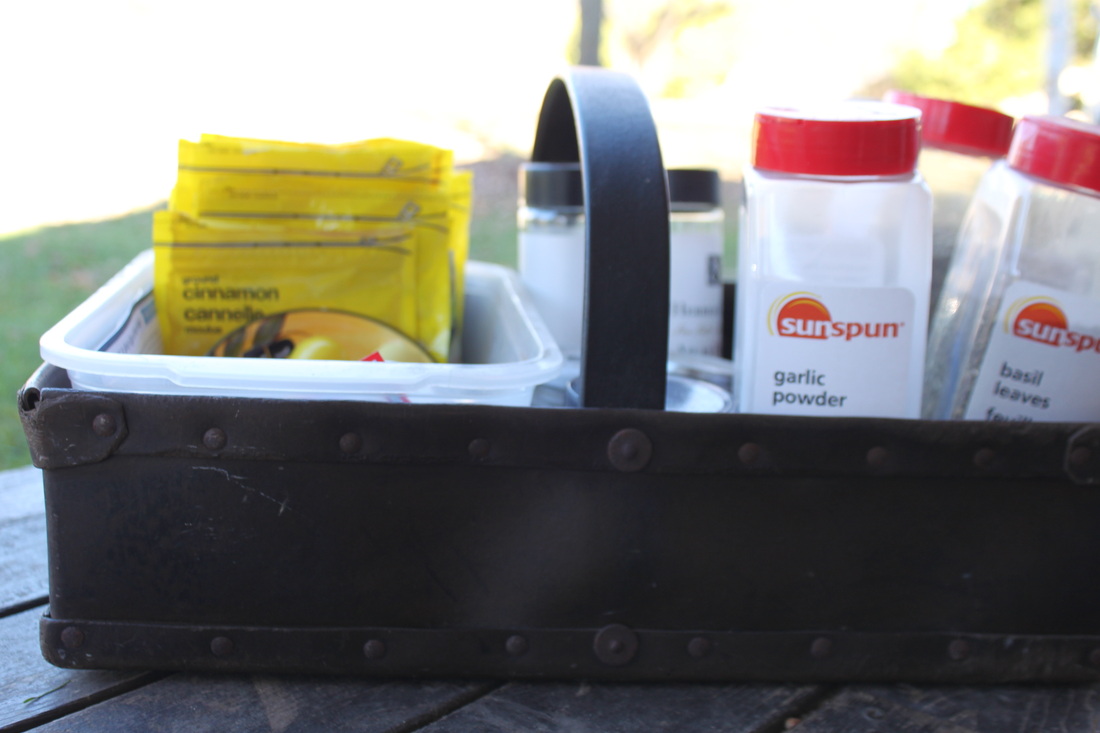 This beautiful, WWII era homemade leather "basket" serves as a spice rack, of sorts. It also was used at my son's summer birthday party to hold drinks. 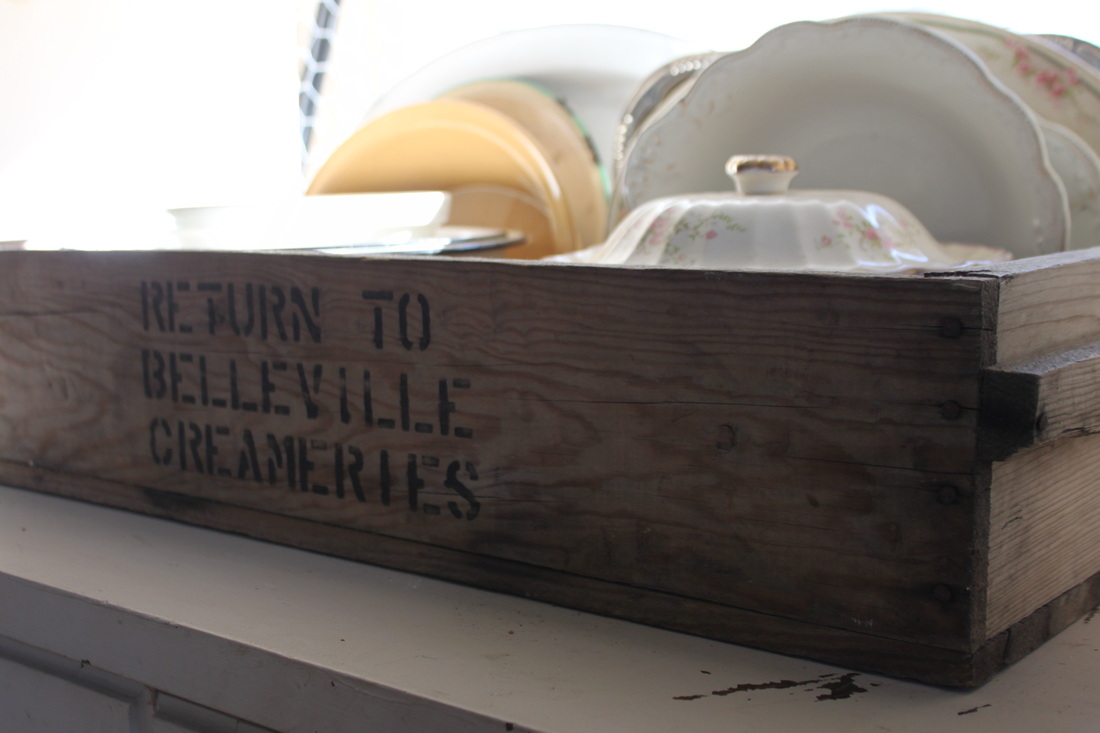 My Belleville Creameries box helps keep my mixing bowls, serving dishes, and platters all tidy and accessible. 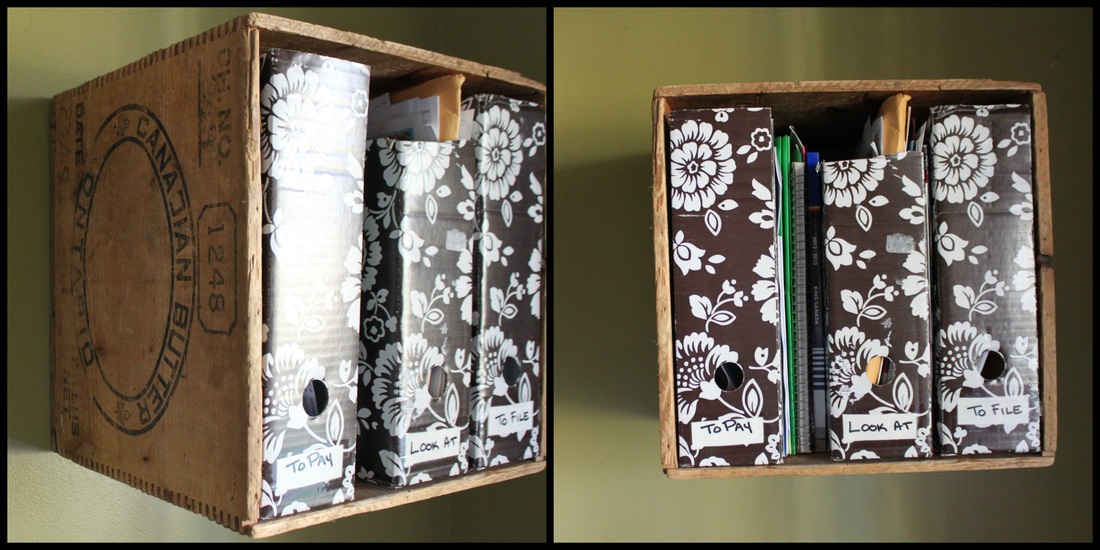 I've had this Canadian Butter box for a while, and it has had many, many jobs. It was a "night stand" sitting on the floor when I had a low bed. Then it served at many parties as a bags of chips holder. It was used very temporarily to hold our cardboard and paper that we would take out to burn (a very undignified job for such a lovely box). Finally, I was trying to get our computer nook in order, and I anchored and screwed it to the wall as a shelf. 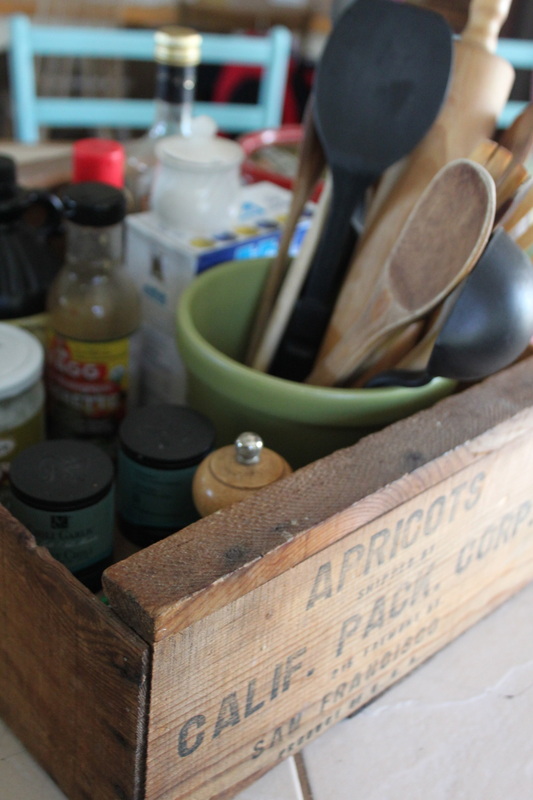 This box sits next to my stove and holds my cooking utensils as well as oil, vinegar, salt and pepper. 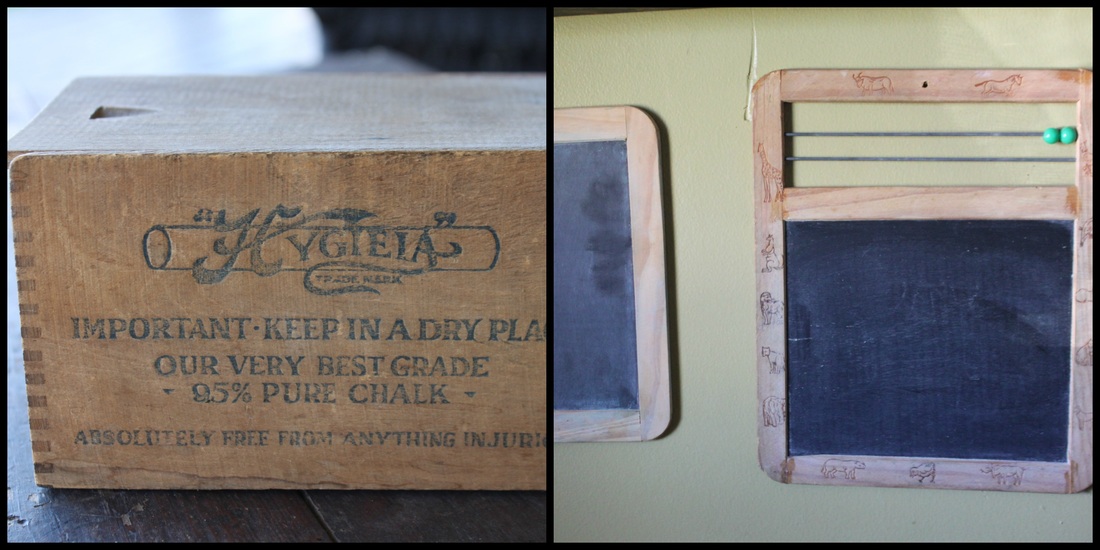 This box literally has not been re-purposed at all, and holds the chalk for our little chalk boards!  I got this box a long time ago to hold toys for my son in his room, but it has since become the potato holder in the kitchen. 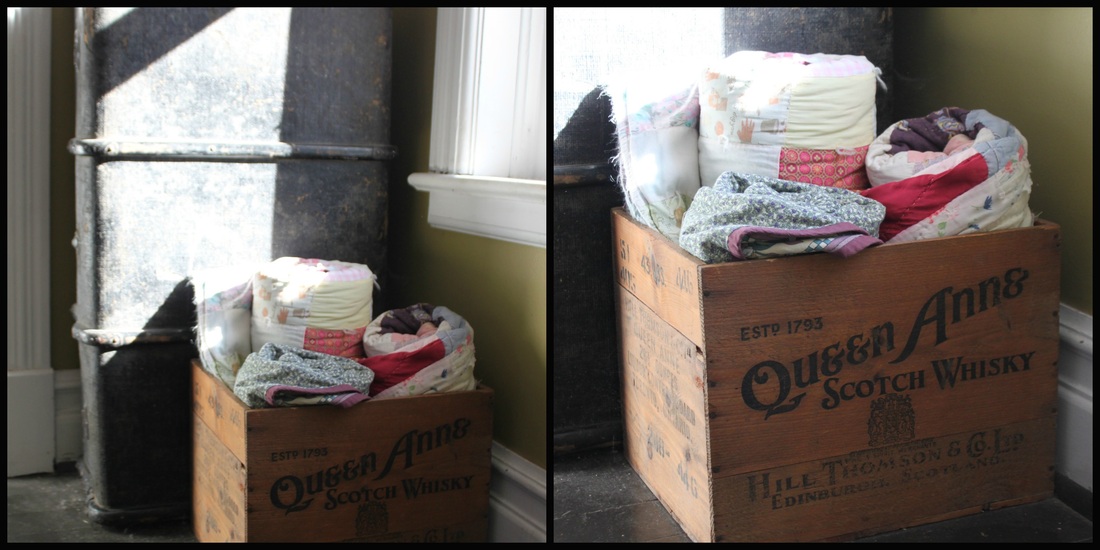 An old whiskey box holds extra quilts in the hall incase guests need an extra blanket in the night, then they don't need to go rooting through my linen closet! 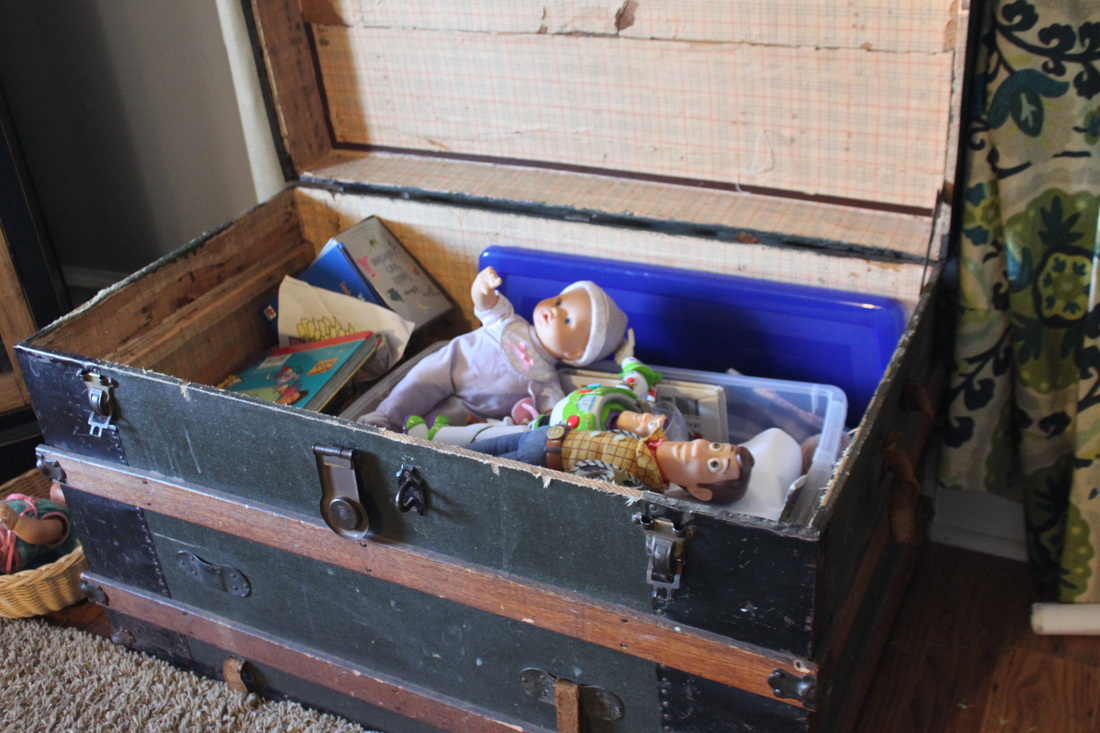 An old steamer trunk holds my kids toys. At night, the toys get tossed in there, and my living room looks like an adult, relaxing place instead of an isle from Toys R Us! 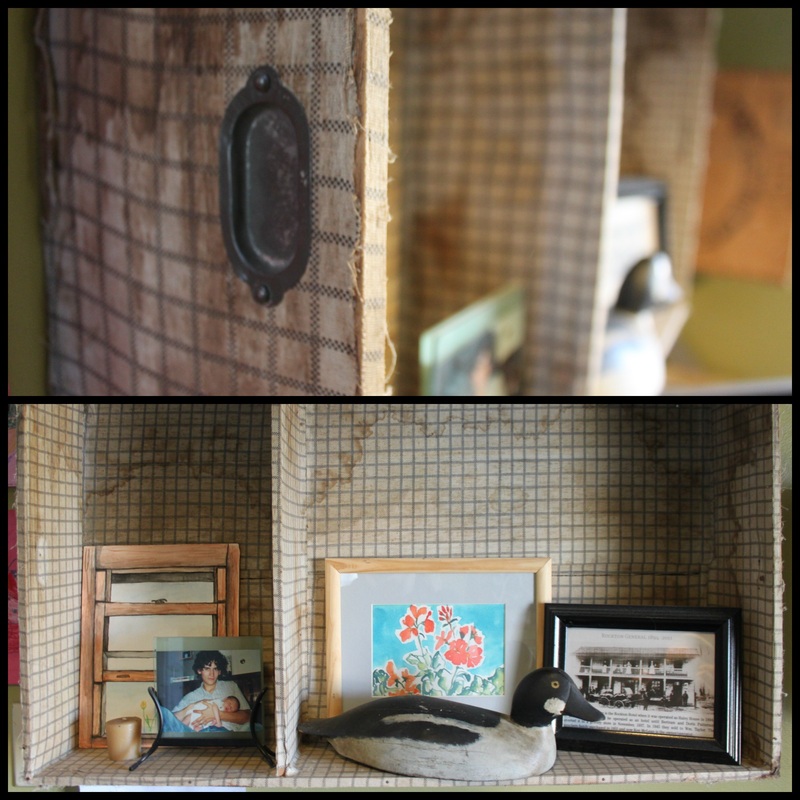 Speaking of steamer trunks, my kids also have one on the front porch to hold outside toys, but the lift out part of it (that most old trunks you'll find have missing), needed a job. So, it got added to our computer nook as a shelf. 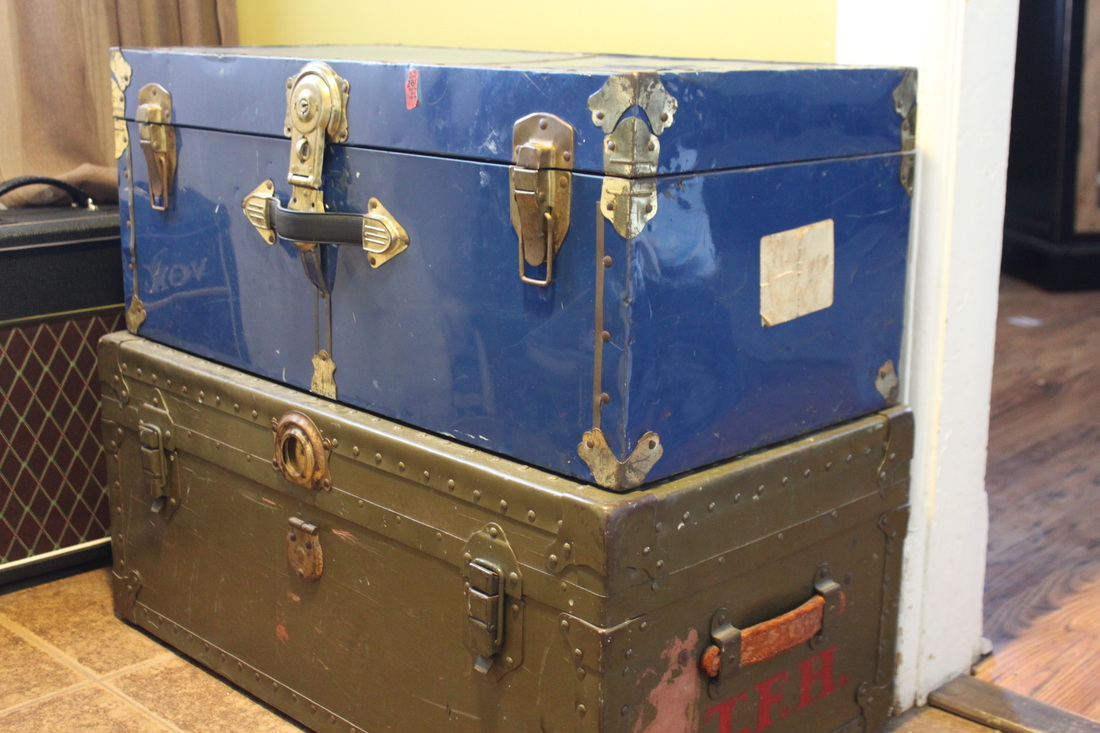 More steamer trunks….o.k, I have a problem….but let's not dwell on that right now. These stacked trunks are also in our computer space, the bottom one is actually a little empty, but the top one has our computer paper, and some other office-y things like binders and files. 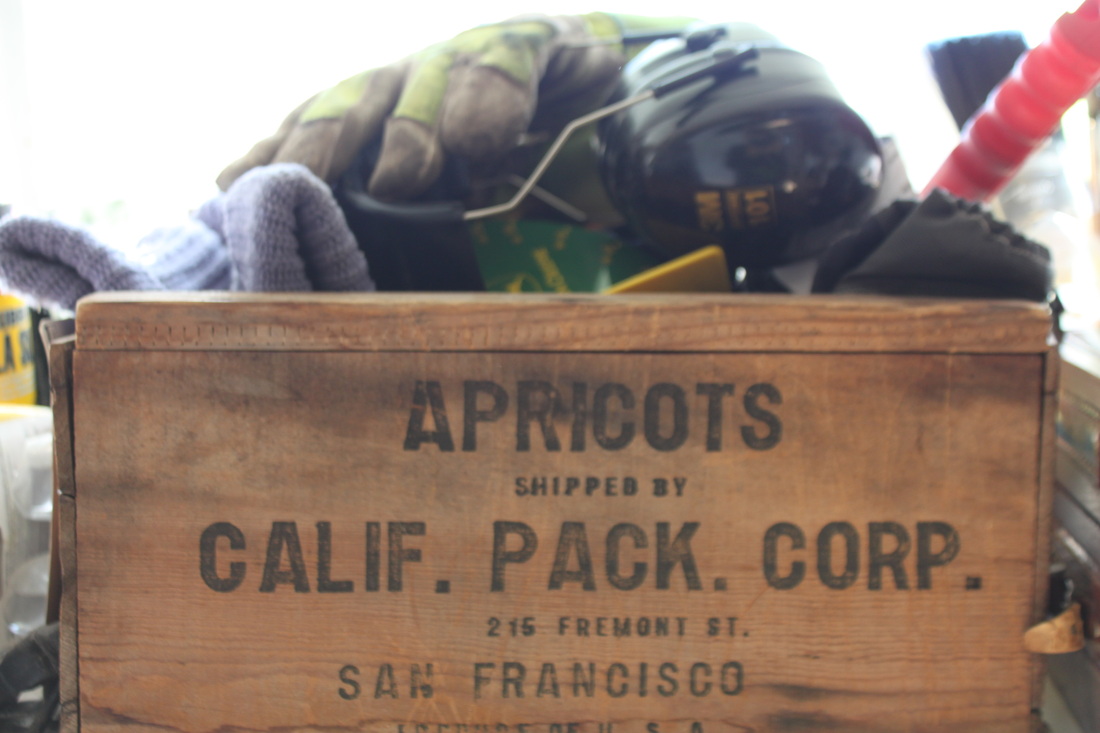 Just so you don't get it in your head that I am perfectly tidy, I am also sharing this photo from my fairly messy back room. This lovely box holds, as you can see, anything that lands in it! In here you'll find things ranging from dog treats, to a thermometer, mitts and a hat, lost nails and screws, and sidewalk chalk. So, (I want to say "in conclusion" as though I am completing an essay) you can love something, but also put it to good use. These beautiful bits of history are a part of our house, a part of us and who we are, and they help keep things tidy! I call that a win/win....um, win!
I have a love for beautiful old things. I love history, really, and antique things that remind me of the past are the only way to "capture" history in my home. 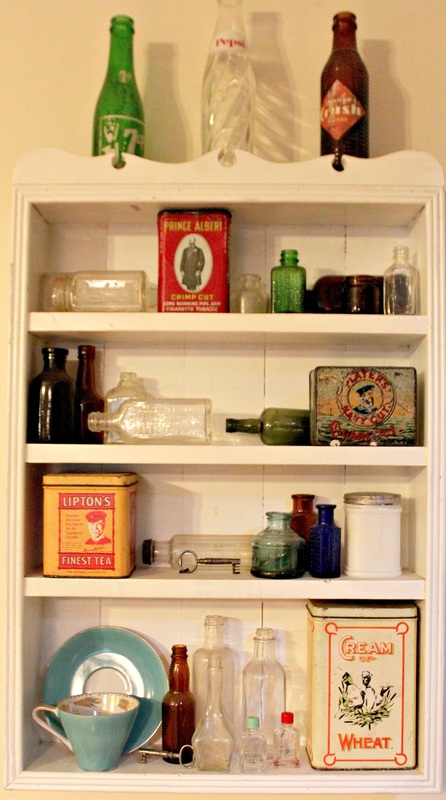 The whole vignette The downside to loving old things....? Finding places for those old things! My solution? Vignettes! A vignette refers to many things and subjects, but in this case, it means a collection of things put together for display (more or less)! 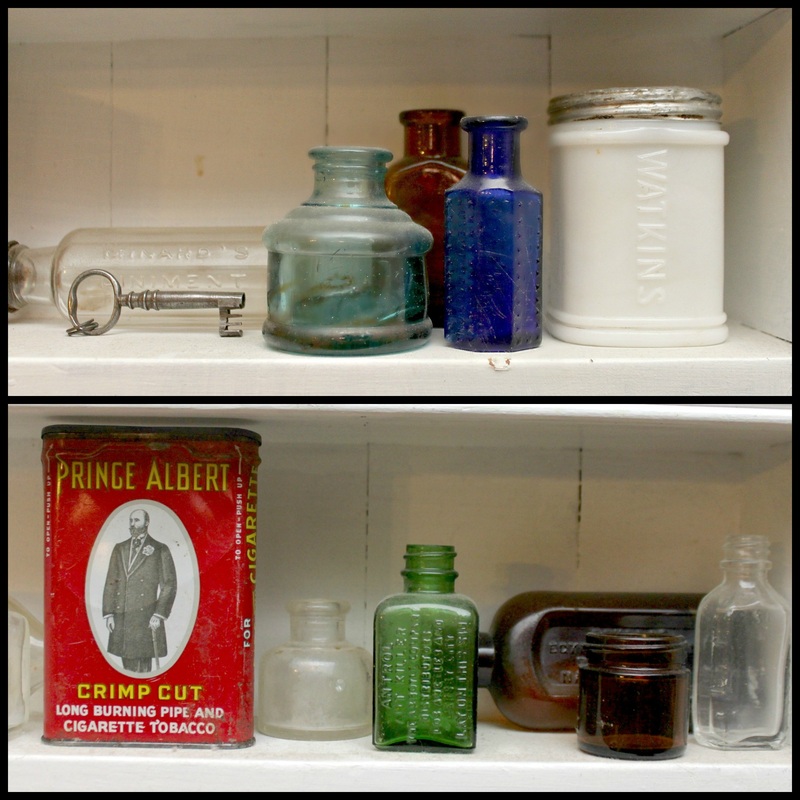 These bottles are a little dusty....but still pretty. Look at that old Watkins jar! So, when I realized I had so many lovely little things, and no place for them all to be seen, I painted a little shelf thingy I had, and worked on arranging my things. The key to a good lookin' vignette is to have levels, mix mediums, and create balance. 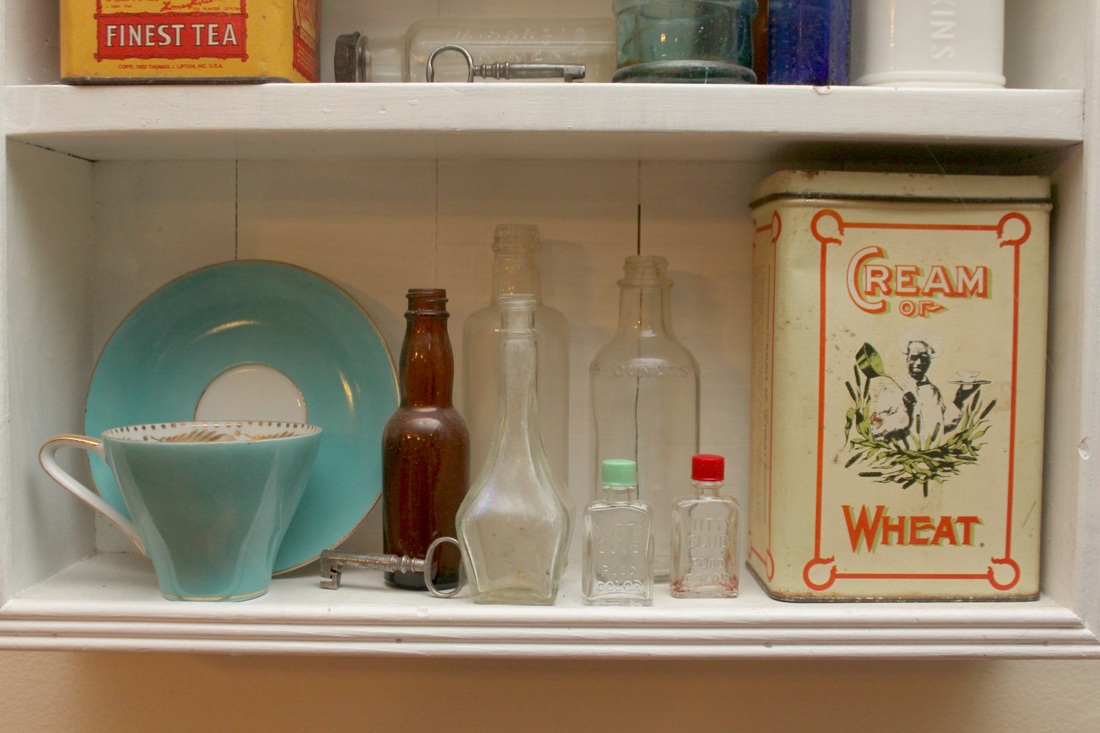 Those tiny bottles on the bottom with the green and red lids are glass food colouring bottles. So, while planning my daughters 3rd birthday (a tea party), I knew I would have to rectify the problem where I didn't own a cookie stand (one of those pretty, multi-layered thingies). Well, I looked around for one, but was never terribly impressed with either the cost or how it looked. Then I saw one on Anthropologie.....for around $80. Yikes. No thanks. 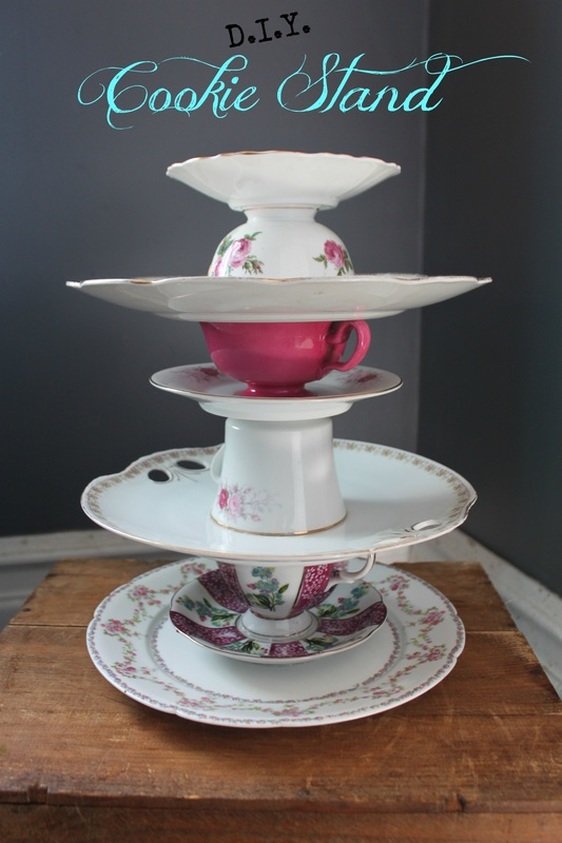 Well, when you find something you love, but it costs too much, what do you do? You go to your local thrift store, and get 'er done your own way! I looked around our "Hidden Treasures" store in my small town for dishes that would fit with the pink and white theme. In total, $3 was spent on the dishes. Then I headed over to our Home Hardware for some glue. Elmer's makes a "Fix-All Cement" (pictured below) that is good for hot and cold weather, as well as water resistant. 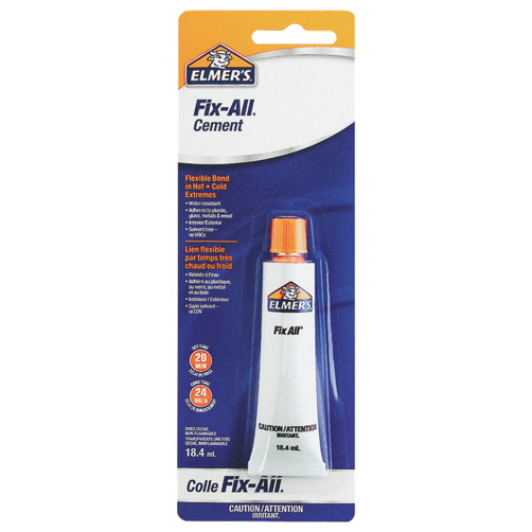 I went home with my dishes (one of which I broke while going home.....good thing I bought that glue....) and my glue, and started working on my cookie tray. I just kept stacking and re-stacking the dishes until I had something I thought was perfect. Then, I carefully glued them together, and put it somewhere safe to dry. So, for under $10 and not that much effort later, I had my own, Anthropologie inspired, cookie stand! I have used it a lot since making it, and so I am glad I have it! It's also a great conversation piece, so that's a bonus! :)
|
Hi, I'm Amy-Lyn! 
I am the lady behind this here blog! I live in the sticks with my animals, my super handsome husband, and my
3 amazing kids! Here you'll find things from recipes (gluten-free, paleo, and strait up junk food!), DIY ideas, thoughts on raising a son with autism, and whatever else pops into my brain! : ) Read more about me by clicking here! Want to Stay Connected?
Find What
|
 RSS Feed


