|
Hello there! Today really is April 1st (incase you're wondering, I thought yesterday was!)! We currently have at least two feet of snow still in our yard, but I am hopeful that spring (not that silly date on the calendar), but the real spring is coming! That really has nothing to do with today's post! In one of our houses we had this huge wall behind our sofa. The room opened up into the dining room, and so, what it really turned into was one, enormous, long, empty wall! I looked at some art that we could buy, but for the sizes we would need to fill the space it would be too much $$$ (I did start painting two large pictures for the dining room side, but I still had a whole lotta wall that needed something!). Anyway, the walls stayed empty, until one day on Pinterest I saw this! A beautiful photo collage that made me say, "oh yeah! I don't need one BIG art piece, I could fill the space with 20 smaller/different sized pictures!" Duh. For real, I hadn't even thought of doing it before! 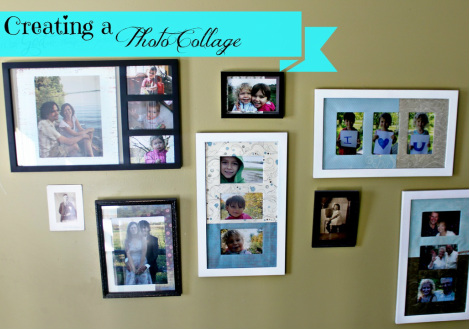 (Ahem) Please ignore the crocked photo! This is a small collection of photos going along our stairs. I am going to keep adding to it. There is no real trick to creating a nice collage, but there are a few rules that (I think) should be followed so that you have a "piece" that looks good. Firstly: Just decide if you want it to be a perfect square, or rectangle (fyi, this can add a lot of extra time to the project), or if you want one with no borders. You will want to know this before you start. Secondly: Make sure you have big & small frames. If all your frames are too small, it will look more like a jigsaw puzzle (and people won't really be able to see all the pictures). Thirdly: I would personally recommend having your frames be similar colours (or all one colour), or a general colour scheme. Think all white, all black, all earth tones, or if you're living on the edge, all jewel tones! Fourthly: Try to have a general spacing idea. You can be strict (everything will be one inch apart from each other), or within a rule (everything will be between 1-3 inches apart from each other). The point is that when you step back from your collage it feels like it belongs there, not like you just helter-skelter put some stuff on the wall! 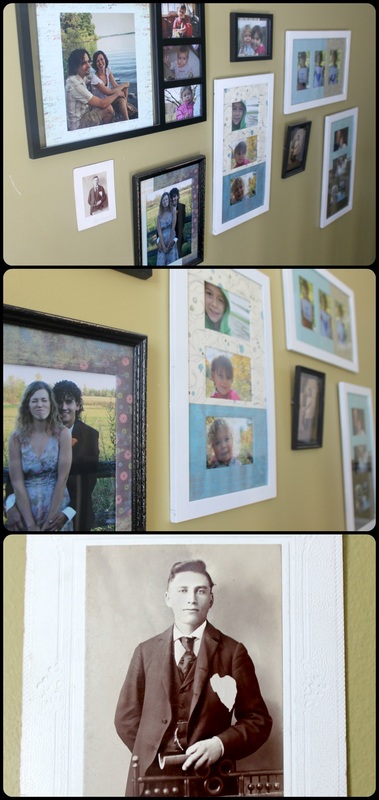 I thought it was important you saw my terrible face in the photo in the middle. Also, this young man in the last photo is of no relation to me, but I found him at the St. Jacobs Antique Market, and thought him quite interesting. :) I need to change out some photos here and there, but I have enjoyed adding things (besides photos) to make the collages/tell a story. Don't feel confined to photos, add art you like, random things you like, just go for it, and make it personal! 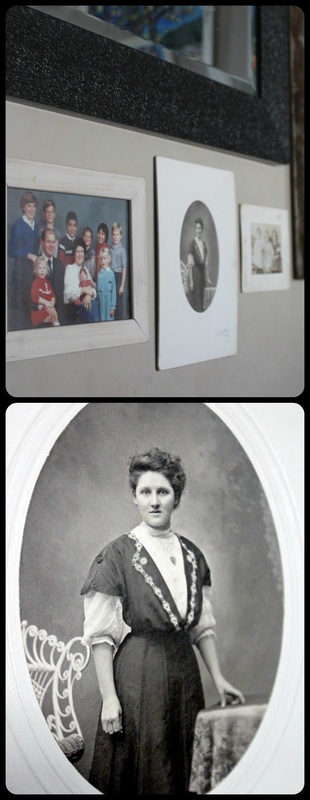 The family photo in the top left is an oldie. That's me in my Mom's lap in the front. I was brand-new! :) And that beautiful women in the bottom is (again) not related to me, but I like her, and I call her Diana Barry! To know what you want before you start making holes in the walls, take everything you plan to use, measure the size of the space you will be using on the floor or a bed (in the room you are putting these up in), and lay your photos/art, etc. down within those confines. This way you can get it "right" before making the commitment of a nail or screw in the wall! The gal in the tutorial link (from Pinterest) shows you this.  Can I just point out how dirty that bottom right mirror is! Yikes! The wall collage above has pictures, art, lots of mirrors (it's a dark room, so the mirrors make it feel more open), a "family" sign I made from some old barn board (out of our barn), and one of the old windows from our bedroom (the window guys thought I was a little coo-coo for wanting to keep ALL our old windows!) 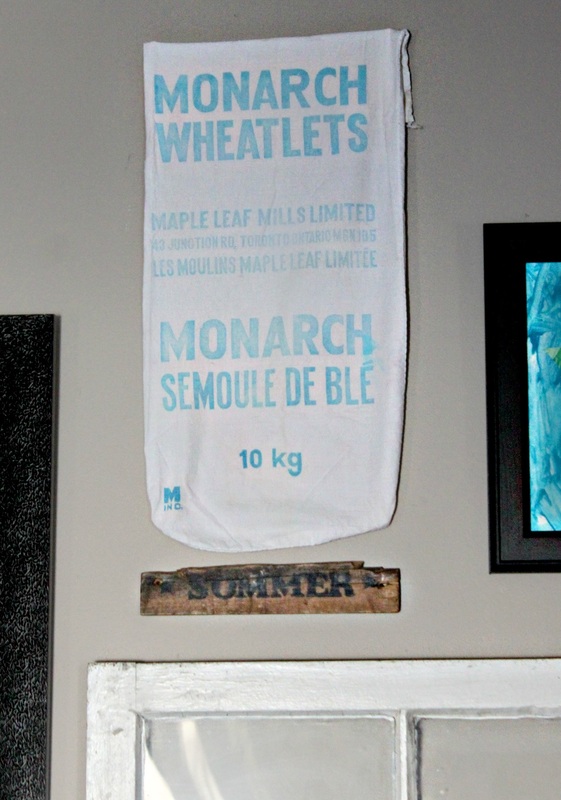 That Wheatlets bag is a beautiful cloth bag I got for $6 at an antique place. The "Sommer" sign is one I took from my horses stall when she was put down (years and years ago).
The point is not just to fill a space, but make a story. Create you, in collage form, in art form, on the wall!
2 Comments
Good day to you! At our house for some reason the internet will suddenly stop working. It's not our computer (we've finally got a good one), and our internet provider is actually pretty good too. But, something happens and the way to fix it is to simply unplug the internet, and plug it back in. This was once a job of horror (for realz), not knowing which plug belonged to which device!!! Horror! : ) Then on Pinterest I saw something brilliant: milk or bread tags as plug tags! So clever. 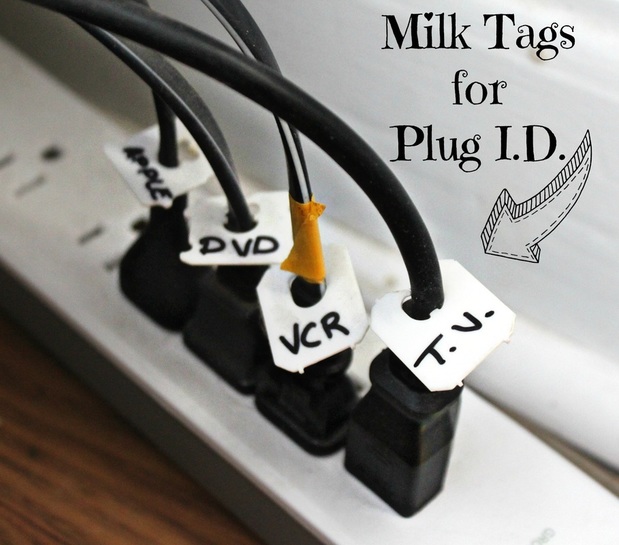 To make the tags, you simply use a permanent marker to write what each plug belongs to. It honestly takes just a few minutes to do, but it will save you a lot of time after! Now, when I need to unplug my internet, I just go and unplug the one I need, and I'm done. Woot woot, time saved! 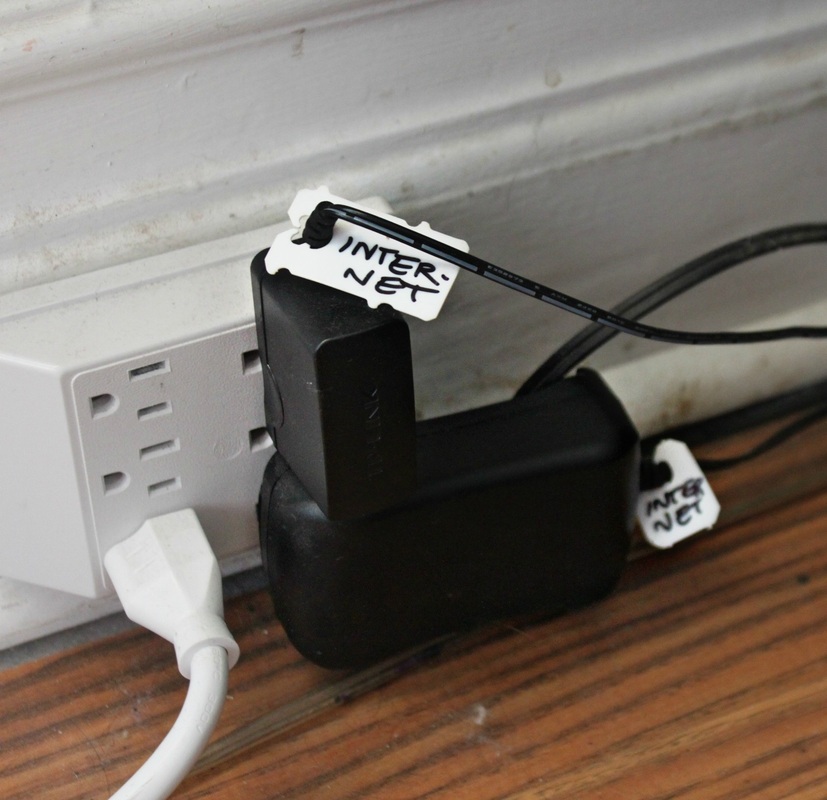 So, just a nice short post today about keeping life a little more organized! I shared about what I do with my veggies when I get home from the grocery store, but I do a few other things too in order to streamline some aspects of my life, and also to eliminate wasting groceries.  Some meats and cheese ready for prep. 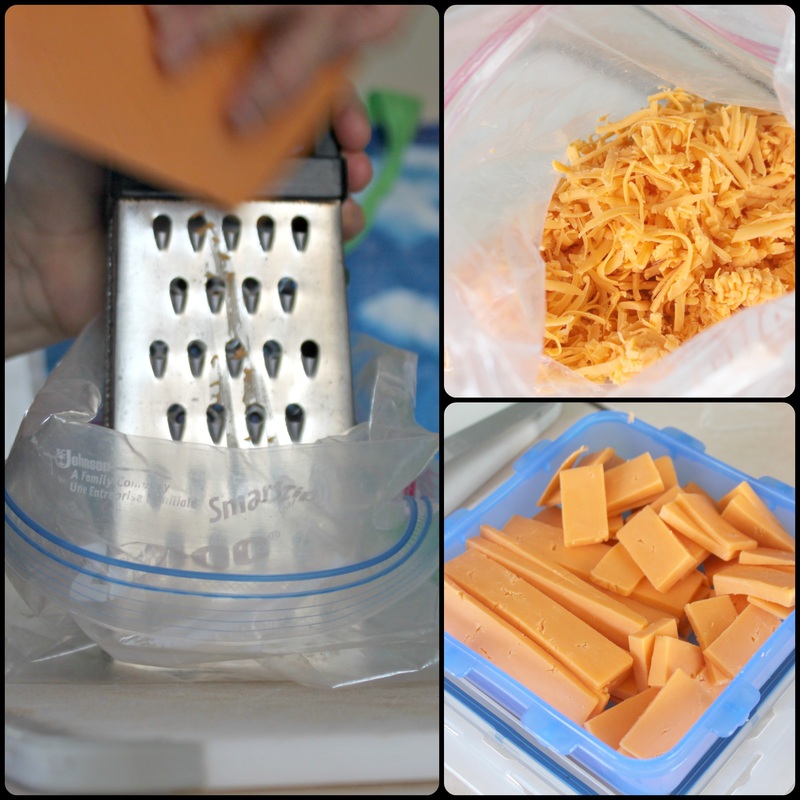 Doing this saves a lot of time, for realz. So, I've been doing this for a while, but it's one of my favourite life hacks. I prep my cheese! I take half the brick and grate it. We use grated cheese on things like broccoli and cauliflower, but also in our grilled cheese, and of course, to put on nachos! I slice the other half into "sandwich" sized strips, and once I've cut it down into a smaller piece, I cut that into "snacking" sized pieces. 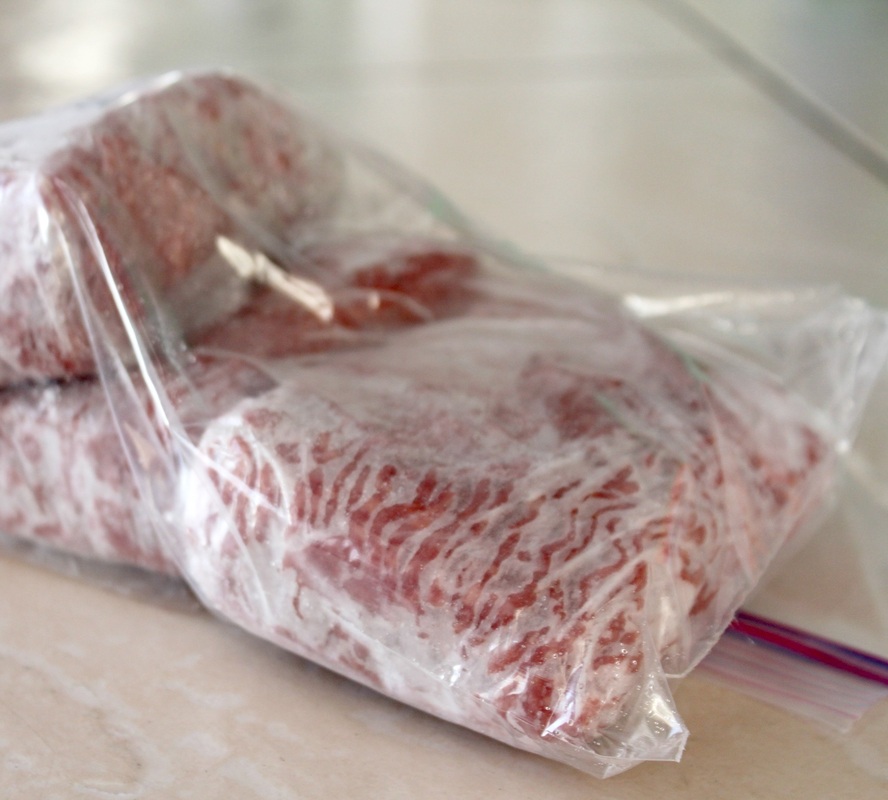 For our meat, I quarter our 2 lbs of ground meat, wrap each quarter in plastic wrap, then put them all into a freezer bag and into the freezer. With packs of chicken (like the thighs in the first picture), I would divide that into 2 meals, placing each half into 2 separate bags and into the freezer (you could divide it more if you're on your own, or have a smaller family, etc.)  My bananas take a beating if I don't do this trick! I simply lay the bushel on it's side, and (using a serrated bread knife) cut the top off, so the bananas are separate from each other. This does two things: One-if the kids want a banana, they just grab one, instead of man-handling the whole bunch! (causing all the bananas to get beat up), and Two-bananas ripen more quickly when they are together because they emit ethylene gas (a plant hormone that is produced as they ripen). So, if they are exposed to more of it, they ripen faster. On that note, if you need your bananas to ripen faster, put them all into a paper bag, or wrap them in newspaper so the gas they emit works overtime by not being able to get away! Small note: If you cut too low, it can be a bit tricky to open the bananas though, so don't cut down too close. 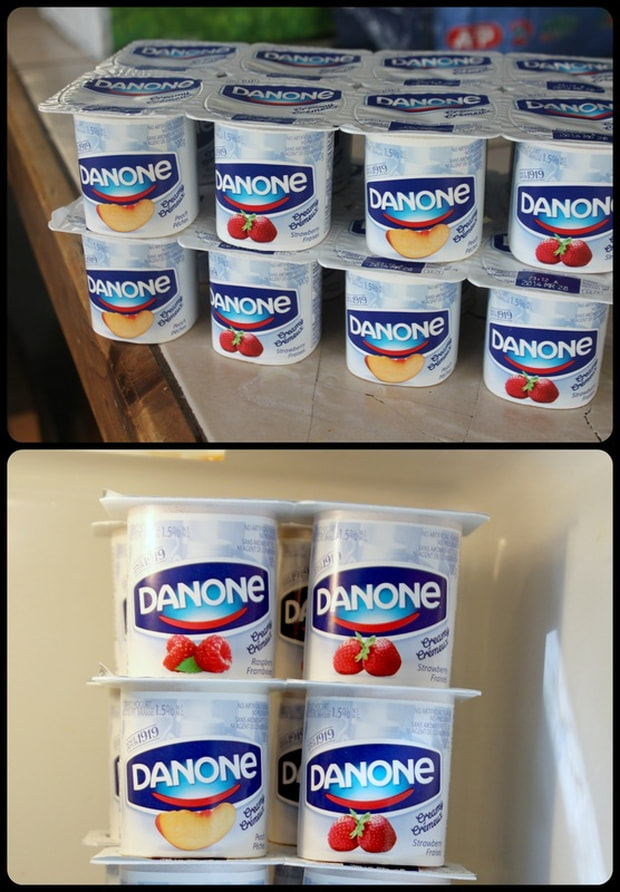 My last hack to share today is with our yogurt. When we get it home, first thing is we take it out of that cardboard sleeve it's in. That thing is useless in a household-it's great for shipping and at the grocery store, but not at home. Then, I take them apart by two's, so they are even more accessible in the fridge. Then I stack them up high, so they use more 'up' room, and less actual shelf space. I hope you're enjoyed my random tips for today! If you have any tips you'd like to share with me, I would love to hear them!
So, this has nothing to do with "Fast Food" as you would think (McDonald's, etc.), but it has something to do with having food that is handy, and accessible. Let me talk about produce purchased at the grocery store or farmers market is great; it is a great first step to eating right. But for real-z, sometimes after it gets home, it sits there taunting me, mocking me for buying it and being too lazy to prep and eat it. Stupid produce. Lazy Amy-Lyn.... 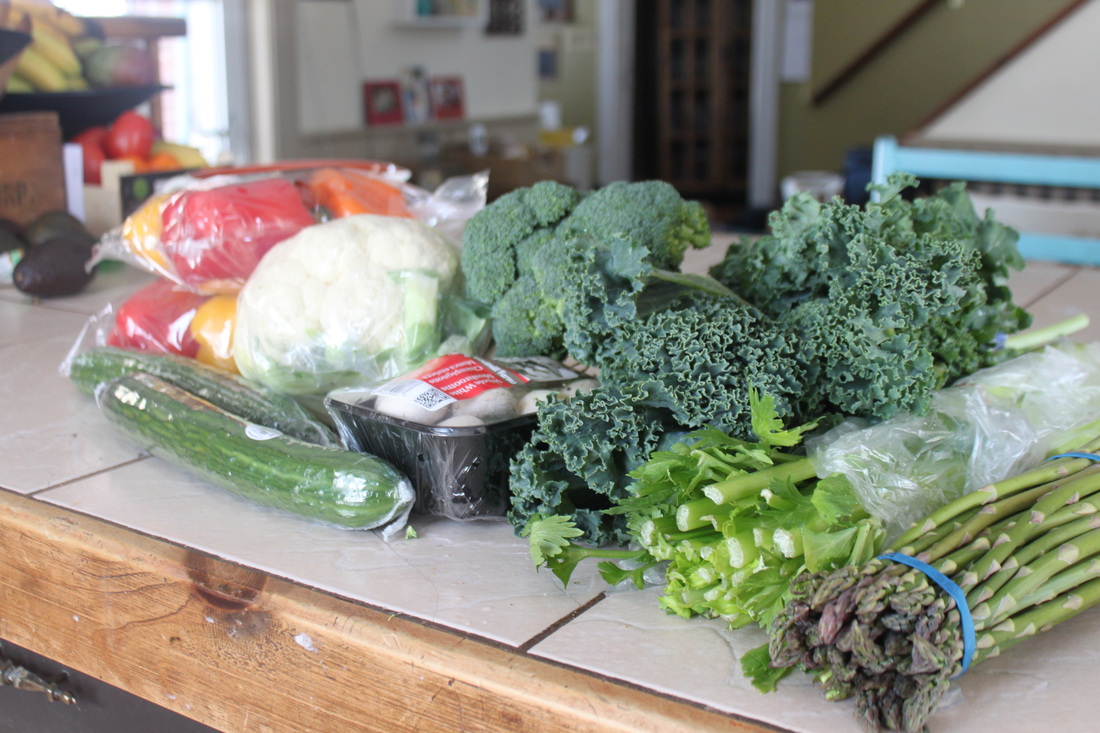 Our average weekly produce (minus a bag of spinach, and a pre-cut bag of romaine). So, a while back I started making myself prep what I bought. This did a few things for me. It kept the fridge a little tidier (let's be honest, cauliflower is just annoying in the fridge with all it's roundness!), and it gave me no excuses for not eating veg throughout the day, or grabbing it as a running out the door snack. It does take some work, but it's all upfront work. It generally takes me 30-45 minutes to get everything washed, cut-up, and into the fridge (depending on how much produce I buy). Seems like a lot of time, but think of the time you save doing it in one lump. If you do it throughout the week, you are re-using and washing a knife and a cutting board. Taking the time to get the produce out, wash it, get it ready. I think that would take more time, personally.  Yup, I'm a weirdo! As a random tip, we eat a lot of peppers, so I feel like I've got a good handle on cutting them up. So, I will give you my "no waste" pepper cutting secrets below! 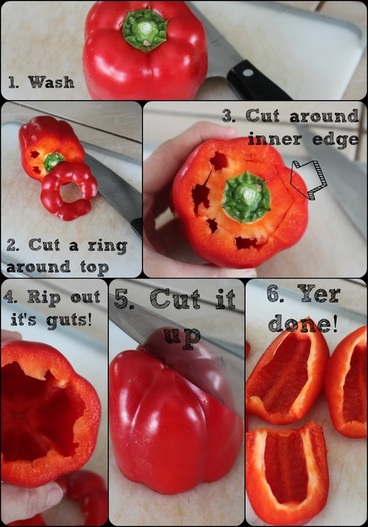 I know, it's amazing :) For step 4, I just use my fingers to reach into the pepper and take out the ribs/whites, and I tap the seeds out. FYI, sometimes the top ring of the pepper doesn't come off properly, don't fret, simply cut off the bits of pepper from the top so it's not wasted. For things like cauliflower and broccoli, I cut them up, and use the bags the peppers came in (I generally buy the four packs of peppers that come in the bags with little holes in them) to store them. Those bags keep the cauli and broc from getting slimy (as they can get in a sealed, no breathing style bag).  As for celery and cucumber, I wash and cup them up, and store them in tupperware and a zippered style plastic bag. The ends of the celery can get dry in the tupperware, so either fill the tupperware they are in with water, or eat it with dry ends (as I do, because dry ends don't bother me!). The cucumber stays lovely in it's plastic bag. 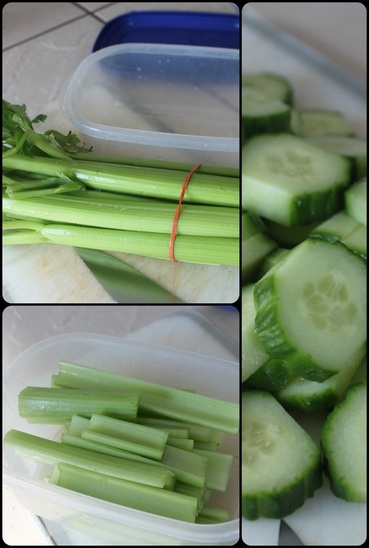 For something like kale, I cut out the big, thick ribs (not everyone does this, or cares about those, but if I cook the kale, they are really woody, and if I throw the kale into a smoothie, my crappy blender doesn't do a good job of actually blending them in), and cup it up. I then store it in the produce bag I brought it home in from the grocery store. Asparagus is happiest and lasts longest in the fridge if it has a little water, and the tops can breath.  So, do as you please, but this is how roll when it comes to my veggies! :) I like having things ready! If I'm hungry, it's just as easy to grab a handful of veg to snack on as anything else, no excuses! And when my kids want t snack, it's ready for them. Next Tuesday I'll bring you some more of my "fast food" tips!
Not everyone keeps the outfit they brought their baby home from the hospital in (or the first thing they put on the baby if it was a home birth). I did though, because I wanted to remember how small my baby was, and as a special thing for them to be able to see when they were older. Only problem is that keeping a cute outfit in a baby box tucked away in a closet is not that special! I know, big surprise! So, this idea is beautiful, and a nice way to display that outfit. Two of my sisters have done this (or something similar), but I'm not sure who I stole the idea from! Either way, only one blogged about it here (the other sisters' shadow boxes made an appearance on that post too). Check out that post! 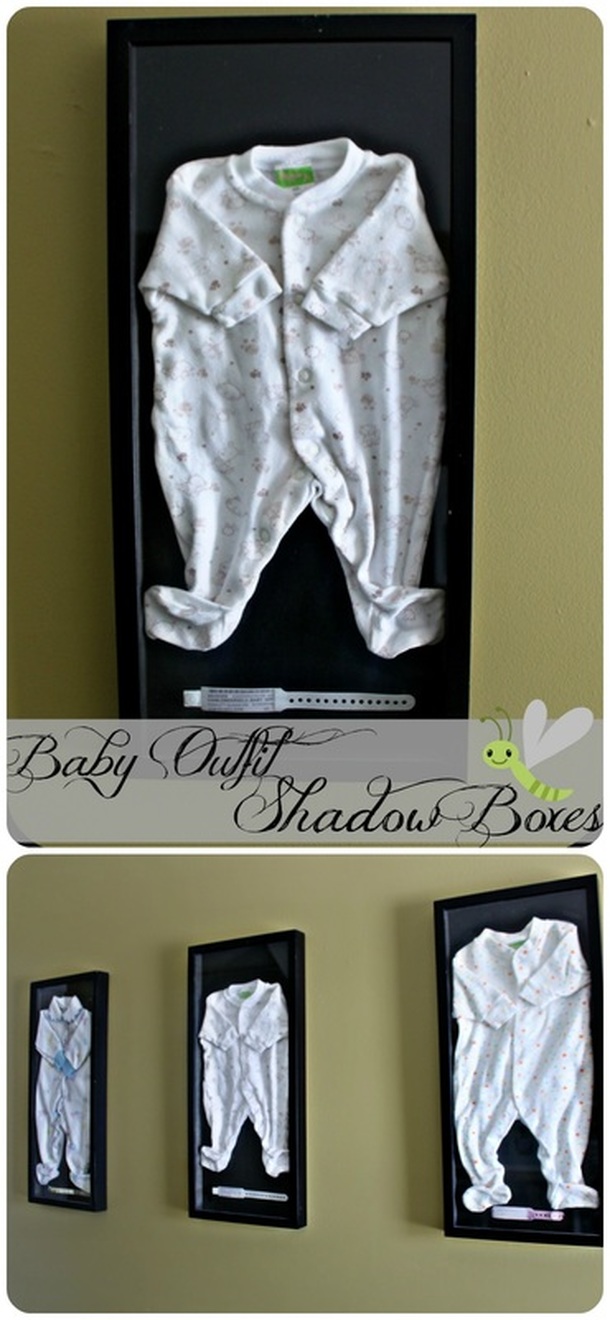 The art store "Michaels" often has good sales on their frames, and that's when I bought mine. They also always have a 40% off coupon in the flyer every week, so if you just need/want one frame, go for that! You can probably check online for a coupon too, but I'm a little old school and just bring in my little flyer clipping. It is a fairly easy process, the shadow box comes with double sided tape (though you may want to buy more, just in case). In some spots I needed to double-side tape the inside of the outfit as well (like in the collar) to keep it from hanging open-ish. Other than that, it was a fairly quick process getting it all together and hung.  Pictured above is our Keziah as a newborn, wearing her first ever "outfit". You can see this outfit on the far right of the wall of our shadow boxes. I enjoy seeing these hanging in the hall, and am glad I stole the idea from one (or both) of my sisters! : ) xo When we moved into this house, I found this "shelf" in the barn. Someone had taken the box that a typewriter had been delivered in, stood it on it's side, and used the top they would have taken off to build some shelves in it. It was cool. 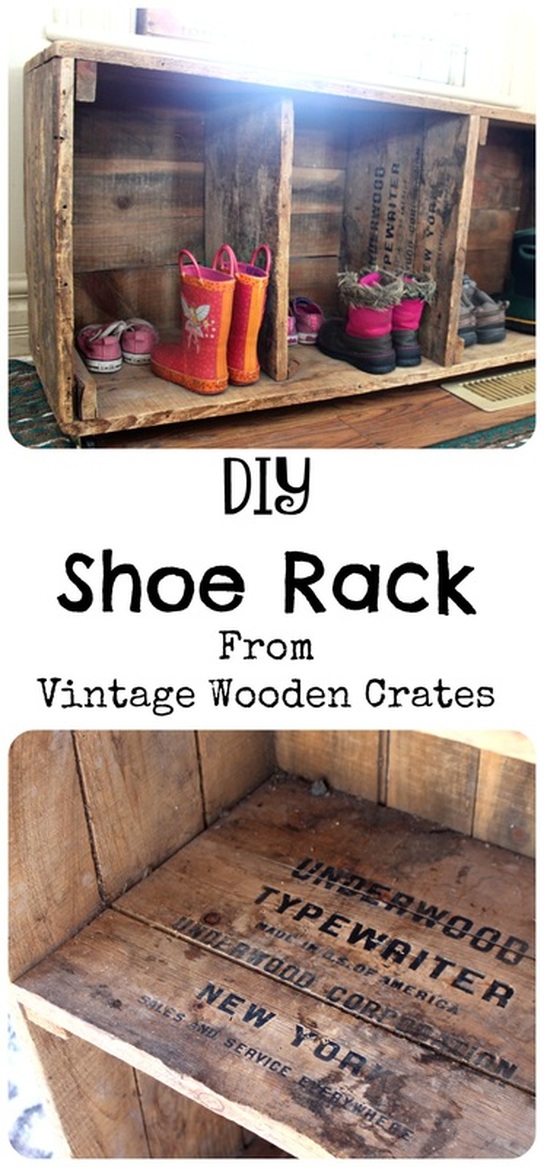 I knew I didn't want this beauty hiding in the barn, so I took it to the house, and cleaned it up. I also knew I didn't want/need it as a standing upright shelf-thingy. So, I decided it might be serviceable as a shoe holder at our front door. I picked which side I like best to be the top, and fastened some simple, inexpensive casters to the bottom four corners. I knew I would want caster for two reasons: First-This box would sit slightly over a heating vent, and I wanted to get it from sitting right on top of it all the time. And second-so that I could easily drag this out of the way for easy cleaning.  Because this was just one large box, and someone had it as a standing shelf (pictured above), all I needed to do was attach casters, and we were good to go! Even without the dividers though it would have been an excellent shelf. I really do like how it looks at our front door, and each of my three kids has their own little "cubby" as we call it. They know to put their stuff in their, and it keeps all the kids from crowding (and fighting) in front of our cramped front closet! 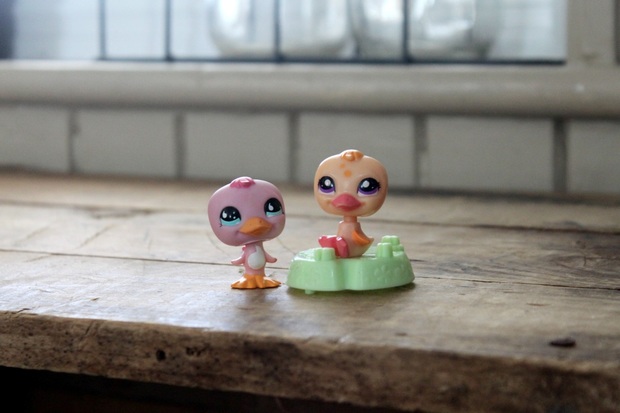 My daughter wanted me to take a photo of her ducks on the shoe shelf :) Other Ideas! Knowing that huge typewriter boxes aren't always readily available, and that not everyone will find one in their barn, I've included some other shoe racks from wooden crates for you to be inspired by! 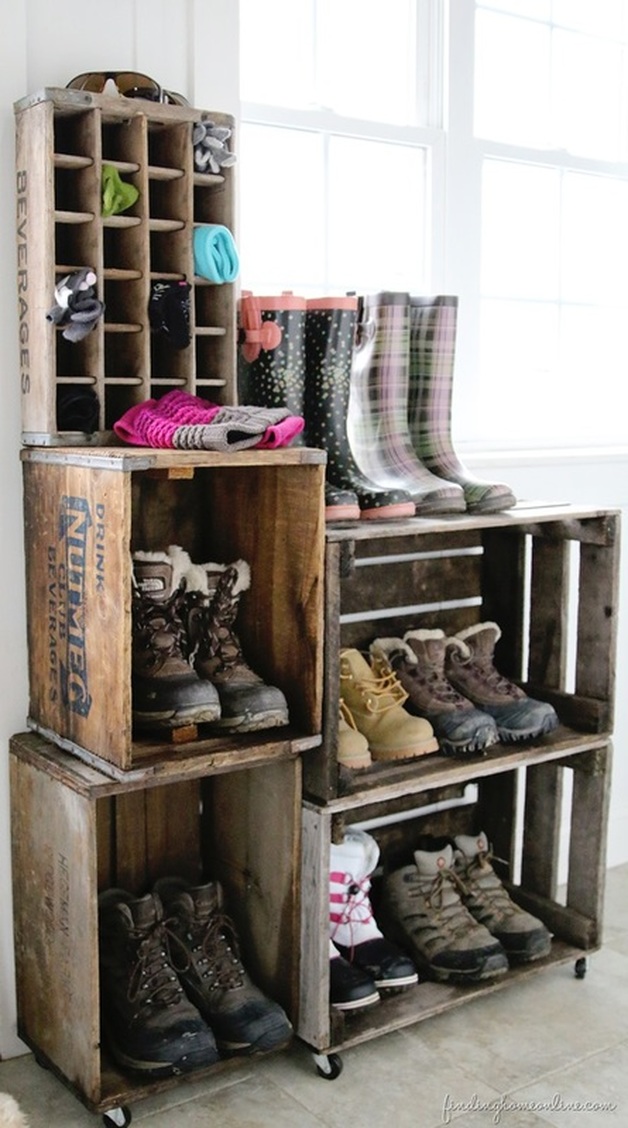 At Finding Home Farms there is this beautiful shoe rack from multiple wooden crates. Find the tutorial here. 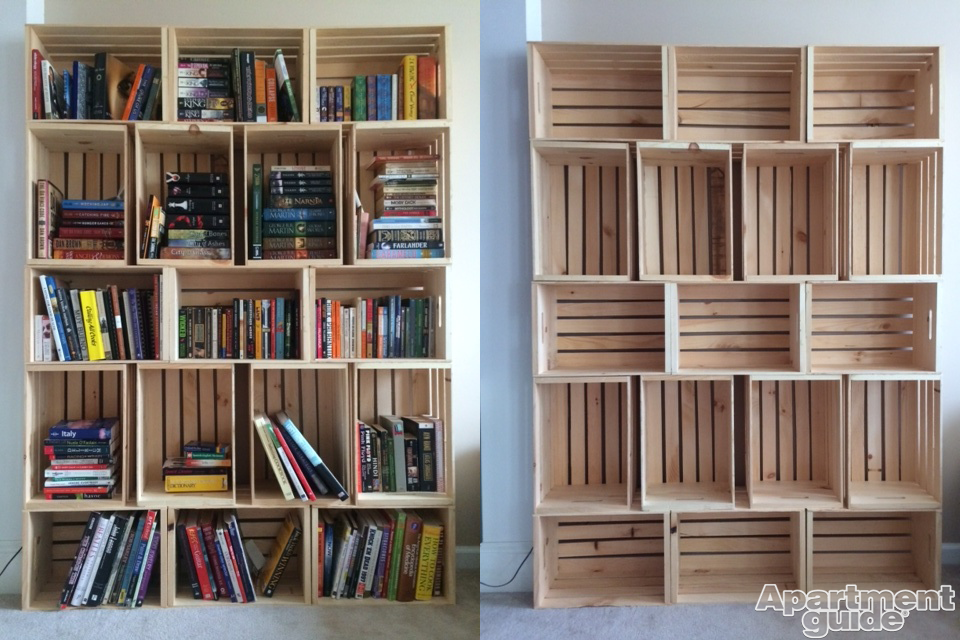 If you can't find/can't be bothered to find vintage crates, you can find new ones at stores like The Home Depot, Canadian Tire, Michaels, and Wal-Mart. Apartment Guide has a tutorial on how to accomplish this shelving from these new wooden crates. It shows the shelves with books, but it can obviously be made to the size you need and used for shoes & boots! Click here for that tutorial! 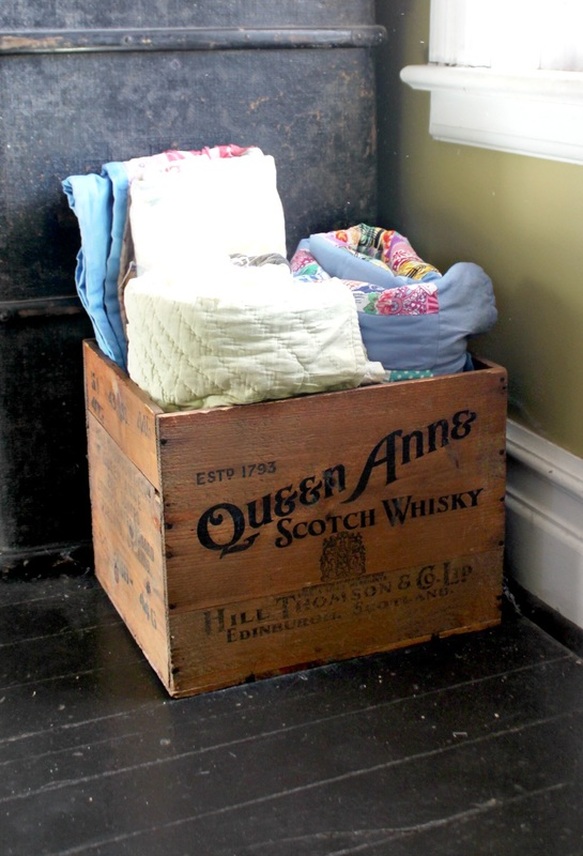 Using an old crate to hold quilts for display and for guests to be able to grab if they are sleeping over and are freezing in our old house! Some of my other uses for old wooden boxes (and steamer trunks) can be seen here. I love finding old things, and bringing them back with a new job, it often saves us money, and is always one-of-a-kind! I'm not 100% sure if this "qualifies" as a life hack, but I find it super helpful, so I wanted to share it! When I was a child, my Dad built a slatted bottom box that sat over the heating vent in our "shoe room". So, when we would come in on a winter day, we would toss our mitts, hats, scarves and sometimes our boot liners into this "hot box", and when the heat would turn on, our stuff would get nice and dry! What a smarty pants!  My version I use today is a simple milk crate sitting over the heating vent near our shoe shelf at the front door. Sure, it's unattractive, but function wins in this fight! To keep life simple and a little less cluttered, my kids only have one hat, one scarf, and one pair of mitts each, so, throwing their stuff in the box means that when they go out again their stuff is dry (and sometimes nice and warm!) for them to use, and they don't need a second set for "just in case the others are wet".
I hope someone finds this little tip from my childhood helpful! So, my closet wasn't the worst, but it had been a little ransacked during the holidays. It was the last on my list of things that needed some attention once life was back to "normal" (whatever that is...) after Christmas. It's not some amazing transformation (at all), but I do have a few tips to share (in case your closet could use some help too)! 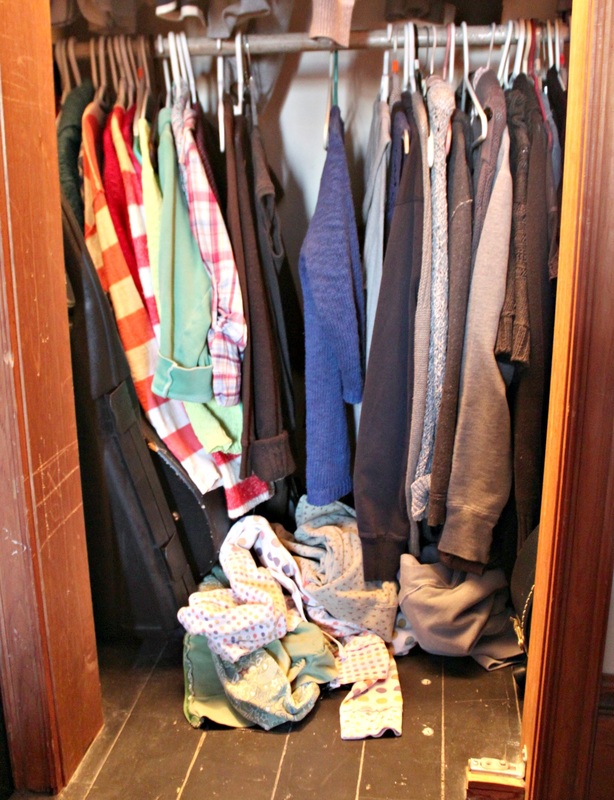 Post-Christmas Mess So, not too bad, but there was a lot of stuff that had been thrown in, pulled down/fallen down on the floor. Also, my closet makes a great hiding spot for children playing hide-and-seek, so I blame my kids for some of this mess. Sheesh. As for the clothes themselves, they were "out of order". Um, yes, that's what I said, "out of order". I like to have my clothes in their colour groups, and in those groups, I like them to be with their similars (not a real word, fyi). So, knitted with knitted, sweatshirts with sweatshirts, etc. 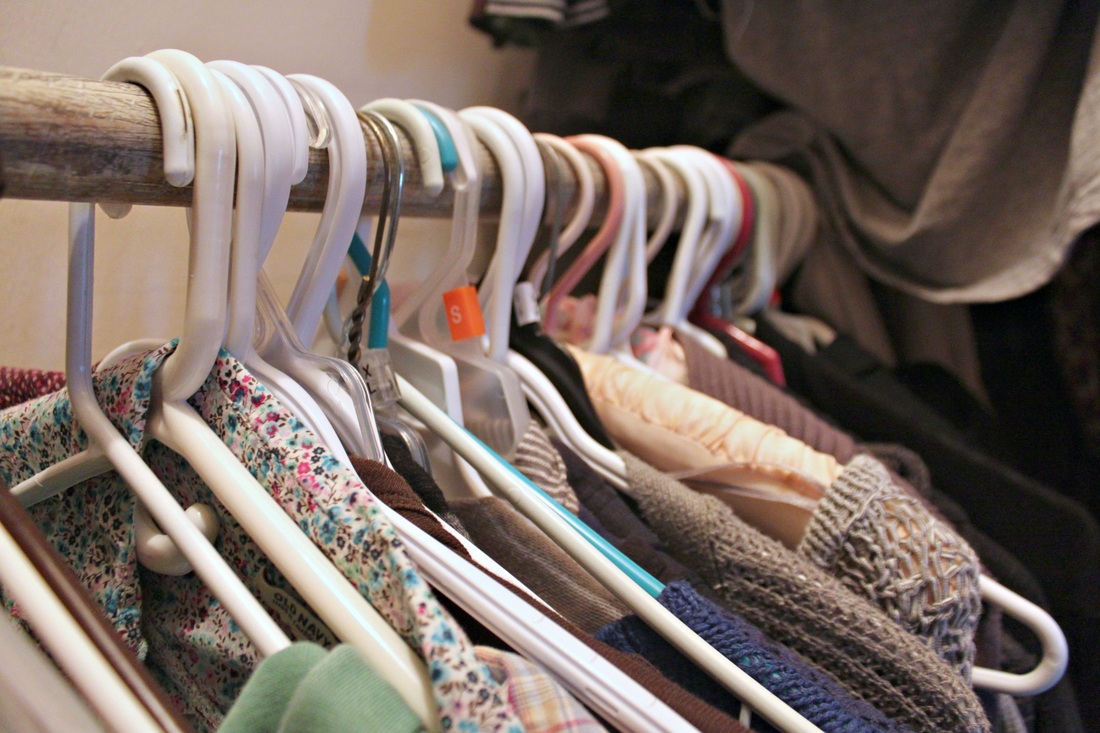 Year End Hangers. Time to get rid of some clothes! So, here you see the hangers are all facing different directions-that, my friend, is on purpose. Every new year, I turn my hangers the "wrong way". As I wear things, I put them back the "right way" (it doesn't count as wearing something if you just pull it out and try it on. You need to actually wear it!). At the beginning of the next year you have a clear, un-biased view of what you actually did and didn't wear by looking at the hangers and which ones are still the "wrong way". You would be surprised what sits in a closet for a whole year! 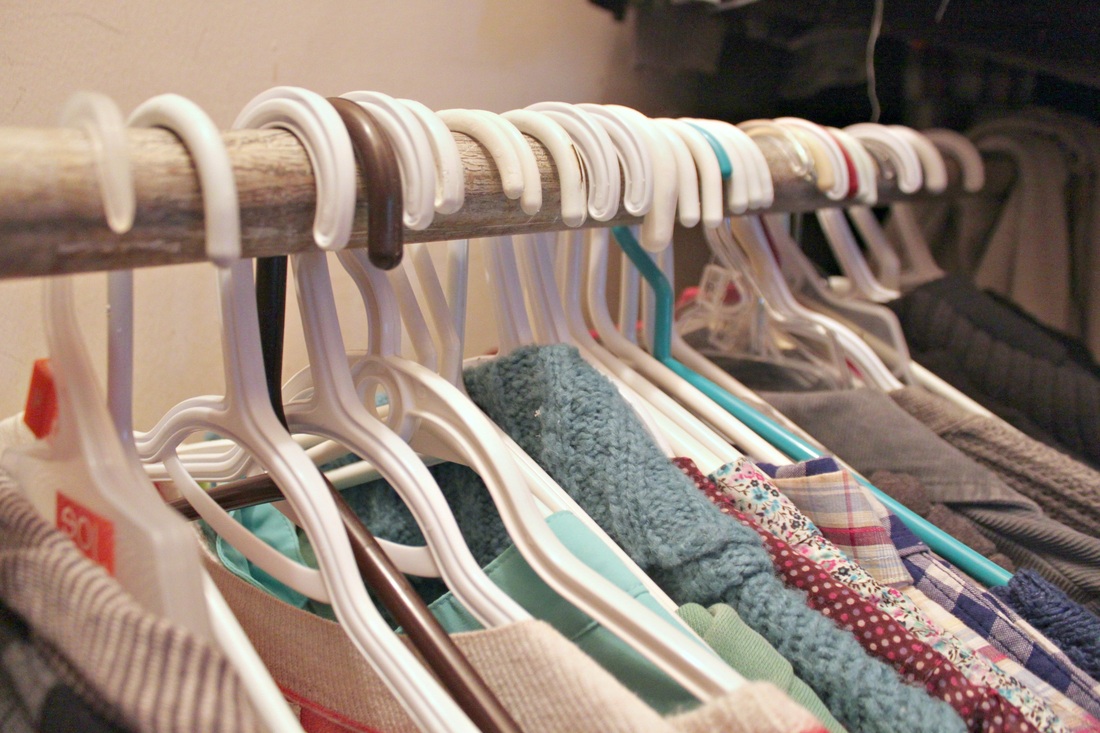 Here's the clothes now, ready for a new year (all hanging the "wrong way"). 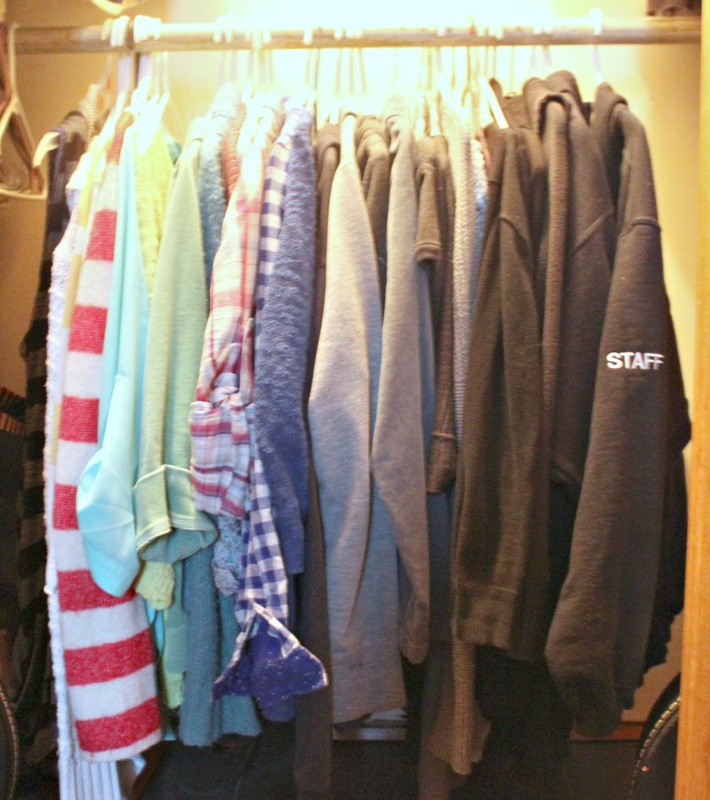 Like I said, nothing amazing, but it's been re-colour organized, "weeded", and the hangers are facing the "wrong way" ready for a new year! Well, back to "colour grouping" my clothes. I find this helps with 3 things:
1. You can see that you maybe own too much of one colour, and should lay off it for a bit (me and black....). 2: When you get dressed, you have a clearer picture of what you have to choose from. You don't have to rifle through your entire closet looking for that one blue sweater, you can just quickly go to "blue", and know it'll be there (....and if it's not, it's in the laundry, or a closet monster ate it). 3: It makes it easier to keep the closet tidy when you know where you are putting something away. I am good at putting things back in their proper place (as long as I am actually hanging it up, not throwing it in!), but when I ask my (hide-and-seek) kids to tidy up their mess, they have no respect for my colour code and just hang things willy-nilly. Sheesh. :) So, that's it! I got my 4 things done that I wanted to after all the hubbub of Christmas had settled! It feels good. As a (slightly crazy) stay-at-home Mom, checking things off my to-do lists helps me feel like I may actually still posses skills beyond endless dish washing and meal making (p.s., neither of those things are ever on my actual list of to-do's). I think the worst hit from my holiday neglect was my baking cupboard....I actually didn't really neglect it, I completely abused it! I was baking a lot, and every time I would bake, I would leave the cupboard a little worse than I found it....the end result? A disaster! 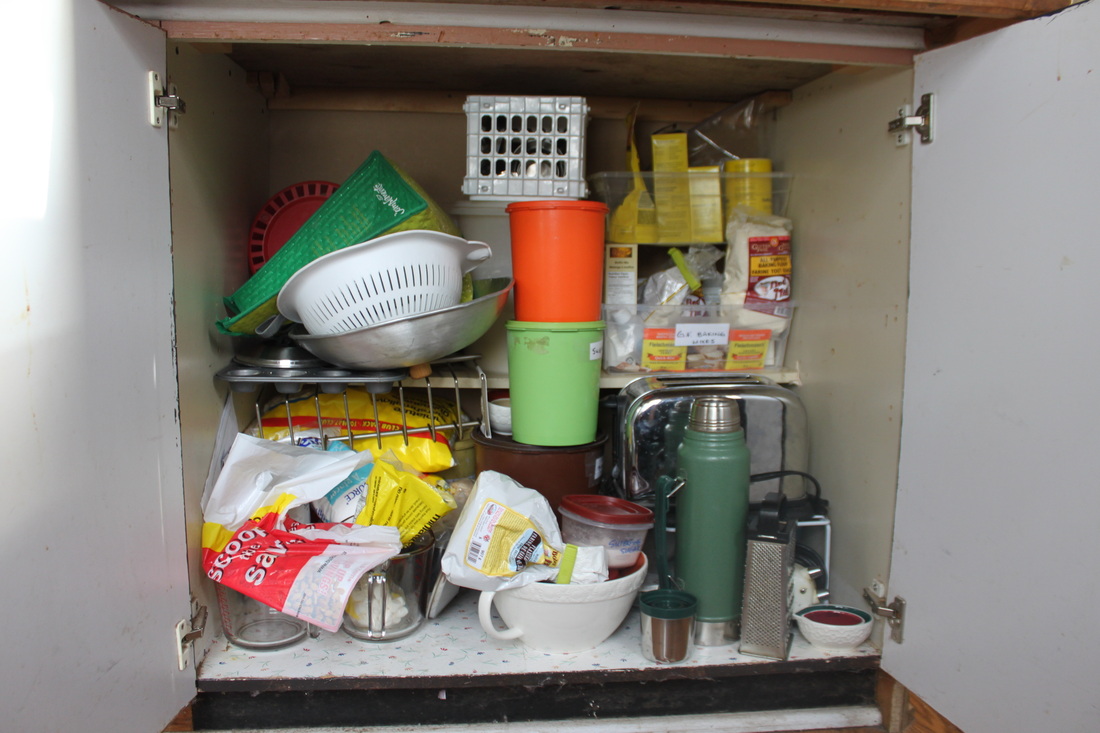 The cupboard in all it's glory! So, clearly it was a need-to-do job after life settled down from the holidays! 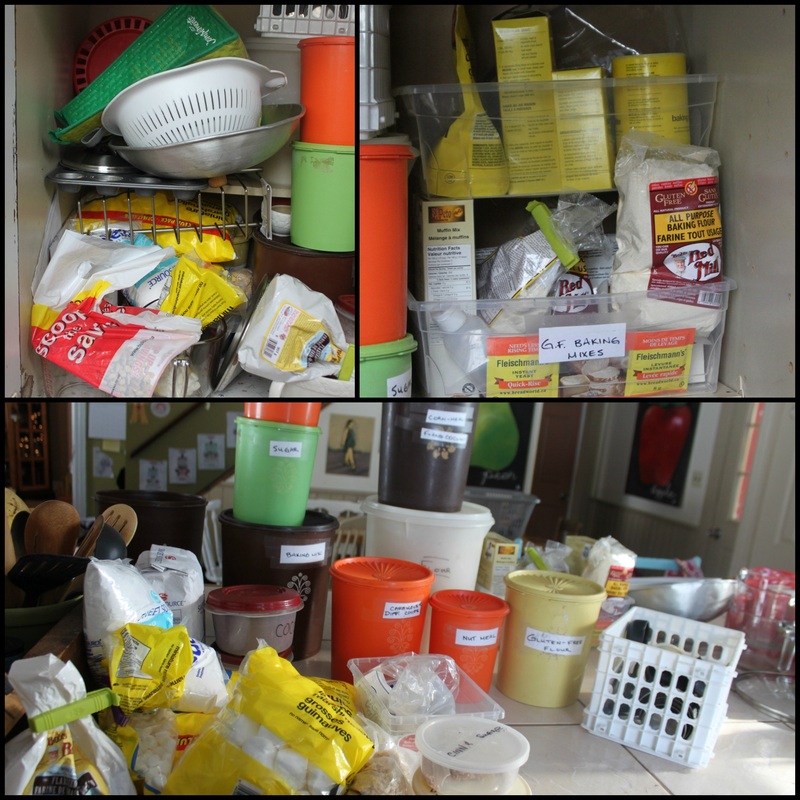 (top 2 pictures) Each section was crammed with stuff, and I couldn't believe how much space it took on the counter (bottom picture) when I pulled it all out! As usual, I began by pulling everything out to see what I had, what was hiding, what needed to be thrown away, etc. This time though, I did spend some money on the project because I knew I would need some baskets to help keep everything in it's place. 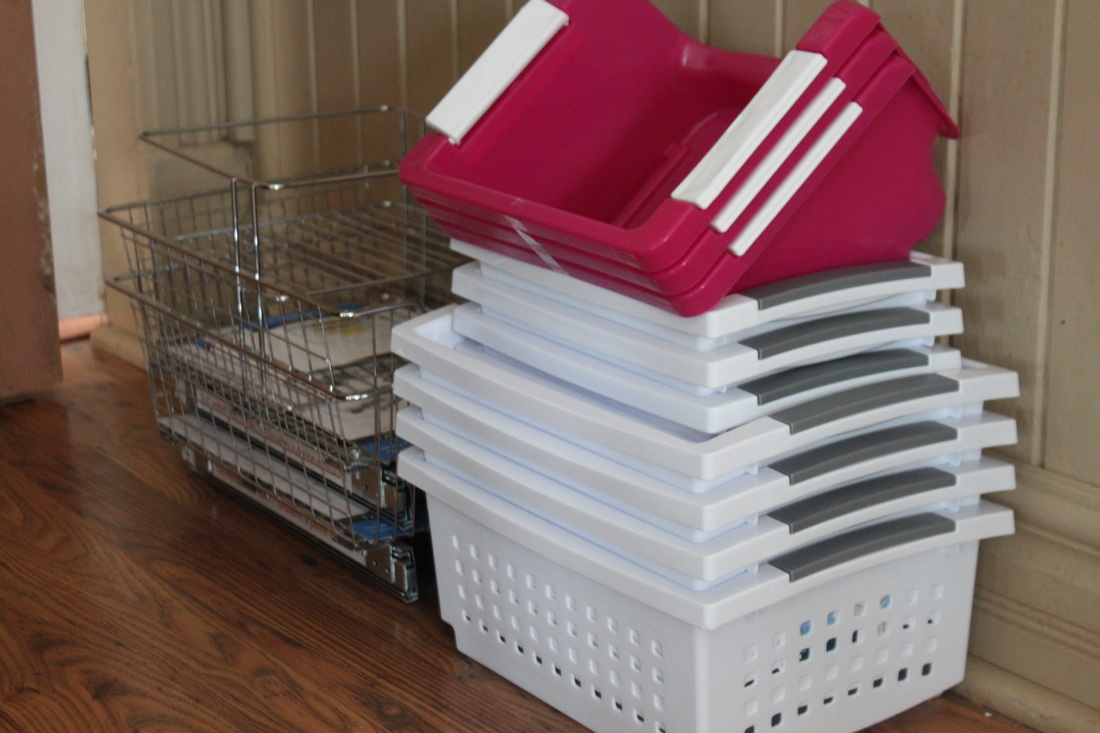 I bought more than I figured I would need because I didn't want to not have what would fit and work for the space. Plus I knew I could find uses for whatever remained, or just return it. Because this is a bottom cupboard, and very deep, I purchased 2 "drawers" to use. They required a little cordless drill work, but they were really very simple to install. Then I re-stocked/re-assigned some of my old school Tupperware, and started to see where they would fit. 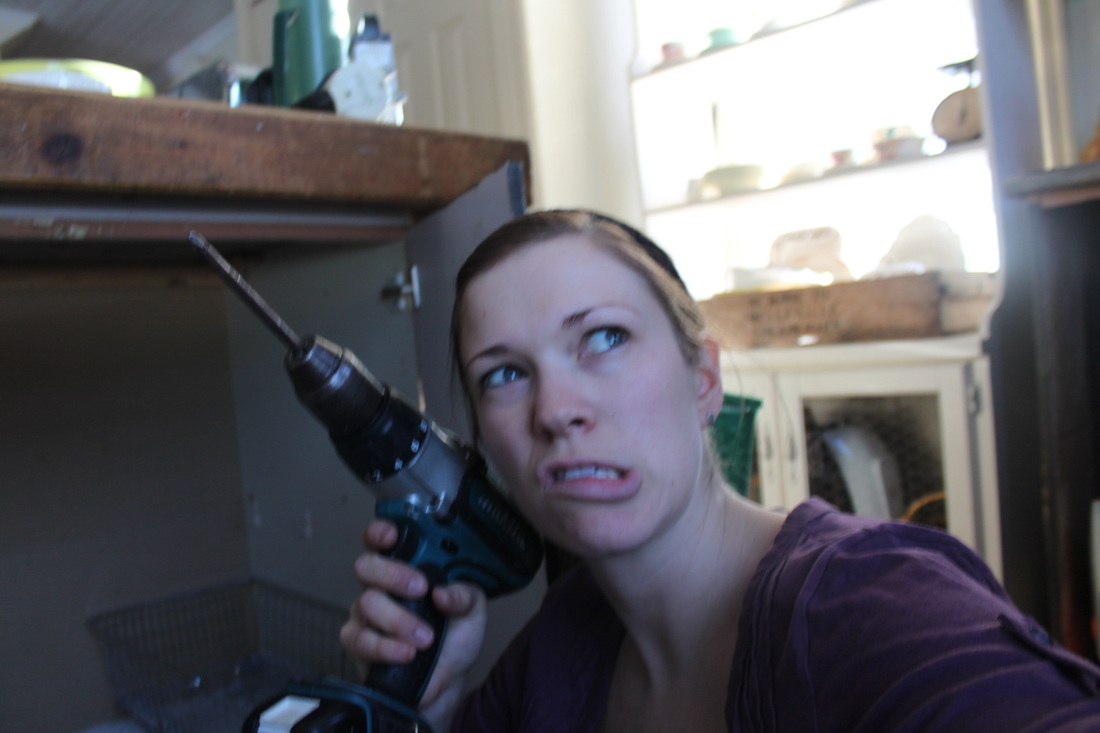 Using the drill selfie. :) Some things were in there by default, and needed new homes, like the lids for my pots (my pots and pans used to be in this cupboard before I did the hanging pot rack, and the lids never left!). They are happy on top of the fridge, though you have to be at least my height to reach them. I also moved a (beautiful, from my sister) mixing bowl out to a new spot, and gave away a few other bowls I had because I no longer needed them. My toaster remains in the baking cupboard though because I don't want it on the counter, and there is literally no-where else to put it! 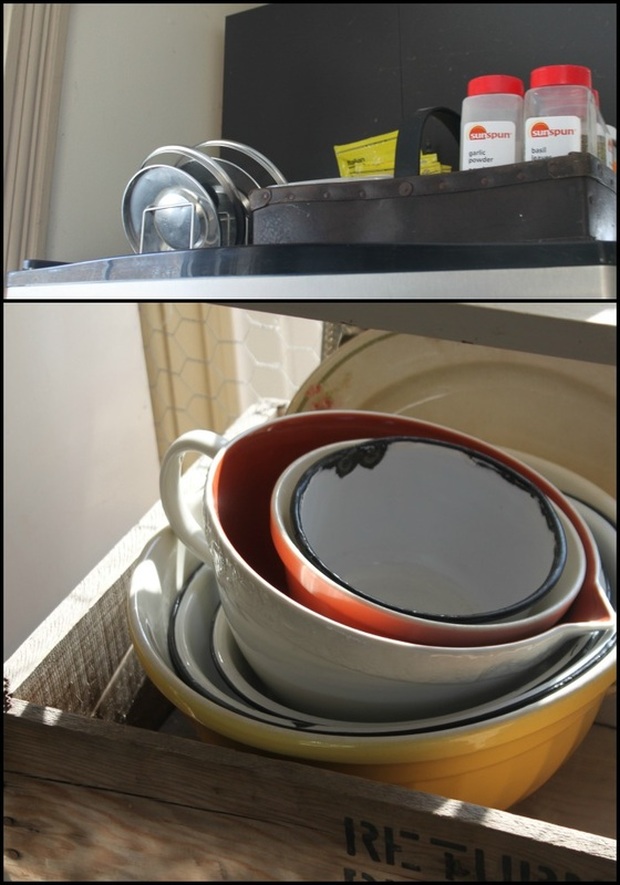 Re-Homed lids (top), and bowl (the cool one with the handle). Labelling things saves a lot of headache when it comes time to use the cupboard. I just wrote on regular paper, cut it out, and taped it on. I'm super happy with how it turned out, and am glad I tackled it instead of just throwing more and more things into it and shutting the door before everything fell out! :) 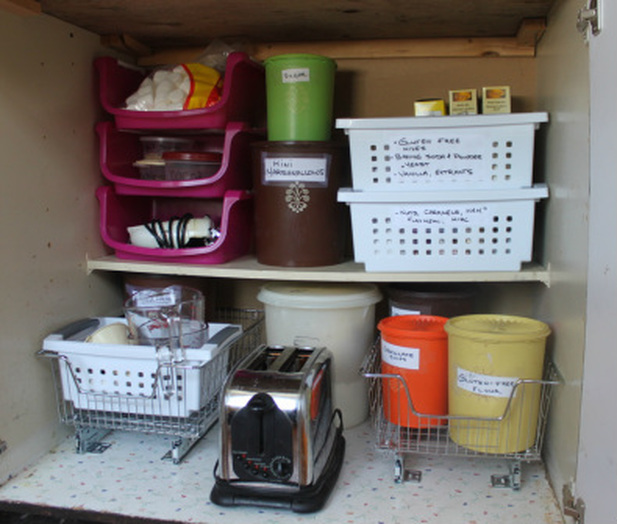 Ohh, lala! :) It took me about an hour to get everything how I wanted it, but I sure do like how I can find everything now. I keep opening the cupboard just to take a little peek at the organization....it's true, I'm that much of a tidy-ing geek.  In my second week of post-holiday organizing, I tackled our over flowing toy box! I actually have 4 bins of toys in total. Each bin is specific, but only one is out at a time. I used to rotate every 2 months or so, but now I rotate as the interests of my kids change. Either way, after getting back from the holidays, I knew we needed to do some re-organizing and eliminating! Can I also say this really is a job for when the kids are in bed. It's good to teach kids about donating, and how to eliminate useless things from their lives, but not all age groups find this liberating-some just have meltdowns, and make this job impossible! I do warn my kids that stuff will be disappearing. So I ask them, "if you had a choice, what would you like to keep?" 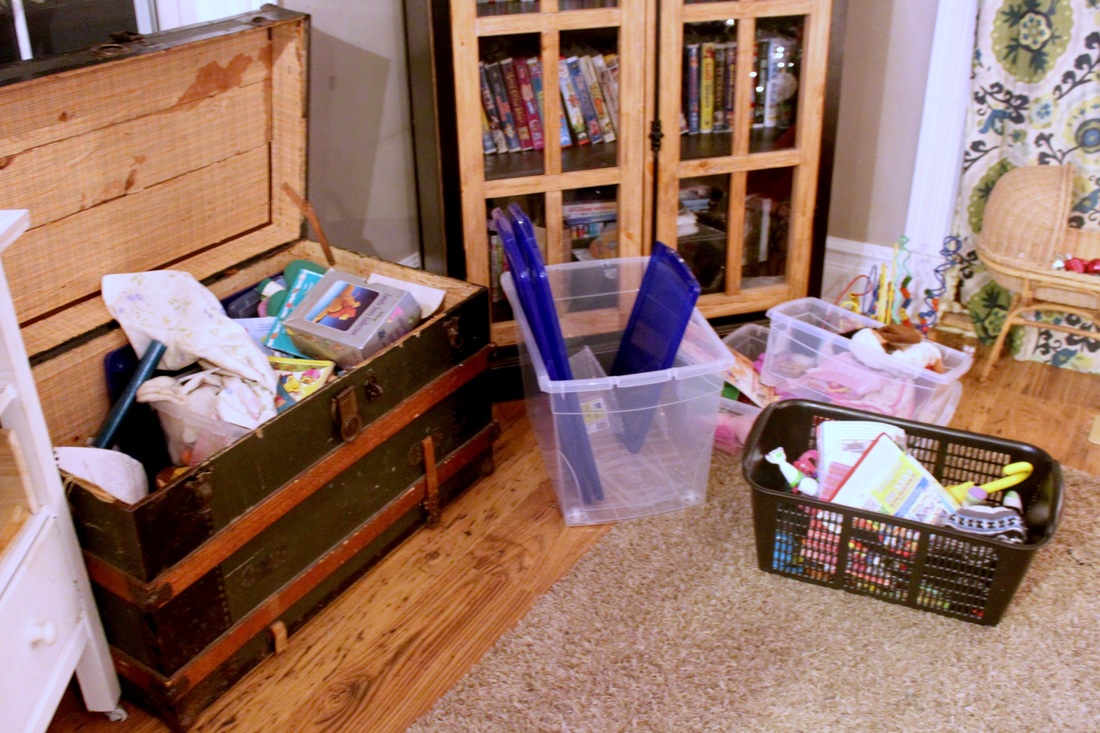 The toy box (the steamer trunk) literally looked like you see it here! A disaster! Not pictured is the couch that had 2 laundry baskets with all their new toys from Christmas, and others from around the house. The best way (in my opinion) to start a toy clean/organize is to grab a laundry basket (or a few!), and collect toys from every room in your house, and bring them all into one room. I tend to do this in my living room because then I can watch some t.v. (sort of) while working on it. Don't forget to look under beds, and under/behind the couch before you start! Next, you will want to have laundry baskets (or just designated spots in the room) for different "categories". Cars & trucks, softies, characters (from movies & t.v. shows), music, blocks, books, etc. Once you've got all your toys into their different baskets, you can see how much crap you have!!! Haha....no, but seriously....that's a lot of stuff! 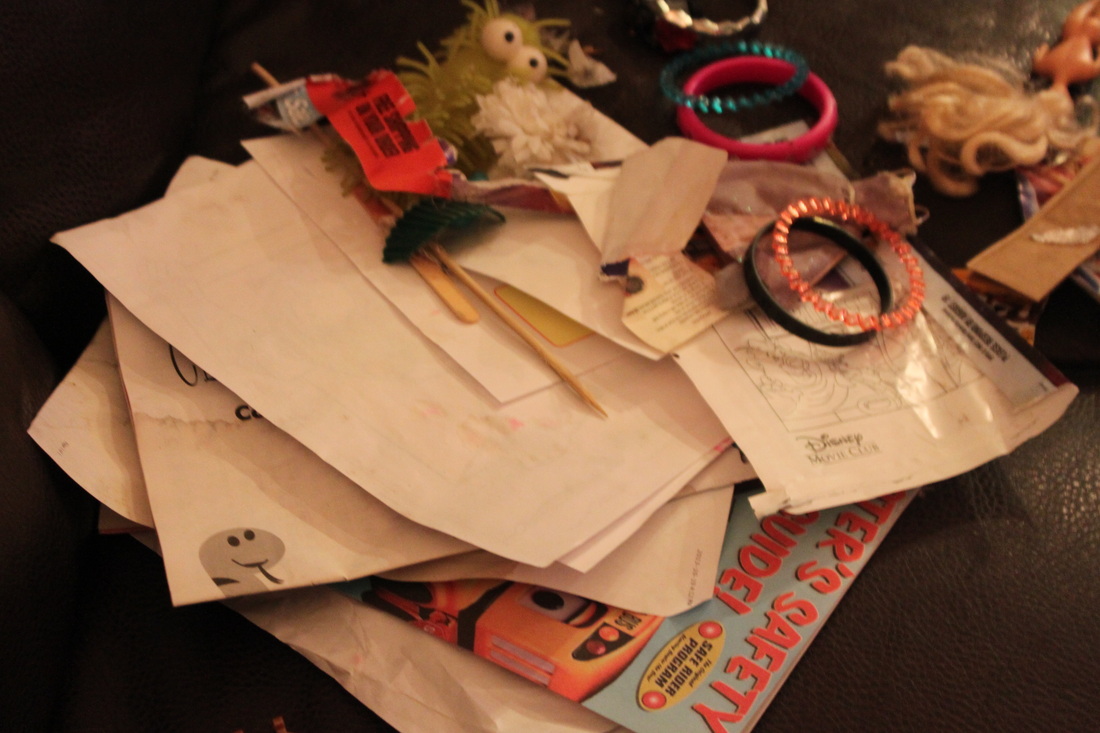 Some of the junk under the couch It's easier to look at eliminating something if you see it in a basket with 10 of the same thing! For instance, I have 2 little girls, does that mean we need to own 9 little baby dolls? Um...nope! But, that's how many we had a one point! Now, we have 2. They each have a baby, and they are good with that. Try your best to separate the emotion from the job. I realize it can be really difficult, but it's important. Look at what you have, and think about A: What's educational (usually worth keeping, but not always), B: What is broken or not (just get rid of broken things, you can do it!), C: What is age appropriate. Put aside or give away things that are too old or to young for your kids. They don't need to be out all the time making more clutter! And don't fogey to have a box or bag of the things you are giving to a second hand store. Please don't just throw stuff in the garbage! If it is still good (not broken, etc) another child may enjoy having it. So, I would recommend using a few different bins for toys and rotating them. Kids generally have waaaaaaay more toys than they can possibly play with at one time, and so they just take every toy out, and leave them everywhere, and drive you bonkers! I had a friend who had four bins that were all in the living/play room, and she would do one bin each day. I keep my extra bins in my basement....out of sight! Do what works for you and your space, but trust me, you will not regret dividing up your toys! When I do a toy clean, it includes bringing out all the bins from the basement to evaluate what we still have, what the kids have outgrown (in age & maturity), and to re-stock! 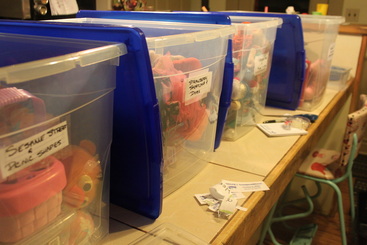 Re-organizing and re-stocking the rotating bins. I generally re-label them each time to make sure I know what is in them (even though they are clear). Once you've separated, & eliminated, you can either put the toys back where they belong (in different children's rooms, a play room, whatever, or in bins if you are doing bins). To do my bins, I just have one type of toy (or toys) that my son will like, and a type of toys the girls will like. They often play with each others things, and that's o.k. too. This time around, I did change things a little because the kids are getting older. So my son has his train track and trains in his room, and my girls get to keep (much to their absolute delight, and slightly to my horror...I must have been having a soft moment!) their My Little Ponies and Littlest Pet Shop animals in bins under their beds. They also have their dolls house things in a drawer in their room (for the doll house that stays in there all the time). 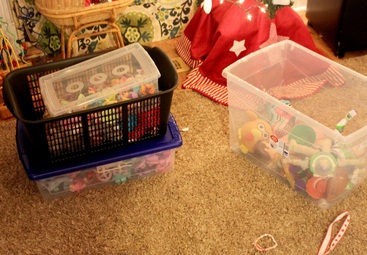 The bin on the right is all that remains in our living room toy box, and the bins on the left are going under the girls beds. The laundry basket has a few toys that belong upstairs (trains, stray dolls house things, etc.). So, in total, it took about 2 hours to do! Gosh, that does sound like a lot of time, but man, it's so worth it!
I know some people are strange (like me) and find relief in tidiness, and others don't. That's o.k! My brain, my emotions and feelings, all feel a little less cluttered when my house is, so that's why I keep organizing. The End. :) |
Hi, I'm Amy-Lyn! 
I am the lady behind this here blog! I live in the sticks with my animals, my super handsome husband, and my
3 amazing kids! Here you'll find things from recipes (gluten-free, paleo, and strait up junk food!), DIY ideas, thoughts on raising a son with autism, and whatever else pops into my brain! : ) Read more about me by clicking here! Want to Stay Connected?
Find What
|
 RSS Feed


