|
I honestly cannot believe that school starts in a week! O.k, some schools already started this week, but it's just the French immersion losers. ;) Anyway, I just wanted to put my 2 cents out into the blogosphere about getting ready for school, and how to make the first day (and the whole year) as stress-free as possible!  O.k., first things first-if you haven't done your back to school shopping, do it today!!! Seriously, the longer you wait, the more stressful the event will be because you will be competing with other last minute families! No fun! Some schools will give you a list of things kids will need (duo tangs, binders, or headphones as some examples), and some don't. If you didn't get a list, there are 3 basic things you'll need until you get some specifics. A backpack and lunch bag (obvi), but something you may not know your child needs is indoor shoes. Non-marking soles are a must, and be sure they are velcro (for younger children) so your child's poor teacher isn't having to stop to help your child get their shoes on! There is this thing about kids having a new first day of school outfit. I like to get my kids a new outfit, but part of it is because they've grown so much over the summer that they need a few new things. But can I say that new to you does not need to be brand new? Don't let some bizarre, social pressure make you think you need to buy new clothes for the new school year. Most people don't know what you already owned, so it's all new to them! Hit up a few second hand stores (& pop some tags...) and you're bound to find some good, gently used clothes that will be serviceable and that your kids will love. Alright, moving on!  Gluten-free banana chocolate chip mini muffins Another thing you can/should do this week to get ready is to get your homemade foods ready. Homemade granola bars, muffins (make 'em mini as kids rarely can eat a whole regular sized muffin), or single serve soup (make a batch of soup, and divide it into separate kid-sized portions to freeze) can all be made ahead and stored in the freezer. It'll save you money, and you'll feel better knowing what's in your kids food! So, speaking of food for lunches, this next idea may sound anal, but it works for me! In the same way as I make a weekly menu for the whole family and our dinners, I also have a menu for the kids' lunches (though it's not a changing menu as our dinner one is). Some of my friends find this idea stressful, but I enjoy it. Like I've said about other ideas on this blog, these are my thoughts and ideas, and if they help you, hooray!! If not, that's o.k. too! Anyway, the idea behind a lunch menu was to help me feel like I was giving the kids a good variety of food, and that I was keeping it simple-by making a menu. The menu is divided into the days of the week, then each day has five sections: main (sandwich, muffin, wrap, leftover pizza or homemade pizza bun, Caleb even got a g.f. doughnut in his menu last year!), protein (cheese, yogurt, rolled lunch meat, hardboiled egg, cold chicken drumstick, etc.), fruit & veg (you can figure this one out), 'snackie' (popcorn, crackers, pretzels, etc.), and a treat (granola bar, cookie, marshmallows, etc.). I need to update my menu from last year as I have a newbie starting school this year, and also the kids have changed their tastes, and I want the menu to reflect that. 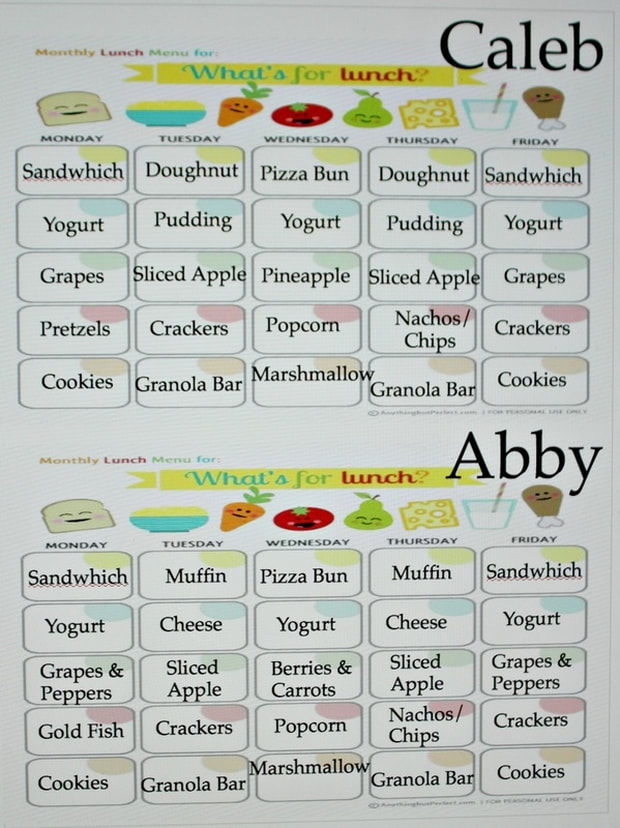 The lunch menu I use. The original source of it seems to have vanished...but if you Google "monthly lunch menu template", you'll get a bunch of hits and ideas. So, having this menu helps me quickly pack lunches because I've taken the stand and stare into the fridge part out of it. Even though I have a menu, I do give it some flexibility based on if there are leftovers from dinner, or if we had a birthday party and there is leftover cake that would make a fun treat in a lunch. And even though there is a menu, I let the kids help me pack the lunches so they know what they're getting. Do whatever you want to do for making a menu or not, but my biggest advice about lunches is to to make lunches the night before! Just do it!!! :) The mornings of school can be a wee bit nutty, and adding a distracted parent trying to mindfully pack a healthy and tasty lunch is not a good part of that equation! Another thing that I like to do at night after I've packed the lunches is to set the back pack (s) out. Either on the dining room chairs, or if you have an entryway with a spot for each child's coat and shoes, just put the backpack out there. It may seem a little pointless, but having it in view reminds you what may need to be added to it (a permission slip, a library book, whatever), and it also makes it visible for your child so that once you've handed them their lunch, they can put it into their bag (without calling, "where's my back pack???"). Then send 'em out the door! 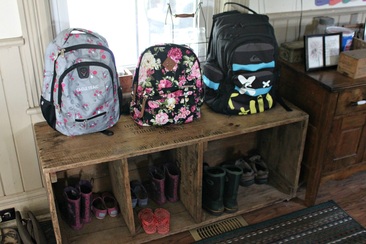 Backpacks waiting at the door. Seriously cute backpacks too. Go to Winners, they have great backpacks that aren't all covered in princesses and Dora! Now, if you're like me, you like to get your kids first day of school photo. Again, do it however you want (or don't do it at all!), but I saw and liked the idea of writing down what grade the child was going into, and what year it was on a page for the child to hold in the photo. I used a cute little chalk board I own, but you could literally just use a marker and write on regular paper to do this. It's just a quick way to remember exactly which year the photo is from (instead of hoping the time stamp on the photo is correct, or guessing based on the outfit or what house you were living in-which is what I did for years!). If the idea of squeezing a photo in the morning of that first day back seem stressful, do it a day or two before. Seriously! Just put the kids into the clothes they will wear, hand them the piece of paper with the grade and year on it, and take the picture! They won't change so much in the few days leading to school that the photo won't be valid, so go ahead and pre-photo the first day of school! It'll also make a funny story for them to tell when they grow up. :)  I did take these the day of, but I haven't always! :) Alright, so this next thought is a whole school year kind of thought, but breakfast....keep it simple! When I was growing up, we would get called down to breakfast, and whatever my Dad had made, we were eating! I'm from a very large family, so there was no, "what would you like for breakfast?", "what would you like for breakfast?" being heard. My Dad making breakfast for us saved a lot of time. I do the same now with my kids. I actually can't remember if I've ever asked my kids what they want for breakfast...I know, I'm so mean. I do a rotating breakfast: cereal, toast and yogurt, cereal, toast and yogurt, cereal, pancakes for Saturday, then toast and yogurt again for Sunday-then I start all over! If you child likes oatmeal or some other quick breakfast, add that into the mix. We'll also add low-maintainance (doesn't require serious prep work like, for example, a mango!) fruits into the breakfasts if the kids say they are still hungry. We eat eggs and bacon around here regularly as a dinner, so I never worry about it as a breakfast. The key is simple, quick options that get your kids fuelled for the day-withuot causing stress and making them miss the bus! Oh, I can hear some people now, "but how will my child learn to make decisions if I don't let them decide what they want for breakfast?". They'll figure it out, they should have other choices they need to make in a day that will be more important, so don't sweat it! I promise this will make life easier! 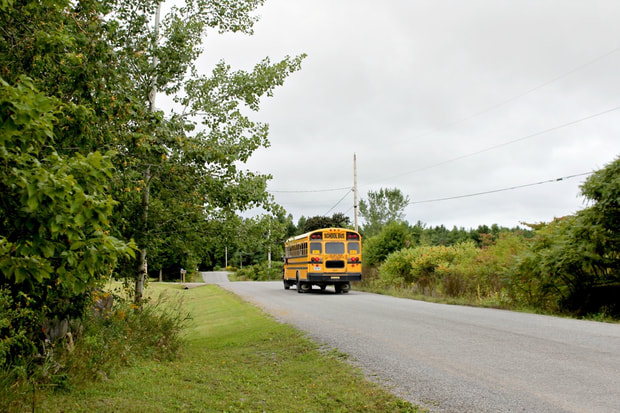 Goodbye darlings (I was crying a bit while taking this photo last year)! Alright, my last bit of advice....wake the kids up early! O.k, not too early, but give yourself more time than you think you need to get them ready and out the door.
I wake my kids up an hour before the bus is due to arrive. That's about 10 minutes for brushing hair and teeth, half an hour for getting dressed and eating breakfast, 10 minutes for getting on coats and shoes (this takes more and less time depending on which season it is), then 10 minutes of buffer time, incase something takes longer than it should have. It honestly ruins my day when I have slept through my alarm clock and I have to rush and "Mom yell" (oh, you know that yell. You're not really yelling, you're just doing that "huuuurrrrry uuuupp!" through your teeth kind of yelling) at my kids to hurry the heck up! I want to be patient and kind to them on the way out the door, instead of momzilla! Seems reasonable enough to me! O.k. I think that's all I have to say about that! I'm sure I have more things I would like to say, but this is probably sufficient! I hope that if you have kids you're sending off to school that some of these tips will help you. There will likely be some speed bumps here and there, and that's o.k. Just be prepared as much as you can be, and be ready to be flexible too, as the need arises!
2 Comments
The summers around here tend to fly by. O.k., well, some moments they drag by (like when the children are whining!), but somehow nine weeks fly by, and I feel some guilt (some Mommy guilt) that maybe we didn't do enough? I'm not sure why I feel this way. Summer was fun when I was young because I liked the freedom to play outside all day, or read as many Nancy Drew mysteries in one day as I wanted. My family would go to a family camp, and I always loved that too. So, I could just let my kids be, and let them make their own fun for the summer, but the truth is, I feel like they need something to do. To make the summer fun, maybe a pinch educational, definitely memorable, and something we can look back on as a family and say, "remember our awesome summers...". Ya know? Anyway, all that to say, I need a plan! I always have good intentions, but suddenly summer is gone! I'm not talking about a written in stone, no-one can change the schedule type of plan. Just an outline, a list of ideas, pulling out the calendar to marking a few days for special events/activities. Here are some things I liked from the world of Pinterest, and will use this summer.
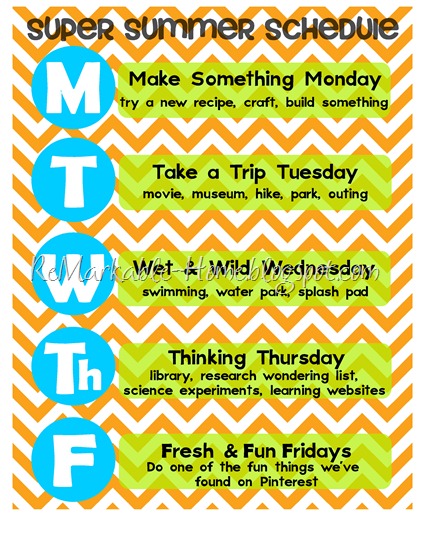
This summer schedule from ReMarkable Home is something I really like! It's fairly flexible as far as different things to do, but gives at least an idea of where to start.  Digital Reflections has a list of 100 things you can do with your kids, and most are free! Yipee! The list includes ideas like visiting a fire department, building a fort, activities that involve using a camera, and taking pictures of things, then printing the photos off, and making a book about your photos (like "things we saw on our nature walk", or "the alphabet through our town"). There are a lot of ideas on here!  We are planning a road trip to Mount Rushmore this summer (fingers crossed it actually works out!). Caleb has been talking and talking and talking about Mount Rushmore, and neither my husband or I have been, so we thought, "why the heck not"?! Our kids are actually great travellers (living in the sticks and having to drive a good distance to get anywhere taught them this!), so I really hope this works out, and we can go on this adventure and make some family summer memories!
Check out my Pinterest board for more ideas of things to do with the kids! I like to do end of the school year gifts. I know not everyone does, and that is completely fine! I personally like to because teachers (and e.a's, and principals, and the secretary!) have a really hard job! I couldn't be a teacher (well, not a good one!). End of year gifts can be as simple or as complex as you want them to be, and can cost a lot or a little, depending on what you have in mind. I'll just let you know though; I asked my friend who used to be my son's e.a., and she said a good gift is homemade stuff like jams, cookies, etc. Just FYI. :) Anyway, so today I'm just going to share with you some of my favourite gifts from Pinterest, and the gift the kids and I made. It's not too late to whip something up to say "thanks"! 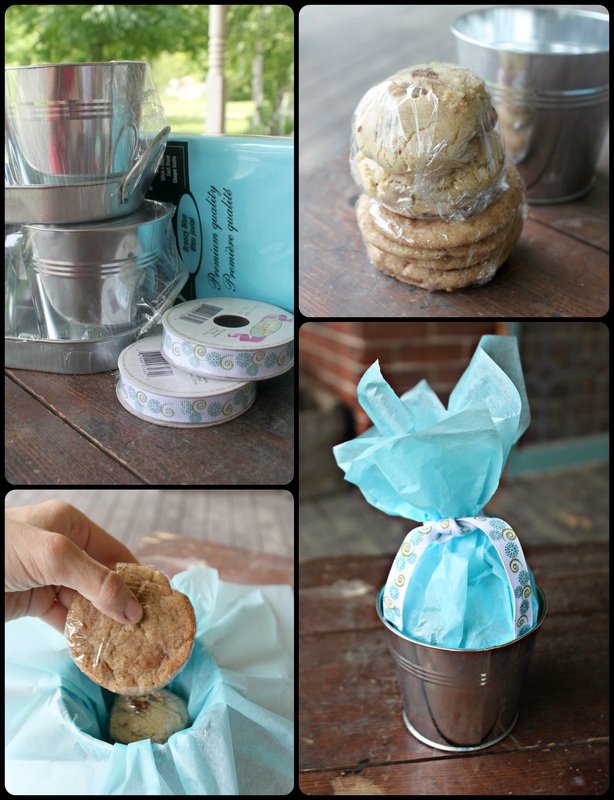
The gift we made
The kids and I made Cinnamon & Sugar cookies, as well as Kit Kat cookies (I'll share that deeeee-licious recipe soon!). I wrapped each type in it's own plastic wrap so the flavours wouldn't smoosh, and placed them into a little bucket with tissue paper I found at the Dollarama. Then we just tied 'em up with some cute ribbon. You can package baked goods in whatever you have available, but a little effort can make a simple gift really pretty. Also, don't feel that each person needs a 2 dozen cookies or squares. Just a few will do the trick; enough they could share if they wanted, but not so much that they end up throwing some of it away because there was too much. 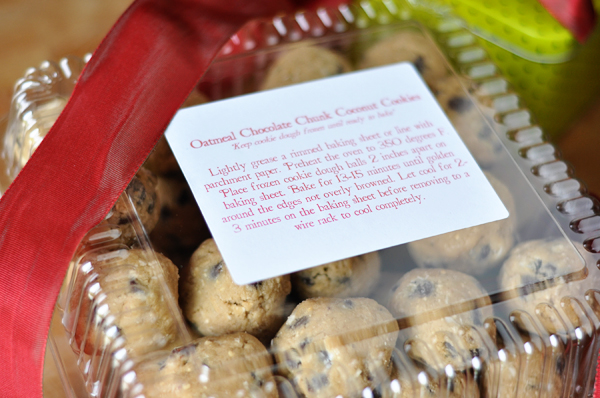
From Mel's Kitchen Cafe
At Mel's Kitchen Cafe, she shows you (what I think) is a brilliant idea of making Cookie Dough Tins. So, basically instead of baking cookies for people, you make the dough roll it and freeze it, then give people the frozen dough balls with instructions. This idea is great because the gift receiver can make the cookies whenever they want, and there won't be any "these cookies are too old now, just throw them away" problems. If you do this idea though, be sure to bring it to the school yourself, or attach a note so that the person getting the gift doesn't just tuck it away, but actually puts it into the freezer until they are ready to go home. 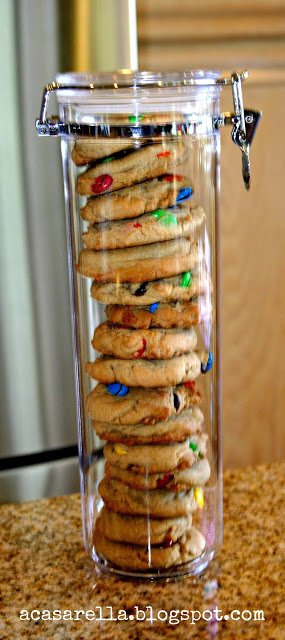
From A Casarella
A post called Facilitating the Appreciation over at A Casarella gives a great idea of using a cheap spaghetti canister to hold a stack-o-cookies as a gift. I like this idea because you can see all the yummy cookies. 
From Bird On A Cake, she also shows you how to do that beautiful icing technique!
The last gift I want to show is this cupcake holder idea. Really, if you were pinched for time, but wanted to give some gift, you could get some store bought cupcakes, and separate them into their own little 9 oz cup as a gift for one (no sharing allowed!). She tells you that to get the cupcake out you need to stab it with a fork and lift it out, but I would even suggest tying a fork to the top so it can be eaten out of the little cup.
Well, I hope that even if you have no teachers you need gifts for, you can still get some nice baked goods packaging ideas from this post. And if you never give away baked good, well, I'm not sure we can be friends anymore. I joke. You are all my friends....and saying stuff like that makes me feel pretty crazy because I feel like I'm talking into the vast world wide web and not any real person! On that cra-cra note, it's time to bow out gracefully(ish). Feel free to make me feel a smidge less coooky by leaving a comment about anything you want, whether it's related to this post or not! :) xoxo We live on the outskirts of a town that meets all our basic needs: a pharmacy, grocery store, hardware store, a health/bulk food store, library and post office, some 2nd hands stores, and even a fantastic bakery. For the most part, we can get what we need in our little town. But groceries, oh man, buying all of your groceries in a small town is bad (the only time it won't be as bad is when there are 2 stores, because then they at least try to have competitive prices)! I'll stop in when I need to pick something up quickly, but otherwise, we have our grocery day when we're in Belleville, a city about 30-40 minutes away. On Sunday's after church, we head on over to noFrills with our menu and our list, and get 'er done. Wow, that slightly off-track intro was all to say...when you're "in town", it can be really easy to stop in someplace for fast-food. Fast-food is obviously super unhealthy (even the 'healthy' choices aren't really that great), but worse than that, it can be a ridiculous expense! If a family of 5 (with kids old enough to want a meal) went to a drive-through only once a week, by the end of the month they would have spent $80-$100 dollars!!! Maybe to some people that doesn't seem like a lot of money, but seriously, that's just ridiculous. I know of people who "can't afford" do anything or go anywhere in the summer as a family, but they eat out (which is way more expensive) and drive-through once or twice a week. If they saved that drive-through money every month starting in September, by July they would have $900-$1000 (or close to $2000 if they ate out twice a week, or more if they ate out more often) to use for some summer. Oh my, I am just off on a tangent, rambling away about stuff. This post is meant to be about planning, about packing a lunch, about choosing the healthier option, and about saving some money! The real trick to doing this is to plan to do it! I know, brilliant. For real though, we leave for church on Sunday morning at 8am-ready with our groceries bags and baskets, our menu and list, and our lunches. Do I wake up at the crack of dawn to have the lunches ready? Gosh no. I make them the night before, and stick 'em in the fridge. Sometimes I'll add a last thing or two in the morning that I know wouldn't be great in the fridge, but otherwise, I try to get the whole thing packed at once. The thing about packing a "lunch" or a snack, is that with kids and adults, having a good variety to choose from/nibble at makes not eating the drive-through food a bit more manageable. If you only pack carrot sticks, all you'll think about is french fries! So, do yourself a favour and "variety pack", as I call it. 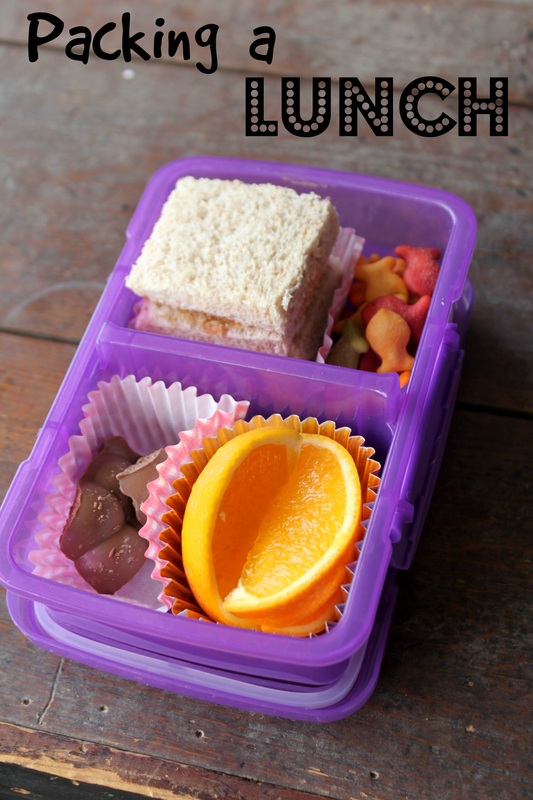 This little lunch for my youngest had half an orange, some Goldfish crackers, a half-sandwhich, and a few pieces of Cadbury Bubbly Bar. I only have this one sad photo from one of our most recent town trips. I make the lunch based on what we have (remember, we are going on grocery day!). Sometimes it's leftovers, sometimes it's lots of fruits and veggies, it's just whatever! I use wax paper or paper muffin cups to divide things. If something is wet (like that orange), I will use the special aluminum lined muffin cups. Yes, I know they are expensive, but I literally re-sue them for these lunches (they just wipe clean), so it's not too bad. I bought this container from Dollarama, and we each have our own. You could also buy (or maybe you have) some silicon baking cups. I used to have some....I'm not sure where they are anymore....anywho.... You could also buy a fancy-schmancy lunch box meant for these types of lunches. Here are some cool boxes, and some great lunch ideas. 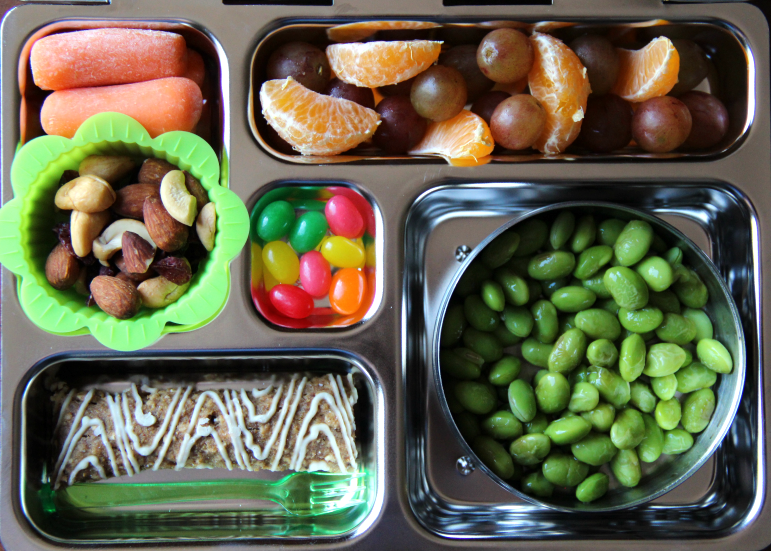 I know, right! This lunch from Family Fresh Meals is hard-core! That lunch box is called a PlanetBox, and I do sort of want one. Anyway, you can see this Mom packed a good variety in this little power-house lunch. I honestly think for kids, these lunches are so ideal. There is never some enormous sandwich that needs eating, or an entire apple that should be finished. Some kids (like my 5 year old mousey eater) just literally cannot do an entire sandwich. These lunches, with their little bits of this and that, make it easy to eat it up all.  This Mom at My Mommy Style packs some good looking lunches too. She just uses plasticware she already has, and some silicon muffin cups to divide and conquer. 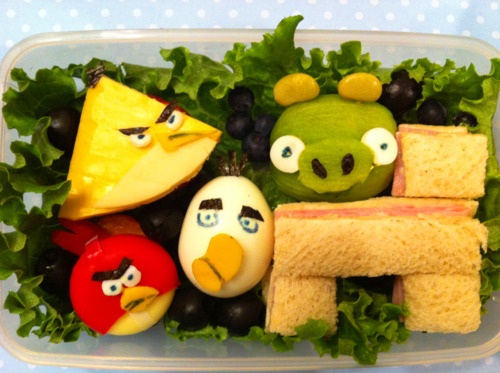 Packing these lunches might be new-ish in our country, but this type of lunch has been around for a long time in Japan. The word "Bento" to us may just be a name brand, but a "bento" is a traditional lunch in Japan, usually with rice, meat, and a vegetable. They even do a "character bento" which is an amazing character based lunch. Seriously, amazing! Check these ones out at Lunchbox Awesome! Seriously, just click there to see some cra-cra character lunches!
Anyway, Bento Boxes (and all the available accessories) are pretty cool, and if you have a kid who comes home from school with a half-eaten sandwich, a half eaten this, a half eaten that....guess what? They may benefit from a bento style lunch. It'll save you food you throw away, that's for sure! And, like us, if you have to travel "into town" often (I know a lot of people around me do because we all live away from the nearest city to us), pack a bento lunch, and save some money (....and calories, and saturated fat, and...). Now, as a closing statement, we DO drive-through sometimes! I don't want anyone thinking we never do! Sometimes we're in town longer (waaaaay longer) than we had hoped and it ends up being a 2 meals in town kind of day. I won't lie, I actually like McDonalds fries a lot, so I'm never too upset if I have to eat them! :) Sometimes we plan on packing one meal, and eating the other one out. It's a treat, and because we don't do it every week, the kids feel like it's special. The End. ....It's really not that bad. I know you loved that opening, didn't you? How the title played right into that first sentence....O.k, it sucked, get over it. : )  I literally am writing a post for today about lemons! I just honestly love them! They are so fantastically good for you, and good at a lot of different things people may not realize. So, here it is, a list of things that should make you happy when life gives you lemons (or when you buy them at the grocery store...)!
 This is by no means an exhaustive list of the benefits of lemons, but I just wanted to give you a glimpse of how wonderful this little gem is! I have lemon juice every day, either by squeezing some juice into a smoothie, or onto a salad. I have squeezed out halves in my sink for scrubbing greasy dishes, and then for giving the sink a rub-down after I'm done doing the dishes (it leaves a brilliant, bright citrus-y smell behind!).
So, anywho, I hope you enjoyed this little romp through the wonderful world of lemons! Now go out and buy yourself some! :) And don't forget, if life does gives you lemons, do make lemonade. Hey there! Just a quick DIY that is so easy to make, and is a great gift for many "hard to buy for" people. I realize I should have/could have posted this pre-mother's day, as it could have been a good gift for that, but I failed. I get it. Sheesh. 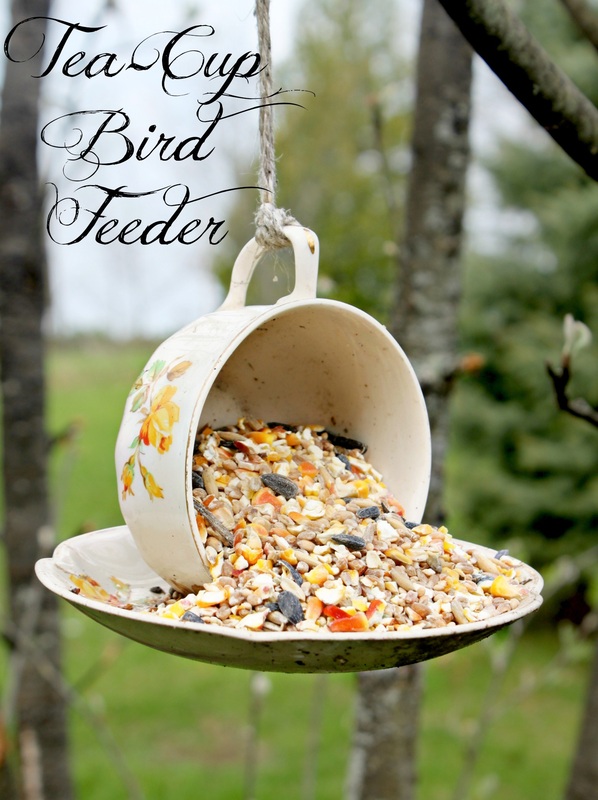 To make this beautiful feeder, all you need is some glass and ceramic glue (I use Elmer's, it costs less than $5), some string or chain to hang it, and a tea cup and saucer you like from a second hand store (I don't buy them from Value Village, they tend to price even the most hideous sets at coo-coo-crazy prices). The set in the picture cost 25 cents from "Hidden Treasures" in Tweed. 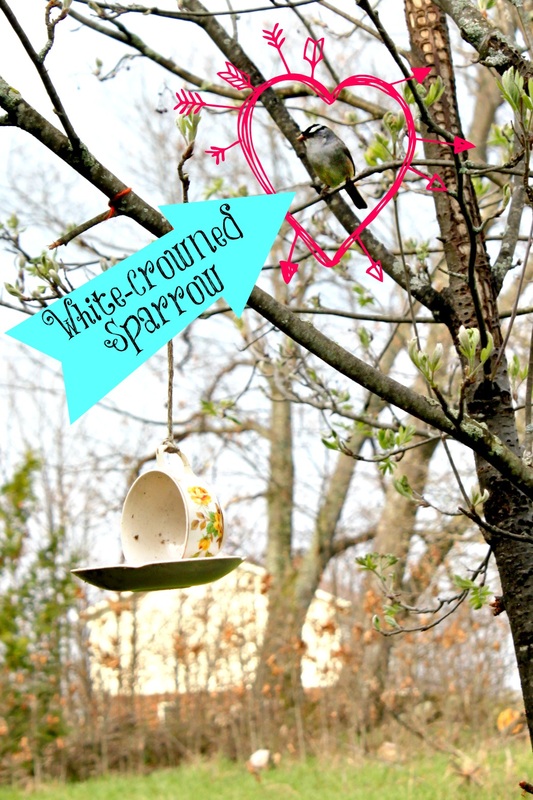 Simply clean the cup and saucer, make sure they're dry, then set the plate down. Run a strip of glue on the saucer, not in the middle, but from the middle to the edge, then with the handle pointing upwards, set the cup over the strip of glue, and gently press it into the glue. Depending on how thin the set is, the cup may be able to sit up on it's own, or you may need to gently wrap a towel around it to keep it in place while it dries.
Once it's dry, fasten a string to the handle, and taa-daa! At our place we have 4-5 different types of birds who will eat out of this feeder, and it hangs outside our kitchen window so the kids can see it while they're eating breakfast at our island. They are always so excited about the birds. And that's it! It's unique, it's simple, it's beautiful. The End. When I was just newly married, I had a mini melt-down over dinner. If you can imagine this: I felt like I didn't ever know what to make (I swear, I couldn't really cook at all!), and I felt like I was letting my husband down by not having those stereotypical wifely skills (as a sub-text, he never made me feel that way, it was just me projecting my own feelings of failure from what I thought I should be able to do). So, after this melt-down, as was typical for me at this time in my life, I ran. No, I didn't "go for a run", I just literally ran away. Bare feet, no plan, just started running down the rail-trail that was behind our house. Once I was finally exhausted from running away, I sat dow and cried. Then, I picked myself up and went back home. When I got home my husband was very nice (possibly because he thought I was a touch crazy and maybe afraid of me!), but he said something that changed my life. He asked, "Do you think it would help if we made a menu so that you didn't feel overwhelmed at dinner time thinking of what to make...?". The answer was YES, that would help me enormously! I started making a menu (that largely consisted of pre-packed meals for lack of any skills on my part, and any real meals that needed being made were done by my husband when he got home, but I would still try to have everything ready for him). Almost 10 years later, I still use a menu. It helps me with my grocery shopping, saves us money, helps keeps things from staying in our freezer for so long it's frost-bitten and needs throwing out, and most of all, it takes the guess work out of "what's for dinner?" everyday! 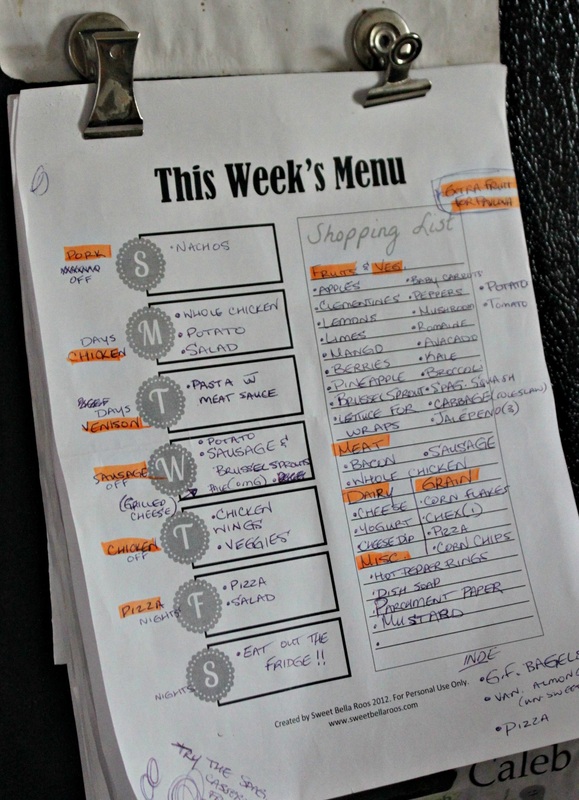 Our menus are never filled with elaborate dishes, just what our family considers the usual. I like to try new recipes, and if I do, I will write in that days dinner the website, blog, or magazine I saw it in so that I'm not wondering where I had seen it. I used to just write the menu out on the left side of a piece of paper, and along the right I would have my grocery list (I find this helpful because not only am I looking at the list, but I have the menu at the grocery store, so if there is a store special, I can look at the menu and see what meal or item I could swap out for the sale). The menu I use now is from here, and I print one off every week (the menu in the picture above). If you want a menu, but the styles in the link above don't suit you, just Google some printable menus, and you will get a plethora (I'm not being serious using that word, I just like it from The Three Amigos) of options. :) I further the organization on my menu by writing next to each day if my husband is on or off work (he gets back late, so the dinner I made should be good warmed up hours later), if we have plans that night (so I know to make a simple dinner), and I also write what kind of meat I'm using so that we have a variety, usually also including a meat-free night. If the thought of making a new menu every week scares you, for a few years I was just doing a four week rotation. I made my menus for 4 weeks (not all at once, just as each week came), then on week 5, I went back to the first menu, and did it again. I have a lot of friends who say they could never do a menu because they're not organized enough. But, those people often don't feel stressed with the "what's for dinner?" question, and that's fine! I would never say that what I was doing was the best way, I'm just saying it's the best for me! 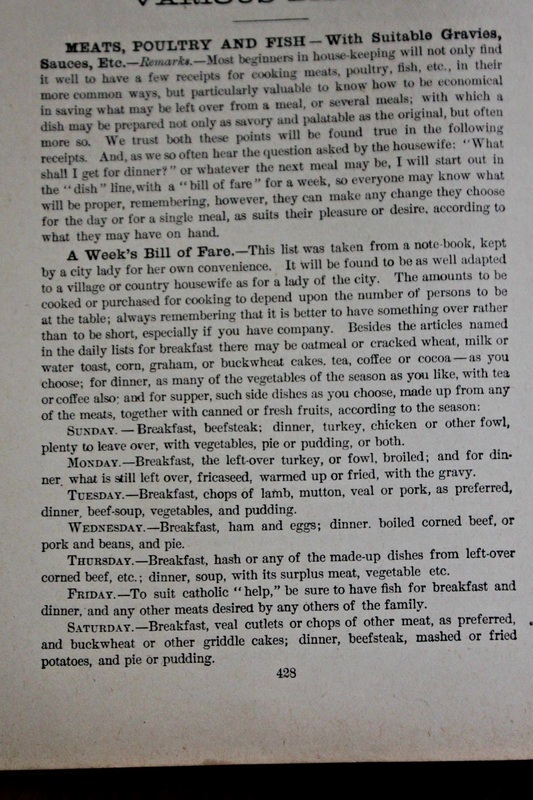 One last thing about using a menu: it's nothing new. In my Dr. Chase book, there is a "Bill of Fare" (pictured above), and it is amazing! Let me share some of the days with you (in case the font in the picture above is too tiny!):
Sunday-Breakfast, beefsteak; dinner, turkey, chicken or other fowl, plenty to leave over, with vegetables, pie or pudding, or both. Monday-Breakfast, the left-over turkey or fowl, boiled; and for dinner, what is still left over, fricasseed, warmed up or fried with the gravy. Tuesday-Breakfast, chops of lamb, mutton, veal or pork, as preferred, dinner, beef soup, vegetables and pudding. You get the gist of this crazy menu from the late 1800's, right! No vegans allowed! :) Dr. Chase does say that beyond this menu, you may also add oatmeal, cracked wheat, more fruits and veggies, coffee and tea. So, all of this to say I am not reinventing the wheel, I'm just doing something that works for my family, and has worked for families in the past. Don't feel like you're less of a person if you don't do a menu, that really isn't the point! Just do what you need to in order to de-stress your life! Today's life hack makes me so happy! My kids (like all kids) love blowing bubbles, but as the adult, I am generally holding onto the bubbles so that they don't spill (so the kids don't cry!). I don't really mind holding the bubbles, but my hands do get pretty sloppy with all the soapy drippings. Option B is that the kids hold their own bubbles, and have soap dripping down their arms, or they set them down somewhere, and inevitably spill them. Then the crying starts.  But this....oh this glorious idea...I saw it on Pinterest, and my life changed forever! :) It's pretty self-explanatory, and (as you can see) doesn't need hard-core tape to hold it up. All I had was painters tape for some reason. Anywho, it worked great, the kids had a blast (well, the youngest missed out because she was in bed having a hard time waking up from her nap), there was no soapy mess, and no crying! The best life hack ever. The End.  Oh, wait, one last thing. Open the bottle(s), take off the seal under the lid, then put the lids back on before attempting to tape it up. Maybe I'm stating the obvious, but I don't want anyone saying I never told them, and they have a bubble soap disaster!
Oh, wait, one more last thing. I don't mind kids getting messy, they are kids after all! But if there is an option that avoids it, I would be a bonkers parent not to at least try it! If I had never seen this idea, my kids would still be blowing bubbles, getting super messy, and crying over spilled soap. Blowing bubbles would not be eliminated from our lives because it was messy. I just needed to say that. The End (for real). Just a quick post today about re-using old things as new! One of my favourite things! These pillow cases are old sacks that I've purchased at antique and flea markets and washed (and washed again), and simply slid another pillow into. 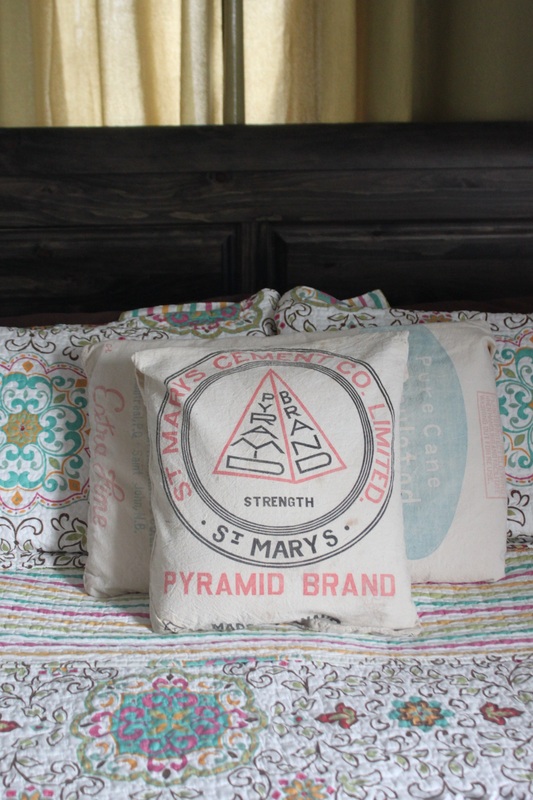 I bought this particular pillow case because years ago my husband worked for an industrial vacuuming company, and they would do regular jobs vacuuming the huge tubes and tunnels at the cement plant in St. Mary's. In my living room I also had 6 other old sacks as pillows, but instead of putting a different pillow into it, I bought them stuffed with "pillow fluff" (stuffing), and sewn shut. They are a little more tricky to wash though....so, I would personally recommend just slipping a different pillow into the sack, and if you want it to close, just sew a zipper, or some cute buttons. 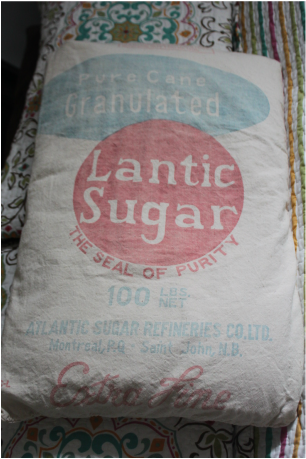 Well, we're heading home today, and I will be able to rest my head on my lovely pillows again! :)
In the 9 houses we've lived in over the last 10 years we've had no linen closet, an open closet in our bathroom, a big ol' plastic bin stuffed with linens, we've pretty much had it all! So, in this house we actually have a real linen closet, but our first year with it, it was a crazy-town disaster! Anywho, that was not cool with me, so a real fix-up was needed! I started by really clearing out what we had. We had a lot of bits and pieces of sheet sets, a ridiculous amount of towels (um, possibly from years of working at camps and inheriting lost and found towels....?), and a lack of good shelf space. 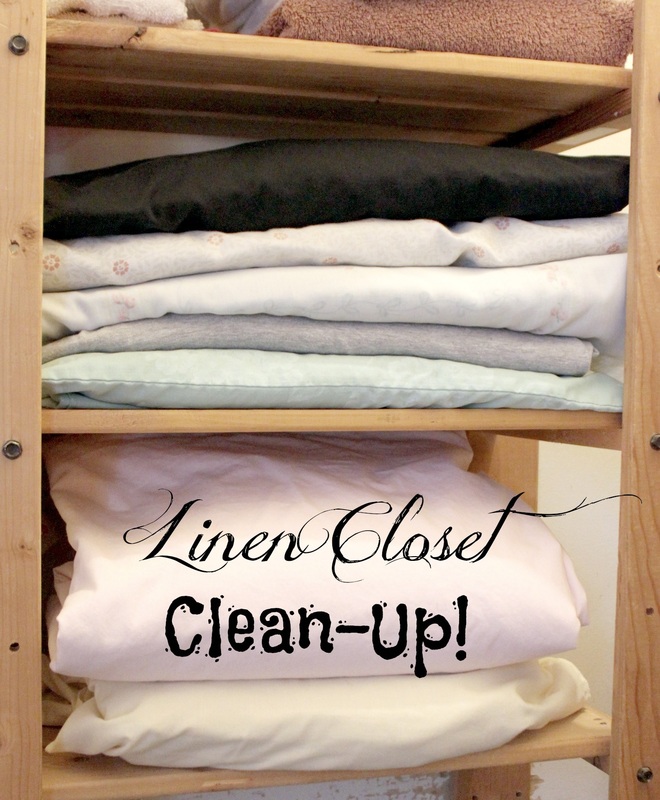 All our sheet sets folded and happy in their own pillowcase. :) I used an Ikea shelf we already had (that was just collecting dust in our basement) and brought it into the closet. The linen closet had some shelves, but they were very deep, and not well made, so I didn't want our sheets on it. So, tip #1: Sheets stored in their own pillowcases! With this method, you just grab what is a whole sheet set with no guess work, and git on your way! :) Extra bonus-if your household gets the barfies (aka-flu), it makes it super easy to grab a clean set of sheets in the middles of the night after someone has gotten sick! Also, with this idea, it made it easier to clean out the random linens I had because if they didn't have a set to be folded and stuffed with, they got the boot! Another tip about sheets sets, however it's possible with whatever shelving space you have, keep each bed size separate somehow. This system is only truly helpful if anyone (read: spouse!) can reach in and pull out the right sheet set! The only extras I kept were 2 pillowcases in case a sleepover friend came over for the kids or something, and I just needed a pillow case for them, and not a whole set of sheets.  "Andrea Style" folding so you only see one folded side of each towel or blanket. These are the shelves that were already in the closet. Because they are so deep and I didn't want to have to reach past the front piles of towels and blankets, I decided that only the front part of the shelves would be used. Tip #2: Folding "Andrea Style".
It's funny because I thought I was being smart and organized by folding our things so that you only saw the one folded side of a towel or blanket, but one my my sisters informed me that our eldest sister (Andrea) does it. So, I clearly (subconsciously) took her idea and just thought I was so smart. Turns out I wasn't. She was. Dang. A word about towels.....you don't need 50 of them! If you own a washing machine, or have weekly access to a washing machine, you don't need a lot of towels! If you have the shelf space for 50 towels, it still doesn't mean you need that many. O.k., maybe if you have 25 people living in your house you need 50, but I'm gonna guess you don't have 25 people living in your house? Thought so. I'm just being a bit bossy, but I just wanna share my deep thoughts on towels. :) So, these simple changes start while you're folding the laundry. If you're folding it anyway, why not fold it so that it will make life easier later when you go looking for this stuff!? |
Hi, I'm Amy-Lyn! 
I am the lady behind this here blog! I live in the sticks with my animals, my super handsome husband, and my
3 amazing kids! Here you'll find things from recipes (gluten-free, paleo, and strait up junk food!), DIY ideas, thoughts on raising a son with autism, and whatever else pops into my brain! : ) Read more about me by clicking here! Want to Stay Connected?
Find What
|
 RSS Feed


