|
I have an oatmeal cookie recipe (my monster cookie) that is gluten free that I love to make (and eat!), but I was making some cookies for a rehearsal for Into The Woods, and someone there has a peanut allergy, so my usual cookies, which used peanut butter, were out. I wasn't sure if this person could have any other nuts, but I didn't want to risk it. So, after some web-searching and experimenting, these little yummies came to be. 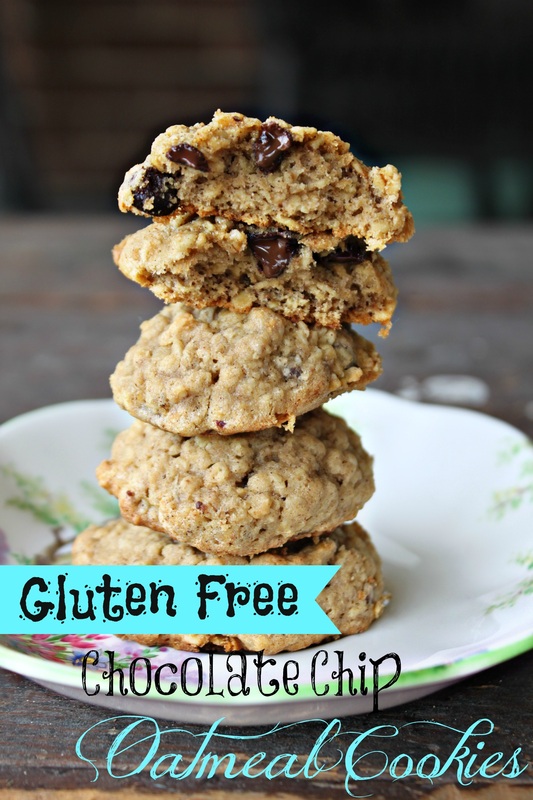
Oatmeal Chocolate Chip Cookies Ingredients:
Method:
Makes roughly 40-45 small cookies. For bigger cookies, use a 2 tablespoon scoop, and bake for 12-14 minutes. 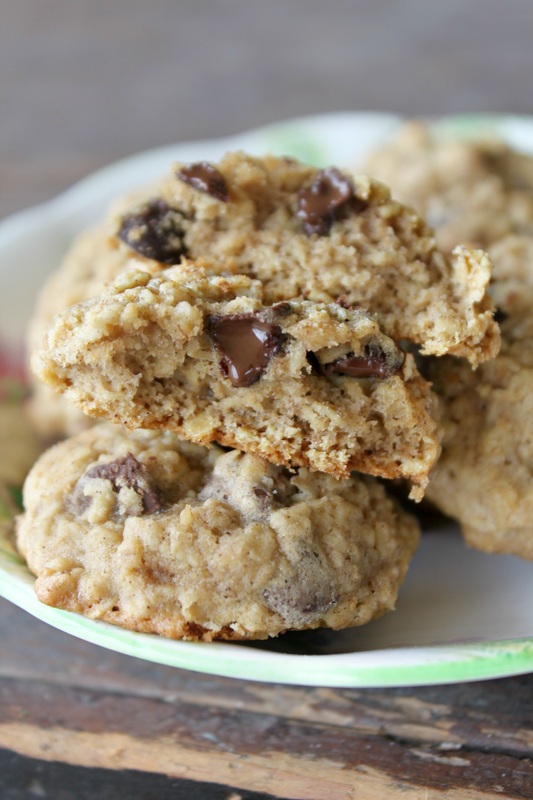
Have a safe and fun Victoria Day weekend!
4 Comments
Today I wanted to give you a look just at Caleb as a person, with his autism tied up into it of course, but just as himself. Just me asking him some questions, and him answering me. Some of the questions I did have to repeat, and I had to give him "the look" to make him focus and answer sometimes, but I think you'll enjoy this look at Caleb, by way of an interview. 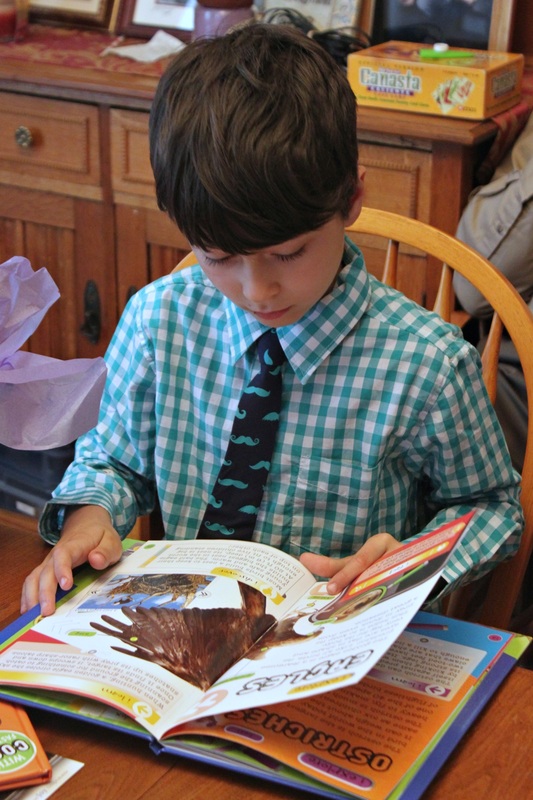
Caleb reading about birds
An Interview with Caleb I taped it, and wrote out what he said. I wanted to post the video, but he tends to mumble, and he was also eating a big bowl of popcorn while I interviewed him, so, it wasn't ideal (aka-anyone who isn't used to him wouldn't be sure what he was saying!). He honestly says some hilarious and abstract things. My questions are in pink, and his answers are in quotation marks. What is your favourite food? "Um.....um......Caleb likes apples, and oranges and pineapples" Why do you like fruit? "Is fruit" No, I said why do you like fruit? Because it's crunchy, or sweet... "Is sports candy" Are you just saying fruit as your answer because you can see them right now? "um......um.....I don't know" Do you like any other food? "Um....um.....um.....Caleb likes tater tots. Tater tots from Luke and Kelly's. Tater tots taste like factory". What do you like to use for dipping sauce for tater tots? "Um.....hmmmmm......Caleb likes mustard. Mustard tastes like sunshine" What are your favourite french fries? "Fast Eddies pickle fries are so salty in my happy belly!!!" What is your favourite movie? "Toy Story 2. Toy Story 2 and Buzz Lightyear new utility belt" What is your favourite t.v. show? "Blue's Clues" Why? "Um....Blues Clues...." What is your favourite colour? "Red is like music" What is your favourite subject at school? "um....St Carthagh's..." No, not what school do you go to, what is the best part of school? Math, reading, French, gym-? (interrupts me)- "French!" Why French? "Msr. Francoer is so very silly and free time video games!" Do you like speaking French? "No" Oh, do you like French at all besides free time? "Um......um......um......Yes" Why? "Caleb loves to sing with French" What is your favourite animal? "Black swans. Black swans are like a duck. Black swans are at Peterborough zoo with cousin Tarah" (side note: cousin Tarah lives in Peterborough, and Caleb remembers that from when we last saw her there at least 4 summers ago). 
Caleb with his art at the Tweed Heritage Museum
Then the phone rang, and we were done. I actually let Caleb answer. He currently has almost no phone skills, so, he mumbled, rambled on for a bit about Buzz Lightyear, and eventually handed me the phone, and I was pleased to hear it was a telemarketer. A persistent one too, he didn't hang up during the conversation with Caleb! He did say my last name wrong though. :)
Anyway, I hope you enjoyed this interview with Caleb. I love some of his answers (like "Red is like music"-so cool). He is honestly such a funny guy. He loves to laugh and be silly, he loves to sing and dance (well, stomp), and he loves animals, well, except small dogs. But that's legit, those little yappers are so darned noisy! He also likes to find creepy crawlers, except dragonflies and butterflies, which Caleb has always run away from screaming! Turns out his fears were well founded about the butterflies though. We just found out a few weeks ago that butterflies will eat rotting flesh! What?!? Disgusting! Good on ya Caleb, you knew they had a dark side! Making a quiche is always nice, hard boiling an egg is good too (if you don't have anger issues about the peels not coming off very well!....I might....). But when you have 8 beautiful hens who each lay an egg almost every day, you want something different than cooking them up in a pan, and easier than a quiche or hard boiled. So, I started baking eggs! This is really less of a 'recipe' and more of an idea, but gosh, it's easy. If you trust your muffins tin, don't use any liners. The end result will be a little different (that 'fried egg' type result on the entire outside). If you're like me, and don't trust your muffin tin & no matter how much you grease it, everything sticks, then grab yeerself some fancy Stay Bright muffin cups (I get mine from Dollarama), and get crackin'!  Baked Eggs Ingredients:
Method:
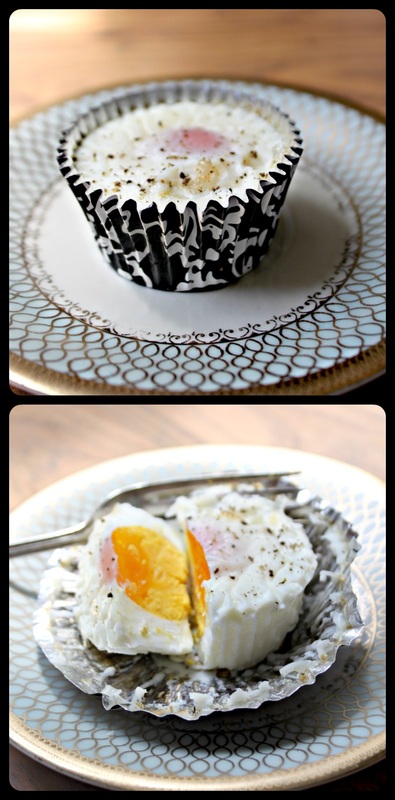 I make extra of these, and stick them in the fridge in an airtight container. Then we'll eat them here and there in a meal, as a snack, or on a salad.
Alrighty, that's it! Hey there! Just a quick DIY that is so easy to make, and is a great gift for many "hard to buy for" people. I realize I should have/could have posted this pre-mother's day, as it could have been a good gift for that, but I failed. I get it. Sheesh. 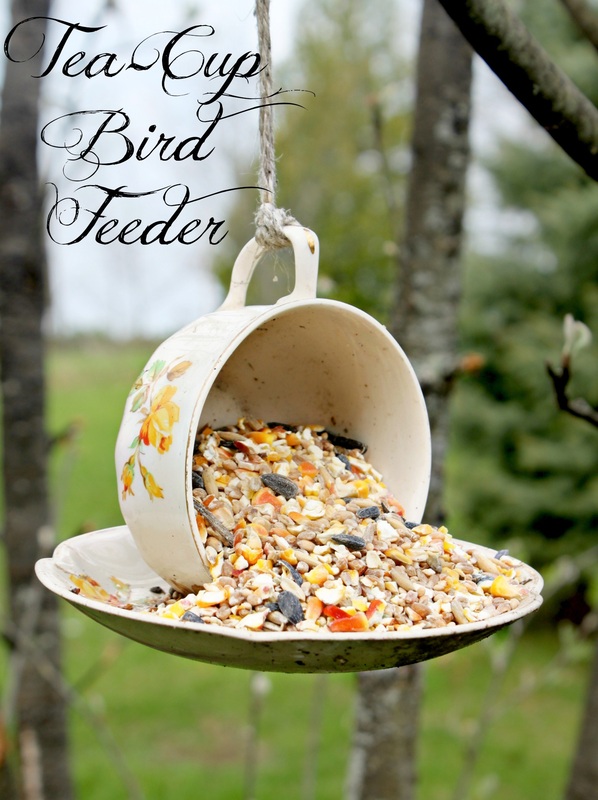 To make this beautiful feeder, all you need is some glass and ceramic glue (I use Elmer's, it costs less than $5), some string or chain to hang it, and a tea cup and saucer you like from a second hand store (I don't buy them from Value Village, they tend to price even the most hideous sets at coo-coo-crazy prices). The set in the picture cost 25 cents from "Hidden Treasures" in Tweed. 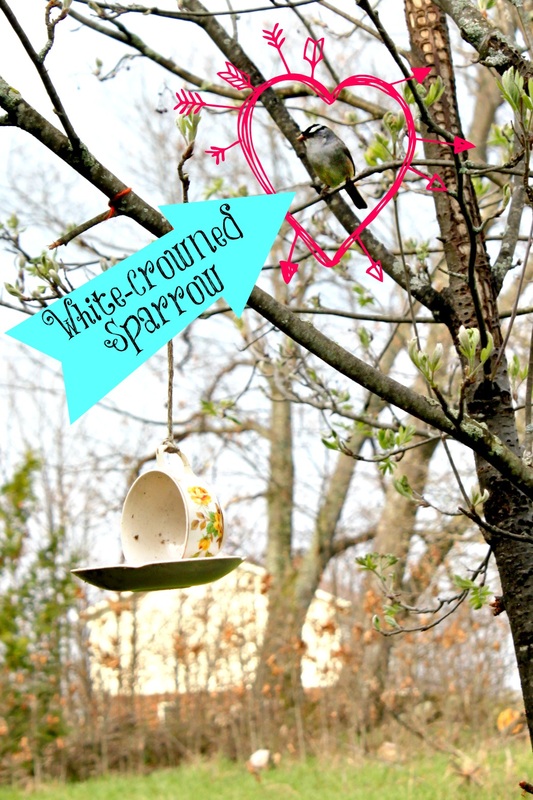 Simply clean the cup and saucer, make sure they're dry, then set the plate down. Run a strip of glue on the saucer, not in the middle, but from the middle to the edge, then with the handle pointing upwards, set the cup over the strip of glue, and gently press it into the glue. Depending on how thin the set is, the cup may be able to sit up on it's own, or you may need to gently wrap a towel around it to keep it in place while it dries.
Once it's dry, fasten a string to the handle, and taa-daa! At our place we have 4-5 different types of birds who will eat out of this feeder, and it hangs outside our kitchen window so the kids can see it while they're eating breakfast at our island. They are always so excited about the birds. And that's it! It's unique, it's simple, it's beautiful. The End. Good day to one and all. I made this lovely coffee cake as part of a brunch when my in-laws came over, and it was such a nice treat, minus the guilt. Grain free, dairy free and sugar free does not mean yucky, and if you're a doubter, this coffee cake will convert you. I promise. 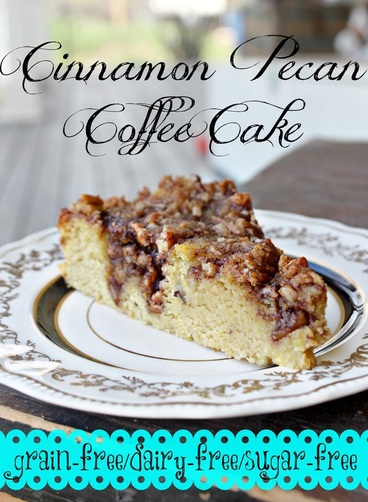 Cinnamon Pecan Coffee Cake Ingredients: For the Cake
For the Topping
Method:
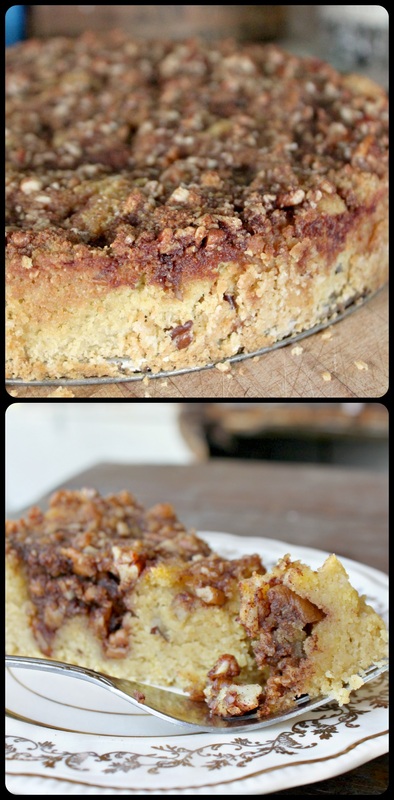 This wonderful cake is really light and fluffy, it's moist and just sweet enough.
Happy Monday! Gosh, I'm having a hum-dinger of a time writing some sort of "intro" here......this happens from time to time, and when it does I like to resort to "what would my kids do?" "Hey, excuse me.....hey...Excuse me.....excuse me....hey, excuse me.....Um, look at my banana bread....." O.k, so none of them would say "look at my 'banana bread', but I hear "look at this (fill-in-the-blank)" all day from my sweet Keziah, so that oughtta do it here! :) 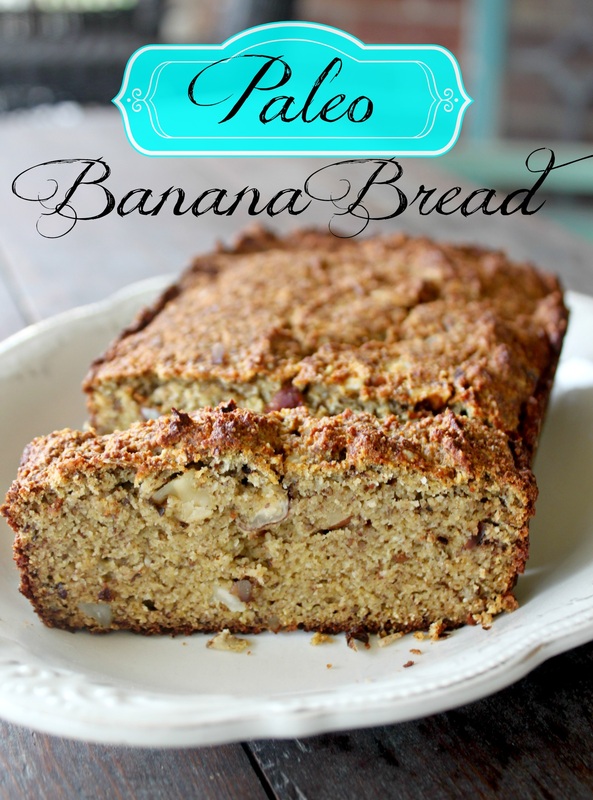 Paleo Banana Bread Ingredients
Method:
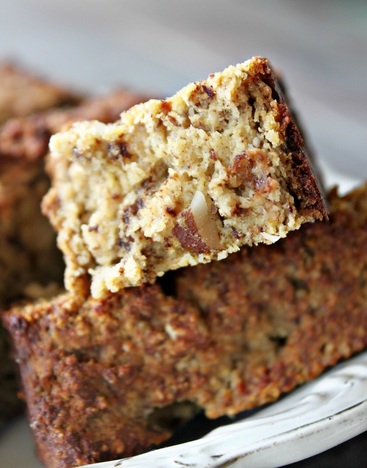 I like to let this bread cool, then cut it into slices, wrap up and put into a freezer bag, and stick it in the freezer. Then when I want some, I can just pull out one piece, put it onto a plate (covered with wrap), and let it thaw out (doesn't take too long). I've also taken out one piece from the freezer, stuck it into a plastic container, and packed it into lunches/snacks for myself or the kids as needed. By the time we get to eating it, it's no longer frozen.
Well now, I hope everyone has a good weekend! I plan on baking (obviously!), going out for dinner, and having the in-laws over, so, it'll be a busy and fun weekend! If you Google "autism and divorce rates", the number looking back at you is staggering. According to most articles you read, 80% of couples who have a child with autism get divorced. That is an alarmingly high number, almost a hopeless number. There's still that 20% of couples who stay together, but it's still not that encouraging. Why would numbers be so high? The thought is that between the regular stress of a marriage, then the extra financial costs of a child with special needs, conflicting parenting styles that get magnified when both parents feel the extreme need to be an advocate for their child, potential blaming, plus the fear and weariness of a diagnosis, that 80% number seemed fair, and no exhausted parent of a special needs child ever challenged it. 
The Centre for Autism and Related Disorders at the Kennedy Krieger Institute recently had a press release regarding the divorce rate among couples with an autistic child. What they found was almost more interesting than the 80% statistic most people were talking about. They found that number to be completely false, and that "a child's autism has no effect on the family structure". Brian Freedman, Ph.D., lead author of the study and his team point out several critical points:
Having determination can go a long way when it comes to staying together or not. If you don't want to be that false statistic of 80%, then don't be! If you see that the relationship is struggling for whatever reason, be it directly because of a child with special needs, or any other marital stressor, fix it now! Don't wait until it's out of control. It may seem like I am just saying this from some pedestal of a perfect marriage, but that is not the case at all! 
Today is my 10 year wedding anniversary! I cannot say that any part of this past 10 years has been easy. But I can say it was worth it. To give you the quick version of the last 10 years, we got married when I was 7 months pregnant, then that child was diagnosed with autism, we've had (many) job losses and being completely broke, no vehicle (or vehicles that only functioned partially-like a stick shift VW that had no reverse, then slowly started loosing other gears!), moving 9 times, having another child with physical challenges, having 2 late term miscarriages, a fire, and that's not even all of it! There have been many, many times where this has almost fallen apart. All I can genuinely say is that it is only by God's grace that my husband and I are still together. I am not being overly dramatic, I mean that with all my heart. The worst things that have happened in our marriage I didn't even mention, but believe me when I say they were breaking us. But I believe that "what God has joined together, let no man separate" (Mark 10:9). Something has happened to me in 10 years, besides getting older. I look back and think, "um......how did we get through all of that?", but then I also look at the road ahead, and know that no matter what, God is in control. I look at who I am now compared to who I was 10 years ago, and I thank God I am not the same person. I have hit rock bottom many, many times, but lucky for me in God's economy, down is up. 
To my husband of 10 years: You amaze me with your faith in me. I have betrayed you many times, but you choose to remain with me, joined to me. I feel like we're in a race, and this last stretch has been even more uphill than we anticipated, but I have genuine faith we will continue to run this race with determination to finish as winners together.
I am a better person now because of you, but mostly because of God working through me and you to keep us changing and growing together. I love you, and here's to another 10 (plus) years. xoxo I really love coleslaw. It's great in the summer for picnics, and for BBQ potlucks, but I just honestly love it all the time! I make a batch of this every week, and I don't share it (yup, I just admitted that!), and it's gone in a day or two. I brought it to a friends house a while ago, and we polished it off waiting for our wings to come out of the oven. My husband came in and caught us red handed, but he let it go...we must have seemed scary devouring all that coleslaw on our own....anywho, this tasty dish is mayo-free (in case you didn't catch it from the title!) sugar free, and Paleo friendly. The Good Kind of Crazy recently posted another coleslaw that, like mine, is mayo-free, but uses hummus as the creaminess. Yummy. So, whatever you do, don't assume that to have a nice, creamy coleslaw you need mayo. That is false. 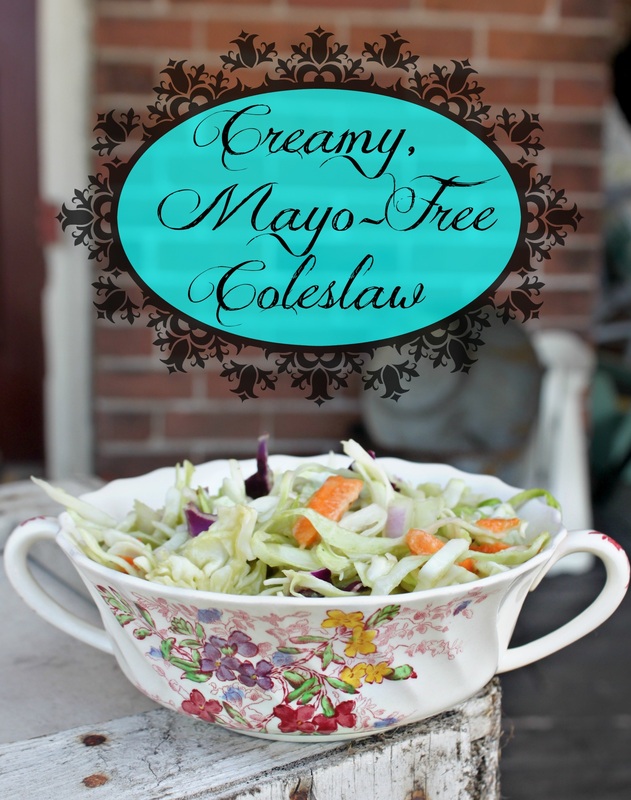 Creamy, mayo-Free Coleslaw Ingredients:
Method:
This will taste great right away, but tastes even better a day or two after (if you can wait that long!). 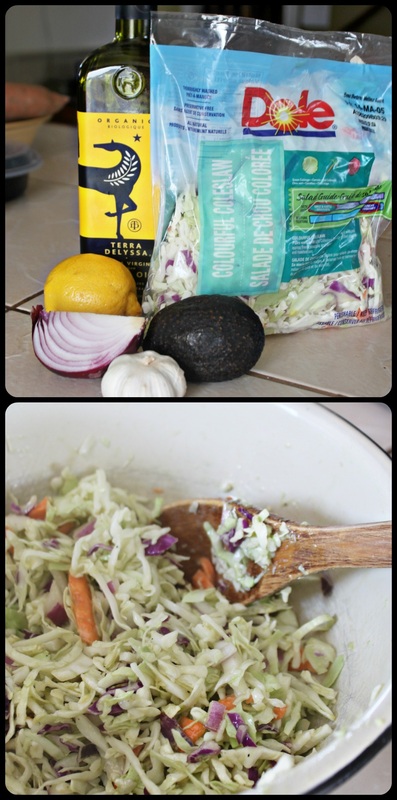 And that's it! It's simple to make, and tastes so gosh darn yummy. If you want it to be creamier, feel free to add the whole avocado.
I actually love this coleslaw so much I even eat it for breakfast (with a side of 2 hardboiled eggs), I know it's weird, but that's me! When I was just newly married, I had a mini melt-down over dinner. If you can imagine this: I felt like I didn't ever know what to make (I swear, I couldn't really cook at all!), and I felt like I was letting my husband down by not having those stereotypical wifely skills (as a sub-text, he never made me feel that way, it was just me projecting my own feelings of failure from what I thought I should be able to do). So, after this melt-down, as was typical for me at this time in my life, I ran. No, I didn't "go for a run", I just literally ran away. Bare feet, no plan, just started running down the rail-trail that was behind our house. Once I was finally exhausted from running away, I sat dow and cried. Then, I picked myself up and went back home. When I got home my husband was very nice (possibly because he thought I was a touch crazy and maybe afraid of me!), but he said something that changed my life. He asked, "Do you think it would help if we made a menu so that you didn't feel overwhelmed at dinner time thinking of what to make...?". The answer was YES, that would help me enormously! I started making a menu (that largely consisted of pre-packed meals for lack of any skills on my part, and any real meals that needed being made were done by my husband when he got home, but I would still try to have everything ready for him). Almost 10 years later, I still use a menu. It helps me with my grocery shopping, saves us money, helps keeps things from staying in our freezer for so long it's frost-bitten and needs throwing out, and most of all, it takes the guess work out of "what's for dinner?" everyday! 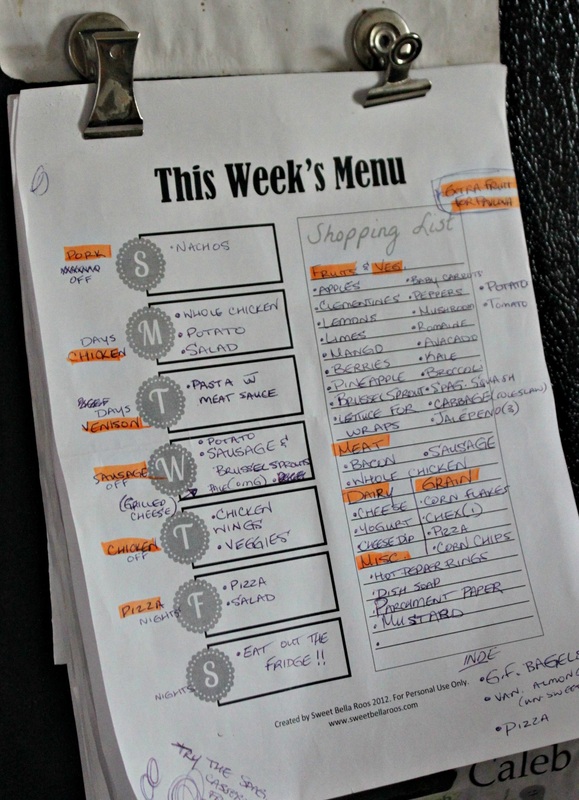 Our menus are never filled with elaborate dishes, just what our family considers the usual. I like to try new recipes, and if I do, I will write in that days dinner the website, blog, or magazine I saw it in so that I'm not wondering where I had seen it. I used to just write the menu out on the left side of a piece of paper, and along the right I would have my grocery list (I find this helpful because not only am I looking at the list, but I have the menu at the grocery store, so if there is a store special, I can look at the menu and see what meal or item I could swap out for the sale). The menu I use now is from here, and I print one off every week (the menu in the picture above). If you want a menu, but the styles in the link above don't suit you, just Google some printable menus, and you will get a plethora (I'm not being serious using that word, I just like it from The Three Amigos) of options. :) I further the organization on my menu by writing next to each day if my husband is on or off work (he gets back late, so the dinner I made should be good warmed up hours later), if we have plans that night (so I know to make a simple dinner), and I also write what kind of meat I'm using so that we have a variety, usually also including a meat-free night. If the thought of making a new menu every week scares you, for a few years I was just doing a four week rotation. I made my menus for 4 weeks (not all at once, just as each week came), then on week 5, I went back to the first menu, and did it again. I have a lot of friends who say they could never do a menu because they're not organized enough. But, those people often don't feel stressed with the "what's for dinner?" question, and that's fine! I would never say that what I was doing was the best way, I'm just saying it's the best for me! 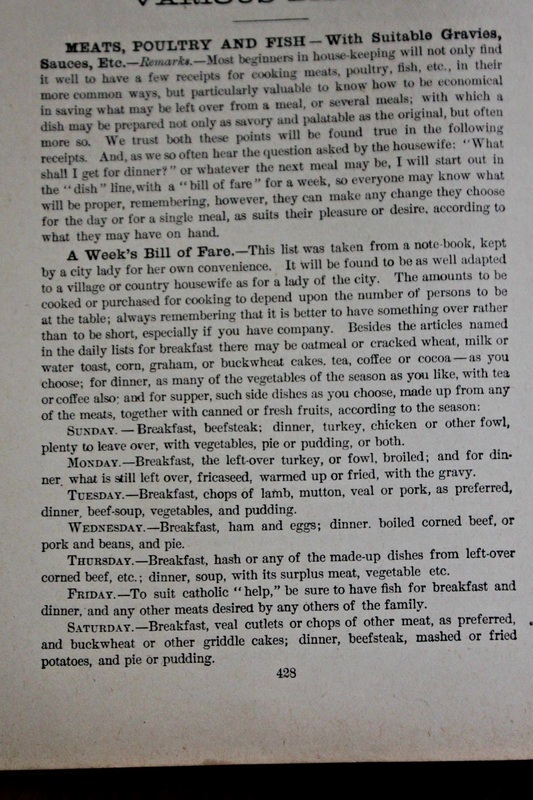 One last thing about using a menu: it's nothing new. In my Dr. Chase book, there is a "Bill of Fare" (pictured above), and it is amazing! Let me share some of the days with you (in case the font in the picture above is too tiny!):
Sunday-Breakfast, beefsteak; dinner, turkey, chicken or other fowl, plenty to leave over, with vegetables, pie or pudding, or both. Monday-Breakfast, the left-over turkey or fowl, boiled; and for dinner, what is still left over, fricasseed, warmed up or fried with the gravy. Tuesday-Breakfast, chops of lamb, mutton, veal or pork, as preferred, dinner, beef soup, vegetables and pudding. You get the gist of this crazy menu from the late 1800's, right! No vegans allowed! :) Dr. Chase does say that beyond this menu, you may also add oatmeal, cracked wheat, more fruits and veggies, coffee and tea. So, all of this to say I am not reinventing the wheel, I'm just doing something that works for my family, and has worked for families in the past. Don't feel like you're less of a person if you don't do a menu, that really isn't the point! Just do what you need to in order to de-stress your life! When we lived in Brantford we used to buy un-pasturized honey from a local beekeeper. One day she randomly gave me a cookbook, the "Ontario Honey Recipe Book", and I went home and tried a few of the recipes right away. Honey lends an unexpected flavour to foods, and I enjoyed using it. One of my favourite recipes though was this Date Orange Muffin recipe. I hadn't made these in a long time though, but want to try them again, only changing a few things to suit us now. They are gluten free, dairy free, and using half honey, half maple syrup (because my neighbour stopped by with syrup he had made!). The result was fantastic, and these muffins were as good as I remembered.  Date Orange Muffins Adapted from the "Ontario Honey Recipe Book" Ingredients:
*If you don't have walnut meal, just make up the difference with more almond meal. * *If you are not gluten free, the original recipe calls for 3/4 cup of honey (I reduced the amount to suit us/the type of flours I was using), and 1 1/2 cups all purpose flour. Method:
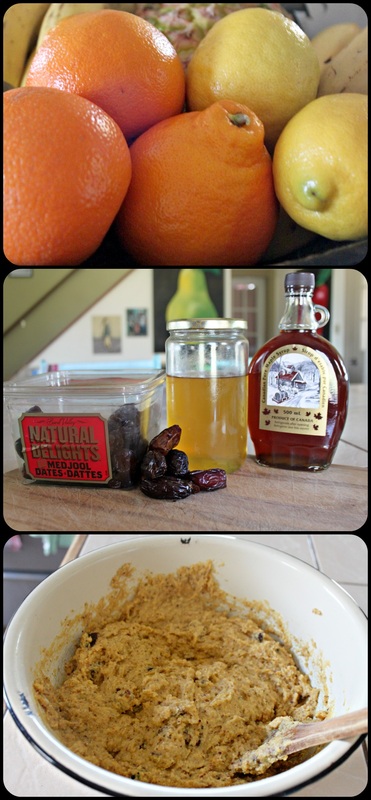 A whole, fresh orange gives these muffins an incredible, bright taste. 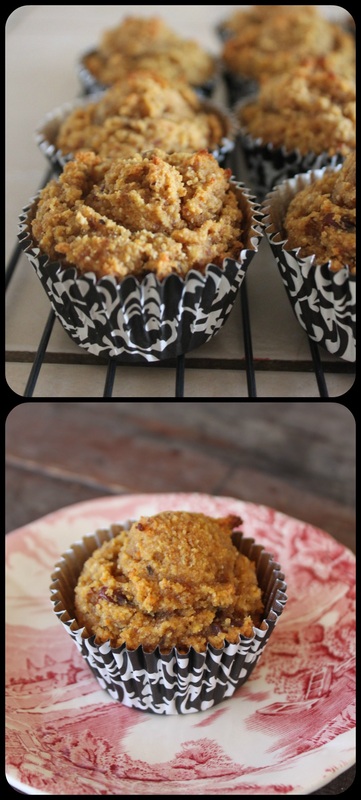 I hope these wonderful, fresh tasting muffins make it into your list of things-to-try!
|
Hi, I'm Amy-Lyn! 
I am the lady behind this here blog! I live in the sticks with my animals, my super handsome husband, and my
3 amazing kids! Here you'll find things from recipes (gluten-free, paleo, and strait up junk food!), DIY ideas, thoughts on raising a son with autism, and whatever else pops into my brain! : ) Read more about me by clicking here! Want to Stay Connected?
Find What
|
 RSS Feed


