|
Something strange has been happening in my kitchen lately.....it all began a few months ago when a hinge on our oven door broke. It should be fixed, but I just sort of shrugged, and figured out a way to keep it from falling off completely (though it did a few times, and let me tell you, that sure messes with baking times!). Anywho, then my beautiful vintage stand mixer was in the middle of mixing when suddenly shhrrruncchhhweeellcchhh.....the engine seized (that strange word is the official sound of a vintage stand mixers engine seizing, btw). So, I was down to only using my hand mixer to recipes, which in some cases proved to be a great arm workout as my hand mixer is also vintage, and weighs at least 8 pounds! Then, in the middle of whipping up some avocado cookies, SNAP, one of the attachments snapped off. Oh well, I thought, I can use a hand mixer with only one mixing attachment... A few weeks back I was going to make some treats for a fundraiser I had volunteered to bring some desserts to, and I turned my oven on, only to watch as the bottom element of the stove caught fire, and burnt its way down the entire element, until only a crunchy, burnt, useless element remained. "No worries!" said I, "Our BBQ has a thermostat, I can bake in there!" It's true, I can bake in my bbq....though it can take twice as long because I only really have 1 rack to use. But, I wasn't worried, I would press on! Then, yesterday during a macaroon experiment in which I was attempting to really mix the ingredients together well in a blender, the bottom ring (the threaded part that holds the blender glass to the base of the blender), broke in half, and everything in the blender came flying out as the glass top came crashing to the floor! ....I think the Lord may be trying to tell me something. It's either A: to make more microwave cakes & leave the oven alone, to B: win the lottery and buy a new oven, C: Stop buying vintage appliances, D: Be a little more gentle when screwing the bottom on a blender on, E: to send a truly heartfelt thank-you card to my father-in-law who bought us our bbq a few years ago, or F:....to stop trying to bake altogether. I really can't imagine the lesson would be that last one, but I can't be sure. All that to say, I made my own birthday cake a few weeks ago on our bbq! My husband shook his head in disbelief....though I'm still not sure if it's because I made a cake on the bbq, or because I made myself a birthday cake? No matter, it worked out really well, and I got a paleo(fied) birthday cake! It wasn't a treat day, after all, and I didn't see why I should have a treat day just because it was my birthday! I thought it more fitting that I would celebrate my birthday eating what had gotten me to the new, healthier place I was in! So, here it is, many stages, a little step-intensive, but overall a simple and tasty cake! 
Paleo Chocolate & Chocolate Chunk Layer Cake *I only have one small round cake pan, so I made the chocolate cake first, then while it was baking I prepared the chocolate chip cake layer. When the chocolate layer was done baking, I washed and dried the cake pan and used it again. If you have 2 cake pans-all the power to ya!* Chocolate Cake Layer: Ingredients:
Method:
Chocolate Chip Cake: Ingredients:
Buttercream Frosting: Ingredients:
Method:
Cake Assembly:
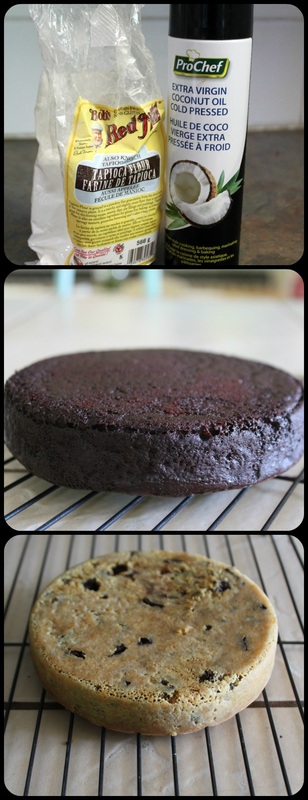
Look at those lovely cakes!
Pictured above is the spray I use for cake pans. And dusting the pan (with cocoa for a chocolate cake, or flour/starch for white cakes) really helps to ensure the came will come out of the pan when you're finished baking it. 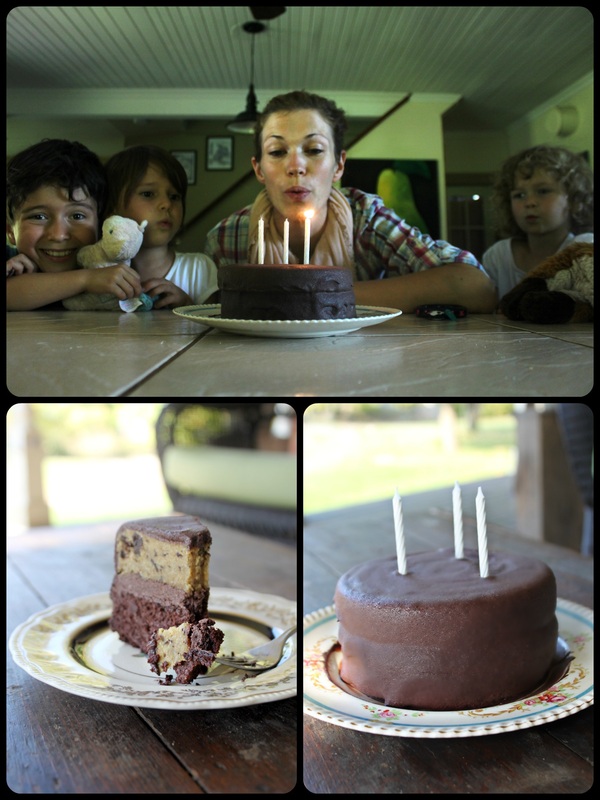
The kids and I having cake for dinner on my birthday! :) Seriously, we had it for dinner. We did have some veggies later on, if that makes you less concerned.
And so, there you have it! My tale of kitchen woes, and how I refuse to be woe-d by such things! :) Seriously, stubbing my toe makes me angry, but my kitchen falling apart around me? Naw, I'll just figure something else out!
I've made this cake, some cookies, muffins, mini muffins, and even a pie on my bbq! It's like having an old fashioned summer kitchen! That's how I will look at it, at least! Once the snow flies I may feel differently though...whomp whomp. And I'm doing fine without a stand mixer, and a hand mixer with only one mixy-thing on it is still easier than trying to whisk everything by hand! I can't make smoothies until I get a new blender, but my Mom gave me a Yonanas for my birthday, so I will just use my frozen fruit for that instead! The glass if half-full for me folks, looking on the bright side is something I want to spread around! Later peoples, and happy Wednesday! Pass on some positive attitudes! :)
2 Comments
Well, it's no secret I love to celebrate my kids birthdays, and I like to run with the theme they give me. I plan ahead, get lots of the work done ahead of time, and assume it'll all come together in the end. Perhaps I will share some of the behind the scenes of the makings of this and that, but for now, I will just tell you about this day. This Buzz Lightyear party for Caleb was different than my usual parties...it was humbling....it was truly a flop. Although, it was also a success. Allow me to explain. 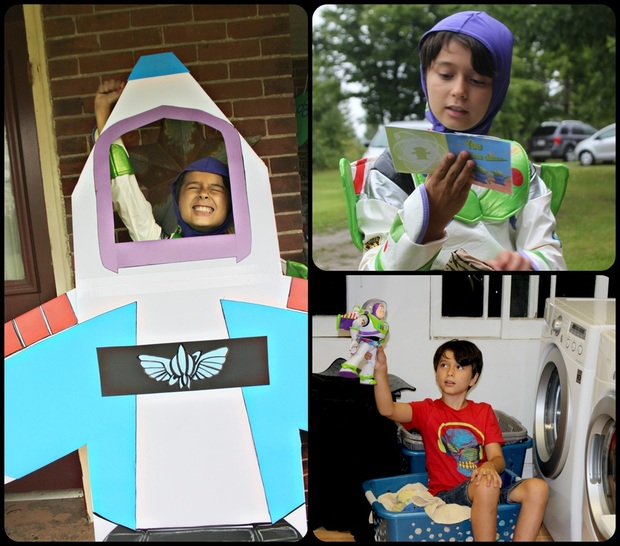 Our Buzz Lightyear Months ago we went internet searching for a new Buzz Lightyear toy for Caleb. He has autism and has been obsessed with Buzz for months (and months!), and asked for his party to be a Buzz Lightyear from Toy Story II with a new utility belt party (hilariously specific, I know). So, we were hunting for this Buzz Lightyear with the blue utility belt, and found one at a good price, and bought it off eBay. After we had purchased it the seller e-mailed to say he accidentally underestimated the shipping and we owed him another 20 pounds (it was from England). Um, heck no. We got out of that, and managed to find another Buzz on eBay...who showed up and wasn't working, and the seller was a complete jerk about it! We did end up getting this Buzz working (thank the Lord!), but this Buzz not working, and seller being a jerk thing happened 4 days before the party, so I was getting a little anxious. We were also looking for a costume to buy him because he wanted everyone to dress up for his party, and he had been talking endlessly about dressing up like Buzz. So, we found a Buzz Lightyear costume (again, on eBay), it got to us, I opened the package....it was a size 4. Caleb turned 10. Grrrrrr........ I e-mailed the seller back, who was kind and very apologetic. We sent it back to her, and found another costume on eBay that arrived 5 days before the party. It was the right size (phew). 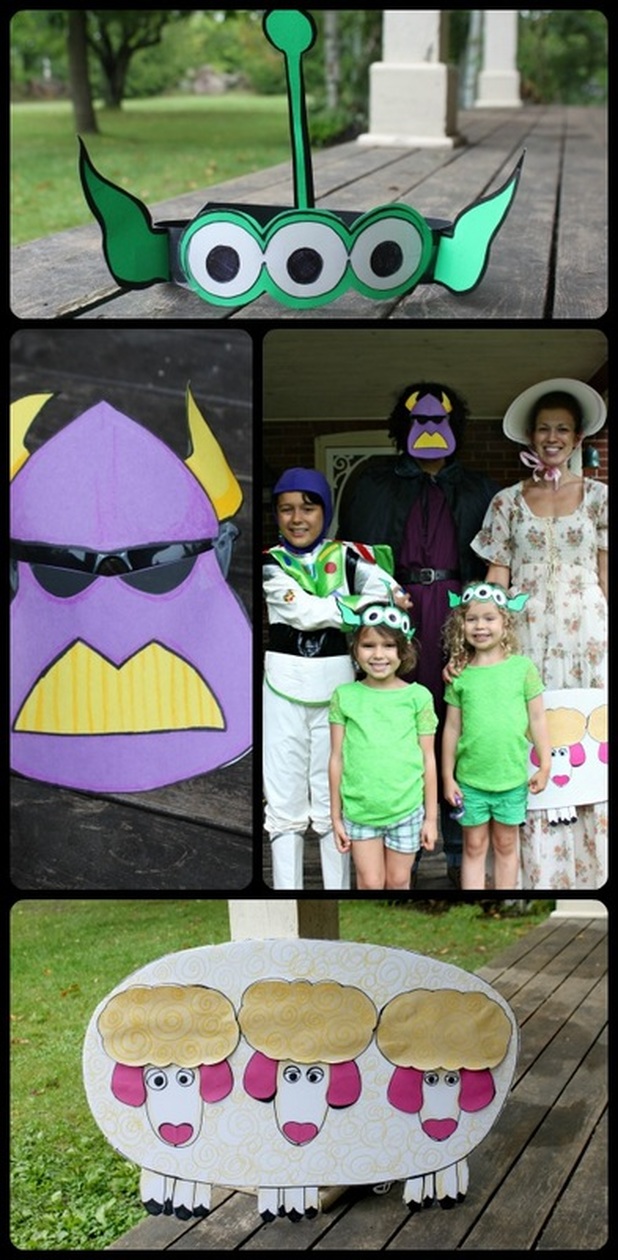 Parts of our costumes, and us in them We have rented a waterslide bouncy castle for Caleb's parties the last few years because they have always been worth he rental as the day is hot, and the kids stay so busy and happy. This year we were told they couldn't pick it up at the end of the day (unless we wanted to pay another $75!), which meant hubby was driving 2 hours that day, just to pick it up and drop it off. The weather report said a 30% chance of rain, and it was for the evening (after the party). Mmmmm, let's see what really happened...the party started at 2, and it began raining right around then....and kept raining until most of the guests had left. 30% in the evening? More like 100% all day, then a 30% chance in the evening! Oh, what else.....oh yes! We had planned on making our own burgers to save some moo-la, but the ground chicken and turkey we had were more like cat food, and refused to be shaped into anything, not even a humble burger paddy! So, an hour before the party the hubster was picking up a bag of pre-made burgers from a local butcher. And the most epic fail of the party was my cakes! Holy jumpin'!!! I had made them the day before (as I always have), and stuck them into the freezer to keep them until the party (as I always do). I will generally pull the cakes out a few hours before it needs to be served to make sure it has thawed sufficiently, and I did just that. But, I'm not sure if it was the rain, or just the crap luck we'd been having, but the black buttercream I had used as trim started to melt and run.....and melt and run some more...then the fondant got sweaty and sticky....perfect!!! It was like a horror film version of Buzz Lightyear....it was terrifying.....terrifying!!!! 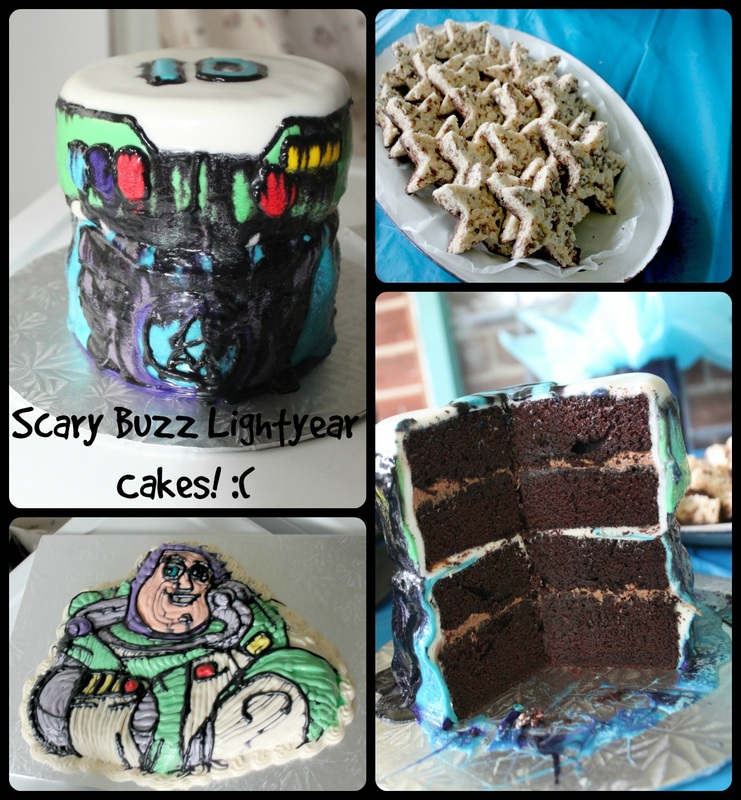 I'm still having nightmares about those cakes! Yikes! You can see the inside of the chocolate looked yummy, and the Buzz bust was vanilla and tasted good too. Thank goodness!  This is a picture a friend took (well, I photo bombed it!), but I think it accurately portrays how I was feeling!!! :) I had taken off my costume by then because it was sopping wet, and had put on my cozies! Now that I'm done whining about all the serious failing that happened for this event, I will tell you why it was also actually a success. For starters, Caleb was sooooo crazy thrilled with his costume. So, so, so very excited. Secondly, he loved his Buzz and had no clue it was such a stressful ordeal getting it here! Third, the kids that came to the party had fun doing anything and nothing! Some played (and froze) out on the waterside bouncy castle, some just had fun on our front porch blowing bubbles and playing with our outdoor trucks and toys. At one point Caleb and a few other kids were just plunked in the living room watching Toy Story II! Fourth, my sister (and her family) were visiting leading up to the party and helped with the grab bags and decorations for the party. And they looked great! Fifth, the parents (our friends) are the best!!! They were easy going and laid back and were o.k. with all the chaos that ensued when there was 21 kids (aged 1-10) running around he house and front porch like a bunch of wild dogs! They were helpful, encouraging, and turned a blind eye to the terrifying cakes I was about the serve the children! haha.....oh man, the cakes... And sixth...the cakes still tasted good. Apparently people will eat cake almost no matter what! :) Oh, and my chocolate dipped Rice Krispie stars worked out perfectly. ....And Caleb had a great time. This is really (and obviously) the most important thing. If he wasn't having an awesome day I likely would have lock myself in the bathroom for a good cry. A really good cry!  All of the decorations were hand made by my amazing sister and myself (and my brother-in-law helped with the grab bags) So, for real, this was a truly humbling experience.
I like order, and things being predictable, and planning and working it out, and having it be just so, and just as I imagined it. I got basically none of those things! What I did get though was a day to make Caleb's wee heart so happy with his friends around him. A day where Caleb was dressed as his ultimate favourite character, and playing with a toy he has been watching on YouTube for months. A day of chaos and friendship, of rain and mud. I got a good anger management day by having friends who didn't care about all the failures leading up to (and during) the party. And at the end of the day, my wonderful son with autism who's birthday parties have not always been the best because he got too overwhelmed and would fall apart, managed to rolled with the punches, he stayed happy and positive, and shone bright all day! Who needs the sun for a summer birthday party when you've gone a beaming Caleb!!! :) I got the chance recently to make a cake for a friends daughter. I was very excited, but also a little nervous about it turning out (making a cake for someone else is very different than making it for yourself or your own kids!). The cake was for an 11 year old girl who was having her party at a bowling alley. The request: vanilla cake, bowling theme, purple & green. Okey doke! 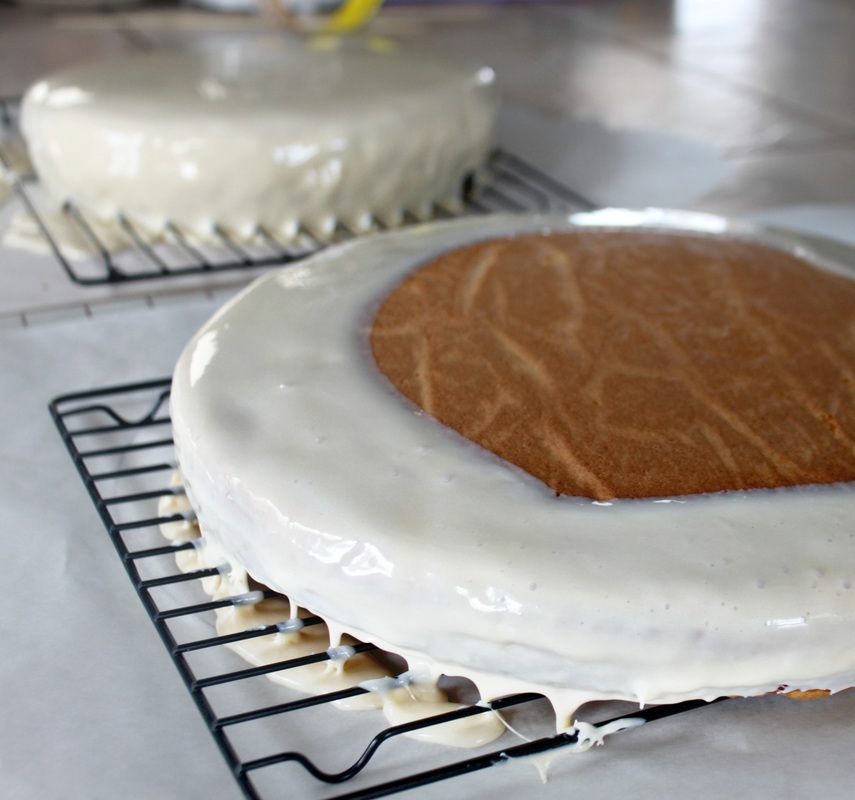
I started with a simple vanilla cake recipe, and doubled it (I made 3 layers, but decided it would be too much cake, so I wrapped up one layer and put it into my freezer). After letting the cakes cool, I used the poured fondant menthol to coat the top layer, and I only covered a portion of the bottom layer because I knew I would be putting buttercream between the 2 layers. 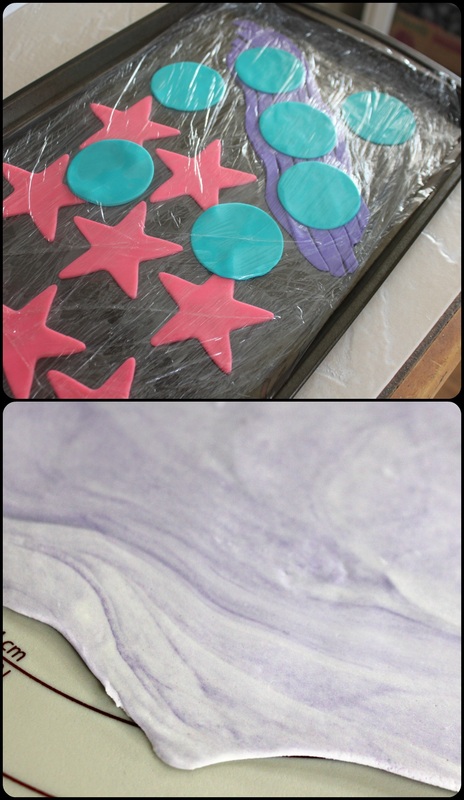
I divided and wrapped the fondant shapes in plastic so they would not get dry.
For the fondant for decorating, I used a simple Rolled Buttercream Fondant (it actually tastes good). I often use a marshmallow fondant, but that fondant can sometimes become dry, and I was making this cake for a party that was a few days away, and I wanted to be sure nothing cracked! I divided the fondant into 5 (the 5th section being tiny) groups, and made purple, pink, teal, purple marbled, and a tiny bit of black. The pink, and teal colours were rolled out, and (using cookie cutters) made into stars, circles, and the purple (using a knife) was cut into strips. I left a small portion of each colour un-rolled and wrapped in plastic wrap in case I needed it for extra details. I used a tiny glass bottle I have to make 3 little circles for the "holes" on the bowling ball. 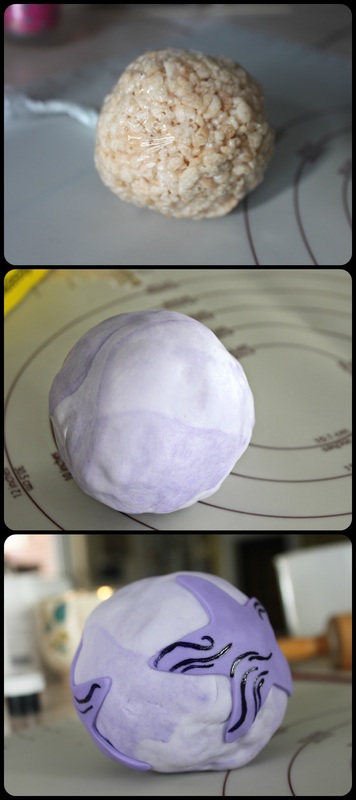
The bowling ball was made using a very small batch of Rice Krispie Squares, and rolling it into a ball (instead of pressing it into a pan). I wrapped the ball in plastic wrap, and put it into the fridge until it set, and I was ready for it. To wrap the bowling ball, I just decided where the bottom would be (for a possible seam), and I gently worked the purple marbled fondant around the ball, and smoothed it out as I went. I wasn't sure it was going to work, but I just plugged away at it, snipped a few pieces of excess as I went, and it came together (it was easier than I thought it would be). I added some fondant stars to it, just for fun, painted on the stars with a gel food colouring, and added the three black fondant "holes". 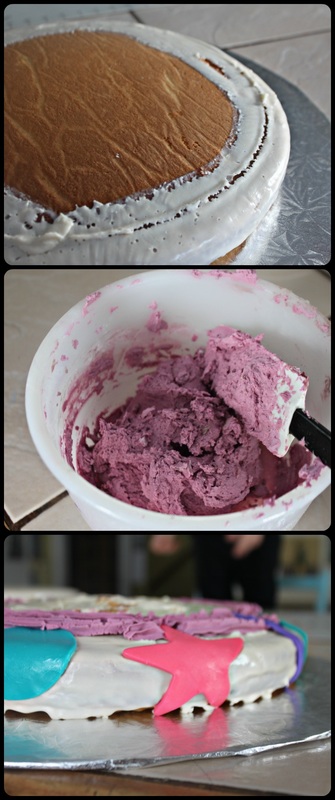
My buttercream is coloured and flavoured using a Duncan Hines Frosting Creations flavour packet. I add the packet while I am creaming the butter, and before adding the icing sugar.
Getting the cakes onto their tray was tricky, but I just made sure I was taking my time, and was oh so careful. Once I had the bottom on, I added some flavoured buttercream (using the cake pan from the top layer to give me an idea of how far out I needed to go), and the shapes I wanted on the bottom. I wanted to add the shapes to the bottom at this stage so that they would tuck in under the top layer. 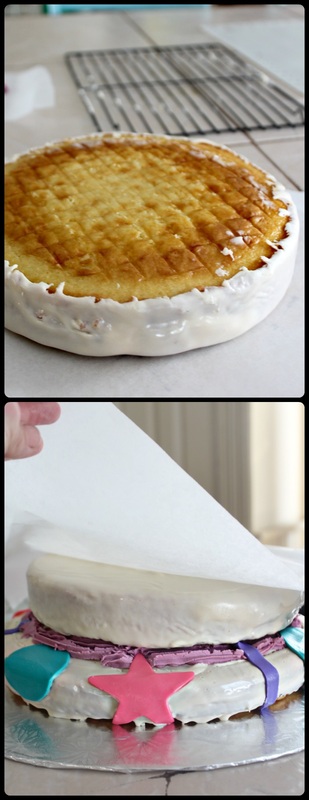
To put the top on, I placed a piece of parchment on top of the cake, and flipped it over to get it off the cooling rack where I had poured the fondant on. I then tucked in the icing that was hanging/dripping (it's how it looks because the icing was poured on while it sat on a cooling rack). Once I had it all tucked in, I gently placed the top layer on top of the bottom layer. To get the top to smooth out, I left the parchment on it and gently (using a rolling pin), rolled the top. Then I removed the parchment. 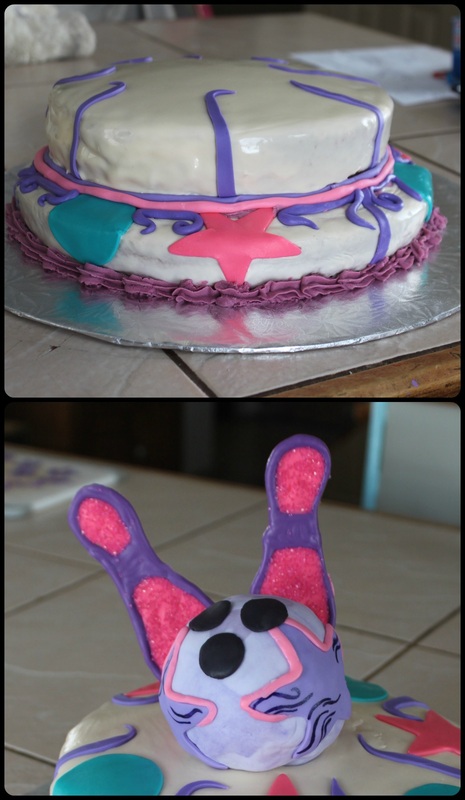
To make the bowling pins I put a piece of parchment over a photo from the internet of bowling pins, and traced over it with melted purple moulding chocolates. Then I filled in the tracing with pink melted moulding chocolate. I added some pink sprinkles too. Photos of this same chocolate tracing technique are here, when I made a Princess Celestia for a cake topper. To make sure the bowling pins would stand up in top of the cake, I place a skewer on the photo before I began tracing with the melted chocolate. With the extra melted chocolate I drew squiggles, stars, and other random shapes that I thought I might be able to use as extra decorations for the cake (or that I could feed to my children who kept asking what they could eat from what I was making!). I also gently pushed a skewer into the bottom of the bowling ball to help secure it to the cake. To the top I added some stripes and shapes, and I also added some purple fondant, rolled and shaped to fill in the gap between the two layers. And I piped some buttercream around the bottom to clean it up. 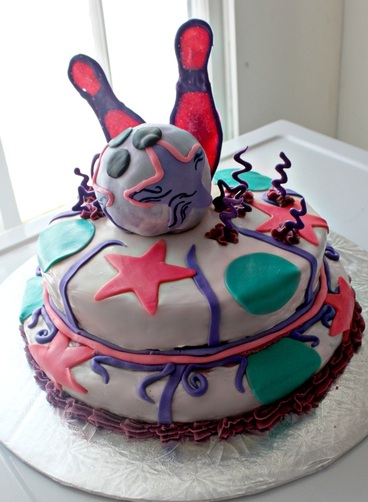
For a finishing touch I piped some buttercream onto the cake in random spots, and gently pushed some of the chocolate squiggles I had made.
The only mis-hap was that one of the bowling pin tops broke on it's journey from our house to the birthday girls' house! Oh my gosh! Luckily my friend is clever, and just melted the piece still on the cake, and re-attached the broken piece. Smarty pants. Well, I feel bad for how long this post is (especially after the doozie from yesterday!), but I wanted to try to break down the making of this cake as much as a could (in case anyone cared to know!)! I was told that the kids loved the cake, and the party went well, so I was very happy! Well, it's Friday people! I hope everyone has a great weekend! My daughter was having an animal themed birthday party. We encouraged the kids to dress like any animal, but my main focus for food, decorations, goody-bags, etc. was domestic animals like dogs, cats, and fish. I decided for her cake that I would make a cat because, of all the animals she loves, she really, really loves cats! 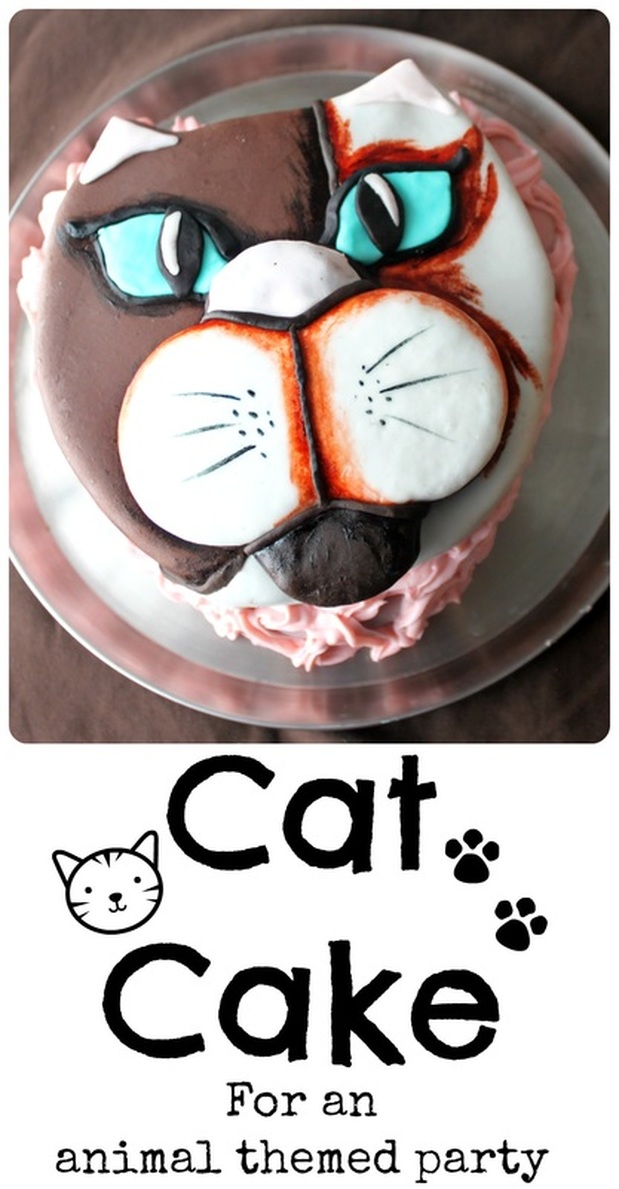 I started with a chocolate cake from Martha Stewart (here-I doubled it), and baked one batch in 2 heart shaped cake pans, and the other batch in a large springform pan (to have as extra cake for the muzzle, and any other random thing I might think of!). I made these 6 days in advance, wrapped tightly in plastic wrap, and stuck them in the freezer. When I started working on it, I didn't even really let it thaw out much. I just carefully cut one of the hearts into a cat head by forming sharp ears, and rounding the bottom. If you don't have a heart shaped cake pan, just start with a regular round cake, and cut cake ears to add. To get a perfectly symmetrical muzzle, I used my circle cookie cutter, and overlapped them, just scoring the cake. Then I used a knife and carefully cut it out. For the bottom lip, I just used the piece I had cut off the bottom of the heart. Making the pieces for the muzzle, nose, & lip is mostly just a matter of seeing what cake scraps you have, and turning them into the new pieces you want. 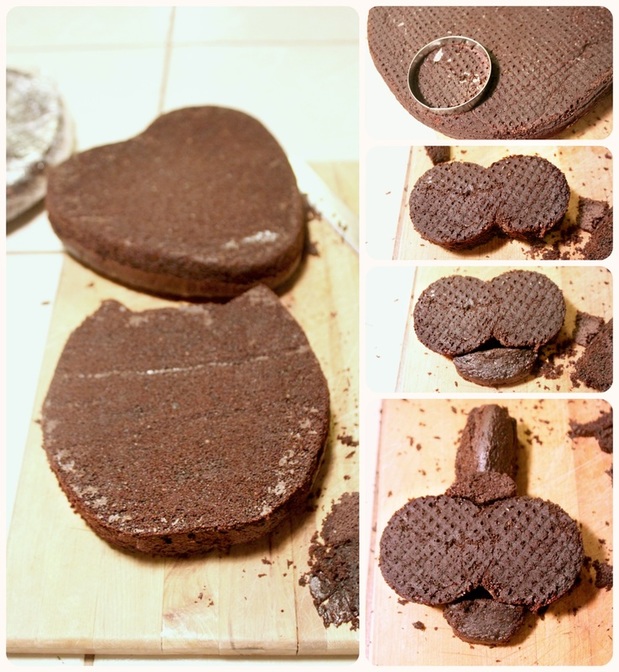 For my icing, I used a marshmallow fondant recipe that I have pinned on Pinterest, and have used many times. It's simple to make, and easy to use. I left some of the fondant white, made a few shades of brown, a little blue, a little pink, and a little black. I started by covering the cake in brown & white fondant, then covering the muzzle white fondant, then the nose in pink, & the bottom lip in black. I used a regular buttercream frosting to stick 'em together, and added some fondant "trim" to clean up the look of the seams. 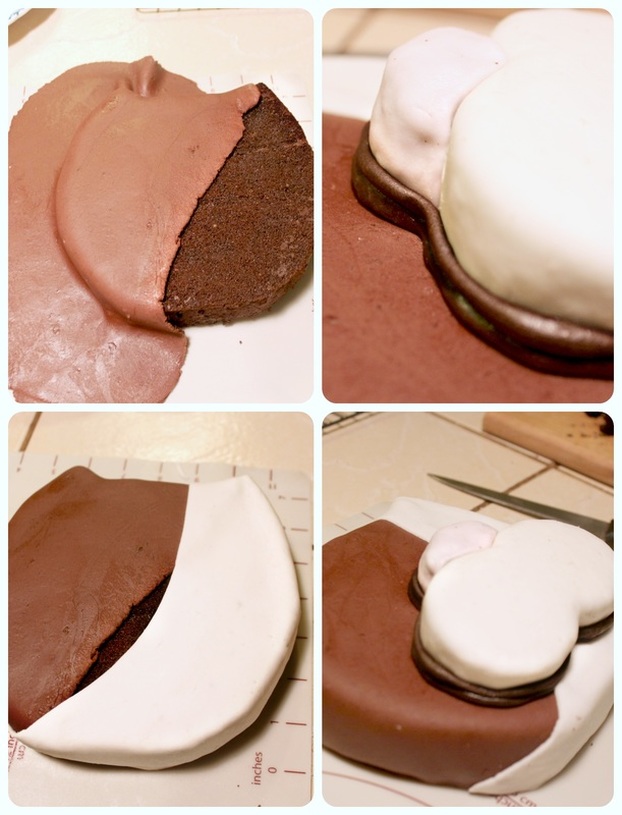 The eyes took some wiggling to make the exact same shape and size, but they turned out well. I added trim around them for definition, then added some more trim detail to the nose and muzzle. The bottom layer is simply the second heart (or a second round cake, if that's what you used), with a "melted fondant" (you take a store bought icing, micro wave it until it's pourable, then pour it over your cake, and let it harden). I turned it pink first with a little icing flavour packet. I carefully set the cat face on top of the fondant covered heart, then piped some coloured butter cream icing around it (I suck at piping icing....) The final stage in making this cake was to paint depth and detail using my Wilton Gel Colouring. I used a new, small paint brush to get the look I wanted. 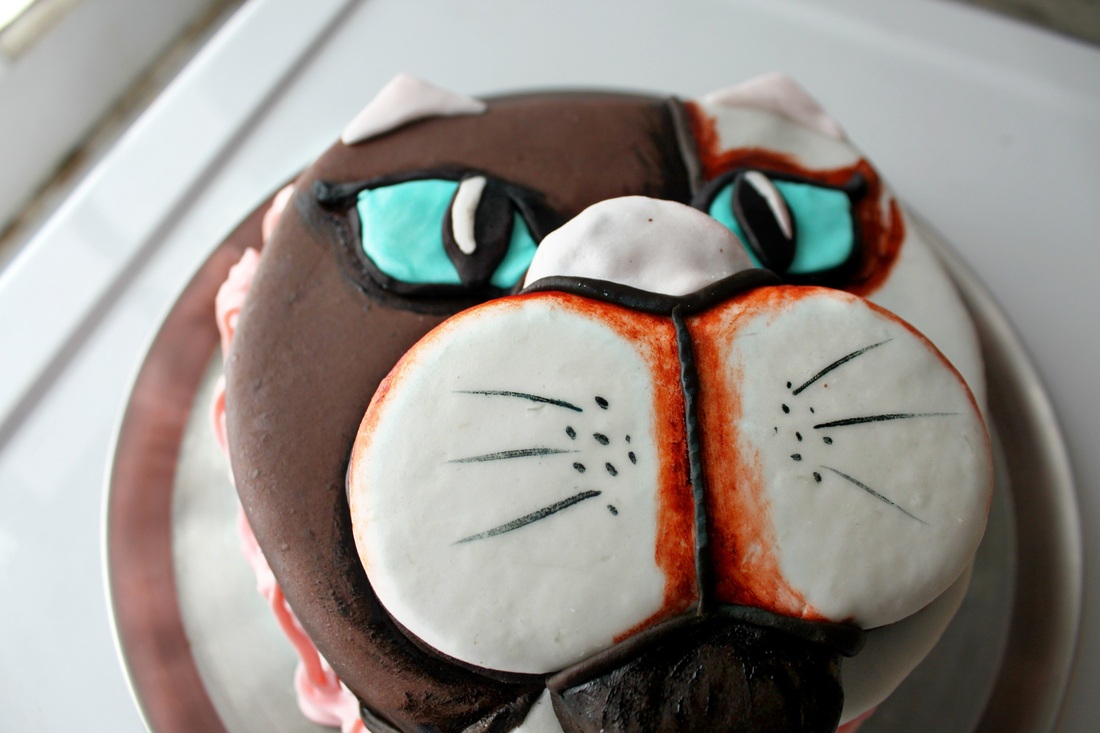 So, it took some time (as cake making/decorating can do), but I liked how it turned out, and my sweet daughter was so very pleased, which is the point! And this concludes my multi-day blogging about my daughters birthday! :) My youngest daughter turned 4, and wanted an animal birthday party (she originally wanted Littlest Pet Shop, but we generalized it because she just really loves animals in general....and because all Littlest Pet Shop paper plates, cups, napkins, etc. have been discontinued for some reason?). Anywho, here it is, with lots of pictures! 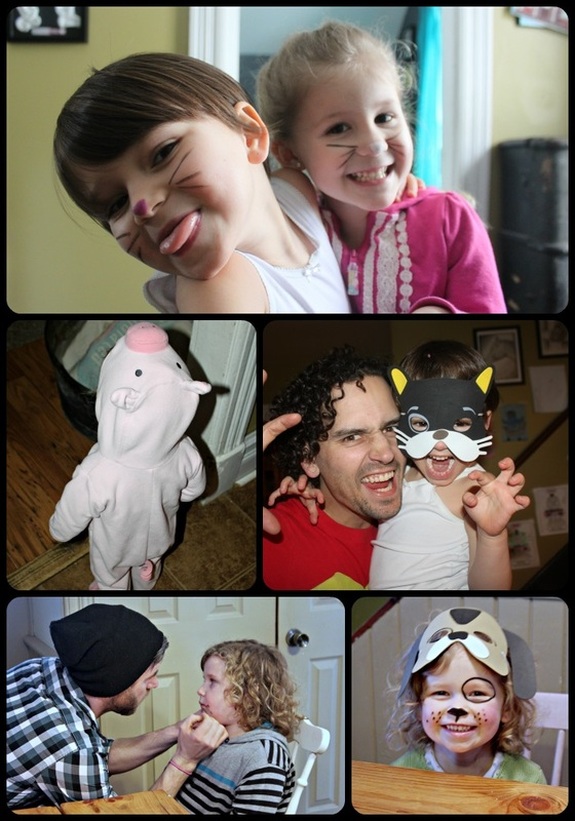 We asked the guests to dress like animals, we also painted faces, and had a few animal masks for the kids to wear. 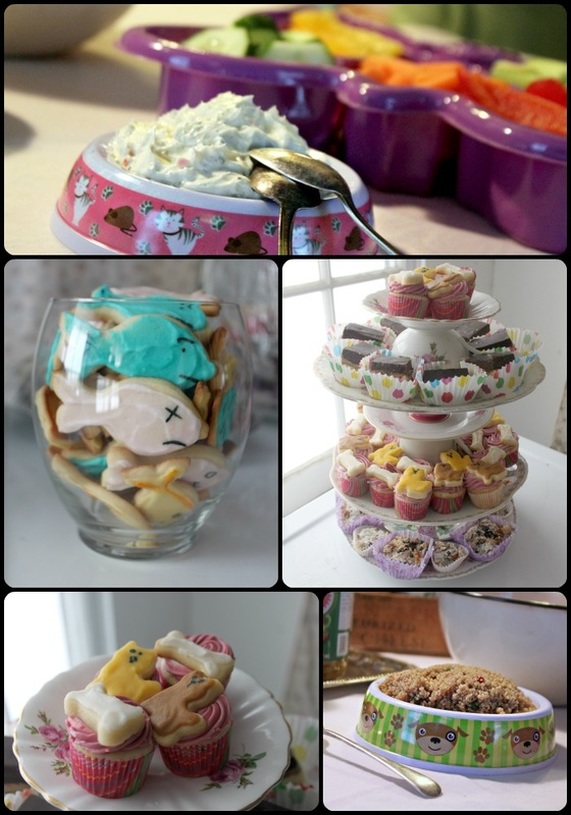 We fed the kiddies mini hot dogs (little cocktail wieners on small dinner rolls), veggies and "cat food" dip, our friends brought some delicious "dog food" quinoa salad, and there was a jumbo dog bowl of party mix. For dessert, we had a fish bowl of fishy cut-out sugar cookies (including one dead one, I know, I'm sick), kitty cat and dog bone cupcakes, a cat cake, rice crispy squares (just because I love them!), and a few extras for adults (Chocolate Dulce du Leche Shortbread squares, and Hello Dolly's). Oh, and ice cream too! 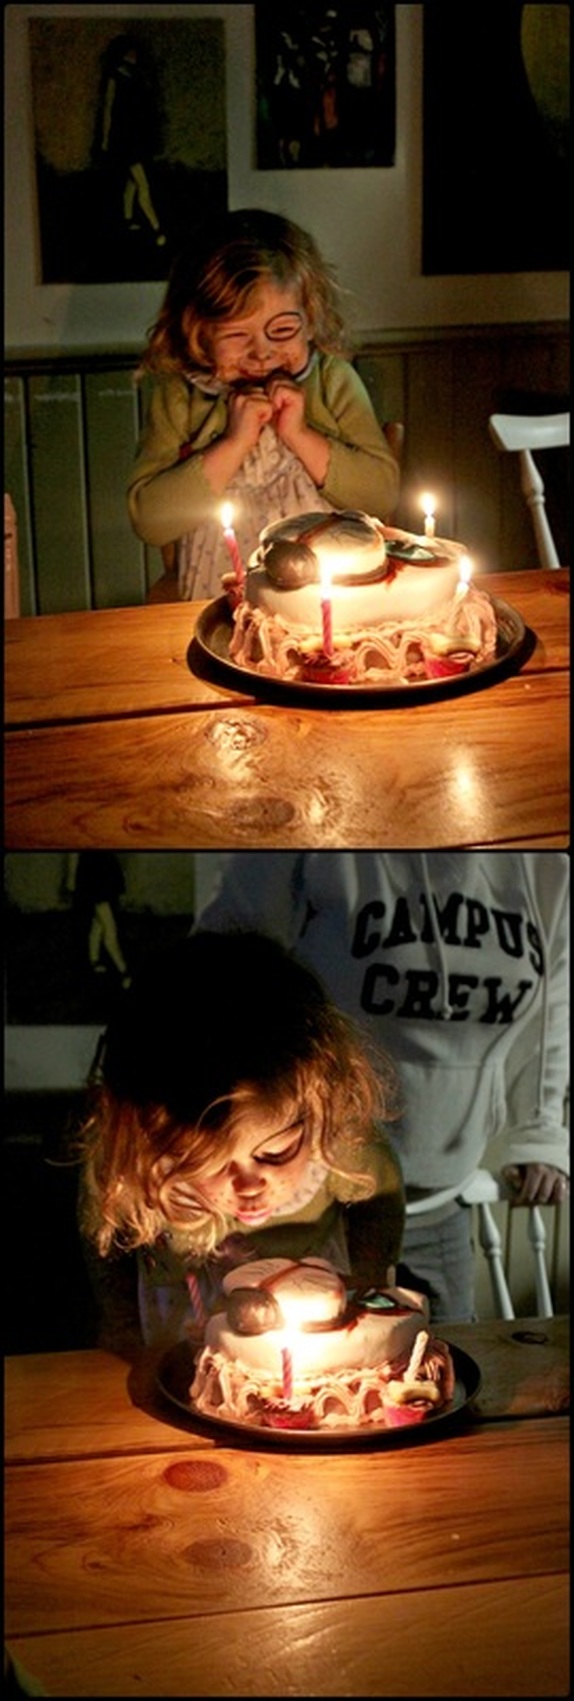 Seriously, check out that darling girl, and tell me she wasn't so excited! Gosh, I love her! I will share about how I made her cat cake tomorrow. 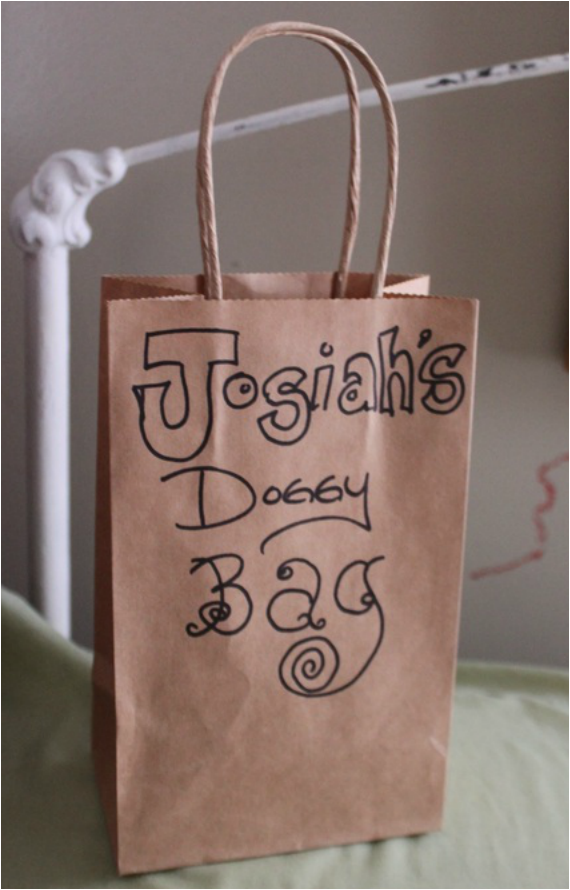 The kids took home "doggy bags" with goldfish crackers, gummie bears, a teeny Littlest Pet Shop animal, and some animal stickers. My daughter had a great party (and I think the other kids enjoyed themselves too!), everything turned out great, and I'm glad it's over! Haha, but seriously.... :) Yesterday I posted about the cake I made for my daughters party. Today I want to share some photos from the rest of her party, but mostly my thoughts on birthday celebrations. Some people feel that having a theme, and looking to Pinterest for party ideas is a waste of time, and too complicated (not that it's complicating, but more that it takes away from simple pleasures). I disagree.  I already had some pink plates, so I ordered some My Little Pony stuff online to be thematic and supplement what I had. Before the party started I was chatting with a Mom (and friend) who came early. I was telling her how I really feel there is a time and place to have simplicity, but then there is a time to go big. My kids birthday's are one of those big times to me! I shared last week how I have had 2 late term miscarriages. Going through that experience (twice) made me really appreciate the fact that I have 3 healthy, beautiful children whose birthdays I get to celebrate! I have 2 babies who's happy birthday song I never get to sing, and whose cake I never get to make, and who's hours of Pinterest hunting for their party I never get to do. So, am I doing big birthday's out of sadness for my loss? No, I am not. I feel that the birthdays I give to my children represent how glad I am that they are here. That being said, if one of my kids only wanted one friend over, and wanted to eat take-out pizza, and watch a movie, and do nothing else-I would do that too! The point of celebrating someones' birthday is to let them know they are loved, and for them to feel special! For instance, this pony party had hot dogs at it! Would I have picked hot dogs for a My Little Pony themed party? Nope! But my daughter wanted them, so we had them! 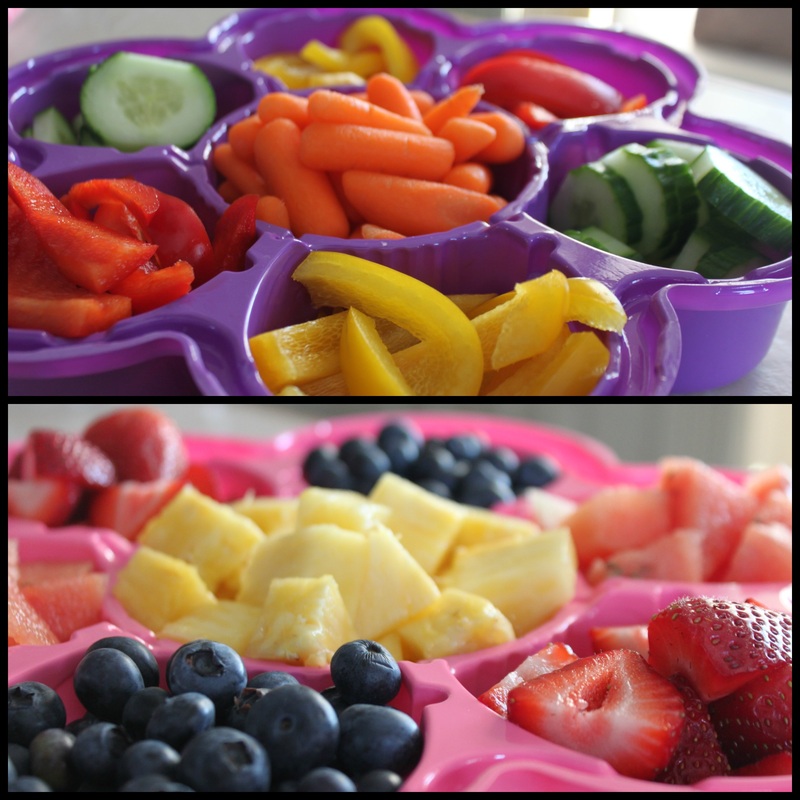 Colourful fruits and veggies. My Little Pony is all about rainbows! My personality type also plays into this in that I enjoy a theme, and having something very specific to work on. If you're not into themes and colour co-ordinating, that's fine! At the end of the whole thing, it is about a child who's day of birth you are celebrating! That's it! What form it takes changes based on you and your family, and your birthday child. 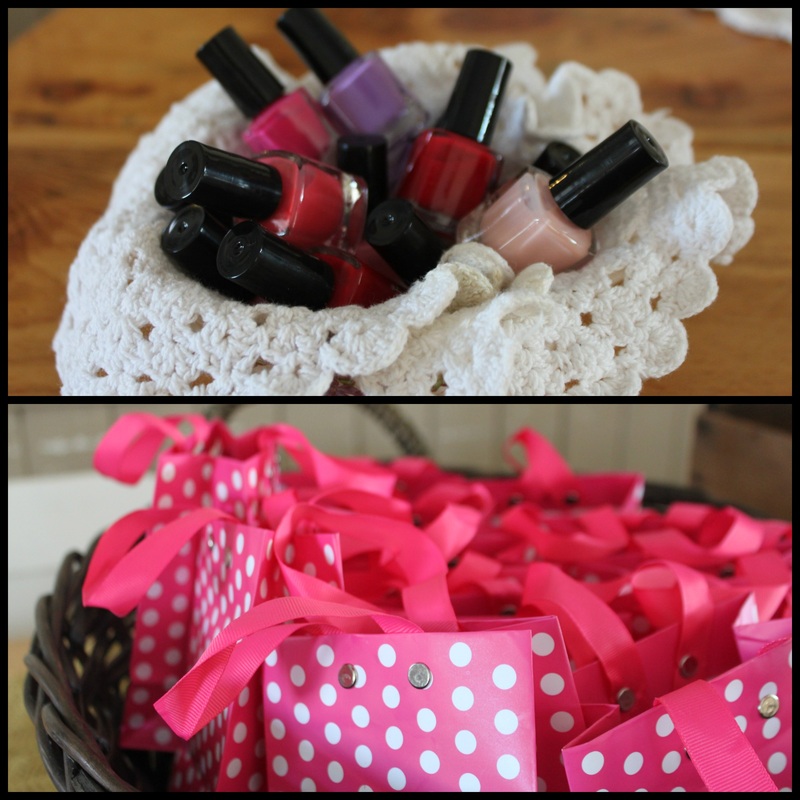 We painted the girls nails, and they got to add the polish they picked to their treat bags. In the bags were some MLP stickers, a MLP charm bracelet (both ordered online with the plates and cups), and some m&m's One thing I do, no matter how big or small of a party my child is having, is I wake them up on the morning of their actual birthday, and tell them the story about when they were born. I had a friend who's Mom did that, and I loved the idea. I also have video of me in the hospital, and my big belly, and of them right after they are born, and I show it to them. They really love it, and it is a really special moment (I usually cry a lot!). It lets them know that they are a treasure, and that I love them so much. 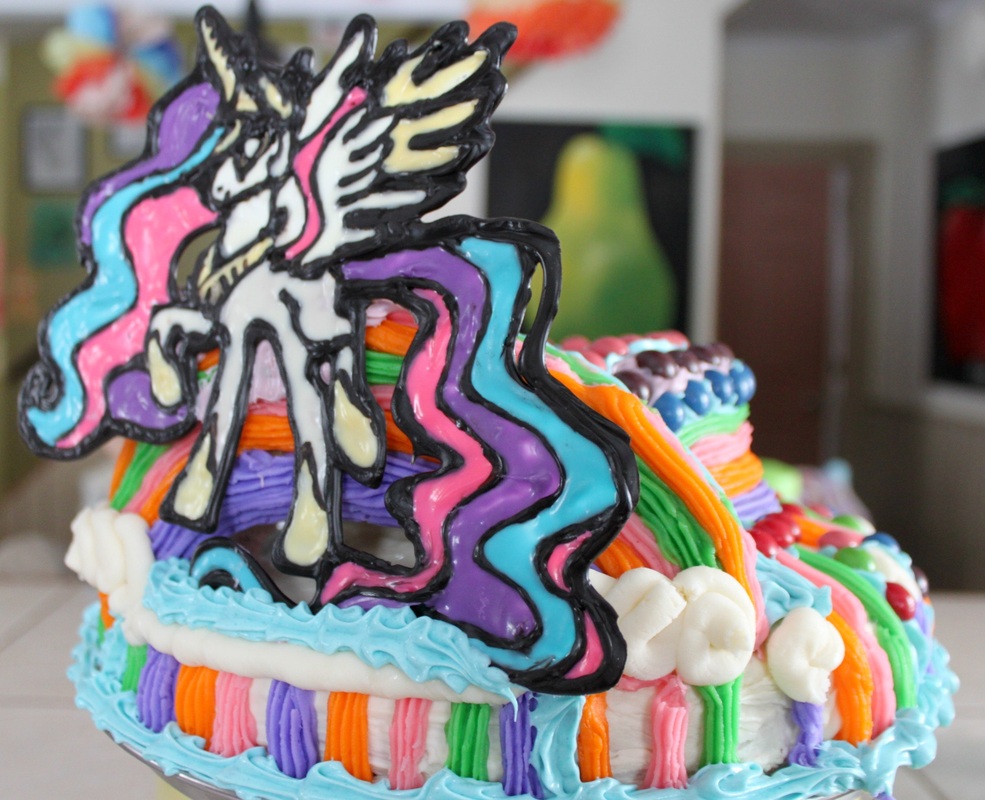 The Princess Celestia Cake Big or small birthdays are a hot topic right now, which way to you tend to go and why? I honestly feel that regardless of what the party looks like, it's about your motives, and your heart. Simple or themed/complicated, who is the party for, and why are you doing what you're doing?
My daughter turned 5, and asked for a Princess Celestia (from My Little Pony) cake. She actually wanted a huge cake that was an actual standing horse! I thanked her for her obvious faith in my abilities, then gently told her I wasn't that good! Gotta love a 5 year old! I did have a plan though, and I wanted to see what I could manage. It's fun to push yourself a little and see what you get! 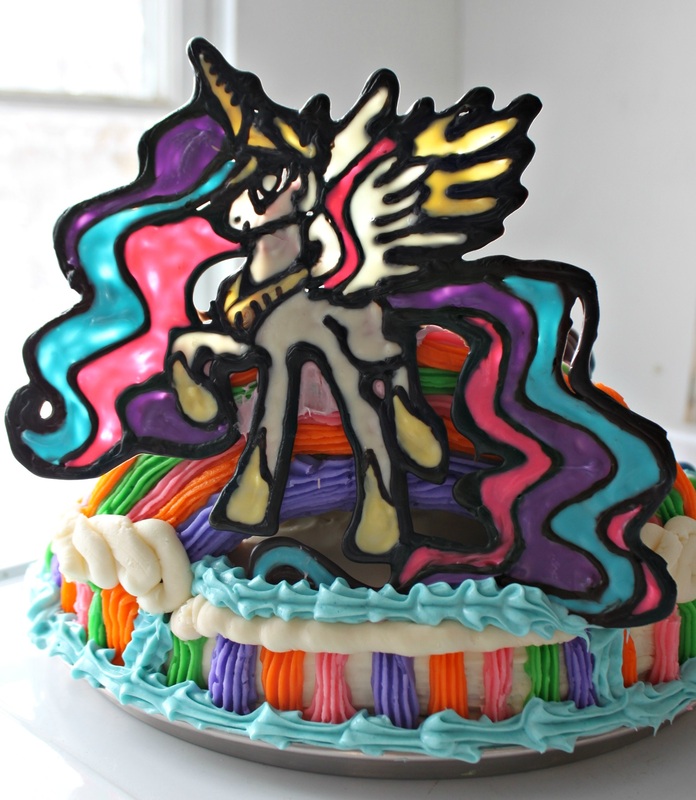 The finished product Princess Celestia Cake: Ingredients:
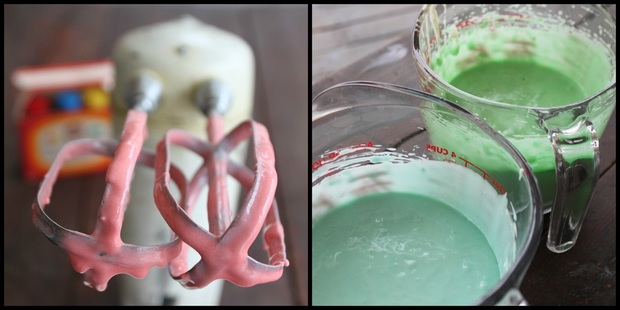 3 of the 4 coloured cake batters Method: So, to start with the cake! I had always wanted to do a multi-layered, multi-coloured cake (and had one huge failed attempt for this same daughters 3rd birthday)-but I was ready to try again! I made the 2 mixes, divided them into four bowls, and added a little food colouring to each and mixed 'em up. 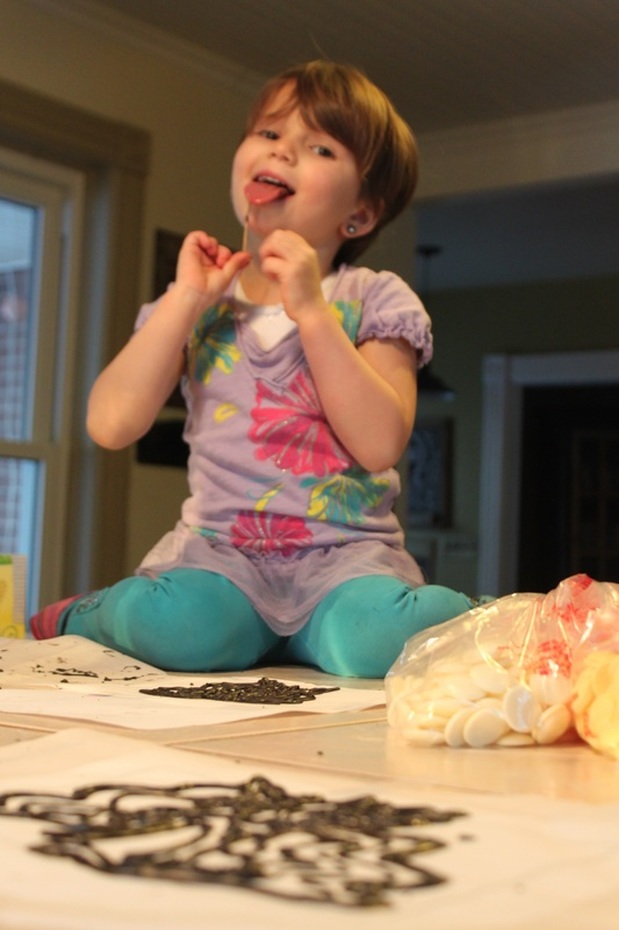 Getting some "help", and encouragement, from the birthday girl. I baked them 2 at a time in round spring form pans. Once they were completely cooled, I put wax paper between each layer, wrapped it up tight in plastic wrap, and put them in the freezer! It was 6 days before her birthday! I like to get stuff done ahead of time, so freezing is a good option that keeps the cakes moist and fresh. 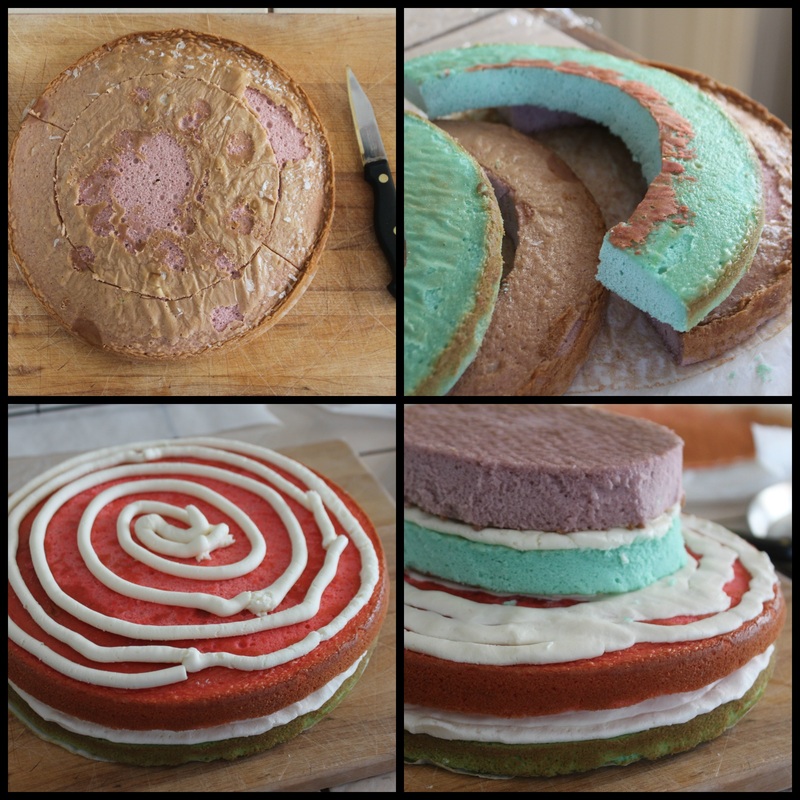 Cutting some of the cakes into smaller circles, the cut-off pieces, a spiral of icing between layers, and the layers iced and stacked! Two days before the party, I got the cake out of the freezer, and started phase 2: cutting the cakes to the right size. I left 2 cakes as they were, and placed a bowl on the other 2, and cut out around the bowl to have smaller circles. I didn't scoop and spread the icing on the cake because when you have this many layers you don't really need a lot of icing in between each. I just piped a spiral of icing on, and gently squished it down to cover. 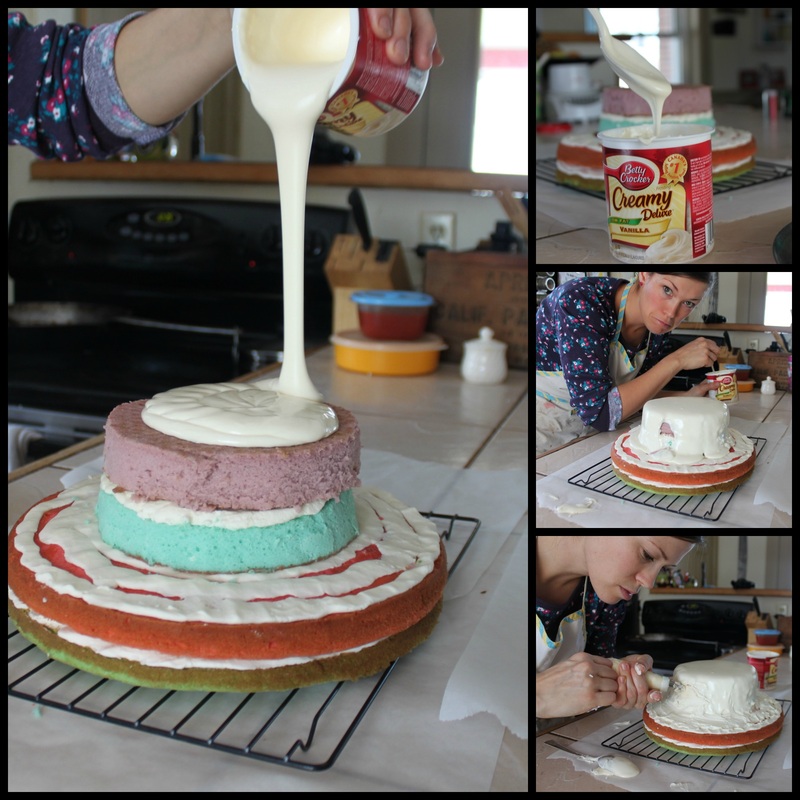 Pouring the warmed icing on the cake, and fixing the bad spots. I use (and love using) fondant for the final icing on cakes. It gives them a really clean, professional looking finish. But recently (on Pinterest) I saw a cake decorator who would warm canned icing and pour it over the cake. She said it dries and sets like a fondant, and would be easier to use. However, it didn't work out 100% for me, so I had some lumpy spots, and a few spots where the icing skipped over, leaving holes! So, I had to fill them in using the icing I had in my piping bag. I was a smidge annoyed, but not too worried because I knew I was going to pipe more icing with colour on the cake, and could hide the bad spots! 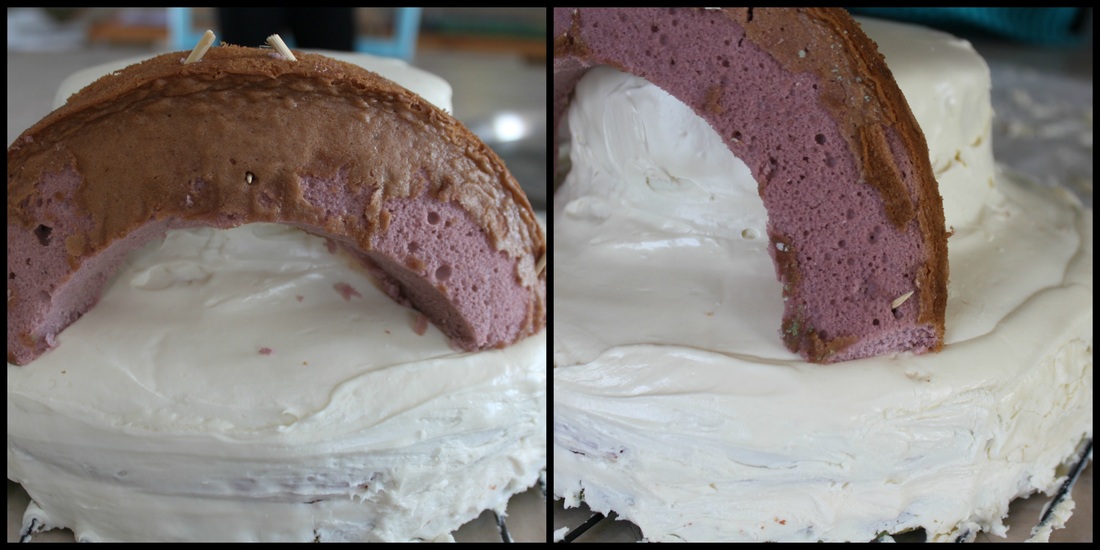 I used one of the pieces I had cut to make a rainbow on the cake. I secured it with toothpicks and halved skewers. 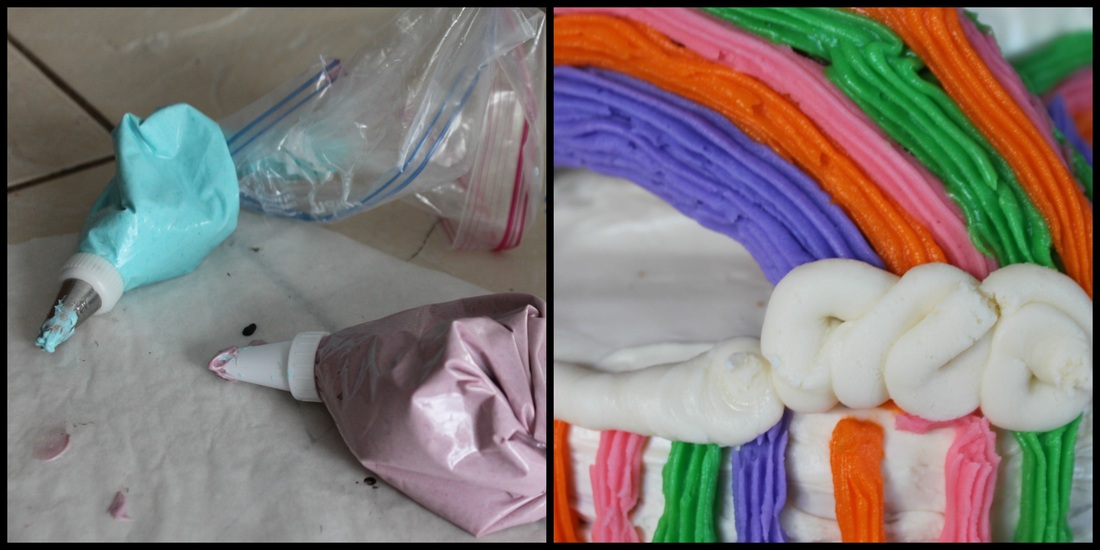 Ziplock bags of icing, and the cake almost finished. Next I divided my white buttercream into different bowls and coloured them. My only thought was rainbows, so, I went with that, and tried to cover the lumpy "fondant" spots, and make everything look good. P.S., by "look good", you can clearly see that I mean "looks ok!". My piping skills are poor!!! Hahaha 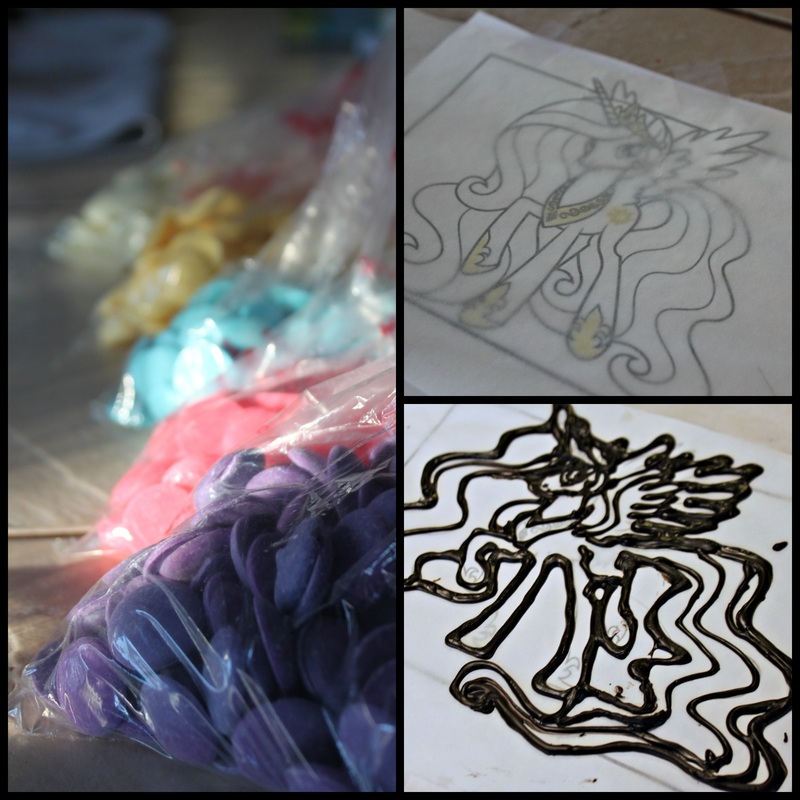 My Mercens Chocolate Melts, and the images I used to "trace". So....now I just needed Princess Celestia...oh boy! I am not really a good character artist, so I decided to print a picture of the pony, and tape it under a sheet of parchment paper. Then I just needed to trace it! I melted the Merken chocolate as needed-starting with the black. I let them cool a smidge after melting, and piped the outline of the Princess. I actually did a different picture first (you can see it in the photo above with Abby), but her face was too smooshy. So, I printed a different picture and started again! (the bottom right picture {above|, and below). 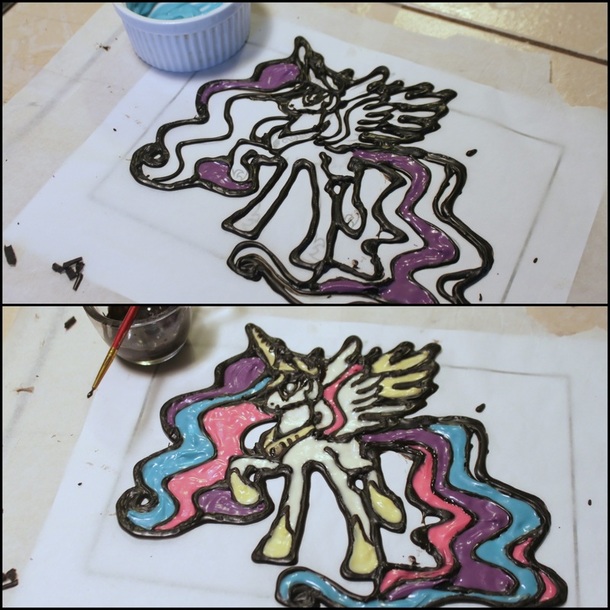 Painting with chocolate Then I used (clean, brand new) paint brushes to paint the colours into the outline. Once I finished with the colour, I did the black chocolate again to clean up the lines. Now I just carefully put the wax paper into our back room which is cold, and let it really cool and set. I had originally intended to find a way to make her stand on top of the cake, but it seemed pretty risky. So, I decided to just stick her in front of the rainbow. Yes, it would hide the rainbow, but the most important part (to my daughter) was Princess Celestia, so I went for it. I was glad I did, it made her very secure to the cake. I did the finishing touches, like adding Skittles candy, and piping blue around the cake edge, and was done (finally!). 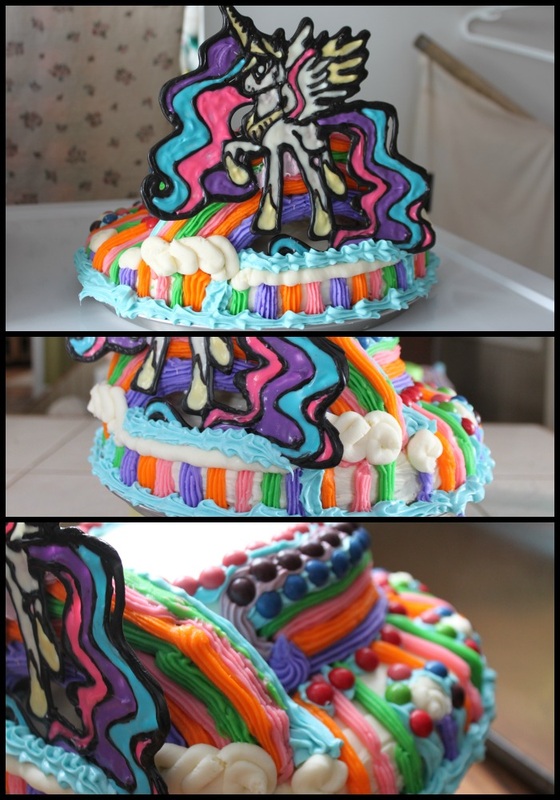 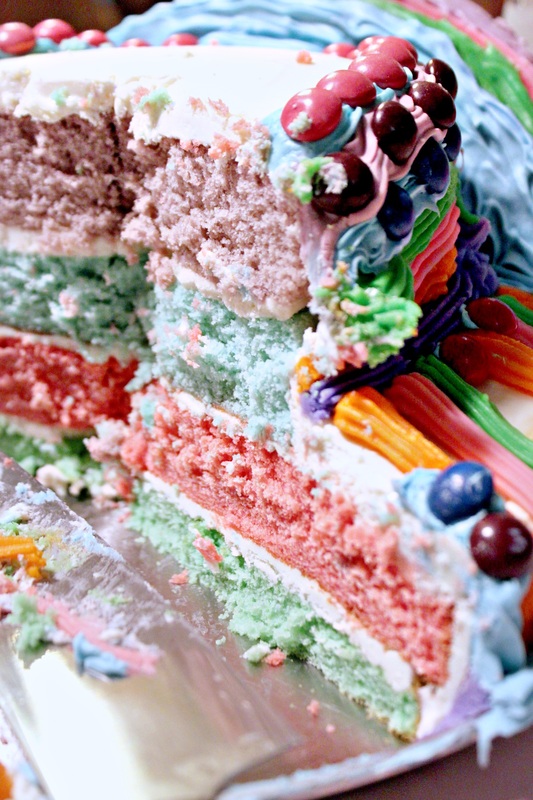 I was despairing at one point about the chocolate and making the princess. I told my daughter that I wasn't happy with how it was turning out, and she looked at what I had painted so far and told me it was "prefect!". That was the point after all, wasn't it? To make it perfect? Haha, gosh no! But to make my daughter happy? You bet! 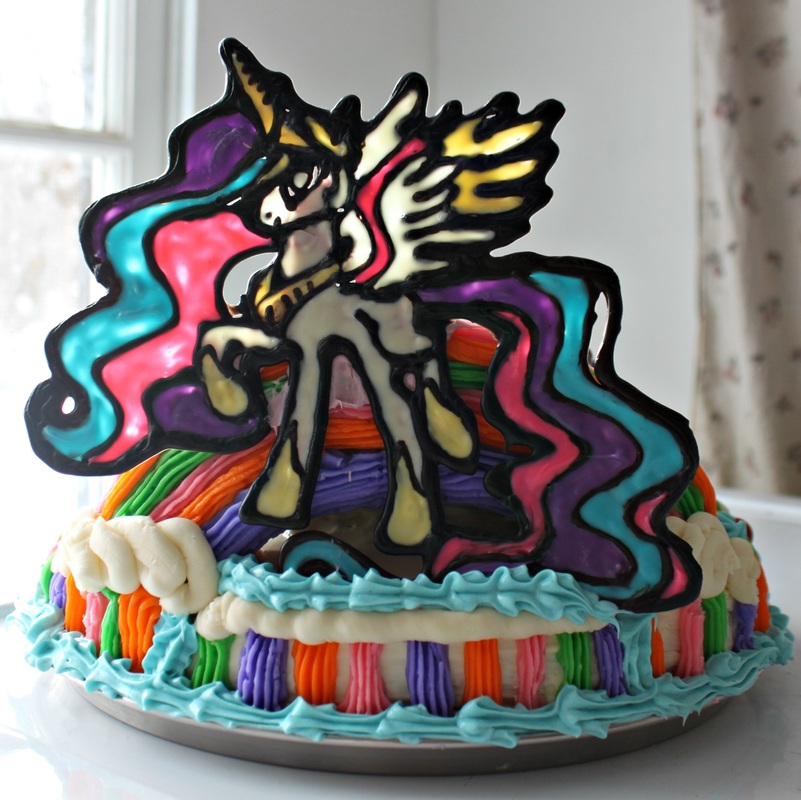 I'll talk more about the rest of the party, and my thoughts on birthday's, tomorrow. See you then! So, I turned 30 last month (yikes....). I told my hubby that I wanted a surprise party. No, seriously I did. I'm not sure why I wanted one, maybe I thought it was distract me from turning 30..... On the day of my birthday, my sister and her family were visiting, so we bought a cake, and I had a party....with all of our children (9 of them between us).  Posing with my cake on my actual birthday. I had no idea another party was in the works! My husband was working on the day of my actual birthday, and he acted all sorry, and promised we could go on a date later in the week for my birthday. I was sad about no party, but my sweet husband isn't always the best planner, so I wasn't too shocked. 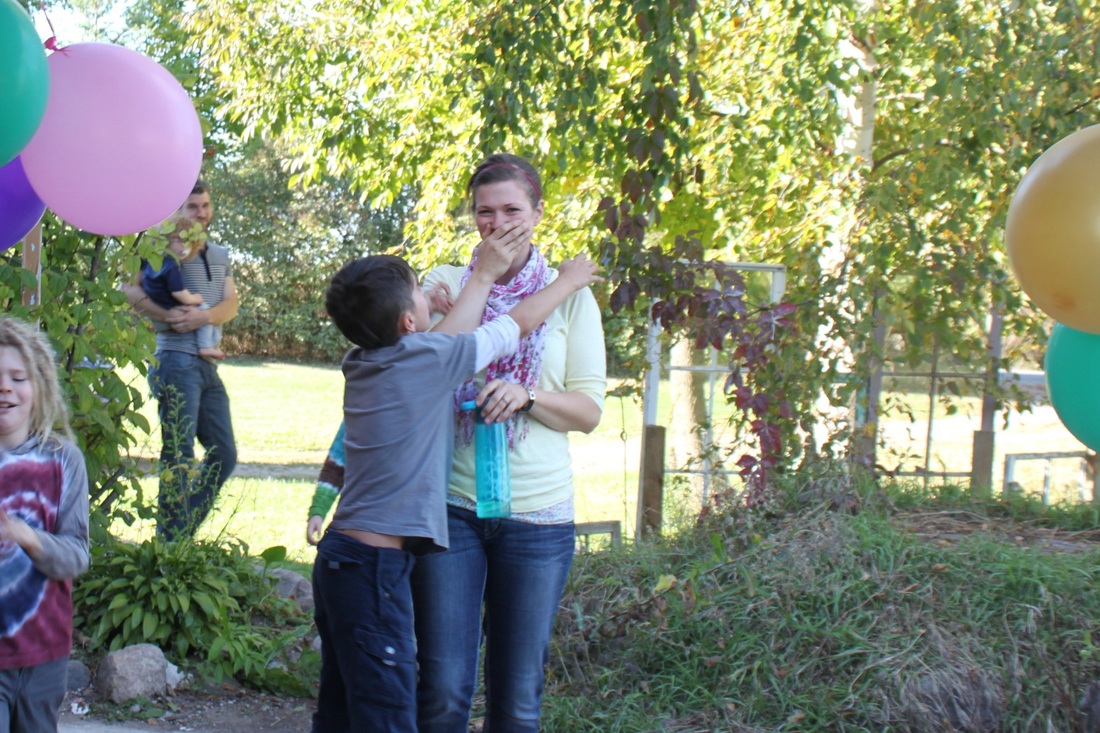 Seriously surprised!!! But, he did it. Not only did he plan a surprise party, but I was genuinely (seriously!) surprised! I cried a little! The morning of the surprise party, he even acted like he was upset that my sister and I were going antiquing, and whined about how long we would be away....all the while wanting me out the door so he could clean the house and get the party set up! Sneaky.....  My sister who was part of the scheme My husband delegated jobs out (aka-made other people do stuff so that I wasn't wondering why he bought things like 8 bags of chips....), and invited some friends and family. He even planned out breakfast for the next morning because my family was going to stay over (because they live far away). 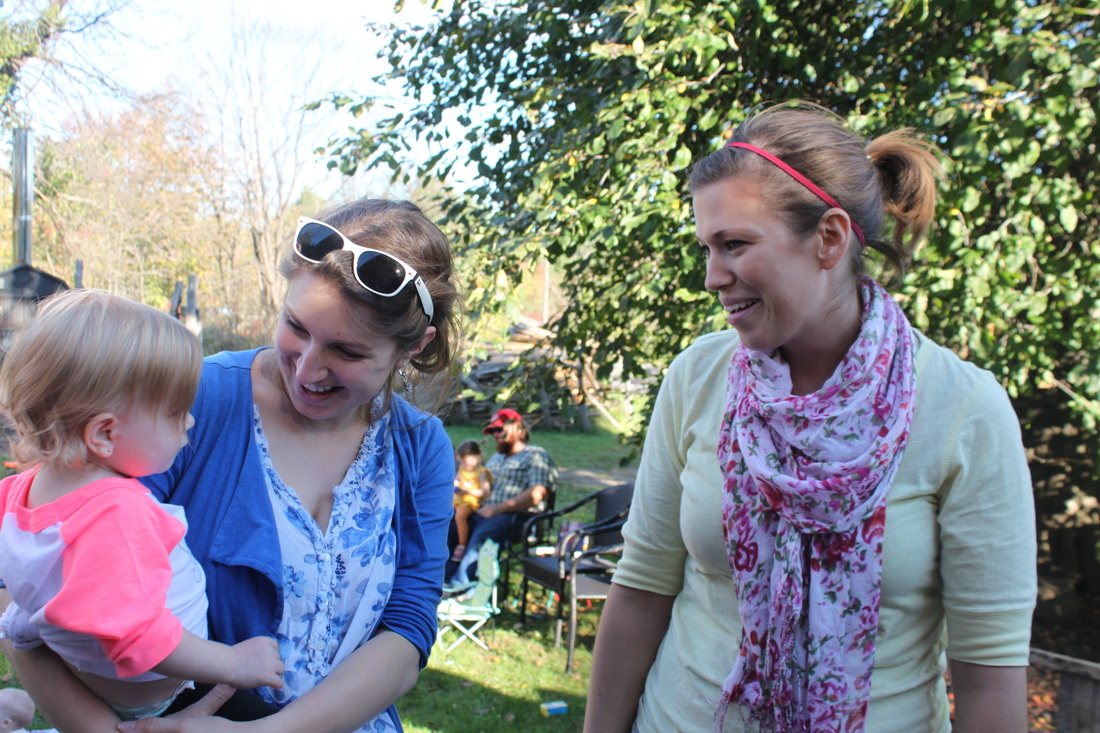 Chatting with a friend All of this to say: I love planning a party; picking the colour scheme, the theme, the food, prepping it all, etc. But, a party doesn't have to have those things. The theme of this party was to surprise me, and it worked! I felt so blessed, and loved, and forgot for a while that I was worried about being "old". 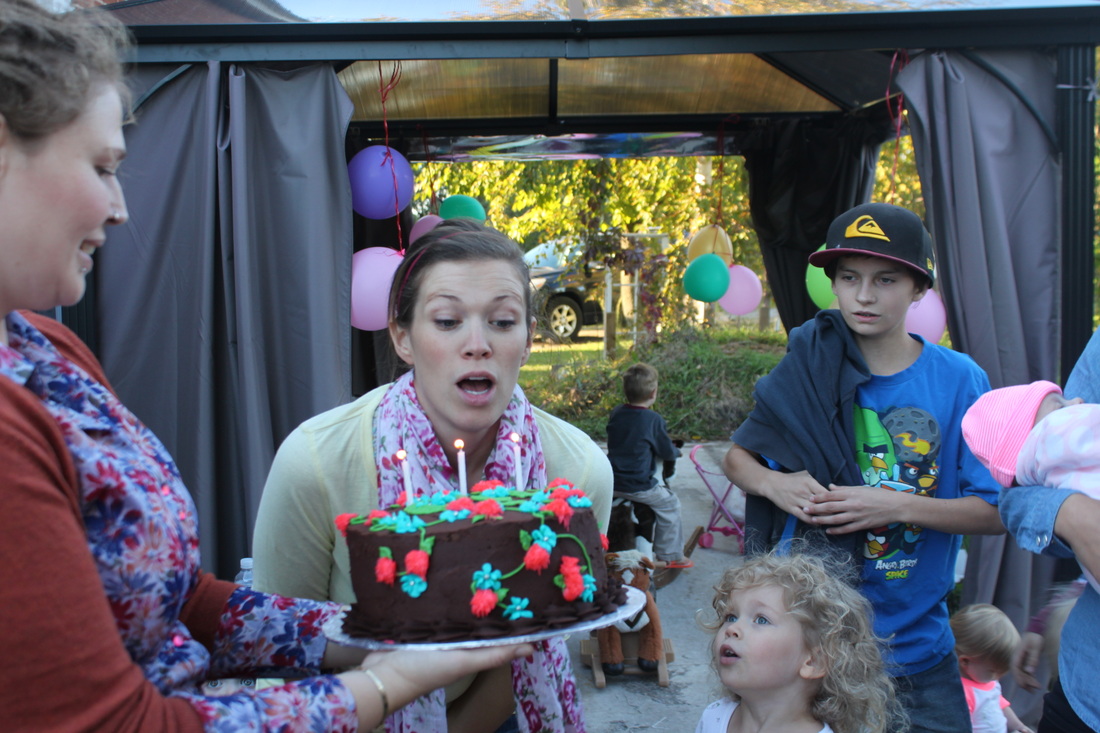 Blowing out the candles My son who turned 9 this summer wanted a "Pirates Who Don't do Anything" themed birthday party. Um, o.k! I love (love, love!) a themed party. There is charm and beauty in an un-themed party, but my personality thrives on a theme. Instead of making it more stressful it actually helps me decide on foods, colours, etc. a lot easier. That's just me though. 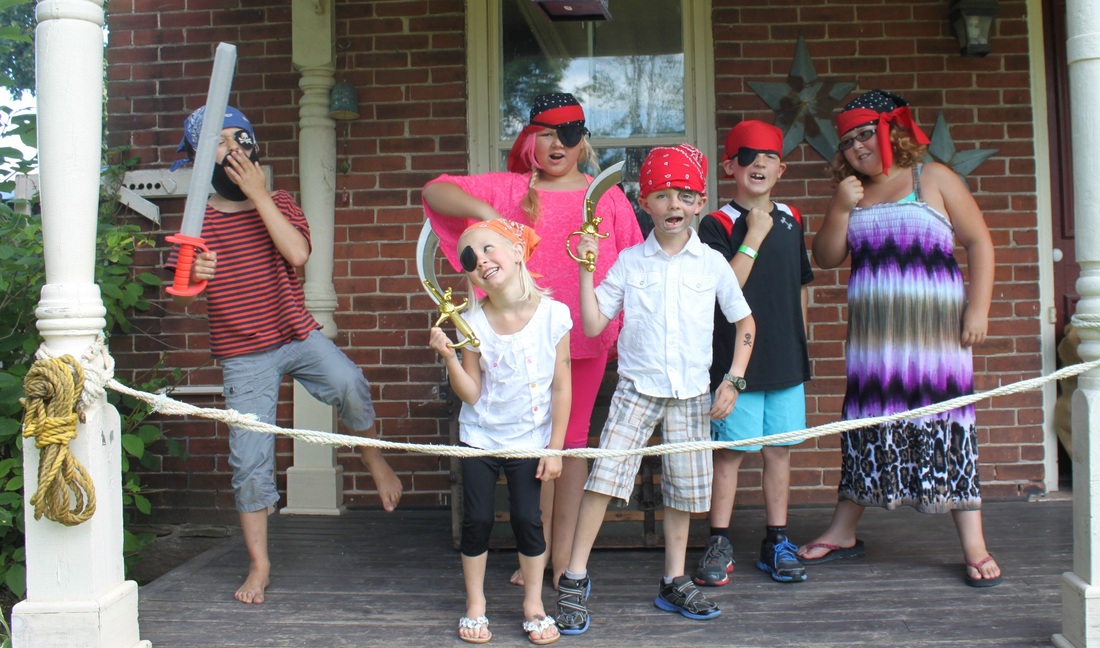 A band of dastardly pirates on their ship! The most important part of a themed party, is to make sure the guests know about it! That way they can come prepared. If they don't come prepared though, just have a few things handy to let them use. In this case, I had made eye patches and cut out read and black cloth for kids to use if needed. The felt, elastic, and black and red fabric cost me all of $6 because I just rooted through the bargain bin at our local Fabric Land! 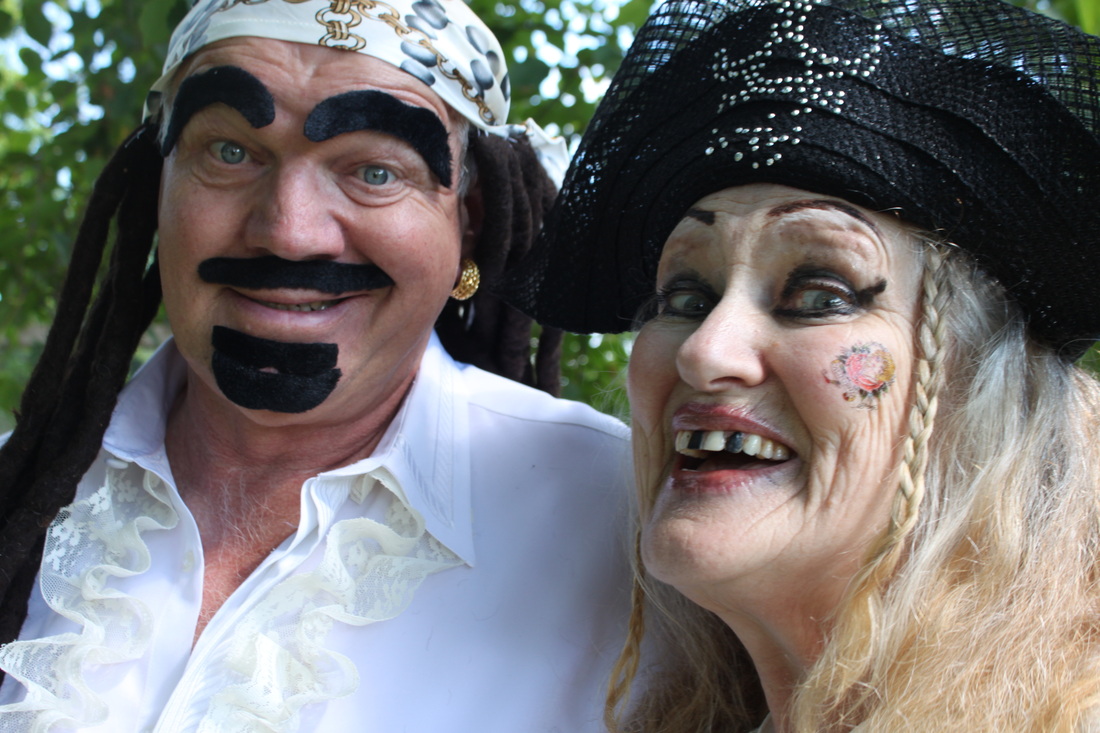 Oma and Opa going all out on the theme! For decoration, I decided the obvious thing to do was to turn our front porch into a pirate ship! O.k, maybe that idea was a bit overboard (pun intended), but I really enjoyed doing it! And my kids thought it was so much fun for days leading up to the party (I did it about 5 days in advance just so it was ready). I just borrowed rope from my favourite antique guy in my area, filled up some old burlap sacks I had to look like sacks of food supply on the ship, and hung some lanterns I already owned. I used the extra fabric I had for pirate bandanas for tables clothes 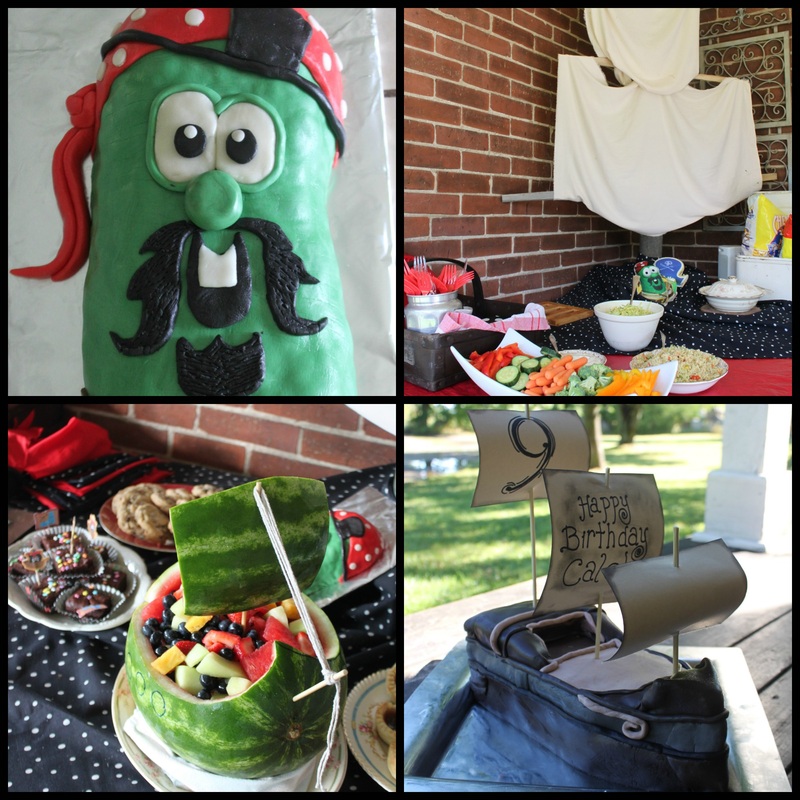 Food glorious food! And the best part-the food! We ate messy pirate food-chicken drumsticks, corn on the cob, baked beans, and some healthy veggies and dip. Oh, and chips. According to my husband, it's not a party unless there are chips. Sheesh. Desert had 2 gluten free cakes (one made from brown rice Rice Crispie Squares), and the other from the g.f. cake mix from Well & Good called "Chocolate Mud Cake mix". For real, it is the best gluten free cake mix. I made the cake into a pirate ship (see post about the "Larry the Cucumber Cake" for how to make brown and black fondant). There was also some other dee-lish foods brought by my sister and mother-in-law, and I made a pirate ship watermelon as well that served as a fruit bowl. 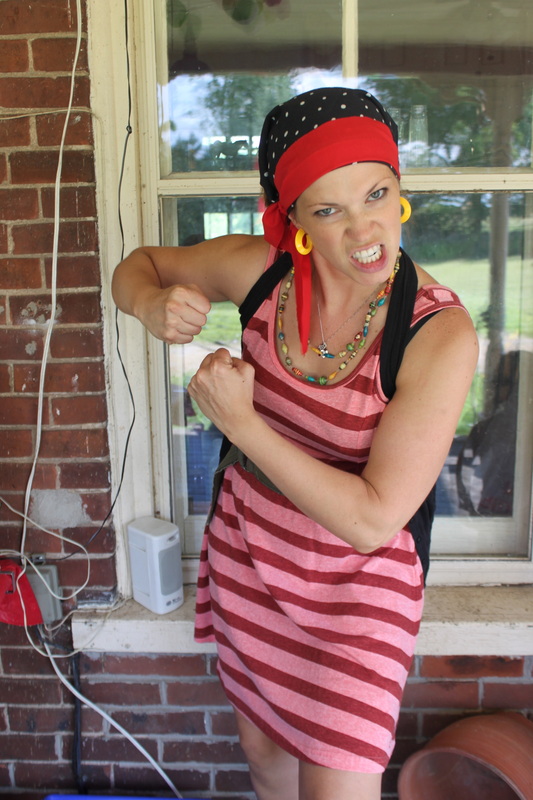 I got into the theme too, of course! It was a great day! It rained for a bit, but everyone just hopped onto the "pirate ship" to stay dry, and it was all good!
Have you thrown a great themed party? Tell me how it went! Amy-Lyn 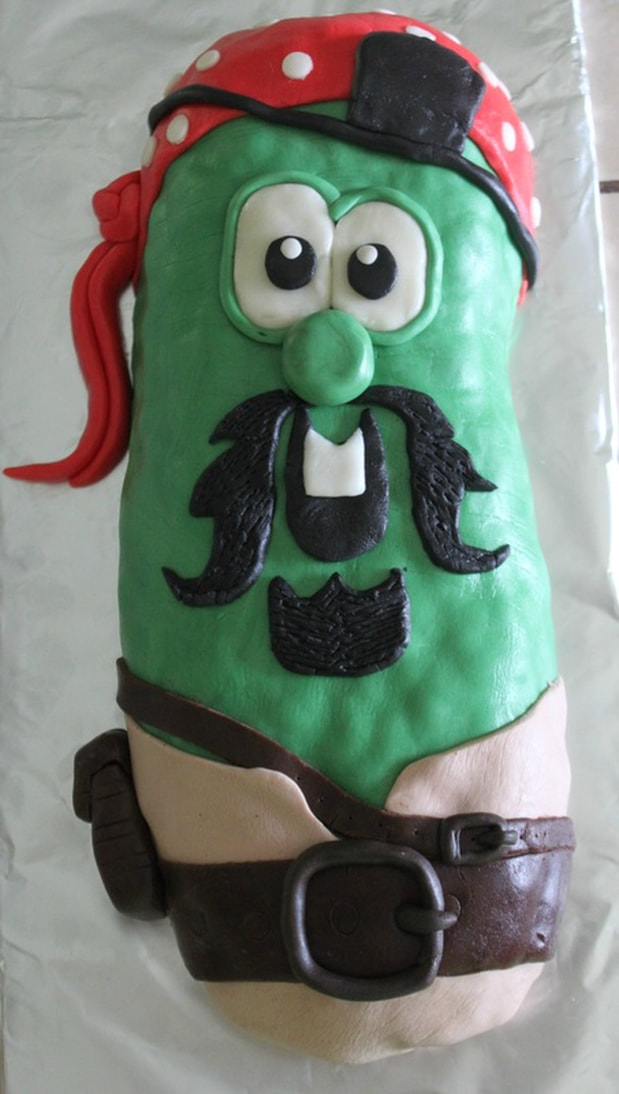 The Larry the Pirate cake I made If you are not familiar with Veggie Tales, than that armless, green pirate guy is probably very strange to you. But to my son who turned 9 this summer, it was perfect! My son has Autism, and can get pretty hooked on movies, subjects, foods, colours, anything! The "need for sameness" is a very common thing among children and adults with autism, and "sameness" can often read as "never ending......." My son has loved Veggie Tales for years.....and years..... So, to all those Veggie Tale virgins out there, it is a series of movies and short shows that deal with life issues (listening to your parents, being your self, facing hardship, etc.) in a fun way, using vegetables (and a few fruits) as the characters. Without further ado, meet Larry the cucumber as one of his many characters, Larry, "The Pirate Who Doesn't do Anything!" I don't have a step-by-step on how I made him, but I will give you my tips from the experience: Tip #1 I used this fondant to decorate him: http://cakejournal.com/tutorials/how-to-make-marshmallow-fondant/ I find this fondant to be very forgiving, and simple to make (two of my favourite things!) Tip #2 To make brown fondant....add cocoa. I know, so simple. When the recipe says to add icing sugar, do it, but also add cocoa as the dry ingredient to make different shades of brown. Ta daa! Tip#3 To make black fondant.....start with brown!!! This is the best tip anyone ever gave me! Tip#4 To make that perfect Larry green....have patience! I just kept adding and tweaking until it was just right (green, yellow, a tiny drop of black). Add each colour in small amounts-trust me! 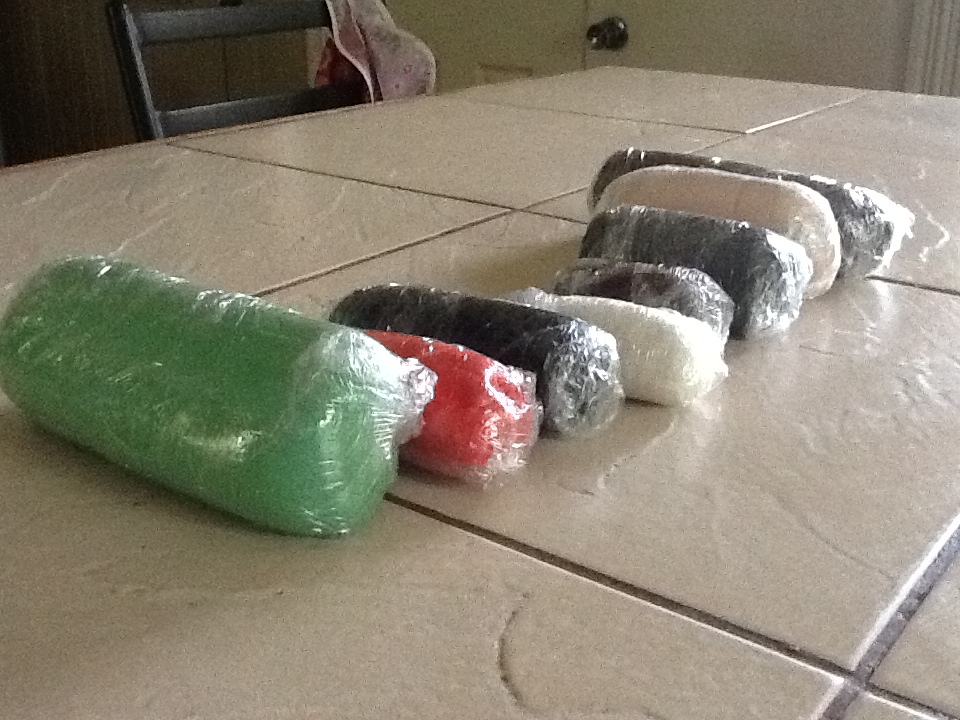 The fondant all ready to go. See the link above for an easy fondant recipe Tip#5
Give yourself lots-o-time to do this! It took me 3 hours to make all the fondant, and then to decorate him. The "cake" itself was actually a big Rice Crispie square that I made 4 days earlier and shaped as Larry, put on a cookie sheet, wrapped up really well, and froze until I started working with it to decorate. I figured it would be easier to use a giant Rice Crispie square to get the shape I wanted. Tip#6 You can freeze a Rice Crispie square! It's one less thing to do the day of the party. Have you made a cake that not only your child or loved one thought was great, and you also thought, "well, that turned out just as I wanted it to!" (truthfully, a rare thing for me!)? Share your pictures of stories with me! Amy-Lyn |
Hi, I'm Amy-Lyn! 
I am the lady behind this here blog! I live in the sticks with my animals, my super handsome husband, and my
3 amazing kids! Here you'll find things from recipes (gluten-free, paleo, and strait up junk food!), DIY ideas, thoughts on raising a son with autism, and whatever else pops into my brain! : ) Read more about me by clicking here! Want to Stay Connected?
Find What
|
 RSS Feed


